Daily Discovery: Wonder Women – Smart Stuff

Post written by Heidi Fuhrman, Discovery Camp Coordinator.

Daily Discovery: Wonder Women – Smart Stuff

Not all superheroes use their physical strength to fight evil! Oracle fights with her hacking skills and She-Hulk uses powers of  persuasion as a lawyer—just like many of our real-life wonder women who use their smarts to make a difference!

Supplies:

  • Pencil & Paper
  • Scissors
  • Brass brad
  • Printed Cipher Wheels (file included in PDF)
  • All your spy skills!

Instructions:

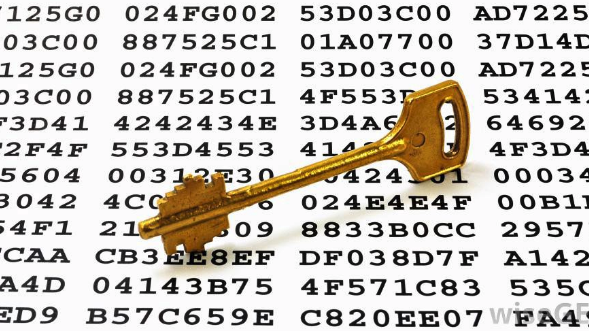
  1. Put your smarts to the test! Like some real life wonder women—spies like Virginia Hall & codebreakers like Elizebeth  Friedman—see if you can crack our codes! Learn about  different types of cryptology below and take a stab at becoming a codebreaker.
  2. Using what you learn about codes, write your own and see if a friend or family member can crack it! You can even send them the codes via text to connect across the city or country! How did they do?
  3. Go learn about some real-life superheroes that used their smarts to make this world better and safer!
    Check out our Wonder Women guide or look online or at your library for stories about inventors, spies, mathematicians, doctors, and scientists.
  4. Think: What do you know a lot about? What are you an expert at? What “smarts” do you have? How can you use your knowledge to help other people and make this world a better place?

Want to download these directions? Click here for a handy PDF!

Follow along with our Daily Discovery! Click here for all activities that you can do at home.

Image credit: Medium

Continue Reading

Daily Discovery: Make Your Own Maraca!/Descubrimiento en casa: Construye tu propio instrumento musical – ¡maracas!

Post written by Eisen Tamkun, Music Education Lead.

Daily Discovery: Make Your Own Maraca!

Shake shake shake, shake it! Create your very own maraca using household items!

Supplies:

  • Tape – any kind will do (the more colorful the better)!
  • Spoons – disposable work best
  • Filler – rice, beans, or dried corn
  • Scissors
  • Plastic Easter Egg

Instructions:

  1. Gather all the supplies.
  2. Start by insertion your filler in the egg. Only fill it half way so there is plenty of room for it to rattle around.
  3. Tape the spoon handles together keeping the bowls of each spoon facing each other.
  4. Secure the egg between the two spoons with some tape.
  5. Lastly, continue wrapping up and around the entire egg

Now that you’ve made your very own maraca, try rocking out to some of your favorite songs! Shake your maraca along to the rhythm!

Want to download these directions? Click here for a handy PDF!

Follow along with our Daily Discovery! Click here for all activities that you can do at home.

Image credit: fun365

Traducido por Károl de Rueda y Laura Vilaret-Tuma.

Descubrimiento en casa: Construye tu propio instrumento musical – ¡maracas!

Crea tu propia maraca usando simplemente lo que tienes en tu casa, y suena, suena, ¡suénala!

Artículos necesarios:

  • Cinta adhesiva—la que tengas disponible. Si tienes de colores, ¡mejor!
  • Dos cucharas desechables
  • Arroz, frijoles, lentejas, maíz crudo o piedritas pequeñas
  • Tijeras
  • Huevo de pascua plástico

Instrucciones:

  1. Reúne todos tus materiales.
  2. Llena la mitad del huevo con el relleno de tu preferencia, asegurándote que haya bastante espacio para que este pueda moverse haciendo ruido, y ciérralo.
  3. Con la cinta adhesiva, une los extremos de las dos cucharas desechables para hacer el mango de tu maraca.
  4. Sujeta tu huevo entre las dos cucharas con la cinta adhesiva.
  5. Finalmente, sigue envolviendo el huevo con más cinta adhesiva hasta que esté completamente fijo y no se mueva.

¡Ahora que hiciste tu propia maraca, trata de sonarla al ritmo de tus canciones favoritas!

¿Te gustaría descargar esta actividad? Haz clic aquí para obtener un archivo PDF.

Para encontrar actividades, ideas y mucho más descubrimiento en casa, ¡síguenos!

Educational opportunities like this are supported in part by Bohemian.

Continue Reading

Daily Discovery: Cardboard Box Creations

Post written by Lea Mikkelsen, Early Childhood Coordinator.

Daily Discovery: Cardboard Box Creations

Have you ever wondered what a box could become? Follow along with Rabbit in the story Not a Box by Antoinette Portis, to imagine all the things a box can become!

Then create and take your own amazing box on an adventure at home!

Supplies:

  • A cardboard box
  • Tape
  • Scissors
  • Hole punch
  • Glue
  • Markers, paint, stickers
  • Metal brads, paper clips, clothespins
  • Loose parts such as: lids and bottle caps, sticks and leaves, beads, buttons, pipe cleaners, string, cardboard tubes, recyclables, any old junk around the house!

Instructions:

  1. Place all your supplies on a clear surface with plenty of room to create.
  2. Brainstorm some ideas for what your box could become. Tip: try drawing your idea on a piece of paper!
  3.  Build and create with all your loose materials. Use your imagination!
  4.  Ask an adult for help with cutting or attaching things to your box if you need it.

Want to download these directions? Click here for a handy PDF!

Follow along with our Daily Discovery! Click here for all activities that you can do at home.

Image credit: parenting.firstcry.com

Continue Reading

Daily Discovery: Tall Tall Tree Craft

Post written by Lea Mikkelsen, Early Childhood Coordinator.

Daily Discovery: Tall Tall Tree Craft

Did you ever wish you could live in a tree? Many different animals live in and around trees. Can you look out your window and spot them? How many can you name?

Some of the most amazing trees are called Redwoods. They can grow to incredible heights; one is taller than the Statue of Liberty! Here is a wonderful video of a redwood forest so you can see these trees from home.

Here is a fun craft to make your very own tall tree at home!

Supplies:

  • A stick with skinny “branches”
  • A paper plat (or piece of cardboard)
  • Clay
  • Glue
  • Decorations: beads, yarn, pom poms, glitter glue, paint, leaves, or whatever you find in your home!

Instructions:

  1. Place all your supplies on a clear surface with plenty of room to create.
  2. Mold the clay around the base of your stick to hold your “tree” upright on the plate.
  3. Decorate with all your craft materials. Be creative!
  4. Share your creation with us on social media using #dailydiscovery

Want to download these directions? Click here for a handy PDF!

Follow along with our Daily Discovery! Click here for all activities that you can do at home.

Educational opportunities like this are supported in part by Buell Foundation. Their support helps make access to early childhood education at FCMoD possible for everyone in our community.

Continue Reading

Daily Discovery: Mermaid Music

Post written by Charlotte Conway, Public Programs Coordinator.

Daily Discovery: Mermaid Music

Mermaids are famous for singing, but do their songs sound different underwater than on land? Do this experiment to discover for yourself!

Supplies:

  • 2 Chopsticks
  • 2 Metal forks
  • 2 Rocks (large enough to clink together)
  • Large bowl
  • Water
  • Tray or similar solid board (we use plastic trays!)
  • Plastic water bottle cut in half (this acts as a hydrophone)

Instructions:

  1. Start by observing what objects sound like in our human environment, surrounded by air. Clink each pair of objects together in the air and listen to the sound they make.
  2. You made a hydrophone out of a recycled plastic water bottle. This tool will allow you to hear what’s happening underwater! Place the narrowest part of the water bottle up to your ear and hold the cut
    end of the water bottle right over the surface of the water.
  3. Have a partner, it could be a sibling or parent, clink the objects together under the water. What do you hear?
  4. Why do you think things sound different underwater? It all has to do with sound waves! Sound is what we hear when sound waves bounce off objects. Molecules are closer together in liquid than in a gas (like our air!), so there is greater opportunity for waves to bounce off molecules underwater. What do you think will happen when sound waves travel through a solid?
  5. Place a tray (face down) up to your ear. Have a partner very lightly tap each one of the objects against the tray. How does this differ from what you heard in the water? What about in the air? Hypothesize why you think that is.

Want to download these directions? Click here for a handy PDF!

Follow along with our Daily Discovery! Click here for all activities that you can do at home.

Educational opportunities like this are supported in part by Bohemian.

Continue Reading

Daily Discovery: Squishy Soap/Descubrimiento en casa: Jabón plastilina

Post written by Lea Mikkelsen, Early Childhood Coordinator.

Daily Discovery: Squishy Soap

Use your rockin’ math skills to measure out different ingredients and make your own soap! Use your squishy soap to mold different shapes and keep it by the sink. Sing some songs or practice counting to 20 while you scrub!

You’ve never had this much fun washing your hands!

Supplies:

  • ‘1/4 cup of cornstarch
  • 2 tablespoons pure liquid castile soap (optional: try scented!)
  • 2 teaspoons of oil (vegetable, almond, coconut)
  • Optional – 1 to 2 drops of food coloring for fun!
  • Bowl
  • Spoon
  • Tray

Instructions:

  1. Carefully measure each of the ingredients into a bowl and mix with a spoon.
  2. Dump the mixture onto a clean tray and knead until the soap is smooth and not sticky!
  3. To use, pull off a small piece of the soap, add water, and scrub for 20 seconds!

Tip: if soap is too sticky add a little more corn starch, if dough is too crumbly add a little more oil. Keep kneading and keep experimenting until you get it right!

Want to download these directions? Click here for a handy PDF!

Follow along with our Daily Discovery! Click here for all activities that you can do at home.

Photo Credit: https://mamapapabubba.com/

Traducido por Károl de Rueda y Laura Vilaret-Tuma.

Descubrimiento en casa: Jabón plastilina

Usa tus habilidades matemáticas para medir diferentes ingredientes y hacer ¡tu propio jabón plastilina! Moldéalo en diferentes formas divertidas y creativas, y úsalo la próxima vez que tengas que lavarte las manos, recordando el cantar algunas canciones o contar hasta 20 mientras las limpias. ¡Nunca ha sido tan divertido lavarse las manos!

Artículos necesarios:

  • ¼ taza de fécula de maíz
  • 2 cucharadas de jabón de castilla liquido (con o sin fragancia)
  • 2 cucharaditas de algún aceite (por ejemplo, aceite vegetal, aceite de almendras, aceite de coco, etc.)
  • Opcional – 1 o 2 gotas de colorante para alimentos
  • Un recipiente para mezclar los ingredientes
  • Una cuchara
  • Una bandeja

Instrucciones:

  1. Une todos los ingredientes en el recipiente, y mézclalos con la cuchara hasta que todo esté incorporado y se forme una “masa.”
  2. Coloca esta mezcla sobre una bandeja limpia y comienza a amasarla hasta que llegue a una consistencia lisa y no pegajosa.
  3. Si quieres usar esto para lavarte las manos, simplemente arranca un pedacito del jabón plastilina, córrelo bajo el agua, ¡y comienza a frotarlo entre tus manos por 20 segundos!

Nota: Si la masa está muy pegajosa, agrégale un poco más de fécula de maíz. Si la masa está muy firme o desmoronadiza, agrégale un poco más de aceite. ¡Sigue mezclando y experimentando hasta que estés contento/a con la consistencia de tu jabón!

¿Te gustaría descargar esta actividad? Haz clic aquí para obtener un archivo PDF.

Para encontrar actividades, ideas y mucho más descubrimiento en casa, ¡síguenos!

Continue Reading

Daily Discovery: Time Machine

Post written by Charlotte Conway, Public Programs Coordinator.

Daily Discovery: Time Machine

Time machines are the stuff of science fiction. In movies and shows, they help out some of our favorite characters… like when Hermione Granger used her time turner to perform better in school in Harry Potter!

Can you use design thinking to design your own time machine? Design thinking is when we design products that help meet specific needs for specific people. Follow the instructions below to get started!

Supplies:

  • Pencil or pen
  • Paper
  • Glue or tape
  • Recycled supplies
  • Some objects that can be found in many homes: paper towel tubes, buttons, tin foil, bottle caps, plastic bottles, stickers, paper clips, or cardboard
  • Your imagination and creativity!

Instructions:

  1. Identify your user. This is the person (or the group of people) who will benefit from your design. What do they like and dislike? What are their goals? What are some obstacles they face in meeting
    their goals?
  2. Sketch out your design on paper. Identify 3 ways your design will help your user.
  3. Using recycled materials construct your design. Get creative with your supplies, and make sure to get
    permission before using supplies you find in your home!
  4. Ask for feedback on your time machine from someone around you. How can you make it even better?
  5. Use your imagination to travel to different time periods!

Want to download these directions? Click here for a handy PDF!

Follow along with our Daily Discovery! Click here for all activities that you can do at home.

Continue Reading

Daily Discovery: Make your own instruments!

Post written by Eisen Tamkun, Music Education Lead.

Daily Discovery: Make your own instruments!

Get ready to rock out like Ringo! Create your very own drum using common household items!

Supplies:

  • Can – the larger the better!
  • Packing Tape or Duct Tape
  • Wooden Stick – chopsticks or wooden spoon
  • Scissors
  • Decorations – stickers, colorful tape, construction paper, color pencils, markers, etc.

Instructions:

  1. Once you have all the supplies, start by taping over the opening of your can. Be careful! Some cans have sharp edges.
  2. Be sure you pull the tape as taut as you can to create a nice strong drum head. Start with this pattern on the right and continue until the tape covers it completely. The more layers, the longer your drum will last (5-6 layers with packing tape, 3-4 with duct tape).
  3. Now that you have created the drum head it is time for decoration! Put a layer of tape around the body of your drum, use strips of tape to create a unique pattern, cut out fun shapes, or draw a picture or story to tape on the side!
  4. The final step is choosing your drum sticks! Large spoons/ladles work great, but make sure they are made of wood or plastic; metal ones can puncture your drum. Chopsticks work as well; Add some tape on the end for a better sound!

Now that you’ve made your very own drum, try making larger or smaller drums to create an entire set ready to rock out!

Want to download these directions? Click here for a handy PDF!

Follow along with our Daily Discovery! Click here for all activities that you can do at home.

Educational opportunities like this are supported in part by Bohemian.

Continue Reading

At Home STEAM Activities

Post written by Alex Ballou, Marketing Assistant.

At Home STEAM Activities

Here at FCMoD, we believe in discovery. And during times like this, we want you to know that discovery can be found anywhere! Which is why we’ll be posting fun, hands-on activities for you and any other life-long learners you’re currently at home with!

In this blog post, we’ve compiled a list of our top STEAM resources. Learn more below!

  • Water Xylophone:

Missing the Music & Sound Lab? Let’s experiment with sound waves! With just some basic materials you can create your own musical instrument to teach kids about sound waves. In this water xylophone experiment, you’ll fill glass jars with varying levels of water. Once they’re all lined up, kids can hit the sides with wooden sticks and see how the pitch differs depending on how much water is in the jar (more water=lower pitch, less water=higher pitch). This is because sound waves travel differently depending on how full the jars are with water.

    • Materials Needed:
        • Glass jars
        • Water
        • Wooden sticks/skewers
        • Food coloring
  • Tornado in a Jar:

    Create your own Tornado Chamber at home!  This is one quick and easy and science experiment for kids to teach them about weather. It only takes about five minutes and a few materials to set up. Once ready, you’ll create your own miniature tornado whose vortex you can see, and the strength of which you can change depending on how quickly you swirl the jar.

    • Materials Needed:
      • Mason Jar
      • Water
      • Dish Soap
      • Vinegar
      • Glitter (optional)
  • Wheel of the Year:

    To help connect kids more with nature and the changing seasons check out the Wheel of the Year crafts – crafts that actually spin! This was a really fun way to learn more about the year, months, and seasons.

    • Materials Needed:
      • Paper plates
      • Construction paper
      • Colored craft sticks
      • Thumbtack
      • Scissor
      • Ruler
      • Marker
      • Glue stick
      • White glue
      • Tape
      • Clothespin
      • Paper (to write month names and draw images)
  • Dinosaur Fossils:

    We love dinosaurs! These DIY dinosaur fossils made with salt dough are so fun. Plus, who knows, it may even inspire someone to become a paleontologist in your home!

    • Materials Needed:
      • Flour
      • Salt
      • Water
      • Plastic dinosaurs
  • Crystal Flowers:

    Have you ever tried making crystals yet? There are quite a few ways of making them, and we’re so keen to try them all!

    • Materials Needed:
      • Borax (laundry detergent alternative)
      • Pipe cleaners
      • Boiling water
      • Glass jars
      • Chopsticks/Pencils
      • Spoon
      • Safety glasses (preferred)

Other resources for at home activities:

Even though the museum is closed, we want to continue to inspire creativity and encourage hands-on learning for all! When you’ve completed any of these STEAM activities, be sure to post a photo and tag us at @focomod on social media!

Continue Reading