Daily Discovery: Storytime in the Home – Going Around the Sun Solar System Craft

Post written by Lea Mikkelsen, Early Childhood Coordinator.

Daily Discovery: Storytime in the Home – Going Around the Sun Solar System Craft

Follow along with FCMoD’s live stream Storytime in the Home: Going Around the Sun: Some Planetary Fun. Then gather your supplies to make your very own solar system art!

Supplies:

  • Construction paper in a variety of colors
  • Glue stick
  • Glitter Glue
  • Scissors
  • Stickers, Pom Poms, Sequins, crayons, or other craft supplies

Instructions:

  1. Place all your supplies on a clear surface with plenty of room to work.
  2. Start with a dark piece of construction paper. Outer space is very dark, so we used black paper.
  3. Cut out some circles in various colors for planets! Can you remember how many planets there are? (8)
  4. What color is the sun? Cut out the sun from yellow or orange (or be creative with other colors)!
  5. Glue the planets in orbit around the sun!
  6. Try using glitter glue to decorate your planets, make moons, rings, or sparkly stars, or glue other fun decorations to your solar system. Be creative!
  7. Share your creations with us on Instagram or Facebook! Use #dailydiscovery or tag us to share!

Want to download these directions? Click here for a handy PDF!

Follow along with our Daily Discovery! Click here for all activities that you can do at home.

Educational opportunities like this are supported in part by Buell Foundation. Their support helps make access to early childhood education at FCMoD possible for everyone in our community.

Continue Reading

Daily Discovery: “Milky” – Way Nebulas

Post written by Hannah Curtis, Education Assistant.

Daily Discovery: “Milky” – Way Nebulas

NASA, with the help of the Hubble Space Telescope, capture the colorful and mysterious formations of nebulas. They are created from the gas and dust from supernovas or become star nurseries where new stars will be formed. With chemistry and experimentation create your own nebula, but they won’t take billions of years to form!

Supplies:

  • Paper plate or glass dish
  • 3 colors of food coloring
  • 1 cup of milk (preferably higher fat content)
  • 1 Tablespoon Dish soap
  • Q-tips

Instructions:

  1. Pour the milk into your plate or dish.
  2. Add as many droplets of food coloring as you want into each plate. Observe how the droplets don’t disperse and remain as individual droplets. The fat content in the milk creates a denser environment making it difficult for the color to move.
  3. Dip one end of the Q-tip into the dish soap and then into the center of the plate.
  4. Watch as your nebula begins to take form. Milk and dish soap cause a chemical reaction when they come together. The food coloring allows us to see this reaction more clearly! The molecules of in the dish soap and the fat molecules in the milk are attracted to each other and work hard to join together. The dish soap also breaks the surface tension allowing the food coloring to move freely.
  5. Use the Q-tip to swirl the colors to create beautiful, mesmerizing patterns. Expand by mixing different
    colors together. What happens if you use different dairy products all with different fat contents, will it produce different nebulas?
  6. Learn more cool facts and check out more nebulas from NASA.

Want to download these directions? Click here for a handy PDF!

Follow along with our Daily Discovery! Click here for all activities that you can do at home.

Continue Reading

Daily Discovery: Make Your Own Pocket Solar System

Post written by Angela Kettle, School Programs Coordinator. Activity and images adapted from the National Informal STEM Educator’s Network (NISE Net) under a Creative Commons Attribution Non- Commercial Share Alike 3.0 United States (CC BY-NC-SA 3.0 US).

Daily Discovery: Make Your Own Pocket Solar System

There’s a lot of empty space in our solar system – distances between planets are vast! The solar system is made up of eight planets and many other objects orbiting the sun. In addition to planets, there are moons, comets, asteroids, dust, and gas, all influenced by the gravitational pull of the Sun. Make a scale model to show how faraway the planets would be from the Sun and each other, if the entire solar system were shrunk down to a meter across!

Supplies:

  • Two letter-sized sheets of paper
  • Scissors
  • Glue stick or tape
  • Crayons, markers, or colored pencils
  • Ruler or tape measure
  • “Make Your Own Solar System” print-out, included at the end of the PDF version of this activity

Instructions:

  1. Fold your two sheets of paper in half the long way (“hot dog style”). Crease firmly. Unfold, and cut the sheets along the crease.
  2. Use tape or a glue stick to attach the four strips of paper together, like you are making a banner.
  3. Measure the length of your strip once all four strips of paper are combined. Measure your strip in meters. Cut your strip so it is 1 meter (100 centimeters) long.
  4. Print the “Make Your Own Pocket Solar System” quarter sheet at the end of the PDF version of this activity. (If you do not have a printer, no worries! Where this activity instructs you to cut out and paste items, you can draw them instead.)

    Note: This print-out includes four identical copies of the same picture. Use the extra copies for siblings, or make another solar system project with them. Feel free to cut out the quarter page you’ll be using before the next steps in the activity, but we recommend you cut out the planets and other solar system objects out when listed below, since they are quite small and easy to misplace once they are cut out.

  5. Cut out the Sun and the Kuiper Belt. Cut closely around items, leaving little or no white space. Paste the Sun at one end of the paper and the Kuiper belt at the other end.
  6. Fold the paper in half and make sure you crease it firmly. Unfold the paper, draw a line in the crease to mark the orbit, and cut and paste the Uranus sticker somewhere on this crease.
  7. Refold the paper in half and fold it in half again (you should now have fourths). At the halfway point between Uranus and the Kuiper belt, draw an orbit line and cut and paste the Neptune sticker.
  8. At the halfway point between Uranus and the Sun, draw an orbit line and cut and paste Saturn.
  9. Now, fold the Sun up to Saturn. Unfold the paper and cut and paste Jupiter at the halfway point between Saturn and the Sun. Be sure to add a line representing the orbit.
  10. Fold the Sun to meet Jupiter. Unfold the paper and cut and paste the asteroid belt picture at the halfway point between Jupiter and the Sun.
  11. Fold the Sun to the asteroid belt. Unfold the paper and cut and paste Mars at the halfway point between the Sun and the asteroid belt. Draw Mars’ orbit line.
  12. Fold the Sun to Mars. Leave it folded and fold that section in half again. Unfold the paper and you should have three creases: Mercury and its orbit go on the crease closest to the Sun, Venus goes on the next crease, and Earth goes on the final crease.
  13. Label each object that you pasted.
  14. Scientists have sent many satellites into space to study our solar system. You can draw some of them onto your model, too! Research a satellite currently in space here, then add it to your model.
  15. Are you surprised by the distances between various objects in our solar system? In what ways?

Exploring Our Solar System

Your model shows the planets lined up so you can see them all at once. In real life, the planets are usually scattered around the Sun along their orbits. Earth and the other planets in the inner solar system are relatively close together, compared with the planets that lie beyond the asteroid belt in the outer solar system. After our Sun, the next closest star to Earth is Proxima Centauri. If we wanted to add Proxima Centauri to our pocket solar system, it would be almost 7 kilometers (4 miles) away. You’d need a really long strip of paper!

NASA’s science missions explore our solar system, and beyond. It takes a long time to travel vast distances, so missions can last for decades. Many people work together to plan and carry out such big projects—from mechanical engineers to planetary geologists. They agree on research goals, design and build tools and instruments for spacecraft, and figure out how to launch the craft and get the data back to Earth.

Where would you go if you could plan your own mission into space? Consider these questions as you plan your mission:

  • Where would you want to send a space craft?
  • What instruments would your spacecraft have? A camera for capturing pictures? A microphone for measuring sound? A thermometer for taking temperature readings? A chemistry kit for testing for different minerals?
  • Who would you need on their spacecraft team? What role would each person play?
  • How much would your mission cost, and who would pay
  • What would you do with your spacecraft once the mission was over?
  • What are the risks and benefits of sending a spacecraft to explore rather than humans?

Want to download these directions? Click here for a handy PDF!

Follow along with our Daily Discovery! Click here for all activities that you can do at home.

Continue Reading

Daily Discovery: Looking for Life – Ice Orbs

Post written by Angela Kettle, School Programs Coordinator. Adapted from the National Informal STEM Educator’s Network (NISE Net) under a Creative Commons Attribution Non- Commercial Share Alike 3.0 United States (CC BY-NC-SA 3.0 US).

Daily Discovery: Looking for Life – Ice Orbs

Ocean worlds may be the most likely places to discover life beyond Earth. To study distant ocean worlds, scientists make observations using a variety of tools and then compare the data to geological processes on Earth. Sometimes scientists can use telescopes based on Earth to observe these far-off places, and sometimes they gather data using spacecraft with special instruments. Explore your own ice orb using tools in the activity below!

Supplies:

To make ice orbs (see Preparation instructions below):

  • 1 party balloon
  • Small funnel
  • Very small items like confetti, chia seeds, crushed cereal, etc. (use what you have!)
  • Liquid watercolor or food coloring (optional)

To complete activity:

  •  Ice orbs (prepared in advance—see instructions below)
  • Tray, plate, or other surface
  • Towel
  • Magnifying lens (optional)
  • Flashlight (optional)
  • Toothpicks (optional)
  • Paper clips (optional)

Ice Orb Preparation:

Note: This activity is most fun when you have one person prepare the orb, and another person explore it! All steps listed below can be adjusted based on the materials you have at home. The important thing is that you place small items in the orb, fill it with the appropriate amount of water, and leave it to freeze.

  1. Add 2 to 4 drops of liquid watercolor or food coloring to the inside of each balloon.
  2. Use the small funnel to add a tiny pinch (about ¼ teaspoon) of chia seeds, crushed cereal, confetti, and other very small items you’ve collected. Less is more! Do not add too much.
  3. Place the neck of the balloon over a faucet and hold it tightly. Slowly turn on the tap and fill the balloon with water, until it is about 6 to 8 inches in diameter. Be sure you add enough water to get a round shape rather than an elongated (egg) shape. Pinch the neck of the balloon closed and carefully remove it from the faucet.
  4. Release any remaining air from the neck of your balloon or the confetti won’t be encased in ice. Tie off the balloon.
  5. Place the balloon in a freezer, leaving them for two days or until frozen. Tip: You can rest the filled balloon in a small round-bottomed bowl to help them hold a more spherical shape while it freezes. To get the roundest shape, freeze the balloons knot-side down.
  6. Just before you start the activity, cut the neck of the balloons and peel the balloons off the ice orbs.

Instructions:

  1. Look closely at the ball of ice. What do you see on the outside and the inside? Compare what you see to the images of icy moons (Europa and Enceladus) below.
  2. Choose an object hidden under the surface of the ice below. What do you observe? Try using tools like your flashlight, magnifying glass, and toothpicks to get more information!
  3. Can you tell what the hidden object is made of? Is it alive? How could you learn more about the object or the ice?
  4. Explore other ocean worlds here.

Ocean Worlds Beneath

Scientists think that ocean worlds have icy, frozen exteriors and warmer, liquid interiors. Examples of ocean worlds in our solar system include Jupiter’s moons Europa, Ganymede, and Callisto, and Saturn’s moons Enceladus and Titan. The ice orbs you investigated in this activity are different from these ocean worlds, because they’re frozen all the way through.

Astrobiologists are searching ocean worlds for evidence of life. Because water is essential to life on Earth, some scientists think that ocean worlds are the most likely places to find living things in other parts of the universe. NASA missions such as Juno and Cassini are contributing data to astrobiology research. In the future, NASA researchers hope to send scientific missions to these cold and alien worlds to gather more data. Future missions might take better images, analyze the chemical and mineral compositions of the oceans, and probe the surfaces and interiors of these planetary bodies.

Questions to Ponder:

  • On the recent Juno mission to Jupiter, scientists made the decision to deorbit—or crash—the spacecraft into Jupiter to avoid contaminating Jupiter’s moons with microbes from Earth. Was this the right thing to do?
  • What tools should we use to study life on other worlds if we find it? Should we bring samples back to Earth and risk endangering species native to our own planet?

Credits:

Funding: This material is based upon work supported by NASA under cooperative agreement award number NNX16AC67A. Any opinions, findings, and conclusions or recommendations expressed in this material are those of the author(s) and do not necessarily reflect the view of the National Aeronautics and Space
Administration (NASA).

Owning institution: The Science Museum of Minnesota

Permissions: Creative Commons Attribution Non-Commercial Share Alike 3.0 United States (CC BY-NC-SA 3.0 US).

Image credit: NASA

Want to download these directions? Click here for a handy PDF!

Follow along with our Daily Discovery! Click here for all activities that you can do at home.

Continue Reading

Daily Discovery: Life Cycle of a Star Mobile/Descubrimiento en casa: Móvil del ciclo vital de una estrella

Post written by Sierra Tamkun, Learning Experiences Manager.

Daily Discovery: Life Cycle of a Star Mobile

One star, two star, red star, white dwarf star! Throughout it’s billion-year life, a low-density star, just like our Sun, goes through many changes. Learn about the different stages in a star’s life cycle, and make your own star mobile!

The Life of a Star

A star’s life cycle is determined by how big it is, or how much mass it has! The greater the mass of the star, the shorter its life. Depending on the amount of matter in the nebula where the star is born, it will either be a high-mass star, or a low-mass star, like our Sun. We’ll use this life cycle for our mobile.

But how are stars formed, anyway? As clouds of gas and dust move around in a nebula, hydrogen gas is pulled together by gravity and begins to spin faster and faster, heating up to become a protostar. When hot enough (about 15,000,000 degrees Fahrenheit!), a reaction called nuclear fusion occurs at the star’s core, pulling in more gas and dust and causing the star to stabilize and glow bright! It will continue shining in this phase as a main sequence star for millions to billions of years. Our closest star, the Sun, is currently at this stage.

Over time, hydrogen at the star’s core is converted to helium through nuclear fusion. Once the hydrogen runs out, the star isn’t able to generate enough heat to maintain its size. The core contracts, while the outer shell expands and cools, glowing red. This is known as the red giant phase. As the core continues to cool, the helium begins to fuse into carbon. Once all the helium is gone, the core collapses, and the outer layer is expelled into gases and dust, creating a planetary nebula! The collapsed core remains as a white dwarf, slowly cooling to become a black dwarf.

A high-mass star undergoes a supernova explosion after its red giant phase. If the explosion is small, it become a neutron star. But if the explosion is large, the core of the star is swallowed by its own gravity, becoming a black hole!

Supplies:

  • Paper Plate
  • Colorful beads, pom-poms, sequins, colored paper, cotton balls, pillow stuffing, etc.
  • Paints, markers, or crayons
  • Scissors
  • Glue
  • String

Instructions:

  1. Decorate your paper plate like outer space! This will be the backdrop for your star’s life cycle.
  2. Carefully use the scissors to cut your paper plate into a spiral. Ask an adult to help you if needed! Leave a small circle at the center of your spiraled plate.
  3. At the top of your spiral, attach your sting so you can hang your mobile when you’re done! You can use glue or tape, or poke a hole through the plate and tie your string to attached it.
  4. Select different objects to represent each stage in the life of your star. Pick any materials you like, or follow these suggestions:
    a. Star-forming nebula: cotton balls or pillow stuffing
    b. Protostar: small light-colored bead or sequin
    c. Main Sequence Star (like our Sun): yellow bead or pom-pom
    d. Red Giant: large red pom-pom or red paper circle
    e. Planetary Nebula: small bead and cotton balls or pillow stuffing
    f. White Dwarf: white bead or pom-pom
    g. Black Dwarf: small black bead or pom-pom
  5. Start by gluing your nebula materials at the very top of your spiral plate, around the string. Next, glue your black dwarf to the end. Evenly space out the rest of your representative objects and glue them to your spiral plate in the appropriate order.
  6. Use the string to hang up your mobile! As it spins, follow along with the different life stages of a star just like our very own Sun!

Want to download these directions? Click here for a handy PDF!

Follow along with our Daily Discovery! Click here for all activities that you can do at home.


Traducido por Károl de Rueda y Laura Vilaret-Tuma.

Descubrimiento en casa: Móvil del ciclo vital de una estrella

Durante los billones de años que podría durar su existencia, una estrella de densidad baja (al igual que nuestro Sol), experimenta muchos cambios. Aprende más sobre las diferentes etapas de la existencia de una estrella, y crea tu propio móvil.

El ciclo de vida de una estrella

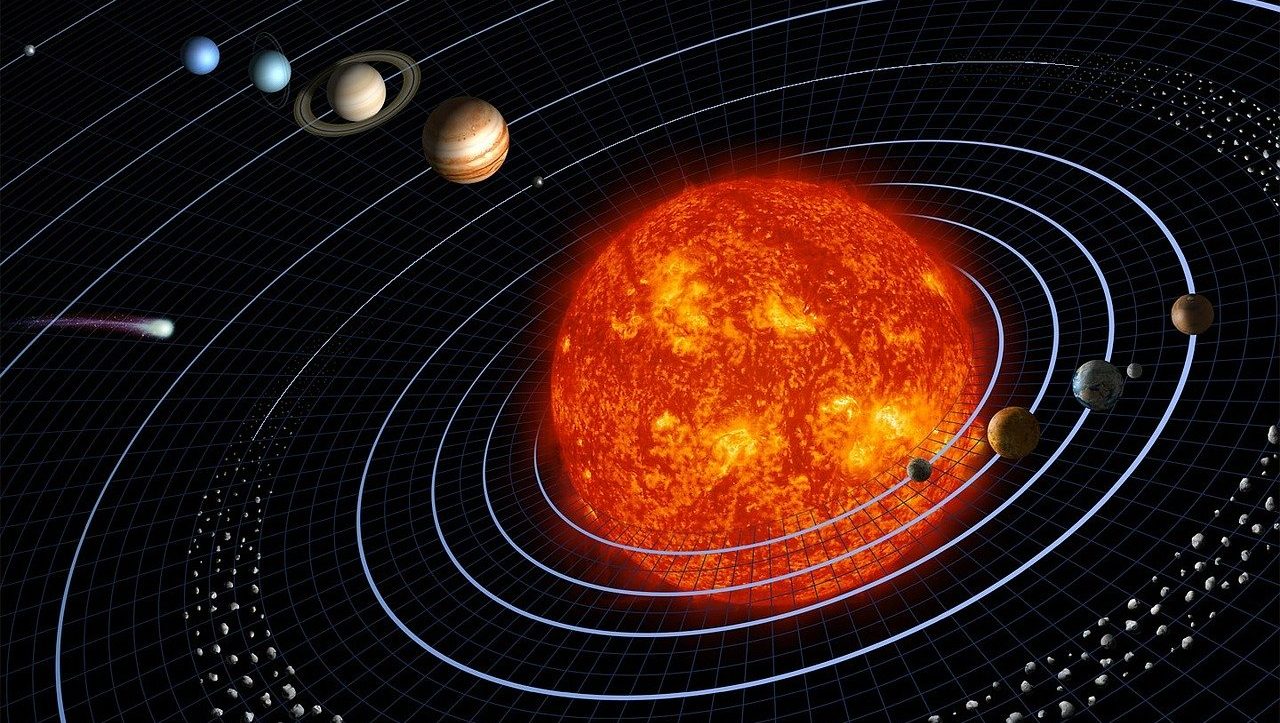
El ciclo de vida de una estrella se determina por su tamaño o por su masa. Mientras más contenido tenga de esta, más corta resulta su vida. La cantidad de sustancia retenida por una nebulosa determina si va a nacer una estrella de masa alta o baja, como el Sol. Vamos a representar estas etapas de vida en nuestro móvil.

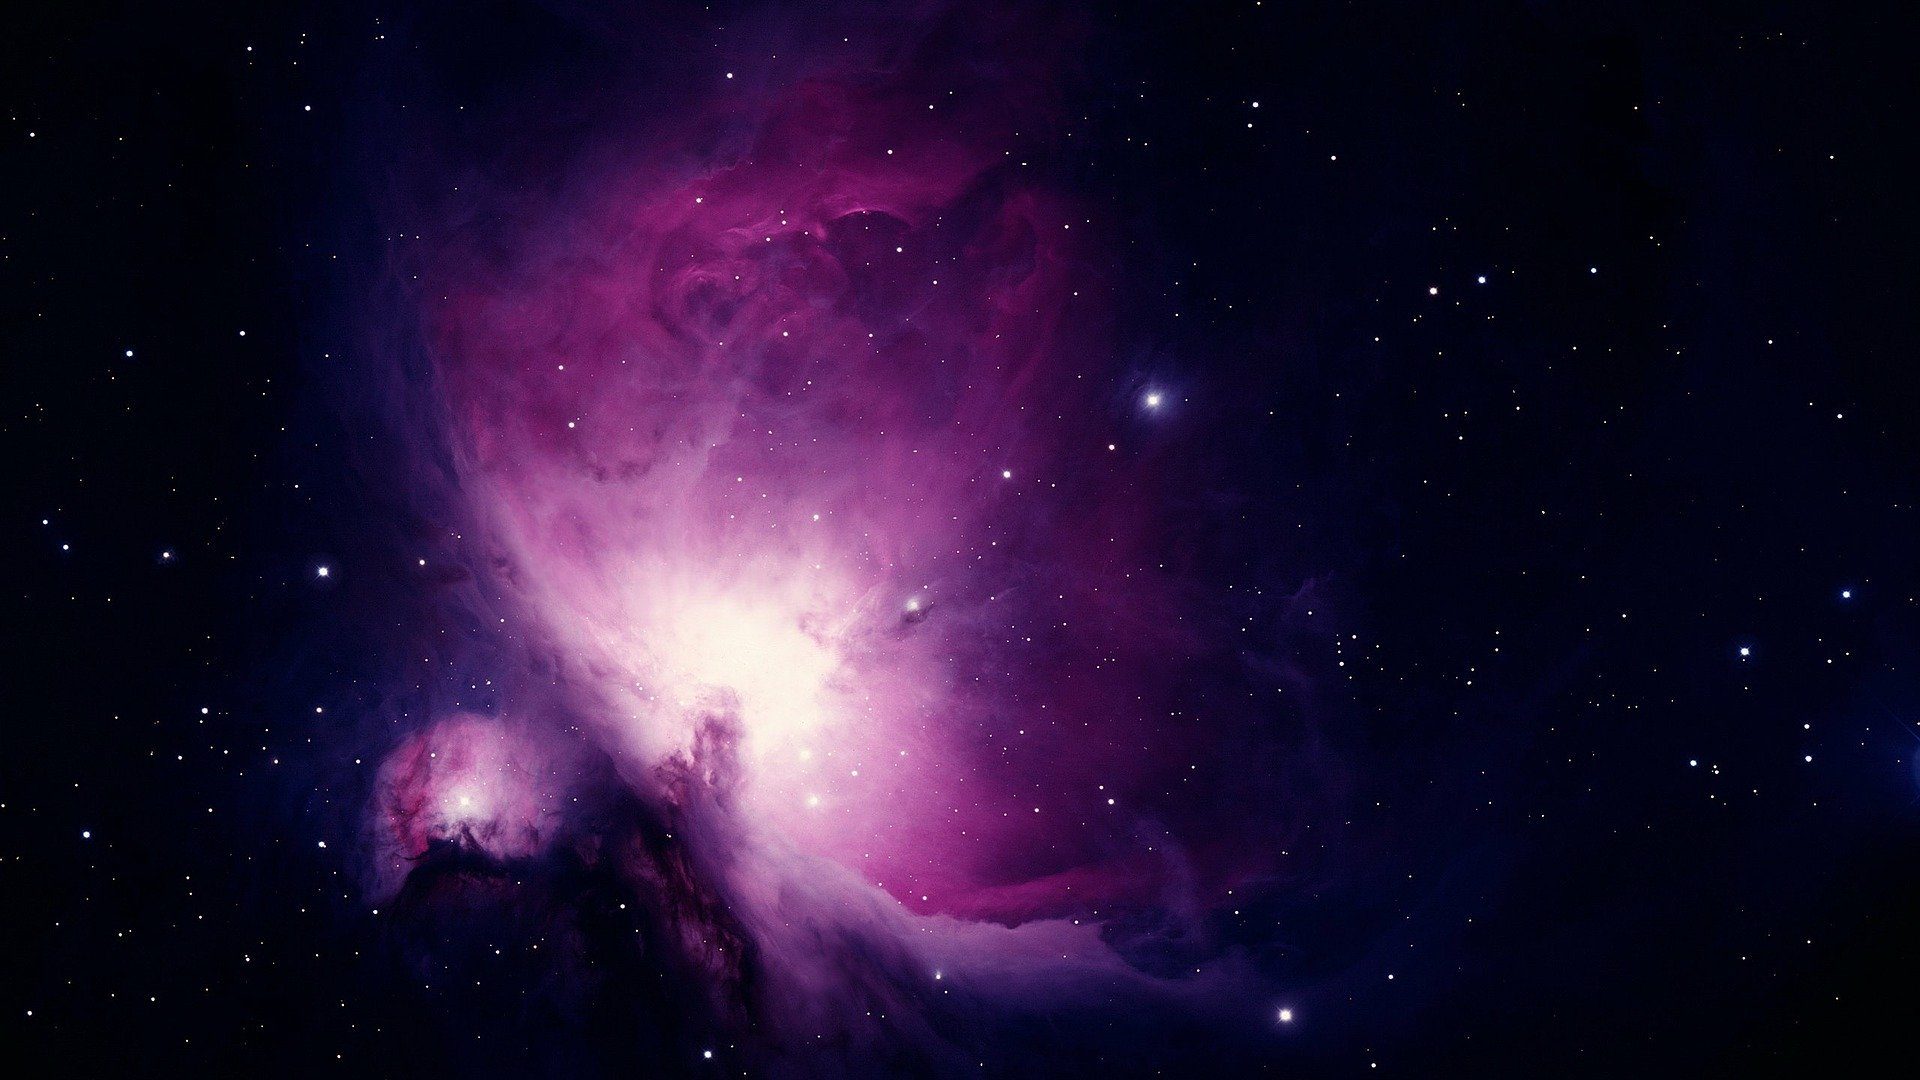
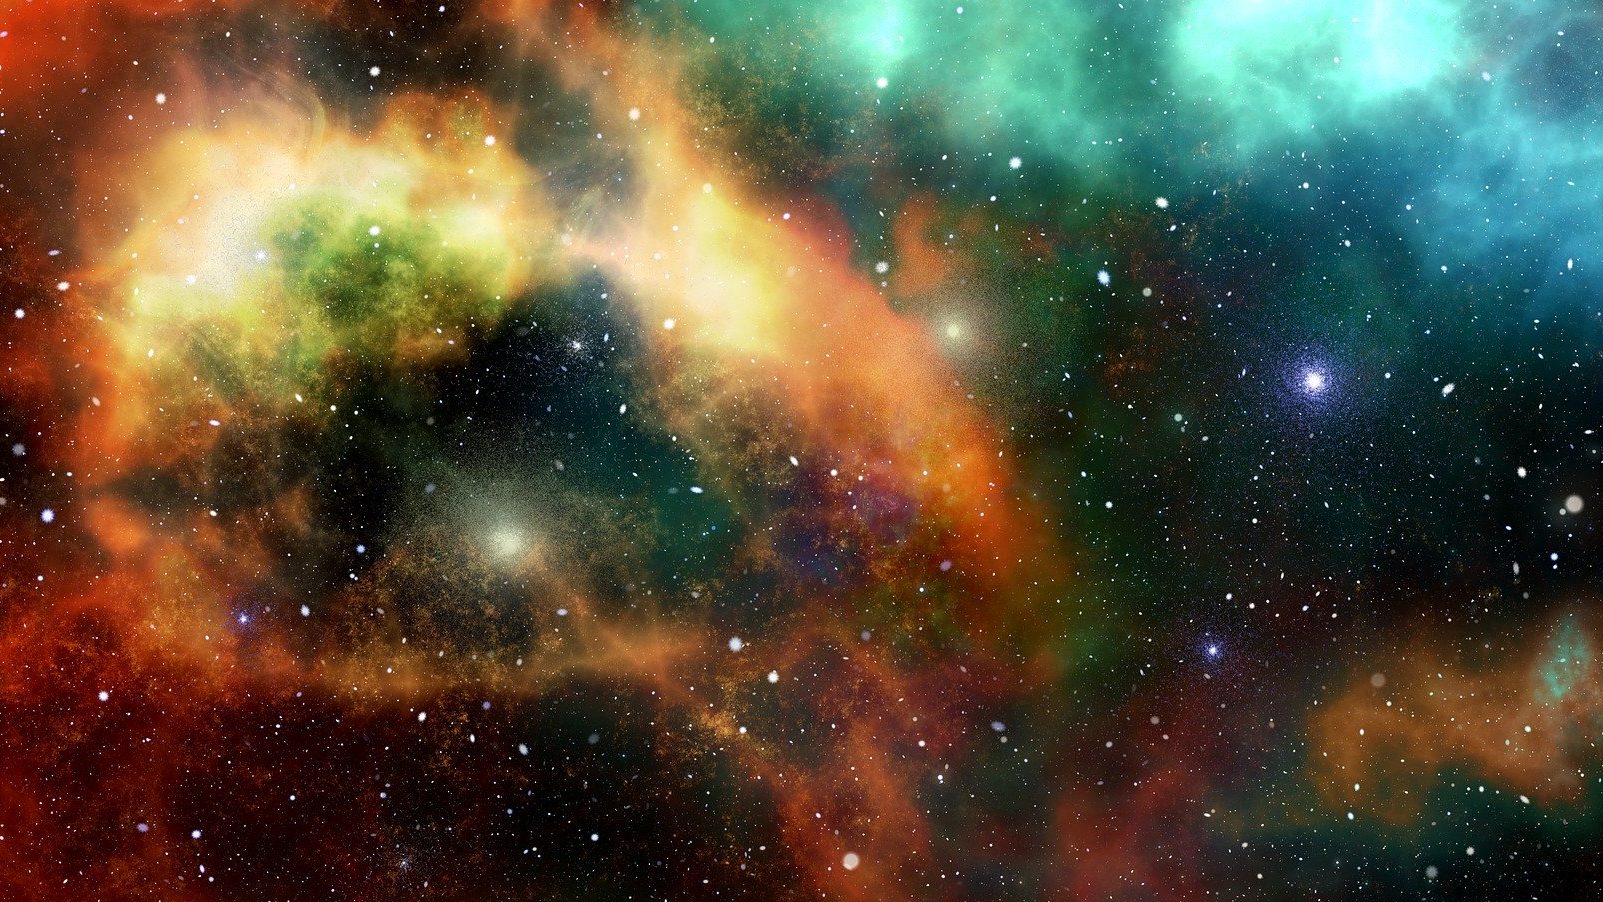
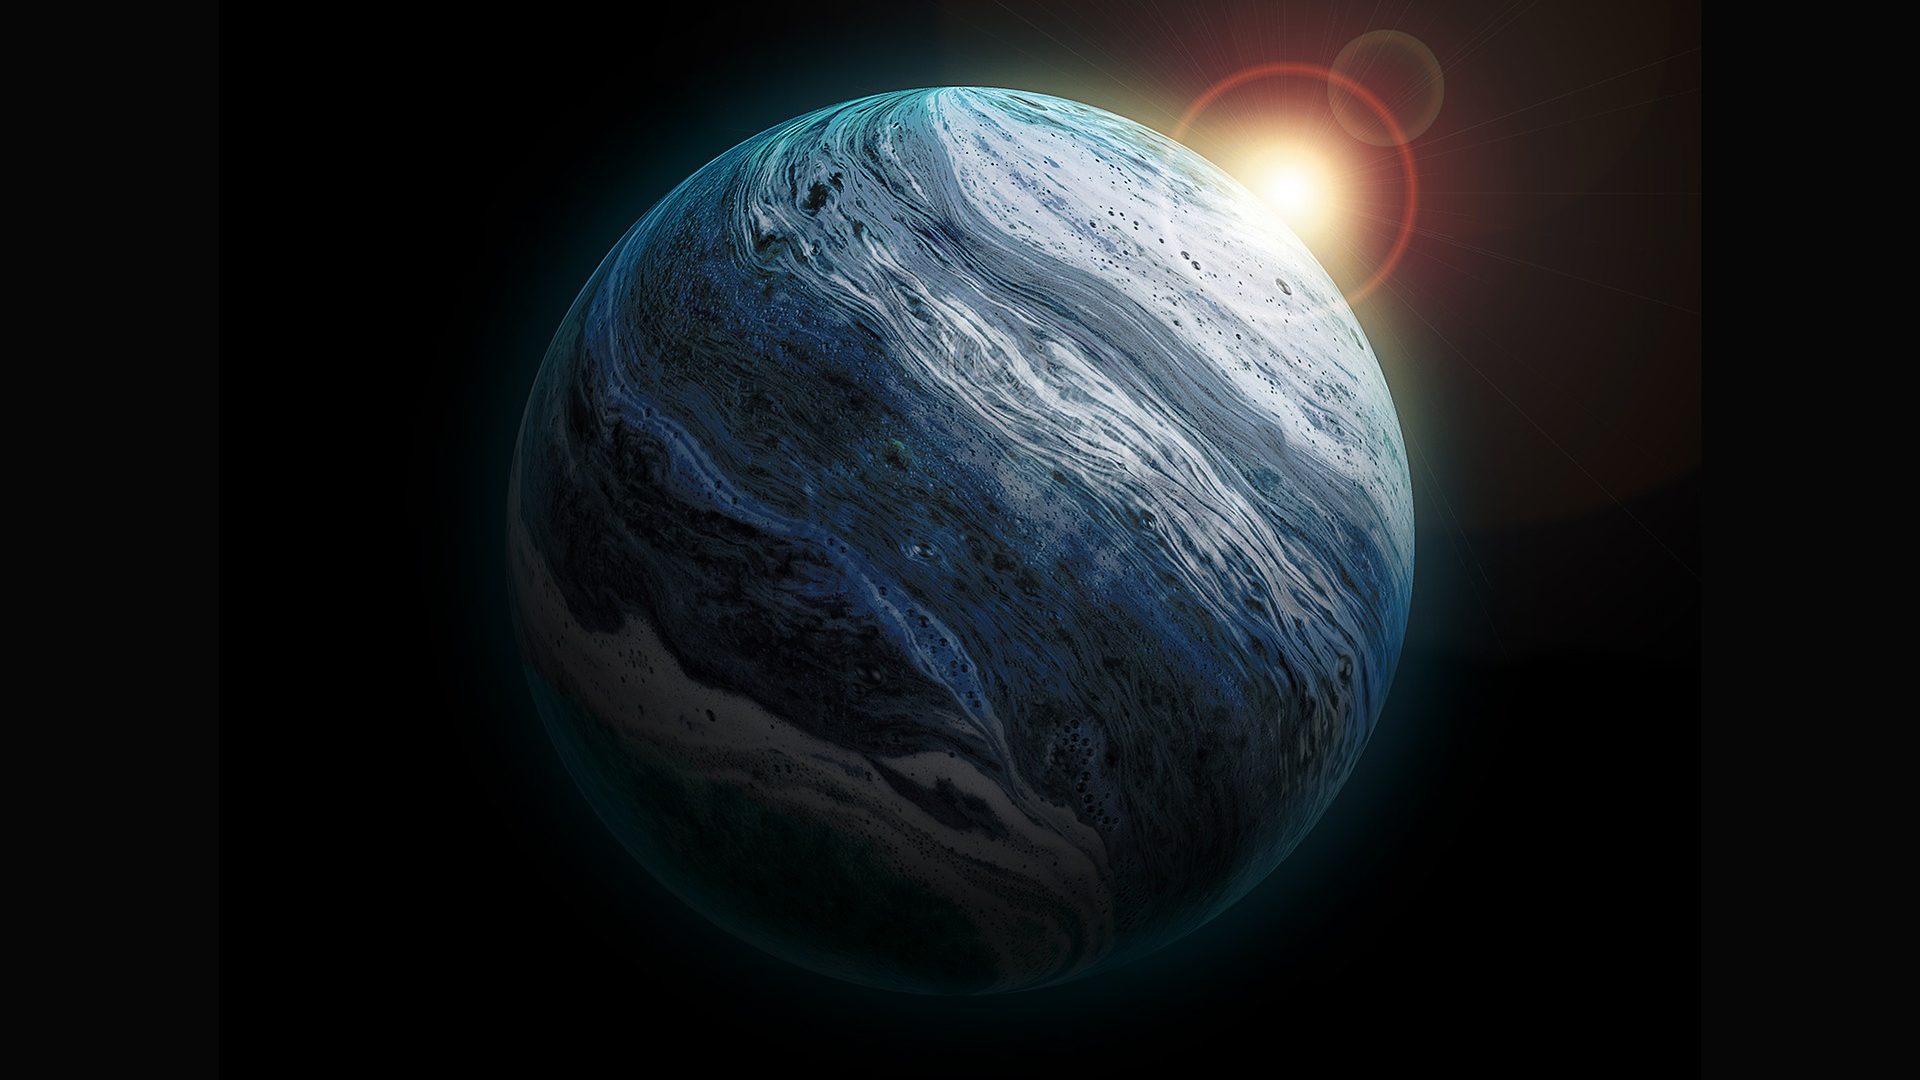
Pero, ¿y cómo se forman las estrellas? Mientras nubes de gas y polvo trastean en una nebulosa, hidrógeno molecular empieza a unirse por la fuerza de la gravedad. Girando más rápido, el hidrógeno se calienta y se vuelve una protoestrella. Cuando está suficientemente caliente, (¡8,333,315 grados Celsius, o 15,000,000 grados Fahrenheit!), comienza una reacción llamada fusión nuclear en el centro, atrayendo más gas y  polvo. En un corto tiempo, la estrella se estabilizará y emitirá un resplandor brillante. Esta continuará a emitir su luz por millones o hasta por billones de años. La estrella más cerca de la Tierra, el Sol, está actualmente viviendo esta etapa.

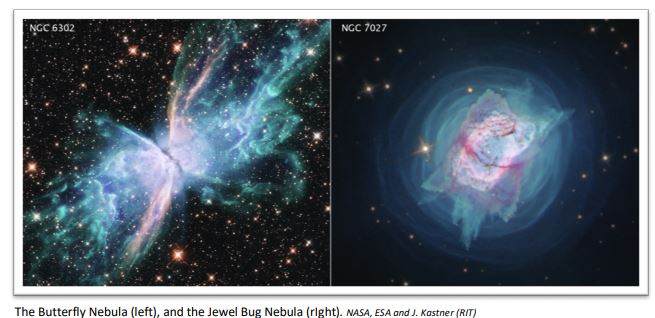
Cuando pasa el tiempo, el hidrógeno presente en el centro de la estrella se convertirá en helio a través de la fusión nuclear. Cuando el hidrógeno se haya agotado, la estrella no tendrá la capacidad de conservar la temperatura que necesita para mantener su tamaño. El centro de la estrella se contractará mientras que su capa exterior se expandirá y enfriará, brillando en un color rojo. Esta etapa de su vida se llama “la gigante roja.” Mientras se enfría el centro de la estrella, el helio se convierte en carbón. Cuando se extingue el helio, el centro se derrumba y su capa exterior expulsa gases y polvo, formando una nebulosa. El centro de la estrella sigue desprendiendo capas y enfriándose, existiendo como una “enana blanca.” Eventualmente se convertirá en una “enana negra.”

Una estrella de masa alta experimenta una explosión supernova después de ser una gigante roja. Si la explosión es pequeña, la estrella colapsa a un tamaño compacto, una “estrella neutrónica.” Si la explosión es grande, la gravedad puede comerse el centro de la estrella y convertirse en un “agujero negro.” Después de esta información tan interesante, ¿estamos listos para nuestra actividad?

Artículos necesarios:

  • Plato desechable de papel
  • Abalorios, cuentas o chaquiras, pompones, lentejuelas, papel de varios colores, bolas de algodón, relleno de almohada, etc.
  • Pinturas, marcadores y lápices de colores
  • Tijeras
  • Pegamento
  • Cordel/cuerda/hilo

Instrucciones:

  1. Decora tu plato de papel como el espacio. Este será el telón de fondo para el ciclo de vida de tu estrella.
  2. Con cuidado, usa las tijeras para cortar tu plato de papel como un espiral. Si es necesario, pídele ayuda a un adulto, dejando un centro redondo y bien pronunciado.
  3. Usa pegamento, cinta adhesiva, o haz un agujero en el centro del plato para atar un cordel.
  4. Selecciona varios objetos para representar las diferentes etapas de la vida de tu estrella. Escoge los materiales que prefieres o que tengas disponibles. Si quieres, sigue estas sugerencias:
    a. Nebulosa de vivero estelar: bolas de algodón o relleno de almohada
    b. Protoestrella: chaquira o lentejuela pequeña y de color claro
    c. Estrella de secuencia principal (como el Sol): abalorio o pompón amarillo
    d. La gigante roja: pompón grande o recorte de círculo de color rojo
    e. Nebulosa planetaria: bola de algodón, abalorio pequeño, o relleno de almohada
    f. Enana blanca: abalorio o pompón blanco
    g. Enana negra: abalorio o pompón negro pequeño
    Pega los materiales a tu espiral empezando de arriba hacia abajo y en orden. Asegúrate que estén uniformes y bien espaciados.
  5. Cuando termines de armar tu móvil, cuélgalo. Mientras gira, ¡observa las diferentes etapas de la vida de una estrella!

¿Te gustaría descargar esta actividad? Haz clic aquí para obtener un archivo PDF.

Para encontrar actividades, ideas y mucho más descubrimiento en casa, ¡síguenos!

Continue Reading

Daily Discovery: Solar System String Model

Post written by Sierra Tamkun, Learning Experiences Manager. This activity was adapted from NASA/JPL.

Daily Discovery: Solar System String Model

How big is our solar system? Really, REALLY big! Astronomers use a unit of measurement called an Astronomical Unit, or AU, to calculate the distances of different planets from the sun and measure the size of our solar system. One AU is equal to the distance from the sun to Earth, about 93 million miles (150 million kilometers)! Use the chart in the linked PDF of relative distances provided to build your very own to-scale model of our solar system and planets!

Supplies:

  • Measuring tape with centimeter markings
  • 4.5-meter-long piece of string
  • Large craft pony beads (or other craft beads) in various colors
  • Small piece of cardboard or wood to wrap solar system string around

Instructions:

  1. Pick out different beads to represent each planet and the sun! Look for beads that are roughly the same colors – blue for Earth, red for Mars, green for Uranus, etc.
  2. Tie the bead representing your sun to the end of your string.
  3. Using the distances (in centimeters) in the chart below, measure the distance from the sun to the first planet, Mercury.
  4. Tie Mercury in place on your sting. Tip: ask an adult to help you to make sure it stays in place!
  5. Repeat steps 3 and 4 for each planet.
  6. Lay your sting out on the floor to see the relative distance between all the planets in our solar system!

On your solar system string, all the planets are in a line so we can see the distances between them, but in space, the planets all orbit around the sun. Want to see your string of planets in orbiting action? Have a friend or family member hold the sun, while you stand apart from them holding the end. With the string pulled tight, walk counter-clockwise around your friend to see how the planets circle the sun in outer space!

This activity was adapted from NASA/JPL. Explore more at https://www.jpl.nasa.gov/.

Want to download these directions? Click here for a handy PDF!

Follow along with our Daily Discovery! Click here for all activities that you can do at home.

Continue Reading

Daily Discovery: What’s With Weather? – Forecast It!

Post written by Heidi Fuhrman, Discovery Camp Coordinator.

Daily Discovery: What’s With Weather? – Forecast It!

One minute it’s sunny and the next you can build a snowman! We all experience weather, but what really is weather and how do we predict it? Learn about how meteorologists forecast the weather before building some forecasting tools and setting up a weather station of your own!

Supplies:

For Observation Journal:

  • Paper
  • Crayons/markers

For Barometer

  • Glass jar
  • Balloon or plastic wrap
  • Rubber band
  • Ruler
  • Straw
  • Tape
  • Scissors

For Thermometer:

  • Bottle
  • Rubbing alcohol
  • Straw
  • Marker
  • Food coloring
  • Clay or playdoh
  • Pan of hot water, pan of cold water

Instructions:

Make Your Own Weather Journal:

Meteorologists track weather over multiple days to make the best forecasts. Weather data over decades gives us information about a place’s climate. You can track the weather from your home! Use your observation skills and the tools below! Keep your eye out for other Discovery at Home tools you can add to your weather station. Over time you will be able to forecast the weather too!

  1. Gather your supplies! You’ll need paper (or you can print the handy weather report sheets at the end of this pdf! Make sure to print double sided!) and a pencil/marker. If you want to make a book, you’ll need a stapler or hole punch and string too.
  2. Fold your paper and cover paper in half. Place your journal paper inside the cover. You can use plain paper or print off our journal pages. Decorate your cover! Attach the journal pages to the cover using stapler or by punching a hole at top and bottom and tying together with string!
  3. Fill out your observation journal! Try and fill it out at the same time every day to be able to make the most accurate forecasts. After a few days try forecasting the weather. Why did you forecast that? What data did you base your forecast off of?
  4. Try some of the other activities included here!

Make Your Own Barometer:

A barometer measures atmospheric pressure. Atmospheric pressure is the weight of the atmosphere overhead! Meteorologists track atmospheric pressure because a change in atmospheric pressure means a change in weather. Weather is controlled by changes in air pressure—high and low pressure systems (remember these are represented by “H” and “L” on our weather maps!). High pressure causes air to flow down and fan out near the ground, keeping clouds from forming—so nice weather! When air pressure is low, air flows together and then upward where it gathers, rising, cooling, and forming clouds—stormy weather! You can monitor the atmospheric pressure in your town by building your own barometer! TIP: It won’t be exciting at first, but if you watch for several days, you’ll notice the pressure is changing without
you realizing it!

  1. Gather your supplies! You’ll need a glass jar, ruler, straw, balloon or plastic wrap, scissors, tape, and a rubber band.
  2. Cut the long end off the balloon. Cut a small slit in the end of the balloon.
  3. Stretch the balloon so that it fits over the mouth of the jar. Make sure it’s nice and tight and secure with a rubber band. If you don’t have a balloon use plastic wrap. Make sure it’s not loose or saggy…we need our jar to be sealed nice and tight!
  4. Tape the end of the straw onto the middle of your balloon lid. A longer straw will make the barometer more accurate. You can put two straws together by cutting a small slit in the end of a straw, squeezing it to make the end smaller, and slipping it into another straw.
  5. Keep your barometer indoors and in a place where it won’t get bumped. Place a ruler behind your straw to observe it rising and falling.

Observe:

Observe your barometer for several days and record what you see in your weather journal. Be sure to observe at the same time each day. What do you notice? Does the straw point to the same place on the ruler each day? Is it rising and falling? What does that mean? Remember, a straw rising means increasing pressure— sunny and clear—a straw falling means decreasing pressure—cloudy and stormy!

Make Your Own Thermometer:

A thermometer measures temperature—how hot/cold the atmosphere is. Meteorologists report temperature using Celsius or Fahrenheit. In the U.S. we use Fahrenheit, but most other countries use Celsius. Temperature can tell us important things—for example it can’t snow until it’s below freezing (32°F)—but temperature is also relative (compared to something). A 70° day would feel chilly after a week of 90° weather, but hot after a week of 40° weather! Thermometers are some of the oldest tools we use to understand the weather. Try making your own thermometer and see what you observe!

  1. Gather your supplies! You’ll need a clear bottle, water, straw, rubbing alcohol, food coloring, and clay (playdoh works too!)
  2. Start by filling your bottle ¼ of the way with equal parts rubbing alcohol and water. Add a couple drops of food coloring. We’re using red like in a real thermometer. PRO TIP: If you’re not using a clear straw add extra drops. The darker the water, the easier it will be to see it in the straw. Mix in the coloring.
  3. Form a small clay pancake (we’re using playdoh!) and poke a hold through for your straw. Be sure there is no clay inside your straw!
  4. Stick your straw into the bottle. The end should be in the liquid but SHOULDN’T touch the bottom of the bottle.
  5. Secure the straw at the top of the bottle with your clay. Be sure you have a tight seal. Pinch it tight against the straw but don’t crush it. Make sure
    the top of your straw is poking out the top and is open to the air.

Observe:

Note where the water level IN THE STRAW is. Make a mark on the outside of the bottle. You can calibrate your thermometer by noting what the air temperature is (say how warm it is in your home) and noting that next to the mark.

Place your bottle in a pan of hot water. What happens to the water level in the straw? Label the level and temperature. What happens when you take your thermometer out? What happens to the level when you place it in cold water? Label that level and temperature.

Forecast It!

Use your new tools to set up a weather station! Observe the weather over the course of a week or two at the same time every day. What do you notice? What patterns do you see?
After a few days of data can you forecast the next few days of weather? Were you right?

Want to download these directions? Click here for a handy PDF!

Follow along with our Daily Discovery! Click here for all activities that you can do at home.

Continue Reading

Daily Discovery: What’s With Weather? – Rain

Post written by Heidi Fuhrman, Discovery Camp Coordinator.

Daily Discovery: What’s With Weather? – Rain

We’ve learned about forecasting weather, but what about one of the components of weather—rain?! Learn about precipitation and create your very own water cycle before building another tool for your weather station! (If you haven’t checked out our “What’s With Weather: Forecast It!” Discovery at Home you might want to start there!)

Supplies:

For Experiment:

  • Ice cubes
  • Pot & Stove top
  • Cookie sheet or pan

OR

  • Glass jar
  • Plate
  • Ice cubes & water

For Rain Gauge:

  • Empty plastic bottle (2 liter soda bottle works best!)
  • Scissors
  • Rocks, gravel, or marbles
  • Ruler
  • Tape & Marker

Instructions:

Experiment: Make It Rain

Precipitation, including rain, is just one important part of the water cycle! The basics of the water cycle are evaporation, condensation, and precipitation but scientists who study our climate also think about how runoff from mountains, groundwater, plant uptake and more effect our water cycle! What can you think about that might effect where water goes and how it gets to the oceans? What might impact how it gets to the skies and back to us? Start by building your own water cycle!

  1. Gather your supplies! You’ll need a pot, stovetop, ice cubes, a cookie sheet or similar pan, and an adult’s help!
  2. Put your cookie sheet into your freezer. You’ll need to let it get cold for a few minutes!
  3. While your cookie sheet freezes, take out a good handful or two of ice cubes and put them in a pan. What do you notice about the ice cube? What do you notice about water in its frozen form?
  4. With an adult’s help, put your pan full of ice cubes on a stove burner and heat them up. What do you hypothesize will happen to the ice? What happened? As the ice warms up, the molecules water can move! It’s now a liquid! What do you notice about water in its liquid form? As the water gets warmer and warmer the water molecules can move faster and faster until they bump each other out of the pan! What you see isn’t smoke but water vapor! What do you notice about water in its gas state? Carefully, with your adult’s permission hold your hand way above the pan and see what happens. Is your hand getting wet?
  5. Take your cookie sheet out of the freezer and hold it a few inches over the pan. You can put some extra ice cubes on top for good measure! What do you hypothesize will happen? What do you notice now? What is happening to the water vapor? Keep holding the cookie sheet there and watch the bottom where the water vapor is hitting. After a few minutes what do you notice? Is the water condensing? As the water vapor hits the cold cookie sheet it cools down and turns back into a liquid, condensing on the bottom of the sheet and falling back to the pot as rain!

You just made a mini-water cycle!

If you can’t use a stovetop, you can do this rain experiment a different way!

  1. Gather your supplies, you’ll need a glass jar, hot water, a ceramic plate, and some ice cubes.
  2. Pour your hot water into a glass jar and place your plate flat on top. What do you notice?
  3. Wait a few minutes and then place some ice cubes on the plate. What is happening on the bottom of the plate?

Make Your Own Rain Gauge:

Meteorologists and other scientists track precipitation to better understand a place’s climate. Knowing how much precipitation has fallen in an area also helps them better predict droughts and floods. This helps farmers and keeps communities safe! NASA helps track precipitation using satellites in space, but meteorologists track it from the ground too! You can track precipitation in your neighborhood by building your own rain gauge to measure how much rain and snow falls in your backyard! Does more or less rain fall then you hypothesized? Add your rain gauge to the weather station you might have built from “What’s With Weather: Forecast It!” You can also track how precipitation your backyard gets in your weather journal you created with that activity or help out real scientists by checking out the citizen science opportunity at the end of this section!

  1. Gather your supplies! You’ll need rocks or gravel, a marker, ruler, scissors, tape, and clear bottle. A 2 liter soda bottle works best, but you can also use a water bottle, juice bottle, or even an empty milk jug!
  2. With an adult’s help, cut the top of the bottle or jug off, about 2-3 inches below the top. If you’re using a jug with a handle, be sure to cut above the handle.
  3. To keep your rain gauge from blowing over or away fill the bottom with some rocks or gravel. Then Flip the top portion of the bottle over and fit inside. It should form a funnel! This will allow your rain gauge to better collect rain as it falls!
  4. Tape the two bottle pieces together. Then, using a ruler, mark the side of your rain gauge! Place your rain gauge outside. You’ll need to pick a good spot! You want somewhere level, open to the sky, and not likely to get too windy. Make sure nothing is hanging over the gauge (like a tree or roof).

Observe:

If it rains or snows within 24 hours, check your gauge and see how high the water is! That’s how much rain has fallen in the last day! In your weather journal make a note of the day and amount of rain. Then go online and find the official rainfall amount…how closely did your amount match? Repeat whenever it rains!

Want to download these directions? Click here for a handy PDF!

Follow along with our Daily Discovery! Click here for all activities that you can do at home.

Continue Reading

Daily Discovery: Investigating Clouds / Descubrimiento en casa: Investigando las nubes

Post written by Charlotte Conway, Public Programs Coordinator.

Daily Discovery: Investigating Clouds

NASA scientists study clouds to better understand and predict how Earth’s climate is changing. Community members can collect data about clouds and share it with scientists to help do this important research. In this activity, you will record cloud observations and learn how you can share data with researchers who collaborate with NASA!

Supplies:

  • Pencil
  • Book, clipboard, notebook, or other hard surface to write on
  • Investigate Your Sky Today activity sheet, or a blank piece of paper

Instructions:

  1. Investigate the sky! If you are able to, go outside or observe the sky from a window.
  2. Notice and observe the shapes of the clouds you see. Are the clouds puffy with clear edges, thin and whipsy, or layered and sheet-like?
  3. Then draw a detailed sketch of what you see. The sky is big. To make an accurate observation, it is helpful to orient yourself north, divide the sky into quadrants, and sketch what you see in each one. If there are no clouds today, that’s okay! That is real data too, so make a note.
  4. Now, estimate the cloud coverage. How full is the sky today? Make an estimation how much the sky is covered with clouds from 0-100%.
  5. When you are finished sketching, go inside. Write down the date and time of day that you make your observations. Write down observations about the shape, size, color, and any features you noticed about the clouds next to your drawings. Try to use some of the scientific vocabulary below to classify the clouds you observed!
  6. If you enjoyed observing the clouds, join a community of participants working with NASA to collect important scientific data about clouds. Learn more and download an app to contribute your cloud observations: observer.glove.gov.

Want to download these directions? Click here for a handy PDF!

Follow along with our Daily Discovery! Click here for all activities that you can do at home.


Traducido por Károl de Rueda y Laura Vilaret-Tuma.

Descubrimiento en casa: Investigando las nubes

Los científicos de la NASA estudian las nubes para entender su función y también para predecir cómo está cambiando el clima. Pero, ¿sabías que tú también puedes colectar datos sobre ellas y compartirlos con los científicos? ¡Tus observaciones podrían resultar en investigaciones muy importantes! En esta actividad, vamos a observar a las nubes haciendo varias anotaciones mientras aprendemos cómo compartir estos datos ¡con los investigadores que colaboran con la NASA!

Artículos necesarios:

  • Página de actividad incluida ¡Investiga el cielo de hoy! o papel blanco
  • Una superficie firme para escribir (como un libro, un portapapeles, o un cuaderno)
  • Algo para escribir (lápiz, pluma o marcador)

Instrucciones:

  1. ¡Investiga el cielo! Si puedes, ve afuera, o también puedes observar el cielo desde una ventana.
  2. Presta atención a la forma de las nubes. ¿Son densas con bordes claros, delgadas y tenues, o tienen capas con áreas grises?
  3. Ahora dibuja detalladamente lo que ves. ¡El cielo parece ser infinito! Para formar una observación precisa, es útil orientarse hacia el norte, dividir el cielo en cuadrantes (o cuatro partes), y dibujar lo que observas en cada uno de ellos. Si no hay ninguna nube, ¡no te preocupes! Apúntalo de igual manera porque este dato también provee información importante.
  4. Estima su cobertura. ¿Qué tan lleno está el cielo de nubes? Haz un estimado desde 0-100%.
  5. Cuando termines de anotar tus datos, apunta la fecha y hora en las cuales hiciste tus observaciones. Al lado de tus dibujos, escribe sobre sus formas, tamaño, color y otras características que hayas notado. Puedes tratar de utilizar el vocabulario científico incluido abajo para clasificarlas.
  6. Si esta actividad te ha gustado, únete a la comunidad de participantes que trabajan con la NASA para recopilar datos científicos importantes sobre las nubes. Obtén más información y encuentra una aplicación para contribuir con tus observaciones en: observer.glove.gov.

¿Te gustaría descargar esta actividad? Haz clic aquí para obtener un archivo PDF.

Para encontrar actividades, ideas y mucho más descubrimiento en casa, ¡síguenos!

Continue Reading

Daily Discovery: Asteroid Mining

Post written by Charlotte Conway, Public Programs Coordinator.

Daily Discovery: Asteroid Mining

People have been mining on Earth for thousands of years. Yet someday in the near future, scientists might to go to space to mine in our solar system!

This is a future technology. Scientists and engineers are still just imagining how they will mine asteroids. Children in school today will be the workers who develop these technologies! Now is your chance to get a head start – how would you design a machine that can mine materials on an asteroid?

Supplies:

  • Asteroid drawing sheets (Included in PDF)
  • Markers or colored pencils
  • Challenge cards (Included in PDF)

Instructions:

Your mission: travel to a distant asteroid to mine for minerals and other resources.

  1. Use your imagination to design a mining machine. How does it work? What special instruments or tools does it need? Does your machine need to communicate back to Earth? How would it get power to operate?
  2. Draw a picture of your mining machine on the asteroid drawing worksheet. If you need inspiration for your design, or would like an extra challenge, choose a challenge card. Imagine you are the person on the card. How does this change your thinking about mining asteroids?
  3. Consider the following questions, or if you have a partner or caregiver available, start a discussion using these questions: Why would you mine an asteroid? What does the asteroid look like after mining? How do you think life on Earth would be different after mining?
  4. Great job on your design. You are helping to imagine the humans’ future of working and living in space!

Want to download these directions? Click here for a handy PDF!

Follow along with our Daily Discovery! Click here for all activities that you can do at home.

Continue Reading