City Nature Challenge and FoCoMX

I know a lot of us are trying to decide how to spend our time this weekend. Do we get out in nature to capture observations for the City Nature Challenge (learn more about City Nature Challenge here)? Or do we engage in the time-honored tradition of wandering around Old Town Fort Collins catching random shows and discovering new local music (learn more about FoCoMX here)?

Good news: you don’t have to choose!

While meandering old town taking in shows, just keep an eye out for any bugs, critters, or wild plants that you could snap a picture of on your way to the next venue.

Some tips for urban nature observing:

  • Wild nature can be found anywhere, even in the middle of a city. Look for weeds pushing up through the cracks in a sidewalk, mosses growing on brick buildings, birds perching in landscaping trees, or pollinators visiting flower pots.
  • You may have heard that “Captive and cultivated” organisms (in other words, anything placed or being maintained by humans) don’t count for the City Nature Challenge, and that is true! However, they can still be useful.
    • “Captive and cultivated” organisms like landscaping plants can be uploaded to iNaturalist even though they won’t count toward the City Nature Challenge. In fact, it can be useful information for scientists. It can tell them what kinds of plants are attracting pollinators to an area, what kinds of planted trees may be propagating, etc. Just make sure you mark your observation as “Captive/Cultivated” so as not to confuse the data!
    • While “Captive and Cultivated” organisms don’t count toward the City Nature Challenge,
      organisms that they host do! Look for birds in branches, bugs on leaves, mushrooms or moss
      growing on bark — anything not intentionally placed or maintained by humans is considered
      wild.
  • Remember: the pictures you take for your observations don’t have to be pretty or perfect, they just have to be evidence of the presence of an organism.
    • While there are some incredible photographers on iNaturalist, it’s not a photography platform. The main purpose is to document wild nature where we live!
    • If you are running from one venue to another to catch the start of a set and can’t stop to do a full photoshoot for that grasshopper you spotted, that’s okay! Grab the best photo you can and keep running to make it to that show!

Get inspired for your FoCoMX City Nature Challenge adventure by checking out other observations that have been made in Old Town

Continue Reading

City Nature Challenge: How to Play!

Become a Larimer County Naturalist!

The City Nature Challenge returns this April! Join a worldwide movement to document nature and help fight biodiversity loss! Every observation you make of WILD nature in Larimer County is a data point that helps scientists and researchers understand and protect nature for all.  

This post will tell you everything you need to know – from how-to-play to local City Nature Challenge events.

In short:

City Nature Challenge is a four-day event from April 24-27. Part friendly competition and part collaborative effort, cities all over the world vie to see who can get the most observations uploaded to iNaturalist in just one weekend. Anyone can participate by uploading observations of wild animals, bugs, fungus, or plants found in Larimer County!

See the bottom of this post for a list of local City Nature Challenge events.

In long:

What is City Nature Challenge?
The City Nature Challenge (CNC) is an annual four-day nature census in which participants
around the world use document nature in their neighborhoods. This data help scientists understand
and protect nature worldwide. Started in 2016 as a friendly competition between Los Angeles and San Francisco,
the CNC has grown into an international event. The goal is for cities to collaborate to find species, collect observations,
and connect communities to nature. The Community Science teams at the California Academy of
Sciences (CAS) and the Natural History Museum of Los Angeles County (NHM) make up the
Global Organizing Team.

What is iNaturalist?
iNaturalist is a platform that anyone can use. You can upload pictures or sound clips of species you’ve observed, then the iNaturalist community helps identify those species. Once an observation has been identified, it’s uploaded into databases that scientists use for biodiversity and other ecological studies. It’s a way we can all help contribute to better understanding our local ecosystem!

iNaturalist is the platform Larimer County will be using for our City Nature Challenge observations — any observations made to iNaturalist from within Larimer County during the challenge will automatically count toward Larimer County’s score! You can download the app for free or visit inaturalist.org to use the browser version.

How to Play

Participating in City Nature Challenge is as easy as 1-2-3!

  1. Observe
    From April 24 – 27, 2026, get outside and take photos or record sounds of nature where you live. Look for WILD plants, animals, fungi, etc. (“wild” means it was not put there by people and is not being taken care of by people.) Take a close look at the plants around you. Are there any insects or spiders on them? How many different types of birds can you find in your local park? Put on your nature eyes and see Larimer County in a whole new way!
  2. Upload
    Download the iNaturalist app or create an account on inaturalist.org, and upload your observations. Be sure to include a rough location and time of day.
  3. Identify
    From April 28-May 10 help identify observations that have been uploaded in the Larimer County City Nature Challenge project! Even if the best you can tell is whether it’s an animal or plant, everyone can help narrow IDs down and get us closer to a species ID!

Two Ways To Play:

  • Observer — Get outside anywhere within Larimer County from April 24-27 and make observations in nature. Upload your observations to iNaturalist to have them contribute toward the Larimer County City Nature Challenge AND contribute to ongoing biodiversity research!
  • Identifier — Keep an eye on the Larimer County City Nature Challenge project page on iNaturalist and help identify observations that are uploaded. You don’t need any prior knowledge or expertise to be an identifier; even narrowing an observation down to “animal” or “plant” helps!

Local City Nature Challenge Events

City Nature Challenge can be enjoyed on your own or with others. Here’s how you can participate:

City Nature Challenge Orientation Sessions – Hosted by Loveland Public Library and Loveland Open Lands and Trails 4/11 and 4/21
11:30-1:00 at the Gertrude Scott Meeting Room in Loveland Public Library, 300 N. Adams Ave, Loveland
The
City Nature Challenge, April 24-27, is a friendly, global quest to see which city can document the most species in support of scientific research and biodiversity conservation. This is your chance to become a citizen scientist, let’s see what we can find!  

Come to this orientation session in advance of the event to learn more. Open Lands & Trails staff will first discuss how to use the iNaturalist app and make quality observations in the Gertrude Scott Room. Then we’ll head outdoors to the Civic Center Park to practice.
Registration Link

How to Use iNaturalist – Hosted by Larimer County Natural Resources 4/24
9-11am at the Larimer County Natural Resources Admin Offices, 1800 S County Rd 31, Loveland.
Using iNaturalist, participants will learn key features of plants and animals and contribute to the body of crowd-sourced scientific knowledge that is iNaturalist. All observations made in Larimer County will contribute towards the annual City Nature Challenge.
Registration Link

Bio Blitz — Hosted by Loveland Open Lands and Trails 4/24-4/27
From April 24-27, document as many wild species as possible using iNaturalist. Participate on your own or join OL&T staff and volunteers for assistance at selected Natural Areas. Check the Open Lands Calendar for details coming soon, on dates and locations to join Open Lands & Trails on-site. 

Pineridge Banding Station — Hosted by Bird Conservancy of the Rockies 4/25
7:30-8:30 or 8:30-9:30 at the Pineridge Natural Area Banding Station, 3502 CR 42C, Fort Collins
Migration is a magical time of year! Join us for a unique opportunity to experience science in action and observe a wildlife biologist banding and collecting important scientific data on live, migrating birds. The data collected gives us insight to many aspects of avian life history and can be used to inform conservation decisions.
 

This program is provided at no cost to participants due to generous support from donors, but registration is required for all individuals and groups. Groups are limited to 15 people per one hour time slot.
Registration Link

City Nature Challenge ID Party! — Hosted by Fort Collins Museum of Discovery 5/2
2:00-4:00 at Fort Collins Museum of Discovery, 408 Mason Ct, Fort Collins
Now that City Nature Challenge is over, the real work begins.
All of our amazing observations of local nature can only assist with biodiversity research once they’ve been identified! Join us at the museum to meet up with other City Nature Challenge Participants. You’ll learn a bit about how to ID observations in iNaturalist and do your part for ongoing biodiversity research!
No wildlife knowledge or expertise required.
Registration Link

City Nature Challenge ID Party! — Hosted by Loveland Public Library and Loveland Open Lands and Trails 5/2
12:00-2:00 at the Gertrude Scott Meeting Room in the Loveland Public Library, 300 N. Adams Ave, Loveland
Join other nature lovers for a fun ID Party to help correctly identify as many observations as possible. Instructions and snacks will be provided
.  See the 
Library Calendar for details. 

Continue Reading

Daily Discovery: Storytime in the Home – A Moon of My Own Paper Craft

Post written by Lea Mikkelsen, Early Childhood Coordinator.

Daily Discovery: Storytime in the Home – A Moon of My Own Paper Craft

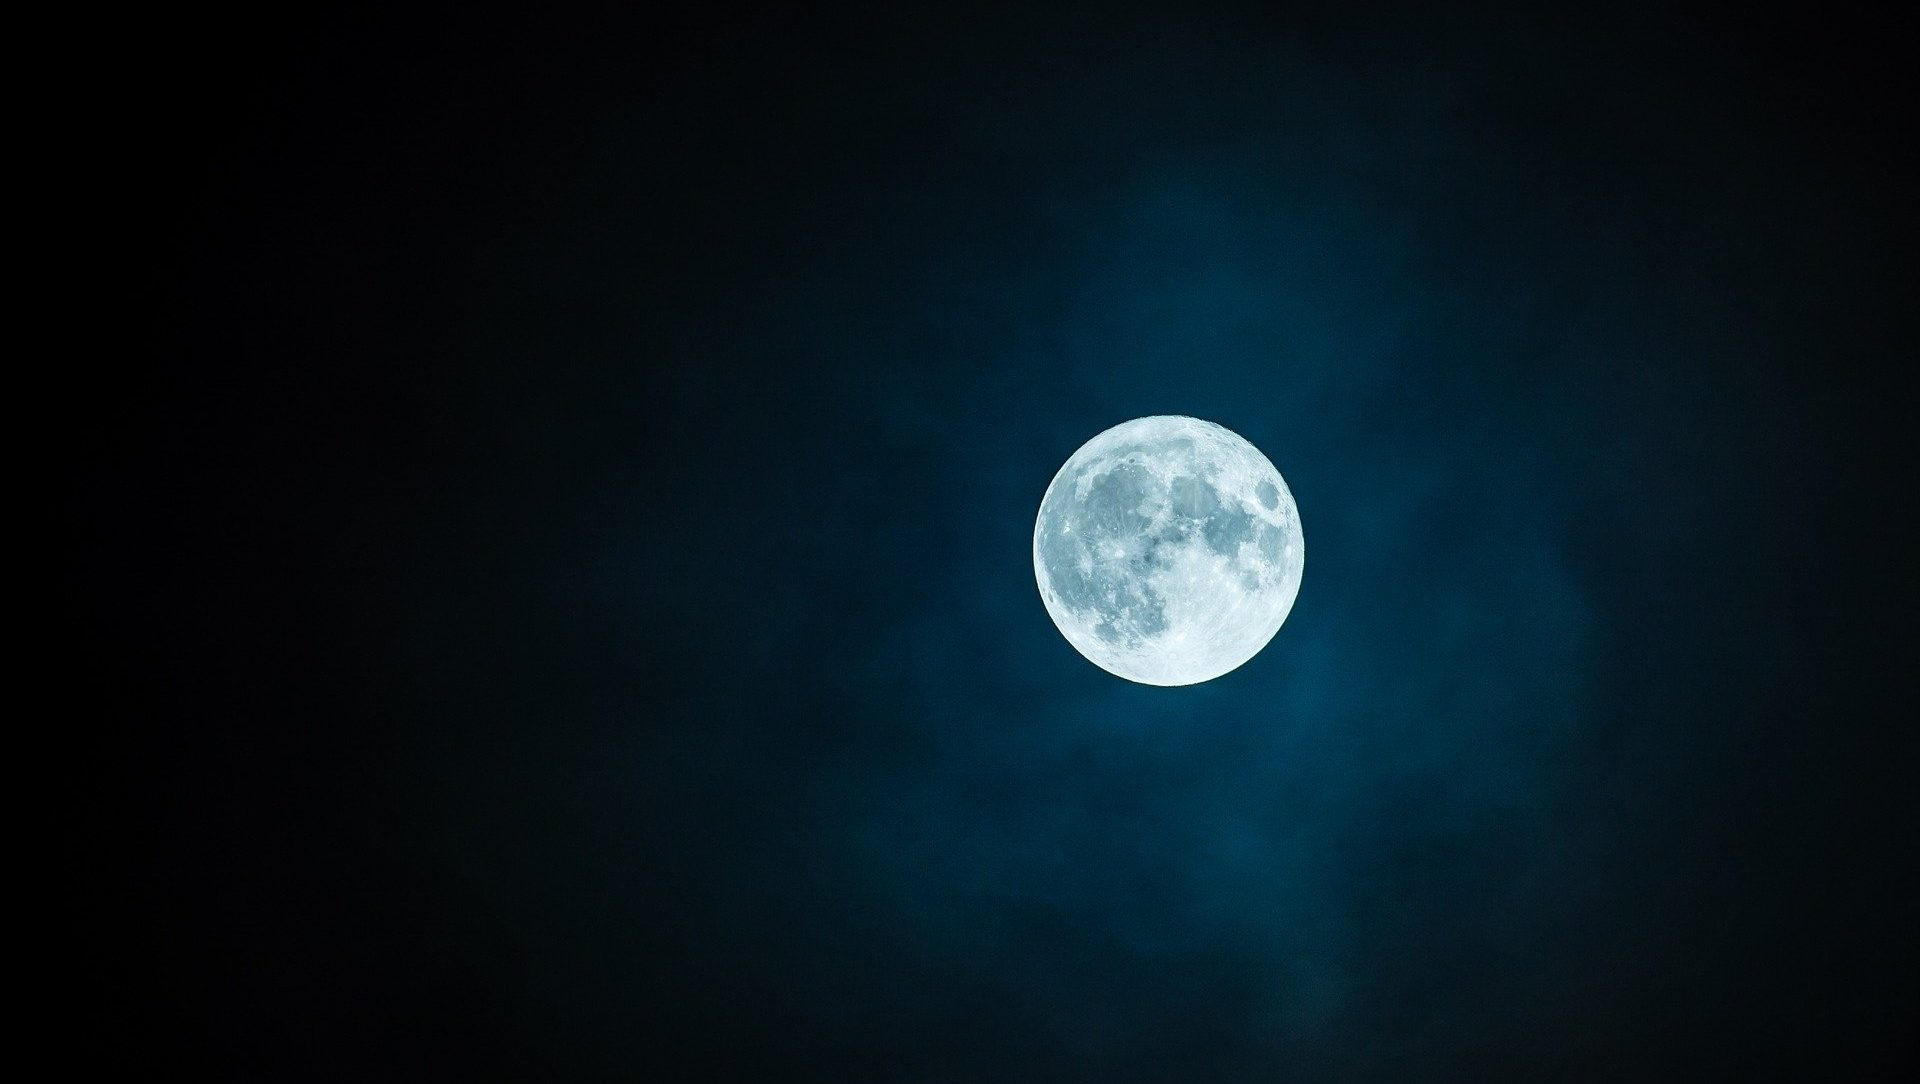
Follow along with FCMoD’s live stream Storytime in the Home: A Moon of My Own. Then gather your supplies to make a beautiful nighttime scene!

Supplies:

  • Black, Blue, and White Construction paper
  • Glue stick
  • Black Crayon
  • Scissors

Instructions:

  1. Place all your supplies on a clear surface with plenty of room to work.
  2. Use your black crayon to draw a moon shape. What phase is your moon in? Is it a full moon, half moon, or crescent moon? Can you draw some craters?
  3. Glue your moon onto your blue construction paper.
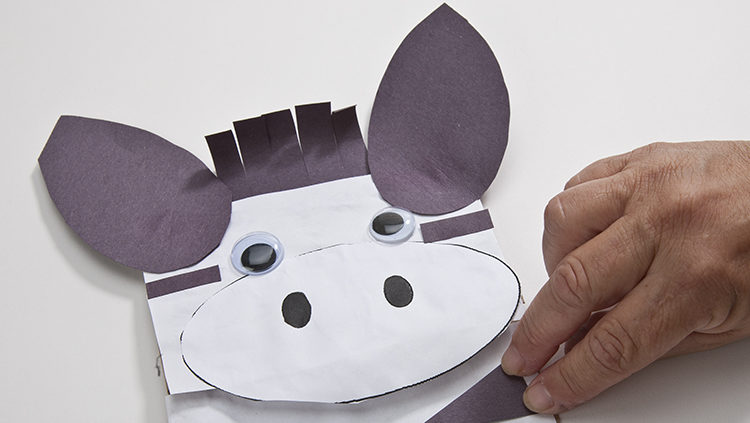
  4. Cut out a nighttime scene with the black construction paper! Can you think of a time you played outside at night? What did you see? Buildings, trees, mountains? What will your nighttime scene be?
  5. Share your creations with us on social media using  #dailydiscovery or tagging us! We can’t wait to see the moon you made!

Want to download these directions? Click here for a handy PDF!

Follow along with our Daily Discovery! Click here for all activities that you can do at home.

Educational opportunities like this are supported in part by Buell Foundation. Their support helps make access to early childhood education at FCMoD possible for everyone in our community.

Continue Reading

Daily Discovery: Storytime in the Home – Going Around the Sun Solar System Craft

Post written by Lea Mikkelsen, Early Childhood Coordinator.

Daily Discovery: Storytime in the Home – Going Around the Sun Solar System Craft

Follow along with FCMoD’s live stream Storytime in the Home: Going Around the Sun: Some Planetary Fun. Then gather your supplies to make your very own solar system art!

Supplies:

  • Construction paper in a variety of colors
  • Glue stick
  • Glitter Glue
  • Scissors
  • Stickers, Pom Poms, Sequins, crayons, or other craft supplies

Instructions:

  1. Place all your supplies on a clear surface with plenty of room to work.
  2. Start with a dark piece of construction paper. Outer space is very dark, so we used black paper.
  3. Cut out some circles in various colors for planets! Can you remember how many planets there are? (8)
  4. What color is the sun? Cut out the sun from yellow or orange (or be creative with other colors)!
  5. Glue the planets in orbit around the sun!
  6. Try using glitter glue to decorate your planets, make moons, rings, or sparkly stars, or glue other fun decorations to your solar system. Be creative!
  7. Share your creations with us on Instagram or Facebook! Use #dailydiscovery or tag us to share!

Want to download these directions? Click here for a handy PDF!

Follow along with our Daily Discovery! Click here for all activities that you can do at home.

Educational opportunities like this are supported in part by Buell Foundation. Their support helps make access to early childhood education at FCMoD possible for everyone in our community.

Continue Reading

Daily Discovery: “Milky” – Way Nebulas

Post written by Hannah Curtis, Education Assistant.

Daily Discovery: “Milky” – Way Nebulas

NASA, with the help of the Hubble Space Telescope, capture the colorful and mysterious formations of nebulas. They are created from the gas and dust from supernovas or become star nurseries where new stars will be formed. With chemistry and experimentation create your own nebula, but they won’t take billions of years to form!

Supplies:

  • Paper plate or glass dish
  • 3 colors of food coloring
  • 1 cup of milk (preferably higher fat content)
  • 1 Tablespoon Dish soap
  • Q-tips

Instructions:

  1. Pour the milk into your plate or dish.
  2. Add as many droplets of food coloring as you want into each plate. Observe how the droplets don’t disperse and remain as individual droplets. The fat content in the milk creates a denser environment making it difficult for the color to move.
  3. Dip one end of the Q-tip into the dish soap and then into the center of the plate.
  4. Watch as your nebula begins to take form. Milk and dish soap cause a chemical reaction when they come together. The food coloring allows us to see this reaction more clearly! The molecules of in the dish soap and the fat molecules in the milk are attracted to each other and work hard to join together. The dish soap also breaks the surface tension allowing the food coloring to move freely.
  5. Use the Q-tip to swirl the colors to create beautiful, mesmerizing patterns. Expand by mixing different
    colors together. What happens if you use different dairy products all with different fat contents, will it produce different nebulas?
  6. Learn more cool facts and check out more nebulas from NASA.

Want to download these directions? Click here for a handy PDF!

Follow along with our Daily Discovery! Click here for all activities that you can do at home.

Continue Reading

Daily Discovery: Storytime in the Home – Over in the Grasslands Zebra Puppet Craft

Post written by Lea Mikkelsen, Early Childhood Coordinator.

Daily Discovery: Storytime in the Home – Over in the Grasslands Zebra Puppet Craft

Follow along with FCMoD’s live stream Storytime in the Home: Over in the Grasslands– On an African Savanna. Then gather your supplies to make a zebra puppet from a paper bag!

Supplies:

  • White paper lunch bag
  • Black construction paper
  • White craft paper
  • Black crayon
  • White crayon
  • Glue stick
  • Scissors
  • Googly eyes (or use paper to cut out eyes)

Instructions:

  1. Place all your supplies on a clear surface with plenty of room to work.
  2. Put the paper bag on the table with the bottom of the bag facing up (see the picture). You will want to be able to put your hand inside and move the bottom of the bag like a “mouth”.
  3. Cut out an oval shape from the black construction paper and glue it to the folded edge of the bottom of the lunch bag to make the zebra snout. Use a white crayon to draw a mouth and nostrils.
  4. Draw two triangles on the white craft paper with a black crayon. Use the scissors to cut them out and then glue them to the bag where the zebra’s ears will go.
  5. Cut out a rectangle shape from the black construction paper and cut fringe on one side for the zebra’s mane. Glue it between the ears.
  6. Tear strips of black construction paper and glue them to the bag to make stripes.
  7. Then glue the googly eyes above the snout where the eyes should go.
  8. Put your hand in your zebra puppet and imagine you are on the African Savanna!

Want to download these directions? Click here for a handy PDF!

Follow along with our Daily Discovery! Click here for all activities that you can do at home.

Educational opportunities like this are supported in part by Buell Foundation. Their support helps make access to early childhood education at FCMoD possible for everyone in our community.

Continue Reading

Daily Discovery: “On One Flower” Paper Flower Craft/Descubrimiento en casa: “Sobre Una Flor:” Flor de papel

Post written by Sierra Tamkun, Learning Experiences Manager.

Daily Discovery: On One Flower Paper Flower Craft

Follow along with FCMoD’s live stream Storytime in the Home: On One Flower. Then, make your very own paper flower garden!

Supplies:

• Paper cupcake liners
• Markers, crayons, or colored pencils
• Blue and green construction paper
• Glue
• Assorted craft supplies:

  • Beads
  • Chenille stems
  • Bits of colored paper

Instructions:

1. Choose 3-4 cupcake liners to be your flowers. Color the liners to make your flowers brighter!

2. Using scissors, cut lines along the edges of your cupcake liners to make flower petals.

3. Glue your flowers onto the blue construction paper.

4. Cut stems and leaves out of the green construction paper and glue them to your blue paper sheet. If you don’t have green paper, you can draw your flower stems and leaves!

5. Decorate the center of your flower with different beads, chenille stems, or pieces of paper.

6. Draw some bugs and butterflies around your paper flower garden!

Want to download these directions? Click here for a handy PDF!

Follow along with our Daily Discovery! Click here for all activities that you can do at home.

Image credit: onelittleproject.com

Traducido por Károl de Rueda y Laura Vilaret-Tuma.

Descubrimiento en casa: Sobre Una Flor – Flor de papel

Sigue nuestro programa de transmisión en vivo “Cuentos en Casa” (Storytime in the Home) a través de las redes sociales. En esta ocasión te presentamos la historia llamada “Sobre una Flor” (versión en inglés). Después, ¡construye tu propio jardín de flores!

Artículos necesarios:

  • Marcadores, crayones o lápices de colores
  • Papel de colores incluyendo verde
  • Pegamento
  • Tijeras
  • Materiales para decorar: abalorios, brillantina, retazos de papel, etc.

Instrucciones:

  1. Para formar los pétalos de la flor, usa papel de colores y con las tijeras corta unas formas como la fotografía de arriba.
  2. Une tus pétalos con pegamento.
  3. Usando el papel verde, corta tallos y hojas para tus flores y pégalos debajo de la flor. Si no tienes papel verde, dibújalos y coloréalos.
  4. Decora el centro de las flores con abalorios, brillantina, retazos de papel o lo que quieras.
  5. Dibuja algunos insectos o mariposas para tu jardín.
  6. ¡Llena tu casa de alegría decorándola con tus flores coloridas!

¿Te gustaría descargar esta actividad? Haz clic aquí para obtener un archivo PDF.

Para encontrar actividades, ideas y mucho más descubrimiento en casa, ¡síguenos!

Educational opportunities like this are supported in part by Buell Foundation. Their support helps make access to early childhood education at FCMoD possible for everyone in our community.

Continue Reading

Daily Discovery: “Three Lost Seeds” Seed Pod Stamps Craft

Post written by Lea Mikkelsen, Early Childhood Coordinator.

Daily Discovery: Three Lost Seeds Seed Pod Stamps Craft

Follow along with FCMoD’s live stream Storytime in the Home: Three Lost Seeds. Then gather your supplies to make your very own nature inspired seed pod stamps!

Supplies:

• Colored paper
• Modelling Clay
• A pencil
• A plastic knife
• White paint
• A paper plate
• Optional: Paint brush

Instructions:

1. Place all your supplies on a clear surface with plenty of room to work.

2. Cut a small piece of clay off with a knife. Using your fingers, pinch part of the clay into a small handle and then press the clay flat on a surface to make the flat stamp end.

3. Images of seed pods can help inspire your seed pod stamp design.

4. Using a pencil or knife, shape the stamp to look like your seed pod.

5. Dip the stamper in the paint and press it on a piece of paper. Tip: Too much paint will look globby. Try brushing the paint on with a paint brush if you want a smoother stamp.

6. Use your stamp to make beautiful seed pod art! You can also make other nature inspired stamps with your clay. Have fun and be creative!

Want to download these directions? Click here for a handy PDF!

Follow along with our Daily Discovery! Click here for all activities that you can do at home.

Image credit: redtedart.com

Educational opportunities like this are supported in part by Buell Foundation. Their support helps make access to early childhood education at FCMoD possible for everyone in our community.

Continue Reading

Daily Discovery: Storytime in the Home – Over in a River Greeting Card Craft

Post written by Lea Mikkelsen, Early Childhood Coordinator.

Daily Discovery: Storytime in the Home – Over in a River Greeting Card Craft

Follow along with FCMoD’s live stream Storytime in the Home: Over in a River – Flowing Out to the Sea. Then gather your supplies to make a lovely river scene greeting card to send to friends or family!

Supplies:

  • Construction paper in a variety of colors
  • Glue stick
  • Scissors

Instructions:

  1. Place all your supplies on a clear surface with plenty of room to work.
  2. Fold a piece of paper in half hamburger style to create a folded card.
  3. Choose a colored sheet of construction paper to be your sky. Tear a strip of paper and glue it down to the top of the card (the folded edge).
  4. Choose a new color paper and tear a wavy strip to create a mountain scene. Glue this one layered on top of the sky.
  5. Choose a new color paper for the river and tear a wavy strip. Glue this one layered on top of the mountains and down to the bottom edge of the card.
  6. Cut out some simple fish shapes and glue them down in the river. Are they salmon swimming upstream to lay their eggs?
  7. Cut a sun or moon for your sky if you want to. There are plenty of ways to be creative with this card!
  8. Write a kind note to a friend or family member and send it to them. Cards are a wonderful way to show how much you care.
  9. Share your creations with us using #dailydiscovery on social media! We love to see what you are making!

BONUS: Here are some counting cards that relate to Over in a River.

Want to download these directions? Click here for a handy PDF!

Follow along with our Daily Discovery! Click here for all activities that you can do at home.

Educational opportunities like this are supported in part by Buell Foundation. Their support helps make access to early childhood education at FCMoD possible for everyone in our community.

Continue Reading

Daily Discovery: Storytime in the Home – What’s This Tail Saying? Peacock Craft

Post written by Lea Mikkelsen, Early Childhood Coordinator.

Daily Discovery: Storytime in the Home – What’s This Tail Saying? Peacock Craft

Follow along with FCMoD’s live stream Storytime in the Home: What’s this Tail Saying? Then create your very own beautiful peacock with a stunning tail of feathers.

Supplies:

  • 2 sheets of green construction paper
  • 1 sheet of blue construction paper
  • 1 small triangle of orange construction paper
  • Glue (glue stick and craft glue will be helpful)
  • Tape
  • Googly eyes or some black craft paper to cut out eyes
  • A small cardboard tube
  • Crayons
  • Optional: pencil, 1 blue pipe cleaner.

Instructions:

  1. Place all your supplies on a clear surface with plenty of room to create.
  2. Glue together the short ends of the two sheets of green construction paper making a longer piece of green paper and then decorate with crayons! Peacocks generally have green, blue, orange, teal, and yellow in their feathers. But you can be creative!
  3. Fold the entire long green paper accordion style (along the short end). Then tape the bottom together creating a point. It should look like a fan when you are done.
  4. Measure the size of the paper towel tube on the blue paper making sure the paper will wrap all the way around it. Use a pencil to trace it if that helps you. Then add a little bump around the middle top of the tube to make your peacocks head and cut the whole thing out.
  5. Wrap the tube in the blue paper and glue it down.
  6. Glue the small orange triangle beak and eyes onto your peacock’s head.
  7. Cut the optional pipe cleaner head feathers, curl them to create a feather shape, and then tape them to the inside of the cardboard tube.
  8. Glue the tube with the head facing out to the center of your accordion folded feathers.

BONUS: Here are some activities including a mix & match that relate to What’s This Tail Saying? Here are some coloring pages!

Want to download these directions? Click here for a handy PDF!

Follow along with our Daily Discovery! Click here for all activities that you can do at home.

Educational opportunities like this are supported in part by Buell Foundation. Their support helps make access to early childhood education at FCMoD possible for everyone in our community.

Continue Reading