Daily Discovery: Hydro Power!

Post written by Hannah Curtis, Education Assistant.

Daily Discovery: Hydro Power!

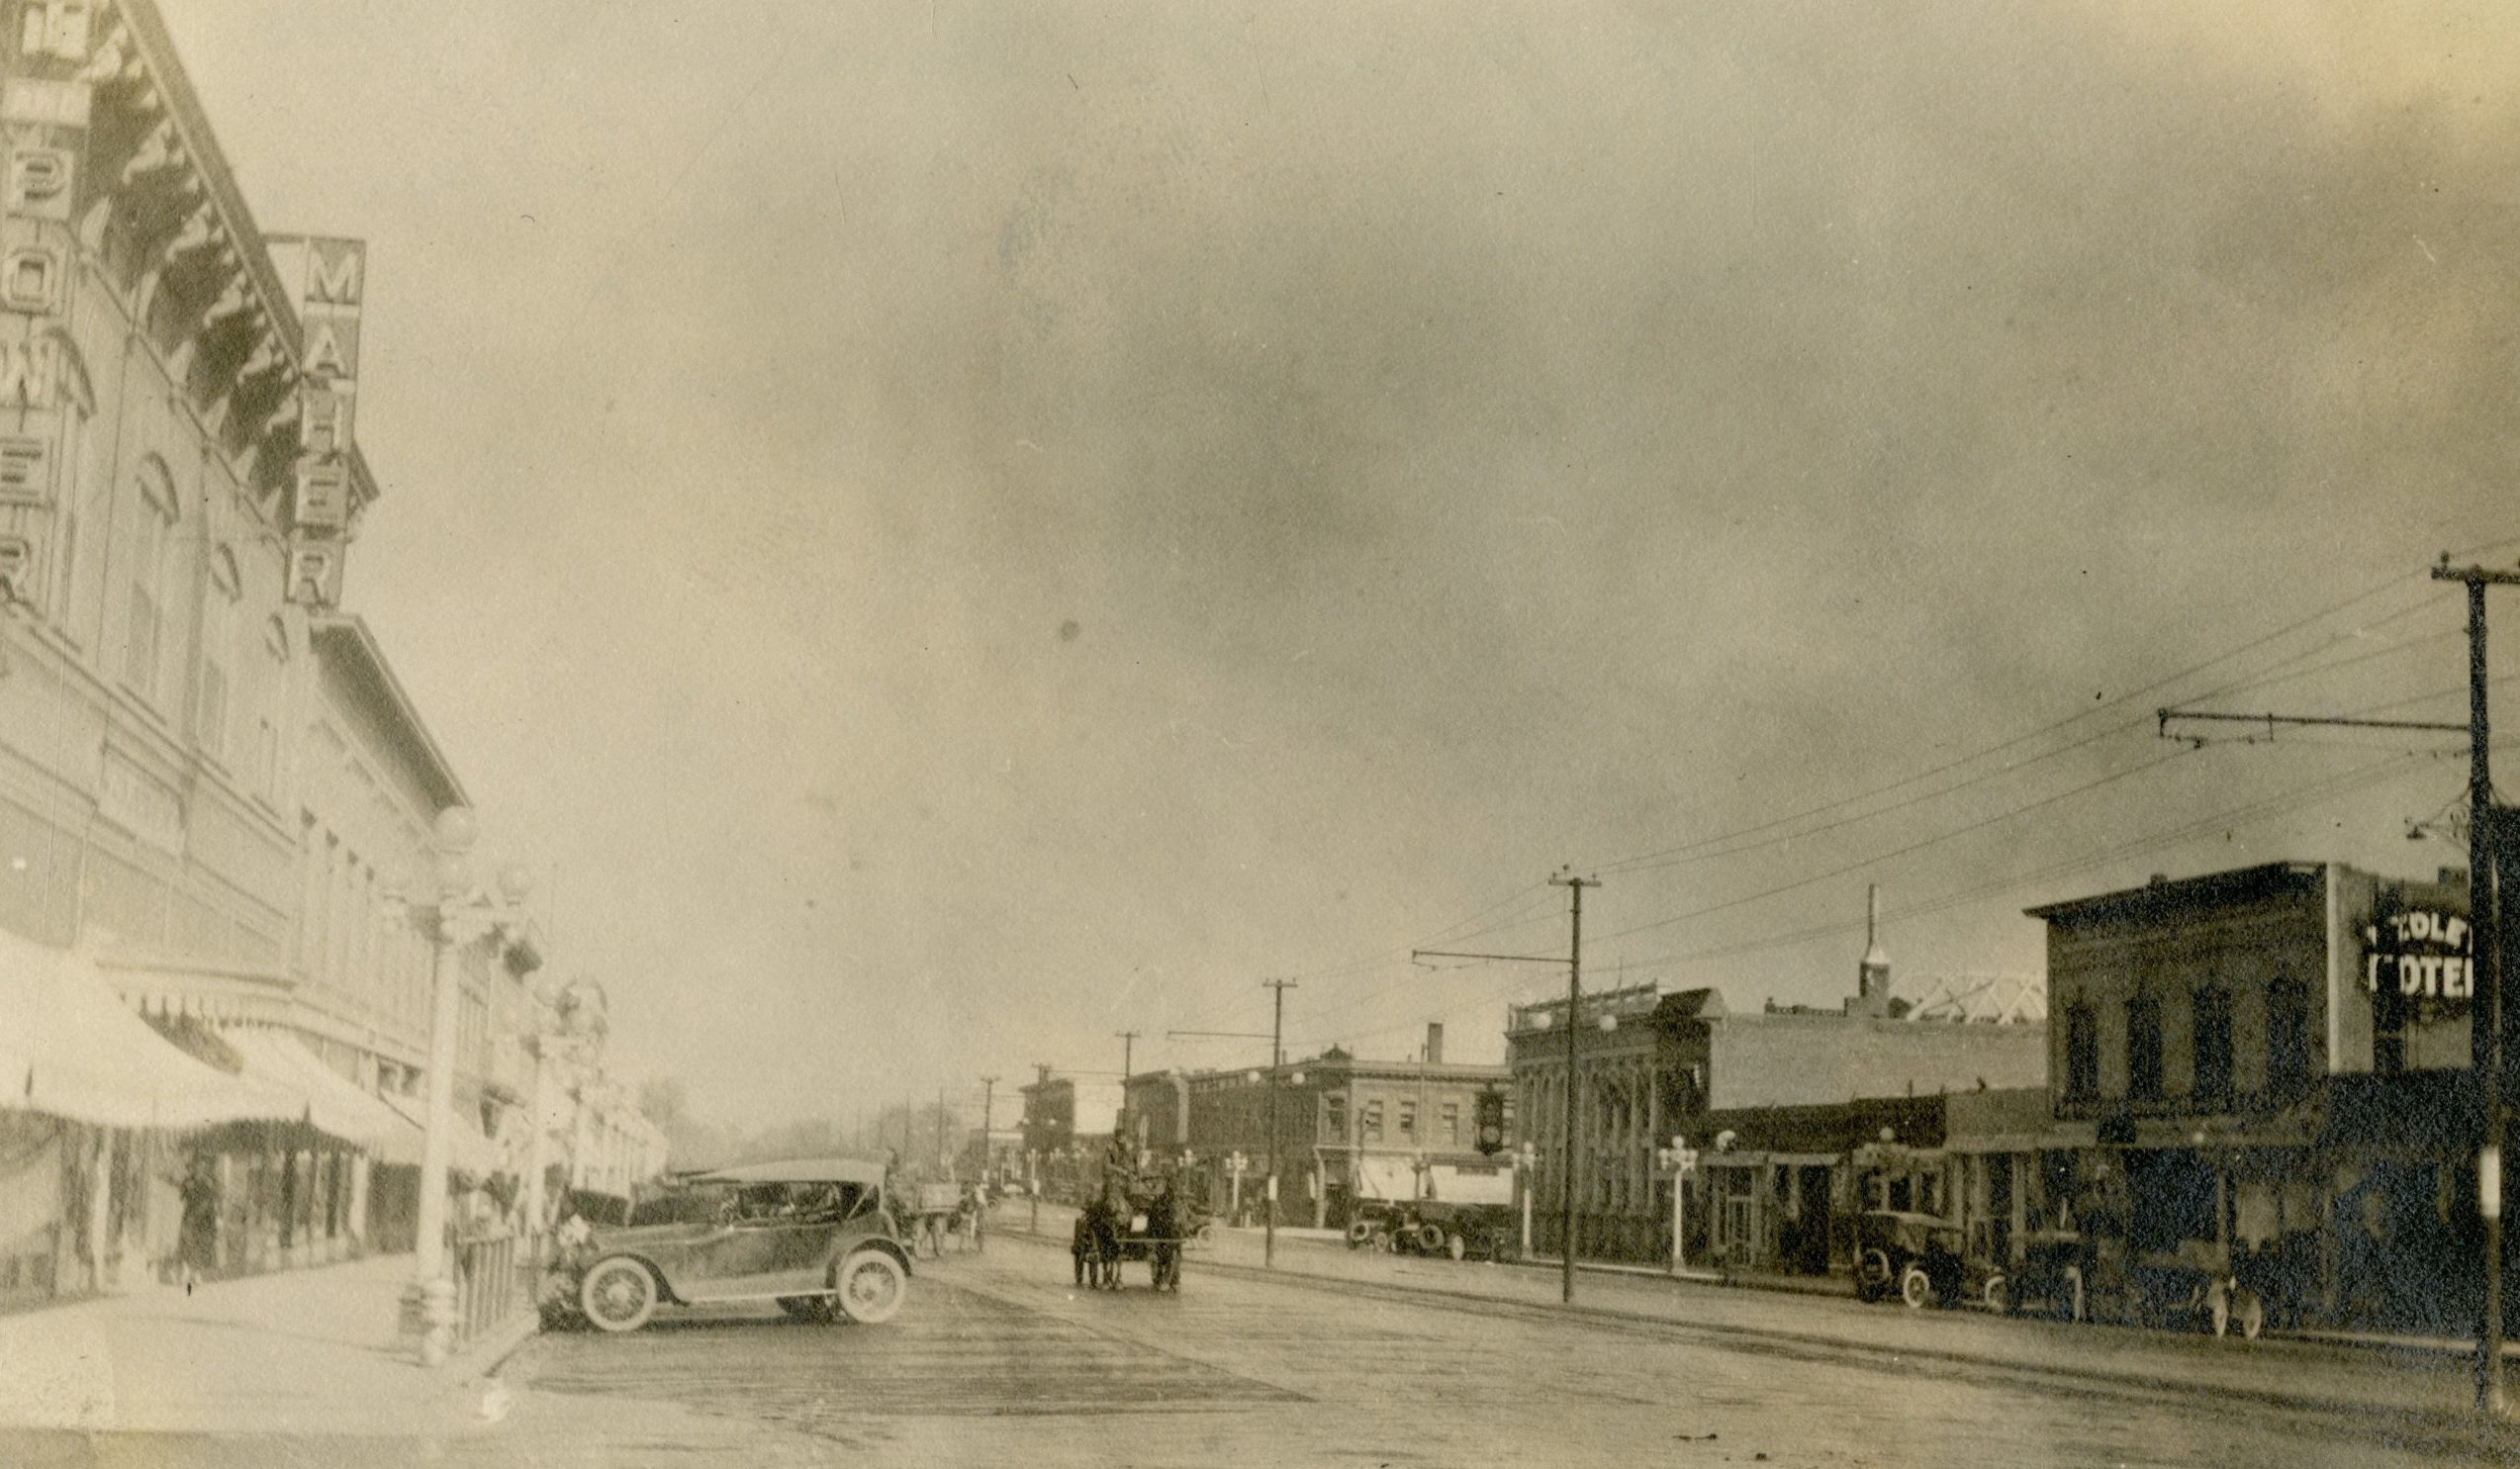
From waterwheel mills, paddle wheel boats, to modern day hydroelectricity, our water resources have assisted humankind in meaningful ways. Come back in time to take a peek at historical Fort Collins and see how the Poudre River influenced the local flour mill. Then, check out how engineers have utilized the power of water to create electricity, and discover more by creating your own paddle boat!

Hydro Power Explained

Hydro power, or hydroelectricity, is the conversion of energy from flowing water to electricity. Similar to wind turbines, hydropower plants use the force of flowing water to turn propellers in a turbine to spin a generator, which creates electricity. Hydropower plants are often large dams, and utilize natural bodies of water like rivers or lakes, like the Crystal Dam in Gunnison, CO. They can also be part of man-made reservoirs or storage systems. Almost all U.S. States generate electricity via hydropower. Colorado hydroelectric plants produce 1,000-5,000 billion kilowatt-hours! Discover more here!

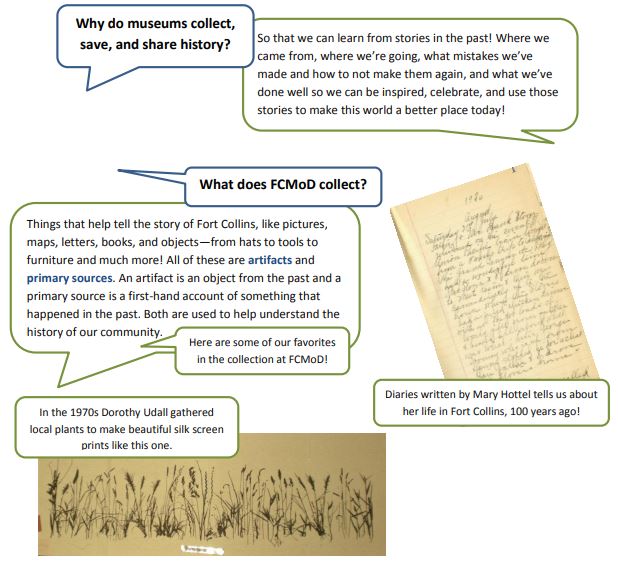
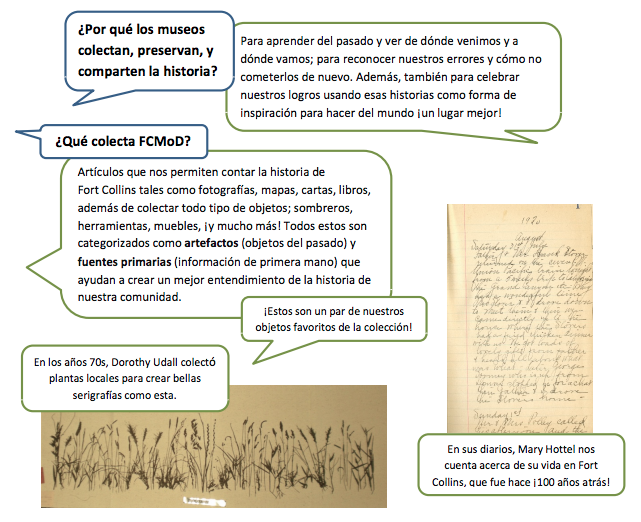
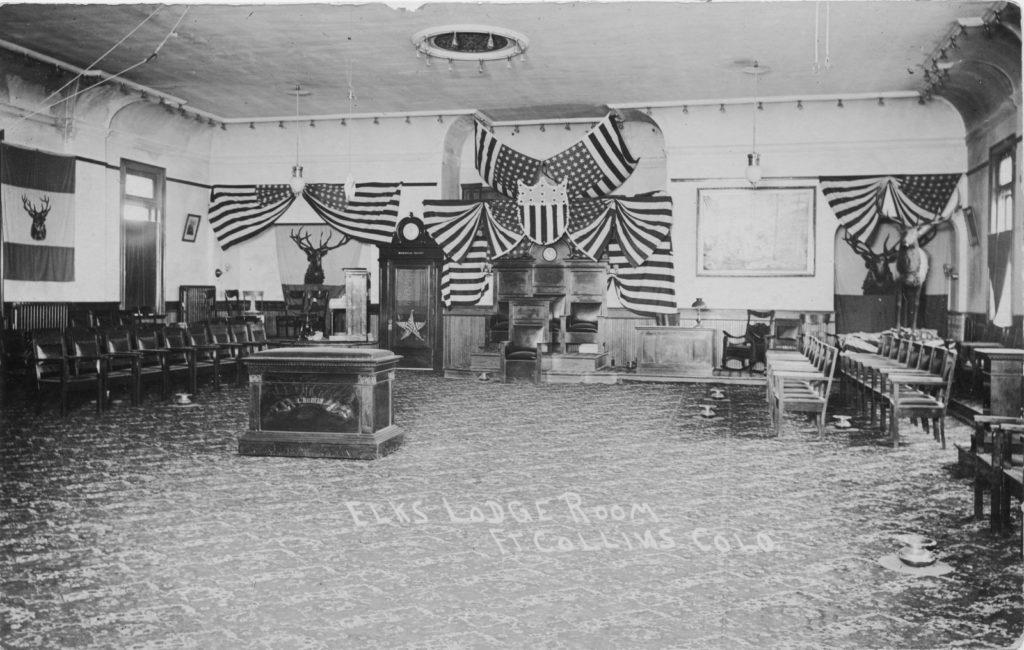
Before the invention of hydroelectricity, hydropower was simply the ability to harness the power of flowing water to move machinery. Ranch-Way Feeds, the livestock feed manufacturing company in Fort Collins, began as the Lindell flour mill built in 1868, built by “Auntie” Stone and Henry Peterson. The mill sits on the bank of the Cache la Poudre River, a perfect spot to draw water from the river to power the mill.

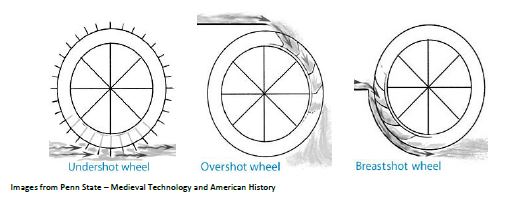
A water wheel was a popular tool used in flour and lumber mills as well as mining. There are three types of waterwheels, and they depend on the location of the river compared to the mill and how fast the water is moving.

Elastic Band Paddle Boat!

It may not be a hydroelectric powered boat, but you can still utilize water resources for innovation, transportation and play-time. This DIY boat reflects the design and function of a water wheel, but real paddleboats are coupled with steam engines to turn the paddle wheel to propel the boat forward.

Supplies:

  • Rubber Band(s)
  • Bathtub, sink, pool or large bucket
  • Water
  • Paper
  • Pencil

Additional Supplies:

These are suggestions, feel free to use what you have at your home

  • Popsicle sticks
  • Glue
  • Tape
  • Styrofoam
  • Plastic utensils
  • Plastic bottles
  • Aluminum cans
  • Scissors
  • Straws
  • Chopsticks

Instructions:

Brainstorm & Evaluate:

Take some time to think up, design, and sketch the basic shape and components of your boat. Think of the materials you have in your home that you could use and re-purpose. How large is your body of water, will your boat fit?

Prototype Development:

Gather your materials, and begin building. Where is the best spot to add your paddle wheel? Will all your materials float?

Testing:

Wind up your rubber band, place the boat in the water and observe what happens.

Evaluate:

Was your boat a success, or does it need a few touch ups? Continue to develop and test until your boat meets all your requirements.

Bonus:

What alterations can you make to your boat to make it move faster and more efficiently without weighing it down?

Remember, water is a valuable resource. Once finished, consider reusing your body of water to give your dog a bath, to water your plants, or simply wash your hands

Want to download these directions? Click here for a handy PDF!

Follow along with our Daily Discovery! Click here for all activities that you can do at home.

Educational opportunities like this are supported in part by Fort Fund.

Continue Reading

Daily Discovery: Storytime in the Home – What’s This Tail Saying? Peacock Craft

Post written by Lea Mikkelsen, Early Childhood Coordinator.

Daily Discovery: Storytime in the Home – What’s This Tail Saying? Peacock Craft

Follow along with FCMoD’s live stream Storytime in the Home: What’s this Tail Saying? Then create your very own beautiful peacock with a stunning tail of feathers.

Supplies:

  • 2 sheets of green construction paper
  • 1 sheet of blue construction paper
  • 1 small triangle of orange construction paper
  • Glue (glue stick and craft glue will be helpful)
  • Tape
  • Googly eyes or some black craft paper to cut out eyes
  • A small cardboard tube
  • Crayons
  • Optional: pencil, 1 blue pipe cleaner.

Instructions:

  1. Place all your supplies on a clear surface with plenty of room to create.
  2. Glue together the short ends of the two sheets of green construction paper making a longer piece of green paper and then decorate with crayons! Peacocks generally have green, blue, orange, teal, and yellow in their feathers. But you can be creative!
  3. Fold the entire long green paper accordion style (along the short end). Then tape the bottom together creating a point. It should look like a fan when you are done.
  4. Measure the size of the paper towel tube on the blue paper making sure the paper will wrap all the way around it. Use a pencil to trace it if that helps you. Then add a little bump around the middle top of the tube to make your peacocks head and cut the whole thing out.
  5. Wrap the tube in the blue paper and glue it down.
  6. Glue the small orange triangle beak and eyes onto your peacock’s head.
  7. Cut the optional pipe cleaner head feathers, curl them to create a feather shape, and then tape them to the inside of the cardboard tube.
  8. Glue the tube with the head facing out to the center of your accordion folded feathers.

BONUS: Here are some activities including a mix & match that relate to What’s This Tail Saying? Here are some coloring pages!

Want to download these directions? Click here for a handy PDF!

Follow along with our Daily Discovery! Click here for all activities that you can do at home.

Educational opportunities like this are supported in part by Buell Foundation. Their support helps make access to early childhood education at FCMoD possible for everyone in our community.

Continue Reading

Daily Discovery: Ghost Signs of Fort Collins!

Post written by Lesley Struc, Curator of the Archive.

Daily Discovery: Ghost Signs of Fort Collins!

A “ghost sign” sounds spooky, but it’s not! It is an old, painted sign on the outside of a building that once advertised things like grocery stores, hotels, and food and drink. They are called “ghosts” because they reflect life in the past; sometimes they are easier to see when the lighting is just right on brick buildings, or when rain brings out their faded colors.

Old Town in Fort Collins features many of these magical old ghost signs. Take a virtual tour of local ghost signs by visiting here!

Then, step into the past by making your own historically inspired ghost sign!

Supplies:

  • Small sponge rectangle (we used the edge of a “magic eraser” but any sponge will work)
  • White paper that takes paint well
  • Red paint (we used washable finger paint)
  • Paper plate for holding paint
  • Pencil and Crayons (bright, contrasting colors work best)
  • Glue stick
  • Newspaper or other scrap paper to protect your work surface
  • Construction paper that is larger than your white paper for mounting the final picture

Instructions:

  1. Lay out a few pieces of scrap paper beneath your white paper to protect your work surface from paint.
  2. Cut the edge of a sponge into a small rectangle (about 1” x 2”) for dipping into the red paint.
  3. Pour some red paint onto the paper plate and dip the sponge, saturating it in the paint.
  4. Start stamping the paper in a brick pattern as shown below.
  5. Let the paint dry completely. The paper may wrinkle a bit while drying, and that is okay!
  6. Sketch out your ghost sign on the bricks lightly in pencil first, then go over your design in crayon. Brighter, contrasting colors show up best on the bricks. Your designs can be inspired by actual signs in Fort Collins, like the Nedley Hotel sign in this example, or you can come up with your own idea, product, or business! (Fun fact: the Nedley Hotel ghost sign can be seen at 130 S. College in Ft. Collins and was painted about 110 years ago! It also had a light above it so it could be seen at night.)
  7. Using a glue stick, adhere your finished sign on a larger piece of construction paper to flatten and frame your art.

Want to download these directions? Click here for a handy PDF!

Follow along with our Daily Discovery! Click here for all activities that you can do at home.

Educational opportunities like this are supported in part by Fort Fund.

Continue Reading

Daily Discovery: Meet the Arthropods!/ Descubrimiento en casa: Conoce al animal- ¡los artrópodos!

Post written by Hannah Curtis, Education Assistant.

Daily Discovery: Meet the Arthropods!

Tarantulas, cockroaches, and millipedes, oh my! These “creepy” crawly animals are often characterized as gross, scary, or straight up “eww,” but they all have unique traits and play an important role in their wild ecosystems. Meet FCMoD’s arthropods and become an entomologist in your own backyard!

What are arthropods?

Arthropods are characterized as invertebrate animals, mean they don’t have a spine but they do have an exoskeleton. Their body is segmented by a head, thorax and abdomen. Insects, arachnids (spider species), myriapods (millipedes and centipedes) and crustaceans (crabs, lobsters, shrimp) are all part of the arthropod (Arthropoda) phylum.

At FCMoD we care for a variety of arthropods such as the Madagascar Hissing Cockroaches, Whip Scorpion, Assassin Bugs, and many more! Check out some of their individual life histories!

Observations in the Backyard!

Whether it is in your backyard, neighborhood or at a Natural Area, animals can be observed just about anywhere! Entomologists are scientists who study all types of insects. They study and observe these animals in the wild to learn about their behaviors and identify their role within the ecosystem. You can be a backyard entomologist to observe similar animals as the museum’s arthropods and record what you discover!

Many arthropods are decomposers, which means they break down organic material, flesh of dead animals, poop, rotting leaves and other foliage. This process provides nutrients to the soil which is essential for plants to grow. Without this process, the organic material and waste would pile up and take longer to decompose.

Supplies:

  • Writing utensil
  • Paper
  • Computer and internet access (optional)

Instructions:

  1.  If you created an observational chart, write down your animal observations in the “explore your world” section. If not, create your own observational chart, using the provided guiding questions.
  2. Head out to your backyard or take a walk to explore some of the smallest animals that live near you. Check under rocks, in the grass and even in the trees.
  3. Check out this BBC Earth video:  and see how the Garden Orb Weave spider weaves their web.

Want to download these directions? Click here for a handy PDF!

Follow along with our Daily Discovery! Click here for all activities that you can do at home.


Traducido por Károl de Rueda y Laura Vilaret-Tuma.

Descubrimiento en casa: Conoce al animal – ¡los artrópodos!

Tarántulas, cucarachas, y milpiés, ¡ay, ay, ay! Estos animales tienen la reputación de dar miedo y de ser “repugnantes,” pero en realidad sus características únicas sirven un rol importante en el ecosistema. Conoce a los artrópodos del Museo del Descubrimiento de Fort Collins (FCMoD) y ¡sé un entomólogo en tu propio patio!

¿Qué son los artrópodos?

Los artrópodos son animales invertebrados, lo que significa que no tiene columna vertebral pero sí tienen un exoesqueleto. Su cuerpo está compuesto de una anatomía segmentada: una cabeza, un tórax y un abdomen. Los insectos, los arácnidos (especie de arañas), los miriápodos (milpiés, ciempiés), y los crustáceos (cangrejos,
langostas, camarones) son parte del filo artrópodo (Arthropoda).

En el museo, cuidamos a una variedad de artrópodos incluyendo a cucarachas gigantes de Madagascar, a escorpiones látigo o vinagrillos, a chinches asesinas ¡y muchos más! Conoce la historia de algunos de ellos.

Observaciones a tu alrededor

Estos tipos de animales se pueden observar en un patio, en un jardín, en un área natural o ¡en cualquier sitio! Los entomólogos son científicos que estudian una variedad de insectos, observándolos en su medio ambiente para aprender sobre sus comportamientos e identificar su rol en el ecosistema. Observa animales similares a los artrópodos del museo ¡y documenta lo que descubres!

Muchos artrópodos son descomponedores, lo que significa que ayudan a desintegrar materiales orgánicos como la carne de animales muertos, excrementos, hojas podridas y otro follaje. Este proceso provee nutrientes necesarios para la tierra y es vital para el crecimiento de las plantas. Sin estos animales, materiales y residuos orgánicos se acumularían en grandes cantidades y tomarían más tiempo para descomponerse.

Artículos necesarios:

  • Algo para escribir (lápiz, pluma, marcador, etc.)
  • Papel y/o cuaderno
  • Computadora y acceso al Internet (opcional)

Instrucciones:

  1. Crea una tabla de observaciones usando la guía de preguntas que puedes encontrar más abajo. Anótalas en un cuaderno, un diario o en hojas de papel.
  2. Da un paseo con tu familia por los alrededores o ve a tu patio para observar algunos de los artrópodos que viven cerca de ti. Encuéntrenlos bajo las piedras, en la hierba, o inclusive viviendo entre las ramas de los árboles.
  3. Si quieres aprender más sobre algunos artrópodos, haz clic en este enlace:  ¡Ahí puedes ver cómo la araña de seda dorada construye su telaraña!

¿Te gustaría descargar esta actividad? Haz clic aquí para obtener un archivo PDF.

Para encontrar actividades, ideas y mucho más descubrimiento en casa, ¡síguenos!

Continue Reading

Daily Discovery: Help Make History! / Descubrimiento en casa: ¡Ayuda a hacer historia!

Post written by Heidi Fuhrman, Discovery Camps Coordinator.

Daily Discovery: Help Make History!

Museums are places to learn, play, and discover…and they also have another important job: to collect, save, and share history! FCMoD focuses on the history of Fort Collins and Northern Colorado, and we need your help by telling us your story of living through COVID-19. Learn more below!

Hi, my name is Lesley Struc and I am the Archivist here at FCMoD. An archivist brings the past to the present by collecting and saving things like photos, letters, diaries, books, maps, and newspapers. I love keeping these things organized and available so that everyone can visit the Archive or our website to discover the history of Fort Collins!

One of my favorite stories about local history is our connection to Disneyland in California. A man named Harper Goff grew up in Fort Collins and later worked for the Disney company. In the 1950s he helped design the look of Main Street in Disneyland and used his happy memories of Fort Collins as inspiration! Here is a view of Walnut Street in Fort Collins from 1891…I think I can see a little Disneyland in there!

“Hi there! My name is Linda and I am the Curator of Collections here at FCMoD. I take care of the artifacts –which can be any of the objects we use to live our lives, while collecting as much information as possible about them. I make sure the rooms where we keep artifacts have the right temperature and light and are safe from pests that could harm them. My favorite moments with artifacts happen when people recognize something familiar in them: like when seeing a toy reminds them of how it felt to be younger, or a fingerprint on an ancient piece of pottery reminds them what it feels like to squish clay in their hands. (Visitors enjoy showing off their aprons from home while visiting an exhibit about historic aprons.)


What Can You Do? . . . Share Your Story!

We want you to tell us your story! Visit here to submit written, video, and photo files about your experience living during COVID-19. Use the ideas and questions below to help you get started.

We want people of all ages to complete it! That means you kids, teens, grown-ups, and families together. Remember your story is so important! You don’t have to be “famous” to be a very important part of history!

Not ready to share your story yet? That’s ok! Use the ideas below to record it anyway. When you’re ready, we’d love it if you share your story with us through our website. We want to help you save your story for your friends and family who will wonder about it later.

Get Started!

Not sure how to tell your story? Here are some ideas:
• Write a letter to your future self. What do you want to remember?
• Take a video of yourself telling the story of your quarantine.
Interview your friends and family (see our “Story Detectives” Discovery At Home to get started!)
• Become a photojournalist for a day/week. Write captions for all your photos and be sure to note
where you took it and the names of anyone in the photo!
• Create a graphic novel or art about living in COVID-19.
• Make a scrapbook! Include mask selfies, pictures of school at home, sidewalk chalk, baked goods, other parts of your experience! Be sure to include when, where, and who info about the photos.
You can share all of these with us through our website portal!

Think about these questions:

  •  If you were a kid learning about COVID-19 in 50 or 100 or 200 years what would you want them to
    know about your life? What would you want to tell them?
  • What do you want to remember about this time?
  • How are you feeling? What scares you? What makes you happy? What makes you sad?
  • What are you doing? What new things have you created or done to stay entertained?
  • What has been the hardest thing for you about stay-at-home and COVID-19?
  • What has changed in your life that is different from before?
  • How do you feel about wearing a mask?
  • How do you feel about doing school or work at home?
  • How do you feel about not seeing friends or family?
  • What has been the best thing about stay-at-home? What is the most fun thing you’ve done?
  • What is making you smile even when life is hard?

Want to download these directions? Click here for a handy PDF!

Follow along with our Daily Discovery! Click here for all activities that you can do at home.


Traducido por Károl de Rueda y Laura Vilaret-Tuma.

Descubrimiento en casa: ¡Ayuda a hacer historia!

Los museos son instituciones para aprender, jugar, descubrir… Pero también tienen otra responsabilidad importante: el colectar, preservar ¡y compartir la historia! El Museo del Descubrimiento de Fort Collins (FCMoD) también se enfoca en documentar la historia de Fort Collins y del norte de Colorado, y en estos momentos necesitamos de tu ayuda. Cuéntanos sobre lo que has vivido, lo que has visto, y lo que has experimentado durante la crisis del coronavirus (COVID-19). Encuentra información sobre este proyecto más abajo.

“¡Hola! Mi nombre es Lesley Struc, la Archivista de FCMoD. La función de un archivista es traer el pasado al presente. Yo me encargo de colectar y preservar artículos como fotografías, cartas, diarios y periódicos. Me encanta mantener organizado este material y hacerlo disponible para todas las personas que quieran descubrir la historia de Fort Collins, ya sea visitando el área de Archivo en el museo, o en nuestro sitio web. Una de mis historias favoritas es la conexión local que tenemos con Disneylandia en California. Un hombre llamado Harper Goff, creció en Fort Collins y luego trabajó para la compañía Disney en los años 50s. Ayudando a diseñar Main Street en Disneylandia, tomó inspiración de sus felices recuerdos basándose en algunos edificios ¡de Fort Collins! Esta es una fotografía de Walnut Street en Fort Collins del año 1891… ¡Creo que puedo ver un poco de Disneylandia es esta imagen!”

“¡Hola! Mi nombre es Linda y soy la curadora de colecciones aquí en FCMoD. Me encargo de los artefactos -que pueden ser cualquiera de los objetos que utilizamos diariamente- mientras recopilo la mayor cantidad de información posible sobre ellos. Me aseguro de que las habitaciones donde los guardamos tengan la temperatura y la luz correctas, y que estén a salvo de plagas que puedan dañarlos. Mis momentos favoritos con los artefactos ocurren cuando las personas reconocen algo familiar entre ellos: ver un juguete que trae memorias de su infancia, o una huella digital en una pieza de cerámica antigua les recuerda lo que se siente el aplastar arcilla entre sus manos.”

¿Qué puedes hacer? ¡Comparte tu historia!

¡Queremos que nos cuentes tu historia! Visita el sitio www.fcmod.org/making-history para enviar escritos, videos, fotografías, etc. sobre tus experiencias durante la crisis de COVID-19. Nos encantaría que nos ayudaran ¡personas de todas las edades! Eso significa que las experiencias de niños, de adolescentes, de adultos y de familias enteras son bienvenidas. ¡Recuerda que tu historia es muy importante! ¡No tienes que ser “famoso” para hacer historia! ¿Aún no estás listo/a para compartir? ¡No te preocupes! Cuando lo estés, nos encantaría recibir tu material a través de nuestro sitio web. ¡Estas historias podrían quedar para la posteridad!

¡Vamos a empezar!

Estas son algunas ideas para crear tu historia:

  • Escribe una carta dirigida hacia ti mismo, pero pensando en el futuro. ¿Qué te gustaría recordar de estos momentos?
  • Graba en video la historia de tu cuarentena.
  • Entrevista a amigos y familiares y anota sus experiencias.
  • Conviértete en reportero fotográfico. Escribe títulos para todas tus fotografías y asegúrate de anotar el lugar en donde fueron tomadas, así como los nombres de cualquier persona incluida en la imagen.
  • Crea una novela gráfica o alguna pieza de arte que exprese tu nueva rutina o alguna experiencia durante estos tiempos de crisis.
  • Haz un álbum de recortes. Incluye selfies con cubrebocas, fotos de “la escuela en casa,” dibujos hechos con gises sobre la acera, comidas especiales, o cualquier otra experiencia personal. Asegúrate de incluir información sobre cuándo, dónde y quién forma parte de las imágenes.

¡Comparte este material con el museo a través de nuestro sitio web!

¿Cómo les responderías a estas preguntas?

  • Si fueras un niño aprendiendo sobre COVID-19 en 50, 100 ó 200 años, ¿qué te gustaría saber sobre tu vida actual? ¿Qué te gustaría decirles a las nuevas generaciones sobre estos momentos? • ¿Qué quieres recordar sobre esta experiencia?
  • ¿Qué quieres recordar sobre esta experiencia?
  • ¿Cómo te sientes? ¿Qué te asusta? ¿Qué te hace feliz? ¿Qué te pone triste?
  • ¿Qué estás haciendo? ¿Has creado o inventado algo nuevo para entretenerte?
  • ¿Qué ha sido lo más difícil para ti sobre la orden de quedarse en casa?
  • ¿Qué ha cambiado en tu vida que ahora es diferente?
  • ¿Cómo te sientes al usar un cubrebocas?
  • ¿Cómo te sientes al tener clases y/o trabajar desde casa?
  • ¿Cómo te sientes al no poder tener contacto cercano con amigos o familiares?
  • ¿Qué ha sido lo mejor de quedarse en casa? ¿Qué es lo más divertido que has hecho?
  • ¿Qué te hace sonreír incluso cuando la vida es difícil?

¿Te gustaría descargar esta actividad? Haz clic aquí para obtener un archivo PDF.

Para encontrar actividades, ideas y mucho más descubrimiento en casa, ¡síguenos!

Continue Reading

Daily Discovery: Life Cycle of a Star Mobile/Descubrimiento en casa: Móvil del ciclo vital de una estrella

Post written by Sierra Tamkun, Learning Experiences Manager.

Daily Discovery: Life Cycle of a Star Mobile

One star, two star, red star, white dwarf star! Throughout it’s billion-year life, a low-density star, just like our Sun, goes through many changes. Learn about the different stages in a star’s life cycle, and make your own star mobile!

The Life of a Star

A star’s life cycle is determined by how big it is, or how much mass it has! The greater the mass of the star, the shorter its life. Depending on the amount of matter in the nebula where the star is born, it will either be a high-mass star, or a low-mass star, like our Sun. We’ll use this life cycle for our mobile.

But how are stars formed, anyway? As clouds of gas and dust move around in a nebula, hydrogen gas is pulled together by gravity and begins to spin faster and faster, heating up to become a protostar. When hot enough (about 15,000,000 degrees Fahrenheit!), a reaction called nuclear fusion occurs at the star’s core, pulling in more gas and dust and causing the star to stabilize and glow bright! It will continue shining in this phase as a main sequence star for millions to billions of years. Our closest star, the Sun, is currently at this stage.

Over time, hydrogen at the star’s core is converted to helium through nuclear fusion. Once the hydrogen runs out, the star isn’t able to generate enough heat to maintain its size. The core contracts, while the outer shell expands and cools, glowing red. This is known as the red giant phase. As the core continues to cool, the helium begins to fuse into carbon. Once all the helium is gone, the core collapses, and the outer layer is expelled into gases and dust, creating a planetary nebula! The collapsed core remains as a white dwarf, slowly cooling to become a black dwarf.

A high-mass star undergoes a supernova explosion after its red giant phase. If the explosion is small, it become a neutron star. But if the explosion is large, the core of the star is swallowed by its own gravity, becoming a black hole!

Supplies:

  • Paper Plate
  • Colorful beads, pom-poms, sequins, colored paper, cotton balls, pillow stuffing, etc.
  • Paints, markers, or crayons
  • Scissors
  • Glue
  • String

Instructions:

  1. Decorate your paper plate like outer space! This will be the backdrop for your star’s life cycle.
  2. Carefully use the scissors to cut your paper plate into a spiral. Ask an adult to help you if needed! Leave a small circle at the center of your spiraled plate.
  3. At the top of your spiral, attach your sting so you can hang your mobile when you’re done! You can use glue or tape, or poke a hole through the plate and tie your string to attached it.
  4. Select different objects to represent each stage in the life of your star. Pick any materials you like, or follow these suggestions:
    a. Star-forming nebula: cotton balls or pillow stuffing
    b. Protostar: small light-colored bead or sequin
    c. Main Sequence Star (like our Sun): yellow bead or pom-pom
    d. Red Giant: large red pom-pom or red paper circle
    e. Planetary Nebula: small bead and cotton balls or pillow stuffing
    f. White Dwarf: white bead or pom-pom
    g. Black Dwarf: small black bead or pom-pom
  5. Start by gluing your nebula materials at the very top of your spiral plate, around the string. Next, glue your black dwarf to the end. Evenly space out the rest of your representative objects and glue them to your spiral plate in the appropriate order.
  6. Use the string to hang up your mobile! As it spins, follow along with the different life stages of a star just like our very own Sun!

Want to download these directions? Click here for a handy PDF!

Follow along with our Daily Discovery! Click here for all activities that you can do at home.


Traducido por Károl de Rueda y Laura Vilaret-Tuma.

Descubrimiento en casa: Móvil del ciclo vital de una estrella

Durante los billones de años que podría durar su existencia, una estrella de densidad baja (al igual que nuestro Sol), experimenta muchos cambios. Aprende más sobre las diferentes etapas de la existencia de una estrella, y crea tu propio móvil.

El ciclo de vida de una estrella

El ciclo de vida de una estrella se determina por su tamaño o por su masa. Mientras más contenido tenga de esta, más corta resulta su vida. La cantidad de sustancia retenida por una nebulosa determina si va a nacer una estrella de masa alta o baja, como el Sol. Vamos a representar estas etapas de vida en nuestro móvil.

Pero, ¿y cómo se forman las estrellas? Mientras nubes de gas y polvo trastean en una nebulosa, hidrógeno molecular empieza a unirse por la fuerza de la gravedad. Girando más rápido, el hidrógeno se calienta y se vuelve una protoestrella. Cuando está suficientemente caliente, (¡8,333,315 grados Celsius, o 15,000,000 grados Fahrenheit!), comienza una reacción llamada fusión nuclear en el centro, atrayendo más gas y  polvo. En un corto tiempo, la estrella se estabilizará y emitirá un resplandor brillante. Esta continuará a emitir su luz por millones o hasta por billones de años. La estrella más cerca de la Tierra, el Sol, está actualmente viviendo esta etapa.

Cuando pasa el tiempo, el hidrógeno presente en el centro de la estrella se convertirá en helio a través de la fusión nuclear. Cuando el hidrógeno se haya agotado, la estrella no tendrá la capacidad de conservar la temperatura que necesita para mantener su tamaño. El centro de la estrella se contractará mientras que su capa exterior se expandirá y enfriará, brillando en un color rojo. Esta etapa de su vida se llama “la gigante roja.” Mientras se enfría el centro de la estrella, el helio se convierte en carbón. Cuando se extingue el helio, el centro se derrumba y su capa exterior expulsa gases y polvo, formando una nebulosa. El centro de la estrella sigue desprendiendo capas y enfriándose, existiendo como una “enana blanca.” Eventualmente se convertirá en una “enana negra.”

Una estrella de masa alta experimenta una explosión supernova después de ser una gigante roja. Si la explosión es pequeña, la estrella colapsa a un tamaño compacto, una “estrella neutrónica.” Si la explosión es grande, la gravedad puede comerse el centro de la estrella y convertirse en un “agujero negro.” Después de esta información tan interesante, ¿estamos listos para nuestra actividad?

Artículos necesarios:

  • Plato desechable de papel
  • Abalorios, cuentas o chaquiras, pompones, lentejuelas, papel de varios colores, bolas de algodón, relleno de almohada, etc.
  • Pinturas, marcadores y lápices de colores
  • Tijeras
  • Pegamento
  • Cordel/cuerda/hilo

Instrucciones:

  1. Decora tu plato de papel como el espacio. Este será el telón de fondo para el ciclo de vida de tu estrella.
  2. Con cuidado, usa las tijeras para cortar tu plato de papel como un espiral. Si es necesario, pídele ayuda a un adulto, dejando un centro redondo y bien pronunciado.
  3. Usa pegamento, cinta adhesiva, o haz un agujero en el centro del plato para atar un cordel.
  4. Selecciona varios objetos para representar las diferentes etapas de la vida de tu estrella. Escoge los materiales que prefieres o que tengas disponibles. Si quieres, sigue estas sugerencias:
    a. Nebulosa de vivero estelar: bolas de algodón o relleno de almohada
    b. Protoestrella: chaquira o lentejuela pequeña y de color claro
    c. Estrella de secuencia principal (como el Sol): abalorio o pompón amarillo
    d. La gigante roja: pompón grande o recorte de círculo de color rojo
    e. Nebulosa planetaria: bola de algodón, abalorio pequeño, o relleno de almohada
    f. Enana blanca: abalorio o pompón blanco
    g. Enana negra: abalorio o pompón negro pequeño
    Pega los materiales a tu espiral empezando de arriba hacia abajo y en orden. Asegúrate que estén uniformes y bien espaciados.
  5. Cuando termines de armar tu móvil, cuélgalo. Mientras gira, ¡observa las diferentes etapas de la vida de una estrella!

¿Te gustaría descargar esta actividad? Haz clic aquí para obtener un archivo PDF.

Para encontrar actividades, ideas y mucho más descubrimiento en casa, ¡síguenos!

Continue Reading

Daily Discovery: “If You Love Honey” Bee Headband Craft

Post written by Lea Mikkelsen, Early Childhood Coordinator.

Daily Discovery: Storytime in the Home – If You Love Honey  Bee Headband Craft

Follow along with FCMoD’s live stream Storytime in the Home: If You Love Honey: Nature’s Connections. Then gather all your supplies to create this adorable honeybee headband. Buzz Buzz!

Supplies:

  • Yellow and Black craft paper
  • Pipe cleaners
  • Glue
  • Tape
  • Scissors
  • Yarn
  • Hole punch

Instructions:

  1. Place all your supplies on a clear surface with plenty of room to create.
  2. Cut a long strip of yellow craft paper.
  3. Cut a second strip of black craft paper and cut that into small bee stripes.
  4. Glue the black bee stripes to the yellow strip of craft paper leaving some yellow bits in between.
  5. Punch a hole in the ends of the strip and thread the yarn through to use as a tie.
  6. Curl one end of each pipe cleaner to make a small ball.
  7. Tape the pipe cleaners to the inside of the headband where you want each antenna to go.
  8. Tie your headband on and do a honeybee dance! BUZZZZZzzzz!

Want to download these directions? Click here for a handy PDF!

Follow along with our Daily Discovery! Click here for all activities that you can do at home.

Continue Reading

Daily Discovery: Bending Light and Eyesight

Post written by Angela Kettle, School Programs Coordinator.

Daily Discovery: Bending Light and Eyesight

Have you ever noticed that your legs look out of place when you dangle them in the pool, or that the straw in a glass of water looks bent? This is called refraction. Refraction occurs when light bends as it passes from one medium to another – for example, from the front of a glass, to the water inside, to the back of a glass. Experiment with refraction for yourself in the activity below!

Supplies:

  • Paper
  • Pencil
  • Crayons, colored pencils, or markers (optional)
  • 2+ different kinds of drinking glasses, filled with water – make sure the glasses are transparent
  • Your Observation Journal (find out how to make one here), or use another sheet of paper to record your findings

Instructions:

Part 1

  1. Draw an arrow on a sheet of paper. Note which way the arrow is facing (right, left, up, or down).
  2. Fill up a glass of water.
  3. Put your glass of water down, and put yourself at eye level with the water in the glass. Hold your drawing at arm’s length, so that you can see it through the glass. What do you notice about the way your drawing looks now? What about if you look at the image through the glass from a different angle?
  4. Repeat the experiment, this time with a different kind of glass. Does the image stay the same as the last glass, or does it change?
  5. Write or draw your findings in your Observation Journal.

Part 2

  1. Draw something new – whatever you like! Make sure that whatever you draw has certain parts facing one way or another (for example, you could draw a face with the eyes looking left, or a cat with its tail on the right side of the paper and its head on the left side).
  2. Look at your drawing through your glass of water, like you did with the arrows. What do you notice?
  3. Play around with your drawing and your glass. Try looking at the image from lots of different angles, through as many different kinds of drinking glasses as you can. How many different images can you create from your original image, just by experimenting with refraction?
  4. Record your findings in your Observation Journal. Share what you find by tagging us on social media and using #DailyDiscovery.

From Drinking Glasses to Eyeglasses

Refraction might seem like a fun magic trick, but did you know that refraction is what makes it possible for humans to see? Light is refracted as it passes through the cornea and the lens of the eye. This allows the light to come into focus on the retina, where it is converted into a message that the brain can understand.

Sometimes, though, refraction can go wrong, causing what’s called nearsightedness or farsightedness. When people are nearsighted, it means they can see things that are close to them, but not far away. Usually, this is caused by the eye being too long, causing light to focus in front of the retina. When people are farsighted, it means they can see things that are far away, but not things that are close. Usually, this is caused by the eye being too short, causing light to focus behind the retina. Both nearsightedness and farsightedness can also be caused by problems with the shape of the eye’s lens.

Thankfully, errors in refraction can be corrected with eyeglasses. First, an eye doctor (an optometrist) tests a patient’s vision to figure out her prescription (a way of measuring a person’s vision). From there, an engineer uses this prescription to make unique lenses. This lens is engineered to refract light so that it focuses in just the right spot on the retina, allowing the patient to see clearly.

Eyeglasses through the Ages

Eyeglasses have undergone many changes as engineers have figured out more efficient ways to craft them… and as fashion has changed, too! Here are a few historical photos from our Archive and a piece from our Collection at the museum! You can learn more about eyeglasses and fashion from our recent blog post, parts of which are adapted below:

The museum’s artifact collections offer a retrospective look (which is 20/20, of course) at the history of innovation in eyewear. Pince-nez spectacles, which had no earpieces and stayed in place with a nose clip were quite popular early in the 20th century but fell out of fashion as they became associated with older generations.

Want to download these directions? Click here for a handy PDF!

Follow along with our Daily Discovery! Click here for all activities that you can do at home.

References & Additional Resources

Educational opportunities like this are supported in part by Fort Fund.

Continue Reading

Daily Discovery: Drawing Music/ Descubrimiento en casa: “Dibujando” música

Post written by Eisen Tamkun, Music Programming Lead.

Daily Discovery: Drawing Music

Music has the power to influence our emotions. Have you ever gotten a chill or thrill while listening to your favorite music? Listening to music is an easy way to alter your mood or relieve stress. Gain a deeper understanding of how music influences us by drawing!

Supplies:

  • Drawing Paper
  • Favorite drawing utensils: pens, pencils, paint, etc.
  • Listening device: iPhone, Computer, etc.

Instructions:

1. Take your paper and divide it into four sections. Label each section 1-4 in the top right corner.
2. Once you are ready to start drawing in section 1, begin playing Blowin’ in the Wind by Bob Dylan. Be sure there are no noises besides the song (works best with headphones). Continue drawing until the song is completely over. Listen and let the song guide your drawing. It can be shapes, images, or anything in between. If need be play through the song a second time (or more if you want!)
3. Move to section 2 on your paper and play Für Elise by Beethoven. Repeat Step 2 and listen to the whole song through letting it guide your drawing!
4. For section 3 listen to Walking on Sunshine by Katrina and the Waves. Repeat Step 2.
5. Lastly, for section 4 play Take Me Home, Country Roads by John D. Repeat Step 2.

Now see if one of your family members can guess which one of your drawings match each song!

Want to download these directions? Click here for a handy PDF!

Follow along with our Daily Discovery! Click here for all activities that you can do at home.

Educational opportunities like this are supported in part by Bohemian.

Traducido por Károl de Rueda y Laura Vilaret-Tuma.

Descubrimiento en casa: “Dibujando” música

La música tiene el poder de influir en nuestras emociones. ¿Haz sentido alguna sensación de alegría o emoción mientras escuchas tu música favorita? Esta puede cambiarnos el humor y aliviar el estrés. Aprendamos cómo la música nos puede inspirar ¡mientras dibujamos!

Artículos necesarios:

  •  Hojas de papel
  • Utensilios para dibujar: plumas, lápices de color, pinturas, marcadores, etc.
  • Algún aparato para poder escuchar música: teléfono, computadora, radio, etc.
  • Opcional: audífonos

Instrucciones:

  1. Divide un papel en cuatro secciones. Numera del 1 al 4 la esquina superior derecha de cada sección.
  2.  Comienza a escuchar tu canción favorita, asegurándote de que no haya ningún otro ruido a tu alrededor (esta actividad funciona mejor con audífonos), y utilizando la sección número 1 del papel, comienza a dibujar lo que quieras mientras la escuchas. Deja que la música te guíe. Puedes trazar figuras, imágenes o cualquier cosa que sientas. Escucha la canción las veces que quieras mientras continúas expresándote por medio de lo que dibujas.
  3. Para el papel número 2, pon otra canción. Repite lo que hiciste anteriormente y escucha la canción entera mientras esta te guía para crear arte.
  4. Para los papeles números 3 y 4, escucha otras canciones que te gusten.
  5. Estas son algunas recomendaciones de nuestras canciones favoritas:
    • Foo Foo por Santana
    • Octopus’s Garden por The Beatles
    • Etude Op. 25 No. 11 (Winter Wind) por Chopin
    Tu rumba por iLe
    • Tu canción preferida.
    Para terminar, podrías ver si alguno de tus familiares puede adivinar las canciones que representan tus dibujos.

¿Te gustaría descargar esta actividad? Haz clic aquí para obtener un archivo PDF.

Para encontrar actividades, ideas y mucho más descubrimiento en casa, ¡síguenos!

Educational opportunities like this are supported in part by Bohemian.

Continue Reading

Fort Collins & The Flu: 1918-1919

Post written by Sarah Frahm, Archive Assistant.

Fort Collins & The Flu: 1918-1919

What did Fort Collins look like the last time the city faced a widespread shutdown? From the fall of 1918 through the early spring of 1919 the citizens of Fort Collins found themselves under varying stages of quarantine due to the influenza epidemic. One document, currently at the Archive, that gives some insight into how the city officials handled the epidemic and quarantining of the population is a “Summary of Advisory Committee Recommendations.”

Fort Collins Quarantine Recommendations

Most telling about the problems the city faced in managing the flu epidemic is that the advisory committee was not even formed until December 1918, despite influenza raging in the city since at least October. According to an October 18th article in The Weekly Courier the state board of health had ordered the closing of “everything” in Colorado  but that those in charge of the college campus, where men were still doing military training, would not close the campus. The previous week an editorial had appeared in the newspaper demanding a “rigid quarantine be established” and that the city should be “shut down tight” like Boulder and Greeley. By the end of the October both the college and the city had enacted some form of closure, although without official documents it is a challenge to tell just how strenuous the shutdown was. Another article mid-November from The Weekly Courier complains that “quarantine has not been very rigid of late” with November seeing both elections and the armistice ending World War One and that these events and gatherings led to a rising in the number of flu cases.


The convening of a citizen advisory committee to the city board of health seems to be a recognition that the previous handling of the flu epidemic had been somewhat ad hoc and unclear (the November issues of The Weekly Courier discuss whether masks should be worn, or not, and if quarantine would be lifted, or not) and in need of some sort of codification.

But how did these regulations, once adopted, affect the citizens of Fort Collins? The first two points recommended by the advisory committee were not all that different from the quarantining, done before and after the influenza epidemic, for other diseases, like measles or scarlet fever. However, the third recommendation of shutting down schools and “ordinary public gatherings” was different. Social and fraternal clubs closed, such as the Elks (in April 1919, The Fort Collins Courier reports that the lodge was in remarkable good financial health despite having been closed for nearly three months. The women’s gymnasium, on the other hand, found itself struggling to have enough members in March.) The superintendent of the school district reported in the summer of 1919 that the school year had been full of “anxiety, hindrance, and depression” and that many of the plans for academic work had to be abandoned.

 The Elks Lodge was located at 202 Linden Street and was closed during the influenza quarantine.

If the lack of proper schooling and a severe curtail on social life were not bad enough, the fourth recommendation from the advisory committee was an extreme frustration to many in Fort Collins. Shortly after the requirement limiting the number of people in any place of business came out The Weekly Courier wrote an editorial telling people to quit complaining, pointing out that they too had to deal with these restrictions upon their office (if someone was to visit the newspaper office, a member of staff would have to leave in order to maintain the proper number of people per square footage). The editorial admonished the people the writer considered to be “knockers” to take the disease more seriously for the sake of the survival of the city.

While the committee was extremely serious on the subject of loafing on the streets (how else does a recommendation get to be written not only in capital letters but also underlined and starred?) the record of impact on peoples’ lives of that specific order is currently unknown. Rather it is the suborder that bares out most in the historical record. The committee called for a special officer to be appointed. The man who became “Quarantine Officer” was Orrin J. Watrous, then the secretary of the Fort Collins Commercial Club. According to The Fort Collins Express writing about the official vote of thanks put forth by the city government to Watrous, Mr. Watrous daily visited between “a dozen to twenty houses in his quarantine rounds” in order to ensure people were properly following the orders of the city.

Orrin Watrous, pictured here at the far right with a cigar in his mouth and boxing gloves on his hands.

When people did not follow quarantine regulations, there were consequences. One farmer, a Mr. Tom Hale, accused of breaking the quarantine on his house, had to go to court on December 27th and face trial. The Weekly Courier reported that Mr. Hale’s case was dismissed. While it is not clear what kind of fine or other penalty Mr. Hale would have had if he had been found guilty, his case is still an example of the added difficulties of living life under quarantine.

It is difficult to know, exactly, how people felt about the restrictions placed upon them by the city government. Currently there is only access to a weekly newspaper (even though the newspaper also ran dailies, Archive staff cannot get to them right now) and while there are potentially useful items held in the Archive collection, with our own doors closed, a lot of the details will have to remain unknown for the current time.

Continue Reading