FCMoD Squad Application Date Extended!!!

Got a passion for music, museums, people and fun? Joining the FCMoD Squad might be just what you’ve been looking for. If you’re between the ages of 15 and 19 – this is an amazing opportunity to meet great people, gain experience and learn about the music and museum industries. The FCMoD Squad provides hands-on experience working with the local music community in a safe, friendly environment. Mod Squaders review and judge entries for local music events where they might even get on stage and emcee. They tour world-class music studios and attend college level discussions while representing the voice and vision of our emerging youth at the museum and beyond. Applications are now closed! Please check back next summer if you missed this year’s application deadline.

Continue Reading

Daily Discovery: Making History with Our Local Legends – Shrink Plastic Charm Bracelet

Post written by Linda Moore, Museum Curator of Collections.

Daily Discovery: Making History with Our Local Legends – Shrink Plastic Charm Bracelet

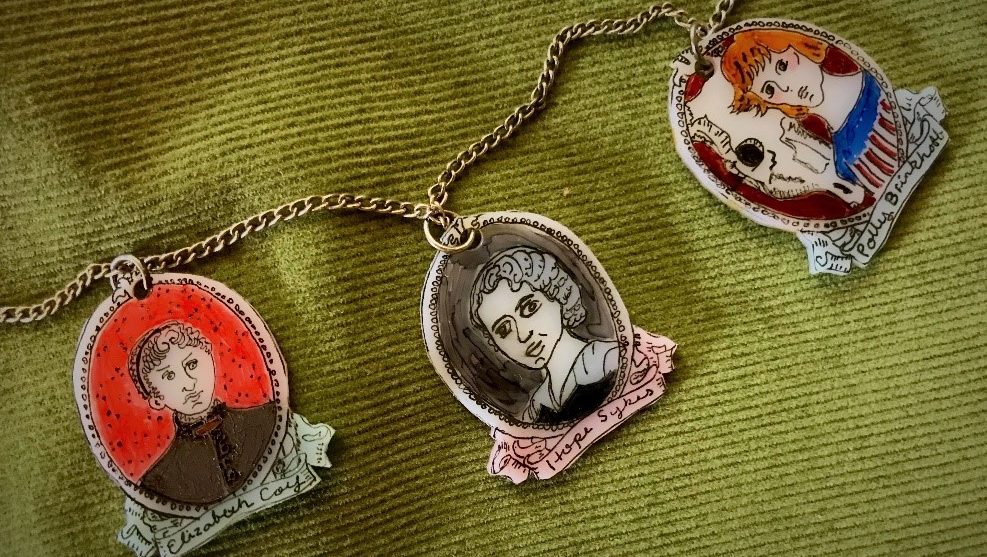
Wearing charms to commemorate or celebrate people, places, or events important to you has a long history: there is archaeological evidence that charm bracelets were worn as long ago as 600 to 400 BCE! Celebrate the stories that FCMoD is presenting of some of our distinguished local women this month by using the templates that will accompany each presentation to create a charming piece of jewelry that will remind you of them every time you wear it!

Supplies:

  • Shrink Plastic
  • Template to trace (example on right)
  • Permanent markers
  • Hole punch
  • Metal cookie sheet
  • Foil to line cookie sheet
  • Oven
  • Jewelry findings of your choice

Instructions:

  1. Print out your template; a 2.5 inch original will create a 1.25 inch charm.
  2. Place your shrink plastic over the template and trace in permanent marker.
  3. Let outline dry completely, then add color.
  4. Cut your charm out. Punch a hole at the top! This is essential for adding it to a bracelet.
  5. Following the guidelines for your specific shrink plastic, preheat your oven.
  6. Place your plastic on a foil-lined cookie sheet, and once your oven is at temperature bake it for the time suggested for your plastic –about 3 minutes, so stand by!
  7. There you go, a perfectly charming portrait to add to your bracelet.

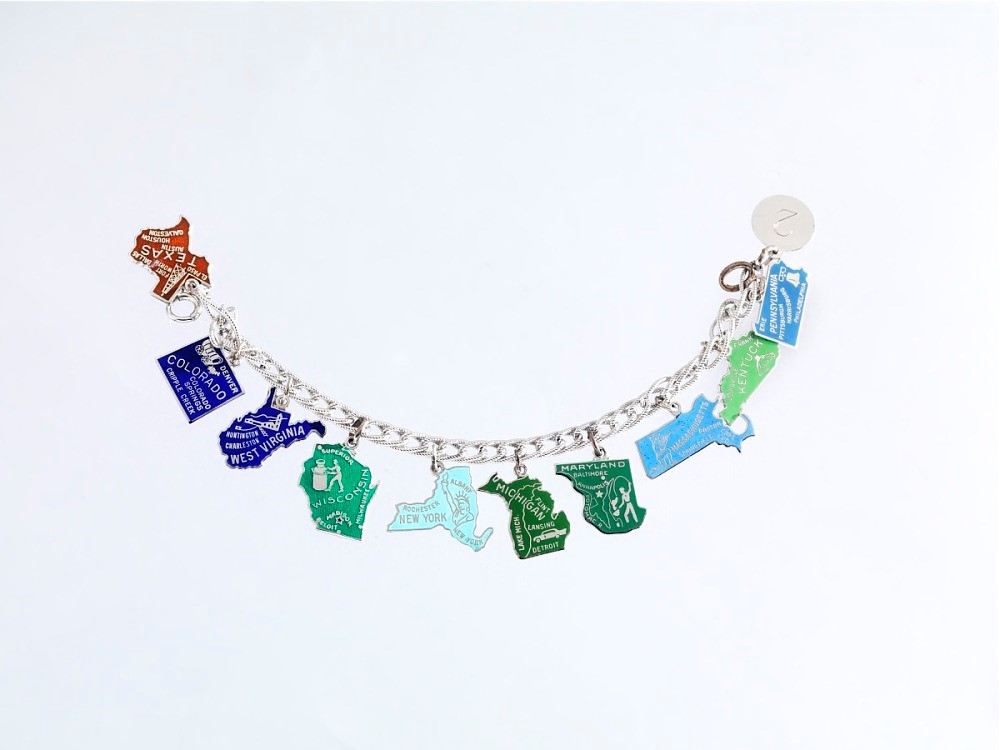
This charm bracelet, in the collection of the National Museum of American History, commemorates the effort to ratify the Equal Rights Amendment with charms added for each state that successfully ratified the amendment.

Want to download these directions? Click here for a handy PDF!

Follow along with our Daily Discovery! Click here for all activities that you can do at home.

Educational opportunities like this are supported in part by Fort Fund.

Continue Reading

Daily Discovery: Coffee Painting

Post written by Kathy Bush, Discovery Agent.

Daily Discovery: Coffee Painting

Use your rockin’ creative skills and make your very own work of art using coffee as your medium!

Supplies:

  • Coffee grounds &/or instant coffee – 1 spoonful
  • Water color paint brushes
  • Paper towel
  • Clean water
  • Water color paper
  • Bottle caps

Instructions:

  1. Tape your paper down if you fear it will buckle while working on it. Use the bottle caps to mix your coffee with fresh water, being careful to use only a little water at a time until you have a good shade. Test until you like what you have. Be aware that your painting will smell of coffee!
  2. Draw two squares for an exercise when first learning to use this medium. Decide which one will be for a layering with coffee and which one will be for water layering.
  3. Paint on the full space with coffee and let dry. The one square that is layered with coffee will be darker with each layer added while the square with water will become lighter. The sun is great for speeding up the drying time!
  4. The paintings from the ground coffee will have a textured look as the grounds will be picked up by the brush. This texture will be delicate as it is easy to brush off, which can take some color off. Ground coffee needs to be fresh when painting. You can reuse coffee grounds for painting but each use will result in a weaker color that is more diluted. Paintings with coffee grounds will be more free form and can lose some definition and/or color as it dries.
    – Instant coffee paintings will be smoother and easy to work with. Instant coffee paintings will acquire a shiny look the more layers you do. It is more durable than ground coffee as it behaves.
  5. Once you’re finished with your painting, it’s time to clean up! Thoroughly clean brushes, especially the ones with the coffee grounds in them as it gets caught in the tips. Have a dirty water cup for cleaning and a clean water cup for re-wetting the brushes. The paper towel is for cleaning the brush and picking coffee up from the painting if desired.


Want to download these directions? Click here for a handy PDF!

Follow along with our Daily Discovery! Click here for all activities that you can do at home.

Educational opportunities like this are supported in part by Fort Fund.

Continue Reading

Daily Discovery: Crazy Quilt Tie-Blanket

Post written by Morgan Wilson, Museum Assistant for Collections.

Daily Discovery: Crazy Quilt Tie-Blanket

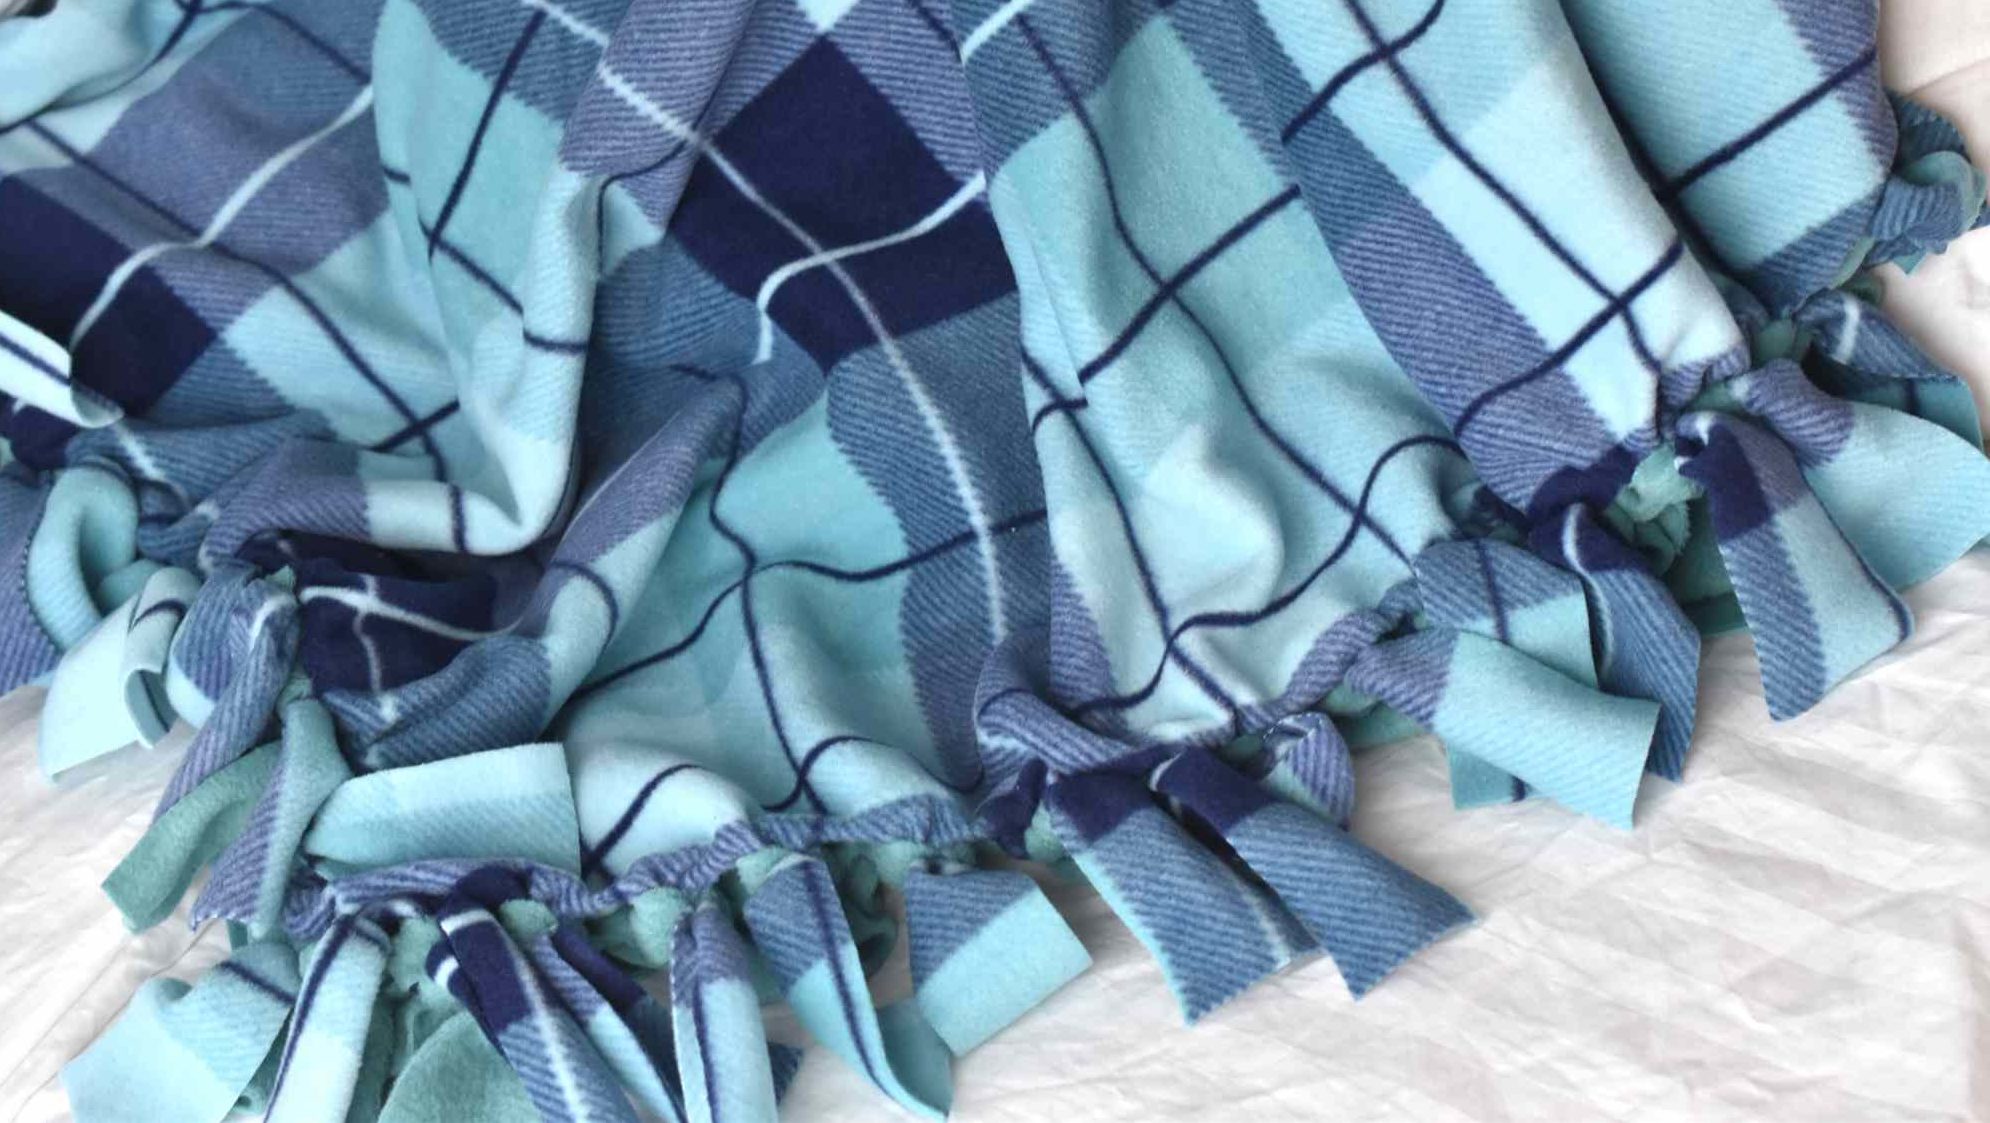
What even is a crazy quilt? It is a pieced together blanket that is all about looking good and does not follow a pattern or have the quilting stitches joining its front to its back that define true quilts. Crazy quilts are often full of souvenir ribbons, fancy fabrics, and embroidered or painted pictures. We have several crazy quilts in our collections at FCMOD. Check them out to get inspiration for your own. Today, we will be making a tie-blanket crazy quilt. There is no sewing required! Don’t worry if you make a mistake, it will just add to the craziness of the quilt!

Supplies:

  • Fleece (2 yards total in at least 2 different colors but use as many as you like. Most fleece that you buy from a craft store will be 60 inches in width which is perfect for this project!)
  • Scissors
  • Tape Measure
  • Colored pencil or fabric marker

Instructions:

  1. Find a work surface to lay your fabric on.
  2. Use the tape measure and colored pencil to lightly sketch a 12 x 12-inch square on the corner of one piece of fabric.
  3. Cut out the square. You can use this first square as a template for the rest of them!
  4. Using your template, cut the rest of the fabric into 12 x 12-inch squares.
  5. Once you have all your squares cut out, take one square, your tape measure and pencil and mark every inch on each edge of the square.
  6. Make a 2-inch cut on each mark. This will create fringe around the square and cut off the corners!
  7. Repeat step 6 until all your squares have fringe.
  8. Take two squares that you want to tie together and line them up so that the tabs are lined up with each other.
  9. Double knot the tabs on either square together until you have 8 knots joining two squares together!
  10. Continue tying squares together lengthwise until you have 5 squares in a row. Make 6 rows of 5 squares.
  11. Now, join each row together width wise until you have a 5 x 6 square blanket –crazy!

Tips and Tricks:

  • You may knot the fringe on the edges of the blanket to give it a more finished look.
  • If your squares are not exactly even, that’s okay. As long as they all have an equal number of fringes it will come together just fine.
  • You can arrange the squares in any pattern you like since a crazy quilt has no pattern.

Image Credit: The Spruce Crafts

Want to download these directions? Click here for a handy PDF!

Follow along with our Daily Discovery! Click here for all activities that you can do at home.

Educational opportunities like this are supported in part by Fort Fund.

Continue Reading

Daily Discovery: Local Women’s History Coloring Pages

Post written by Lesley Struc, Curator of the Archive.

Daily Discovery: Local Women’s History Coloring Pages

In celebration of the 100th anniversary of the passage of women’s suffrage in the United States, explore the stories and legacies of several local women, and add some color while you’re at it! Then, test your knowledge with the quiz below!

Supplies:

  • Coloring book pages, and the end of this document
  • Crayons, paints, whatever you want to use to add some color!

Instructions:

  1. Print out the coloring pages from this document.
  2. Learn about the history of some notable Fort Collins women as you color!

Want to download these directions? Click here for a handy PDF!

Follow along with our Daily Discovery! Click here for all activities that you can do at home.

Educational opportunities like this are supported in part by Fort Fund.

Continue Reading

Daily Discovery: Storytime in the Home – Over in the Grasslands Zebra Puppet Craft

Post written by Lea Mikkelsen, Early Childhood Coordinator.

Daily Discovery: Storytime in the Home – Over in the Grasslands Zebra Puppet Craft

Follow along with FCMoD’s live stream Storytime in the Home: Over in the Grasslands– On an African Savanna. Then gather your supplies to make a zebra puppet from a paper bag!

Supplies:

  • White paper lunch bag
  • Black construction paper
  • White craft paper
  • Black crayon
  • White crayon
  • Glue stick
  • Scissors
  • Googly eyes (or use paper to cut out eyes)

Instructions:

  1. Place all your supplies on a clear surface with plenty of room to work.
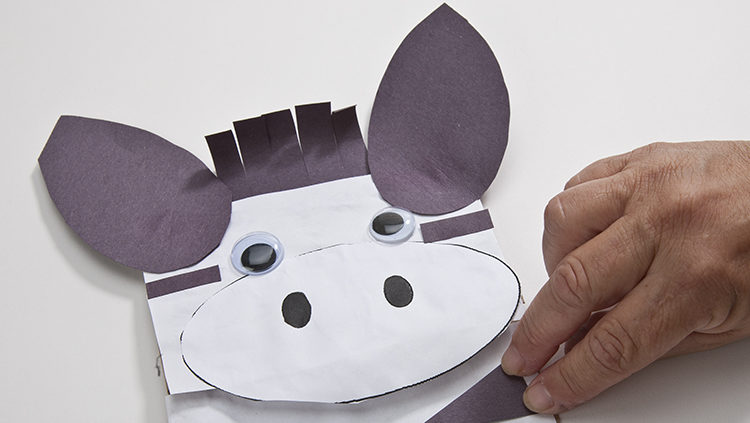
  2. Put the paper bag on the table with the bottom of the bag facing up (see the picture). You will want to be able to put your hand inside and move the bottom of the bag like a “mouth”.
  3. Cut out an oval shape from the black construction paper and glue it to the folded edge of the bottom of the lunch bag to make the zebra snout. Use a white crayon to draw a mouth and nostrils.
  4. Draw two triangles on the white craft paper with a black crayon. Use the scissors to cut them out and then glue them to the bag where the zebra’s ears will go.
  5. Cut out a rectangle shape from the black construction paper and cut fringe on one side for the zebra’s mane. Glue it between the ears.
  6. Tear strips of black construction paper and glue them to the bag to make stripes.
  7. Then glue the googly eyes above the snout where the eyes should go.
  8. Put your hand in your zebra puppet and imagine you are on the African Savanna!

Want to download these directions? Click here for a handy PDF!

Follow along with our Daily Discovery! Click here for all activities that you can do at home.

Educational opportunities like this are supported in part by Buell Foundation. Their support helps make access to early childhood education at FCMoD possible for everyone in our community.

Continue Reading

Daily Discovery: Explore Origami- Fold Your Own Music Note/Descubrimiento en casa: Explora el arte del origami- cómo hacer una nota musical

Post written by Eisen Tamkun, Music Education Lead.

Daily Discovery: Explore Origami- Fold Your Own Music Note

Just like any other language, music can be written down. Instead of letters making words, musicians write down music using notes! Create your own music note using the amazing art of Origami.

Supplies:

  • 8 ½” by 11” paper
  • Clear tape
  • Coloring pencils or markers

Instructions:

  1. Start by folding the paper taco style. Be sure you press down every fold!
  2. Fold your paper again.
  3. Next, three inches from the right side make a diagonal fold across the back.
  4. . Now flip the paper around so the tab is sticking up on the left side. And make another taco fold, folding up from the bottom!
  5. Fold the tab out and refold it tucking it to the left side.
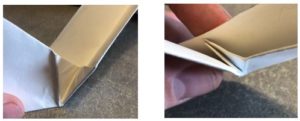
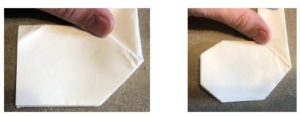
  6. Fold the two corners of the tab back.
  7. Take the top 2 ½ in. of the shaft and fold diagonal in the opposite direction of the tab. And then unfold.
  8. Now push the fold in forward splitting this new tab in half and bending back.
  9. Congrats you have made your very own music note origami! All that’s left is to color tape it up.
  10. Give your music note a good coloring on both sides. And then tape all the folds shut!
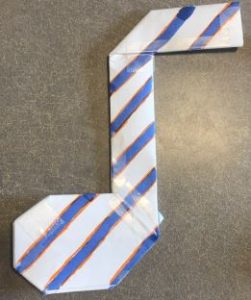
Great job! You’ve learned how to fold an origami music note. Keep reading for brief facts on Origami!

Origami- History, Facts, and Legend

Origami is the art of folding uncut pieces of paper in shapes such as birds and animals. First appearing in 17th century Japan, Origami has become a popular activity around the globe. The word is derived from ori- meaning “folded” and –kami, meaning “paper”.

There are thousands of origami creations; from mice and fish, to houses and balloons, the possibilities are practically endless! Explore the world through origami creations. Find patterns and more with a simple web search.

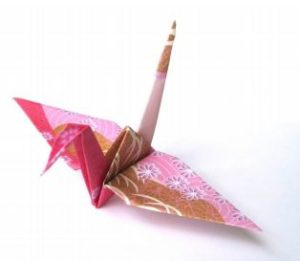
Probably the most famous origami sculpture is the Japanese Crane. There is a legend which states whoever folds a thousand cranes will have their heart’s desire come true. A thousand cranes is called senbazuru in Japanese. If you are feeling up to the challenge of creating a thousand cranes, or even just one, visit this website and give it a shot!
Want to download these directions? Click here for a handy PDF!

Follow along with our Daily Discovery! Click here for all activities that you can do at home.

Image Credit: Pinterest

Educational opportunities like this are supported in part by Bohemian.

Traducido por Károl de Rueda y Laura Vilaret-Tuma.

Descubrimiento en casa: Explora el arte del origami- cómo hacer una nota musical

Como cualquier otro idioma, la música se puede escribir y  entender. En vez de usar letras para formar palabras, los músicos escriben notas para expresar frases musicales. Crea tu propia nota musical usando las técnicas maravillosas del origami.

Artículos necesarios:

  • Hoja de papel tamaño carta (8 ½” por 11”)
  • Cinta adhesiva transparente
  • Lápices de color o marcadores

Instrucciones:

  1. Empieza doblando el papel a la mitad, asegurándote que el doblez esté bien definido.
  2. Dobla el papel de nuevo pero a lo largo.
  3. Haz un doblez diagonal de tres pulgadas (7.5 centímetros) del lado izquierdo.
  4. Voltea la hoja de papel para que el doblez que hiciste en el paso anterior esté boca arriba al lado izquierdo. Agarra el papel desde abajo y dobla el largo otra vez a la mitad.
  5. Saca la lengüeta pequeña hacia afuera. Dóblala hacia adentro, situándola dentro de tu nota al lado izquierdo.
  6. Dobla las equinas para formar la cabeza de tu nota musical.
  7. Para formar el corchete de tu nota musical, usa la parte superior y haz un doblez en la dirección opuesta de la cabeza. Debe medir 2.5 pulgadas (6 centímetros).
  8. Por último, desdobla el corchete y empuja el doblez hacia adentro, dividiéndolo a la mitad y doblando hacia atrás.
  9. Colorea tu nota musical de cada lado. No te olvides
    pegar todos los dobleces con cinta adhesiva.

¡Buen trabajo! Ya aprendiste cómo doblar una nota musical de origami. ¡Sigue leyendo para aprender algunos datos curiosos sobre este gran arte!

Origami – Historia, datos, y leyenda

Origami es el arte de doblar retazos de papel en distintas formas como pájaros y otros animales sin cortarlos. Originando en Japón durante el siglo 17, el origami se ha vuelto una actividad practicada en varias regiones del mundo. La palabra se deriva de las raíces ori- que significa “doblado” y –kami, que significa “papel.”

Hay miles de formas que puedes crear con origami; desde ratoncitos, peces, casas hasta globos, ¡las posibilidades son infinitas! Podrías explorar el mundo a través de esta técnica. En el internet puedes encontrar infinidad de guías y plantillas para practicar.

La escultura más famosa del origami es la Grulla Japonesa. Una antigua leyenda japonesa nos dice que, si logras hacer mil grullas de origami, tu más grande deseo se cumplirá. Las mil grullas de origami se llaman senbazuru en japonés. Si quieres aprender cómo hacer una Grulla Japonesa o completar el reto de senbazuru, visita este sitio web: https://origami.me/crane/

¿Te gustaría descargar esta actividad? Haz clic aquí para obtener un archivo PDF.

Para encontrar actividades, ideas y mucho más descubrimiento en casa, ¡síguenos!

Educational opportunities like this are supported in part by Bohemian.


Continue Reading

Daily Discovery: Celebrate our State Fossil- Build Your Own Stegosaurus/ Descubrimiento en casa: Celebrando el fósil oficial de Colorado – Crea tu propio estegosaurio

Post written by Angela Kettle, School Programs Coordinator.

Daily Discovery: Celebrate our State Fossil – Build Your Own Stegosaurus

Did you know that the Stegosaurus was named Colorado’s state fossil in 1982? Build your very own Stegosaurus using household materials. Then, discover a little bit about how the Stegosaurus lived!

Supplies:

All supplies are optional. Use what you have!

• Air dry clay or play-doh for the Stegosaurus body
• Cardboard or paper plates for the Stegosaurus plates
• Construction paper for the Stegosaurus spikes
• Glue or tape
• Markers
• Paint

Instructions:

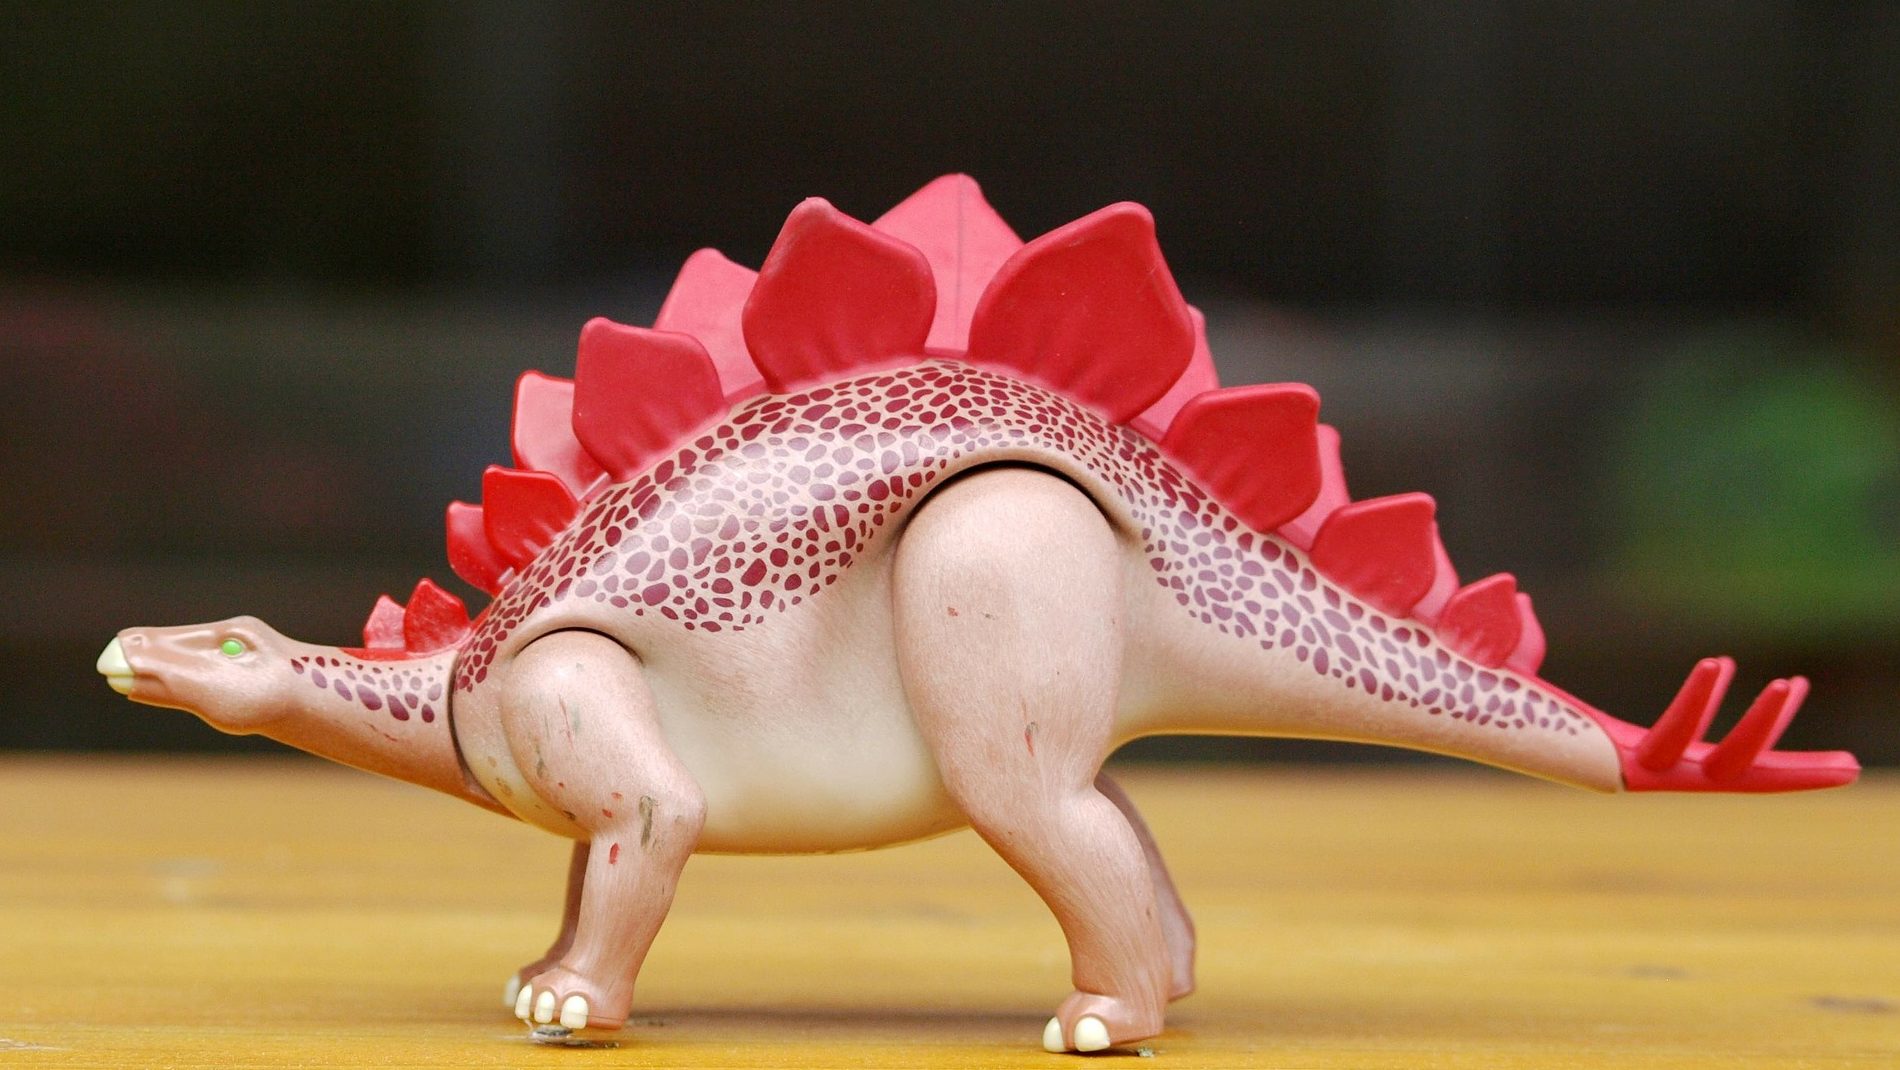
1. Build your Stegosaurus! Be innovative with your materials, and use the graphic to help guide you! Here is one way you could build your stegosaurus:

  • Did you know that the Stegosaurus was around 21 feet long and 30 feet tall in real life? Since we’ll be making a model in this activity – or a smaller version of the original — decide how big you want your Stegosaurus to be for this purpose.
  • Use play-doh to make the body. The Stegosaurus is known to have a small skull, short upper limbs, broad feet, and a  relatively long tail.
  • Use the cardboard to make the Stegosaurus’s plates. The plates are mostly triangular. Press these cardboard plates into the Stegosaurus body in an alternating pattern. (Fun fact: did you
    know that no two plates from the same Stegosaurus are  identical?)
  • Cut down your construction paper. Use the pieces to make 4 spikes. Press these spikes into the Stegosaurus tail.
  • Paint or color your Stegosaurus if desired.

2. Behold your 3D Stegosaurus creation!

Questions to Ponder:

1. How might a Stegosaurus use its plates? What about its spikes?Why do you think?

2. Stegosauruses have very small, flat teeth. What other animals have flat teeth? What do you think Stegosaurus was eating based on its teeth?

3. Study the picture of the Stegosaurus, along with your 3D creation. Based on its anatomy (how it is structured), how do you think a Stegosaurus would look when it moved?

4. Research your answers here.

References and Additional Information:

Povid, K. (n.d.). A Stegosaurus brought to life. Natural History Museum. https://www.nhm.ac.uk/discover/stegosaurus-brought-to-life.html

Encyclopedia Britannica. (2019). Stegosaurus. In Encyclopedia Britannica. https://www.britannica.com/animal/Stegosaurus

Want to download these directions? Click here for a handy PDF!

Follow along with our Daily Discovery! Click here for all activities that you can do at home.

Educational opportunities like this are supported in part by Fort Fund.


Traducido por Károl de Rueda y Laura Vilaret-Tuma.

Descubrimiento en casa: Celebrando el fósil oficial de Colorado – Crea tu propio estegosaurio

¿Sabías que el estegosaurio fue nombrado el fósil oficial del estado de Colorado en el año de 1982? Crea tu propio estegosaurio utilizando materiales que ya tienes en casa, y ¡descubre un poco más sobre cómo vivió este dinosaurio asombroso!

Artículos necesarios:

Todos estos materiales son opcionales. Puedes usar lo que tengas disponible en casa.
• Arcilla o plastilina (para el cuerpo de estegosaurio)
• Cartulina o platos desechables/de papel (para las placas)
• Papel de colores (para las púas)
• Pegamento y/o cinta adhesiva
• Marcadores
• Pinturas

Instrucciones:

1. ¡Construye tu estegosaurio! Sé innovador/a con tus materiales y utiliza la imagen a continuación como guía. Sigue estos pasos para construir este dinosaurio único:

  • ¿Sabías que el estegosaurio medía 6.2 metros (21 pies) de largo y 9.1 metros (30 pies) de alto? Para esta actividad, tú decide el tamaño que quieras. Tu dinosaurio puede ser pequeño, mediano o muy grande.
  • Una opción es utilizar arcilla o plastilina para moldear el cuerpo del estegosaurio. Esta creatura es conocida por su cráneo pequeño, extremidades delanteras muy cortas, patas anchas, y una cola larga y rígida.
  • Utiliza la cartulina o platos desechables para formar las placas. Estas son mayormente triangulares. Presiónalas contra el cuerpo de tu estegosaurio en dos hileras. Dato curioso: ¿sabías que ningunas de las placas de un estegosaurio eran idénticas una de la otra? ¡Todas eran diferentes!
  • Corta tu papel de colores en formas puntiagudas para hacer cuatro púas, y presiónalas contra la cola de tu estegosaurio.
  • Si quieres, pinta o colorea tu modelo. Como mencionamos antes, todavía no se sabe de qué color eran estos grandiosos animales, así que puedes pintarlo y decorarlo con tus colores favoritos y de la manera que quieras.

2. Cuando esté completamente terminado, ¡admira tu propio modelo de estegosaurio en tercera dimensión hecho por ti mismo y muéstraselo a tu familia!

Y hablando de estos dinosaurios, ¿puedes contestar a estas preguntas?

1. ¿Para qué crees que un estegosaurio usaría sus placas? ¿Y sus púas? ¿Para qué servirían?

2. Los estegosaurios tenían dientes relativamente pequeños con facetas planas. Basándonos en la estructura de sus dientes, ¿qué crees que este dinosaurio comía? ¿Hoy día, cuáles otros animales tienen sus dientes así?

3. Estudia la imagen del estegosaurio que está más arriba, y también tu propio modelo. Observando su anatomía (su cuerpo/estructura) ¿cómo crees que estos animales se movían?

4. Investiga tus respuestas aquí (enlace en inglés para el National History Museum): https://www.nhm.ac.uk/discover/stegosaurus-brought-to-life.html

Referencias y más información:

Povid, K. (n.d.). A Stegosaurus brought to life. Natural History Museum. https://www.nhm.ac.uk/discover/stegosaurus-brought-to-life.html

Encyclopedia Britannica. (2019). Stegosaurus. In Encyclopedia Britannica. https://www.britannica.com/animal/Stegosaurus

¿Te gustaría descargar esta actividad? Haz clic aquí para obtener un archivo PDF.

Para encontrar actividades, ideas y mucho más descubrimiento en casa, ¡síguenos!

Continue Reading

Daily Discovery: Storytime in the Home – Over in a River Greeting Card Craft

Post written by Lea Mikkelsen, Early Childhood Coordinator.

Daily Discovery: Storytime in the Home – Over in a River Greeting Card Craft

Follow along with FCMoD’s live stream Storytime in the Home: Over in a River – Flowing Out to the Sea. Then gather your supplies to make a lovely river scene greeting card to send to friends or family!

Supplies:

  • Construction paper in a variety of colors
  • Glue stick
  • Scissors

Instructions:

  1. Place all your supplies on a clear surface with plenty of room to work.
  2. Fold a piece of paper in half hamburger style to create a folded card.
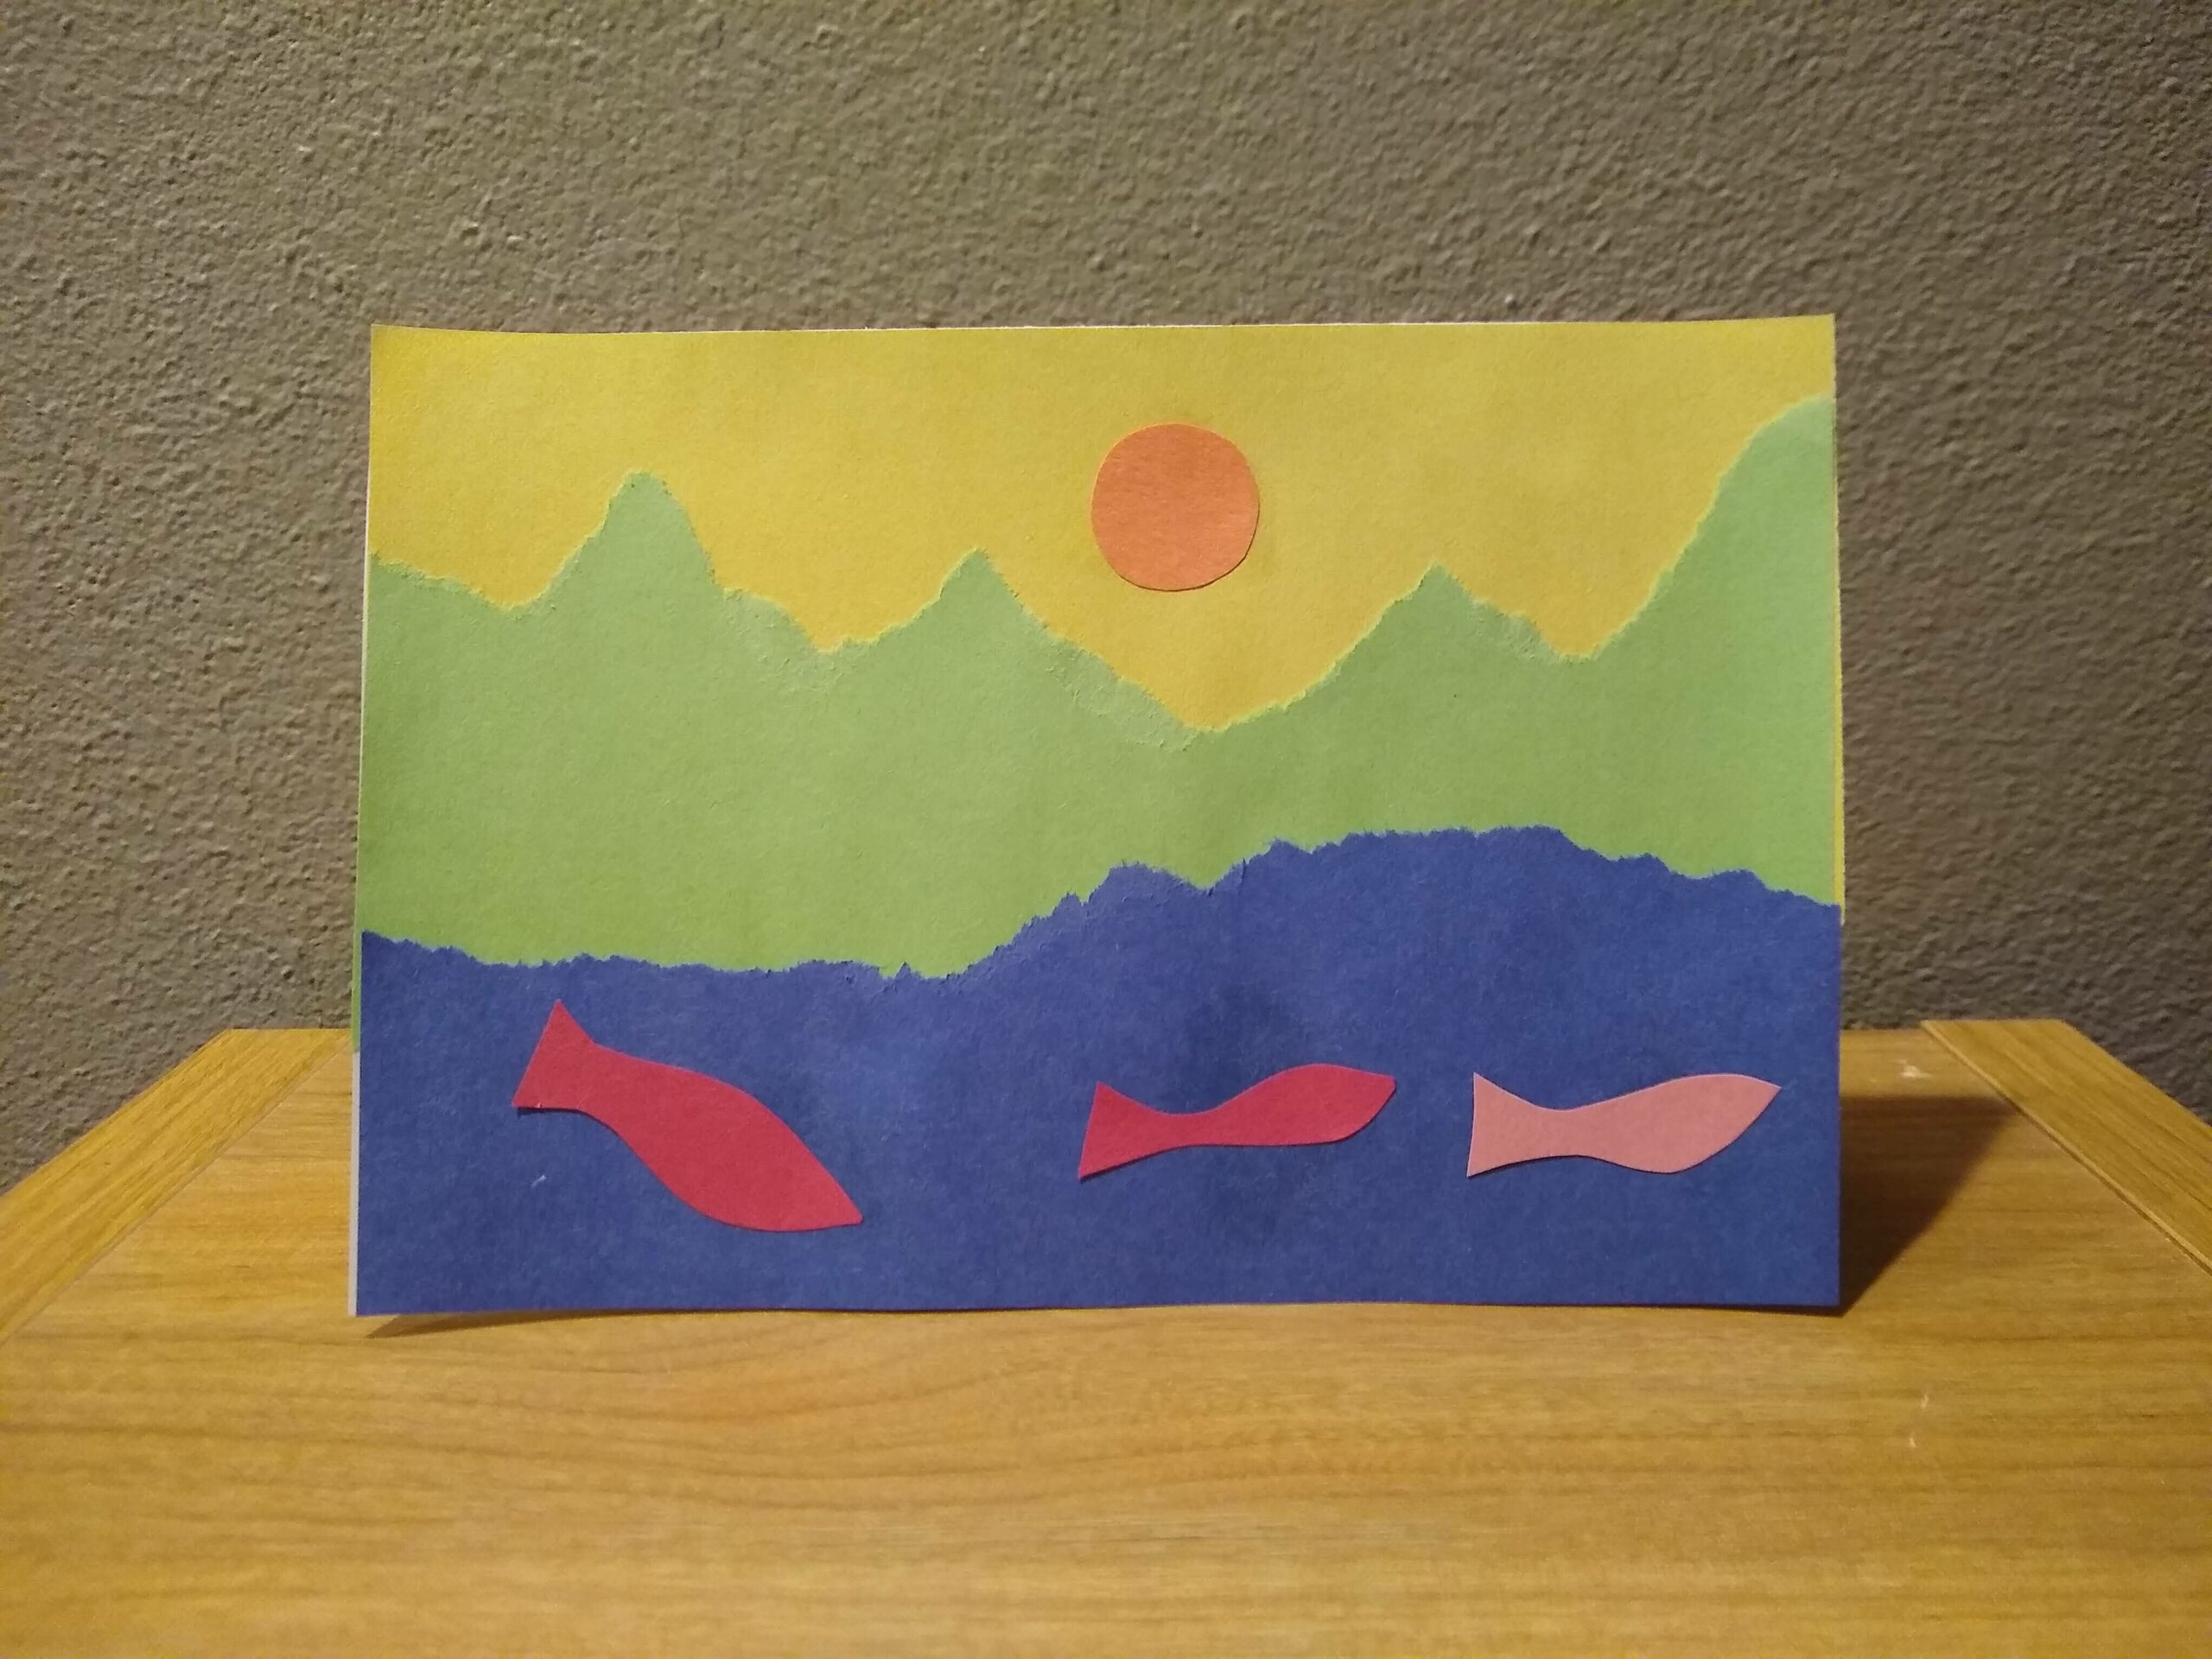
  3. Choose a colored sheet of construction paper to be your sky. Tear a strip of paper and glue it down to the top of the card (the folded edge).
  4. Choose a new color paper and tear a wavy strip to create a mountain scene. Glue this one layered on top of the sky.
  5. Choose a new color paper for the river and tear a wavy strip. Glue this one layered on top of the mountains and down to the bottom edge of the card.
  6. Cut out some simple fish shapes and glue them down in the river. Are they salmon swimming upstream to lay their eggs?
  7. Cut a sun or moon for your sky if you want to. There are plenty of ways to be creative with this card!
  8. Write a kind note to a friend or family member and send it to them. Cards are a wonderful way to show how much you care.
  9. Share your creations with us using #dailydiscovery on social media! We love to see what you are making!

BONUS: Here are some counting cards that relate to Over in a River.

Want to download these directions? Click here for a handy PDF!

Follow along with our Daily Discovery! Click here for all activities that you can do at home.

Educational opportunities like this are supported in part by Buell Foundation. Their support helps make access to early childhood education at FCMoD possible for everyone in our community.

Continue Reading

Daily Discovery: Ghost Signs of Fort Collins!

Post written by Lesley Struc, Curator of the Archive.

Daily Discovery: Ghost Signs of Fort Collins!

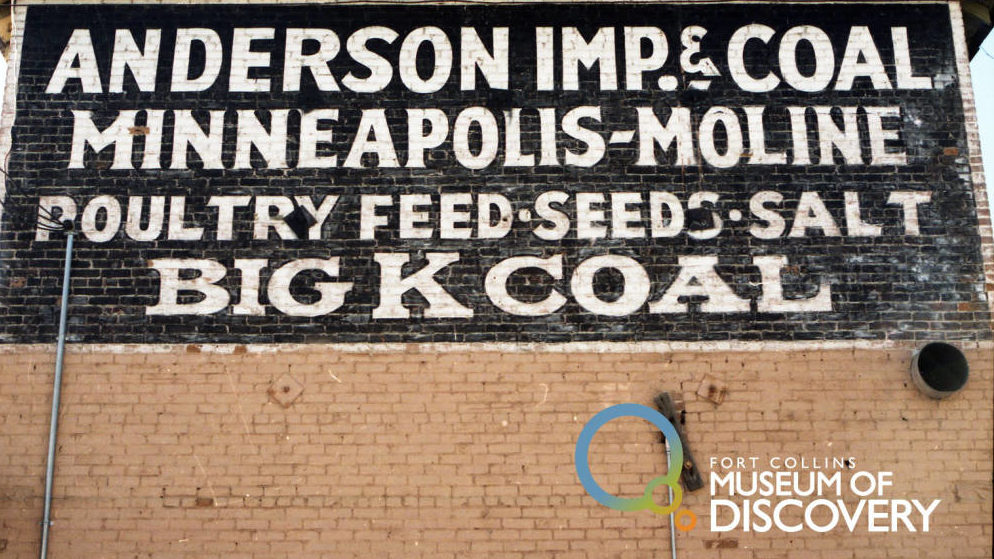
A “ghost sign” sounds spooky, but it’s not! It is an old, painted sign on the outside of a building that once advertised things like grocery stores, hotels, and food and drink. They are called “ghosts” because they reflect life in the past; sometimes they are easier to see when the lighting is just right on brick buildings, or when rain brings out their faded colors.

Old Town in Fort Collins features many of these magical old ghost signs. Take a virtual tour of local ghost signs by visiting here!

Then, step into the past by making your own historically inspired ghost sign!

Supplies:

  • Small sponge rectangle (we used the edge of a “magic eraser” but any sponge will work)
  • White paper that takes paint well
  • Red paint (we used washable finger paint)
  • Paper plate for holding paint
  • Pencil and Crayons (bright, contrasting colors work best)
  • Glue stick
  • Newspaper or other scrap paper to protect your work surface
  • Construction paper that is larger than your white paper for mounting the final picture

Instructions:

  1. Lay out a few pieces of scrap paper beneath your white paper to protect your work surface from paint.
  2. Cut the edge of a sponge into a small rectangle (about 1” x 2”) for dipping into the red paint.
  3. Pour some red paint onto the paper plate and dip the sponge, saturating it in the paint.
  4. Start stamping the paper in a brick pattern as shown below.
  5. Let the paint dry completely. The paper may wrinkle a bit while drying, and that is okay!
  6. Sketch out your ghost sign on the bricks lightly in pencil first, then go over your design in crayon. Brighter, contrasting colors show up best on the bricks. Your designs can be inspired by actual signs in Fort Collins, like the Nedley Hotel sign in this example, or you can come up with your own idea, product, or business! (Fun fact: the Nedley Hotel ghost sign can be seen at 130 S. College in Ft. Collins and was painted about 110 years ago! It also had a light above it so it could be seen at night.)
  7. Using a glue stick, adhere your finished sign on a larger piece of construction paper to flatten and frame your art.

Want to download these directions? Click here for a handy PDF!

Follow along with our Daily Discovery! Click here for all activities that you can do at home.

Educational opportunities like this are supported in part by Fort Fund.

Continue Reading