Daily Discovery: Homemade Bagpipes? Oh Laddie!

Post written by Eisen Tamkun, Music Education Lead.

Daily Discovery: Homemade Bagpipes? Oh Laddie!

Bagpipes… once you hear ‘em, they’re hard to forget! You might heard them, but have you ever played them yourself? Make your very own and give it a try!

Supplies:

  • Two Recorders
  • One Garbage Bag
  • Two Pens
  • Scissors
  • Tape

Instructions:

  1. Gather all of your supplies together.
  2. Take the pens apart and tape both pen bodies together.
  3. Next, trim the open end off your garbage bag down so it is about 3/4 of its original size.
  4. Take your new pen-body straw and tape it to one side of the open bag end. Have the pens reach an inch and a half into the bag to ensure no air will escape. This will be your blowpipe.
  5. Take one of your recorders and tape it into the bag about 1/4 of the bag length down from the blowpipe. Be sure the mouthpiece part is in the bag with the whistle side out of the bag. Close up the rest of the bag. Be sure it is air tight!
  6. Tape all of the holes shut on this recorder. It will play one note constantly.
  7. Cut a hole on the bottom corner below your blowpipe and tape the other recorder to this hole. Be sure the mouthpiece is inside the bag.
  8. Well done! You’ve finished your very own DIY bagpipe!
  9. To play this awesome new instrument, blow up the bag using the pen tubes. Check for any leaks and seal them with some more tape! Once the bag is full, the recorders will start playing. The first recorder (on top) will rest on you shoulder with the second (below the blowpipe) is the one you will play.

Check out this video to see how this gentleman does it!

Want to download these directions? Click here for a handy PDF!

Follow along with our Daily Discovery! Click here for all activities that you can do at home.

Educational opportunities like this are supported in part by Bohemian.


Continue Reading

Daily Discovery: Explore Origami- Fold Your Own Music Note/Descubrimiento en casa: Explora el arte del origami- cómo hacer una nota musical

Post written by Eisen Tamkun, Music Education Lead.

Daily Discovery: Explore Origami- Fold Your Own Music Note

Just like any other language, music can be written down. Instead of letters making words, musicians write down music using notes! Create your own music note using the amazing art of Origami.

Supplies:

  • 8 ½” by 11” paper
  • Clear tape
  • Coloring pencils or markers

Instructions:

  1. Start by folding the paper taco style. Be sure you press down every fold!
  2. Fold your paper again.
  3. Next, three inches from the right side make a diagonal fold across the back.
  4. . Now flip the paper around so the tab is sticking up on the left side. And make another taco fold, folding up from the bottom!
  5. Fold the tab out and refold it tucking it to the left side.
  6. Fold the two corners of the tab back.
  7. Take the top 2 ½ in. of the shaft and fold diagonal in the opposite direction of the tab. And then unfold.
  8. Now push the fold in forward splitting this new tab in half and bending back.
  9. Congrats you have made your very own music note origami! All that’s left is to color tape it up.
  10. Give your music note a good coloring on both sides. And then tape all the folds shut!

Great job! You’ve learned how to fold an origami music note. Keep reading for brief facts on Origami!

Origami- History, Facts, and Legend

Origami is the art of folding uncut pieces of paper in shapes such as birds and animals. First appearing in 17th century Japan, Origami has become a popular activity around the globe. The word is derived from ori- meaning “folded” and –kami, meaning “paper”.

There are thousands of origami creations; from mice and fish, to houses and balloons, the possibilities are practically endless! Explore the world through origami creations. Find patterns and more with a simple web search.

Probably the most famous origami sculpture is the Japanese Crane. There is a legend which states whoever folds a thousand cranes will have their heart’s desire come true. A thousand cranes is called senbazuru in Japanese. If you are feeling up to the challenge of creating a thousand cranes, or even just one, visit this website and give it a shot!

Want to download these directions? Click here for a handy PDF!

Follow along with our Daily Discovery! Click here for all activities that you can do at home.

Image Credit: Pinterest

Educational opportunities like this are supported in part by Bohemian.

Traducido por Károl de Rueda y Laura Vilaret-Tuma.

Descubrimiento en casa: Explora el arte del origami- cómo hacer una nota musical

Como cualquier otro idioma, la música se puede escribir y  entender. En vez de usar letras para formar palabras, los músicos escriben notas para expresar frases musicales. Crea tu propia nota musical usando las técnicas maravillosas del origami.

Artículos necesarios:

  • Hoja de papel tamaño carta (8 ½” por 11”)
  • Cinta adhesiva transparente
  • Lápices de color o marcadores

Instrucciones:

  1. Empieza doblando el papel a la mitad, asegurándote que el doblez esté bien definido.
  2. Dobla el papel de nuevo pero a lo largo.
  3. Haz un doblez diagonal de tres pulgadas (7.5 centímetros) del lado izquierdo.
  4. Voltea la hoja de papel para que el doblez que hiciste en el paso anterior esté boca arriba al lado izquierdo. Agarra el papel desde abajo y dobla el largo otra vez a la mitad.
  5. Saca la lengüeta pequeña hacia afuera. Dóblala hacia adentro, situándola dentro de tu nota al lado izquierdo.
  6. Dobla las equinas para formar la cabeza de tu nota musical.
  7. Para formar el corchete de tu nota musical, usa la parte superior y haz un doblez en la dirección opuesta de la cabeza. Debe medir 2.5 pulgadas (6 centímetros).
  8. Por último, desdobla el corchete y empuja el doblez hacia adentro, dividiéndolo a la mitad y doblando hacia atrás.
  9. Colorea tu nota musical de cada lado. No te olvides
    pegar todos los dobleces con cinta adhesiva.

¡Buen trabajo! Ya aprendiste cómo doblar una nota musical de origami. ¡Sigue leyendo para aprender algunos datos curiosos sobre este gran arte!

Origami – Historia, datos, y leyenda

Origami es el arte de doblar retazos de papel en distintas formas como pájaros y otros animales sin cortarlos. Originando en Japón durante el siglo 17, el origami se ha vuelto una actividad practicada en varias regiones del mundo. La palabra se deriva de las raíces ori- que significa “doblado” y –kami, que significa “papel.”

Hay miles de formas que puedes crear con origami; desde ratoncitos, peces, casas hasta globos, ¡las posibilidades son infinitas! Podrías explorar el mundo a través de esta técnica. En el internet puedes encontrar infinidad de guías y plantillas para practicar.

La escultura más famosa del origami es la Grulla Japonesa. Una antigua leyenda japonesa nos dice que, si logras hacer mil grullas de origami, tu más grande deseo se cumplirá. Las mil grullas de origami se llaman senbazuru en japonés. Si quieres aprender cómo hacer una Grulla Japonesa o completar el reto de senbazuru, visita este sitio web: https://origami.me/crane/

¿Te gustaría descargar esta actividad? Haz clic aquí para obtener un archivo PDF.

Para encontrar actividades, ideas y mucho más descubrimiento en casa, ¡síguenos!

Educational opportunities like this are supported in part by Bohemian.


Continue Reading

Daily Discovery: Bubble Science!

Post written by Hannah Curtis, Education Assistant.

Daily Discovery: Bubble Science!

Bubble baths, a carbonated summer time drink, bubble gum, or the result of the chemical reaction between baking soda and vinegar. We all know and love bubbles, but what’s up with them always being round? Come explore the science of bubbles with us and experiment with non-spherical bubbles!

Why are Bubbles Always Round?

Bubbles are simply one substance inside of another forming a sphere. These substances are usually a gas inside a liquid. The bubbles we know best are made with dish soap or glycerin and water, and are created using the CO2 gas that we naturally exhale from our lungs. You’ve probably wondered why bubbles are always round, why can’t they be square or a triangle. Well, when you blow a bubble and it begins to float in the air, this bubble will always be spherical. The water and soap molecules that make up the bubble like to be close together creating a force called surface tension creating a shape that has the smallest surface area, which happens to be a sphere, rather than a cube or pyramid.

Bubble Cage for Non-spherical Bubbles!

Supplies:

  • Pipe Cleaners
  • Straw or bubble wand
  • Water
  • Dish soap
  • Glycerin (optional)
  • Medium – large bin, bowl or container

Instructions:

  1. To create your cube bubble cage, start by cutting 6 full pipe cleaners in half to make 12 smaller pipe cleaners.
  2. Twist together the ends of four pipe cleaners to make a square. Do this again so you have two pipe cleaner squares.
  3. Now twist the remaining pipe cleaners to each corner of the two squares to form a cube. Remember a cube has 4 corners and 6 sides.
  4. Get your bubble solution ready. In a large enough bowl or container to fit your cube, fill it with water and add dish soap to make it nice a foamy. (As you test your experiment, you may need to add more soap as needed. You may also add glycerin to your solution to strengthen the bubble film).
  5. Submerge your bubble cage into the bubble solution and swish it around a few times.
  6. Remove the cage from the solution and ensure that each side of the cage has a bubble film.
  7. Now gently, but with some force move the cage from side to side. This will cause the bubble films to come together into the center of the cage. A square bubble may appear just from this movement so keep your eyes peeled.
  8. You can add in another bubble into the center with a straw or bubble wand by blowing a small bubble in the center of the cage, creating a cube bubble.
  9. This process may take a few times to get right. Experiment further and see what other bubble shapes you can create!

Want to download these directions? Click here for a handy PDF!

Follow along with our Daily Discovery! Click here for all activities that you can do at home.

Educational opportunities like this are supported in part by Fort Fund.

Continue Reading

Daily Discovery: Nature Among Us – Recreators/ Descubrimiento en casa: La naturaleza entre nosotros – personas que practican diferentes actividades de recreo

Post written by Bella Harris, Discovery Agent.

Daily Discovery: Nature Among Us – Recreators

Use your scientific skills to research recreators around Fort Collins! All you need is a camera, a pen or pencil, and a love for exploration to be a recreation researcher. Below is a table to check off different recreator sightings around Fort Collins. Try to find as many as you can! You can print this table or simply use it as an online guide. When you finish, share a picture of your table and pictures from your natural place adventures on our social media pages listed below!

Here are some recommendations for natural places to look for recreators:
● Lee Martinez Park
● Fort Collins City Park
● Spring Park
● Lory State Park
● Coyote Ridge Natural Area
● Check out here for more natural places to explore!

Instructions:

  1. Put a check by every plant you find! Or fill out your own recreator discovery at the bottom of the table. You can also document your discoveries on a piece of paper.

Please take about a week to fill out this worksheet. When you have completed as much of the table as possible, please take a photo of it! Be sure to photograph your exploration throughout natural places in Fort Collins, too!

You can upload your photos and share your adventures on the museum’s Facebook page. When creating your Nature Among Us post, please include a photo of your plants chart/list, photos of the natural places you visited, and a short description of where you went, what you saw, and how many times you explored. And don’t forget to use the hashtag #NatureAmongUs! You can also email your research results to Bella Harris.

Each week, we’ll highlight the work you have done! Looking for more adventure? Explore wildlife, plants, and pollinators with past Daily Discovery: Nature Among Us activities, available on the museum’s website at fcmod.org/blog.

Want to download these directions? Click here for a handy PDF!

Follow along with our Daily Discovery! Click here for all activities that you can do at home.

Learn more about local recreators!

Image Creidt: mtbproject.com

Traducido por Károl de Rueda y Laura Vilaret-Tuma.

Descubrimiento en casa: La naturaleza entre nosotros – personas que practican diferentes actividades de recreo

¡Usa tus habilidades científicas para investigar y observar a las personas que practican diferentes actividades de ocio en tu área o en los alrededores de Fort Collins! Solo necesitas una cámara, algo para escribir, y el entusiasmo para explorar y convertirte en un/a investigador/a del recreo. Debajo encontrarás una tabla para marcar avistamientos de personas haciendo diferentes actividades a tus alrededores. ¡Intenta encontrar tantas como puedas! Imprime esta actividad o simplemente úsala como una guía. Cuando termines, ¡comparte fotos de tus aventuras en nuestras redes sociales!

Les recomendamos estos espacios naturales en Fort Collins:
●Parque Lee Martinez (Lee Martinez Park)
● Parque de la ciudad de Fort Collins (Fort Collins City Park)
● Parque de la primavera (Spring Park)
● Parque Estatal de Lory (Lory State Park)
● Área Natural de la cresta del coyote (Coyote Ridge Natural Area)
● Haz clic en el enlace ¡y encuentra más espacios naturales para explorar!

Antes de completar esta actividad, te invitamos a llenar una breve encuesta en tu propio idioma. Con tus respuestas, aprenderemos más sobre tus intereses y sobre las diversas formas en las que podríamos adaptar nuestros programas y actividades en el futuro. ¡Muchas gracias!

Instrucciones:

  1. Marca cada persona que veas practicando alguna de estas actividades. Si te topas con alguna otra que no se encuentra en esta lista, puedes nombrarla en los espacios de “nuevo descubrimiento” al final de la tabla, o también puedes documentar estas aventuras en cualquier hoja de papel o cuaderno.

Podrías completar esta actividad durante el curso de varios días. Cuando hayas terminado la mayor parte de la tabla, tómale una foto. También asegúrate de fotografiar tus exploraciones en los varios espacios naturales que visitaste en Fort Collins.

Puedes subir tus fotos y compartir tus aventuras en nuestra página de Facebook. Cuando estés escribiendo tu publicación, por favor incluye los resultados de la tabla más arriba, una pequeña descripción sobre los lugares a los que fuiste, lo que observaste, y el número de veces que visitaste un espacio natural. Podrías utilizar la etiqueta #NatureAmongUs.

Si quieres, también puedes mandar tus investigaciones por correo electrónico a Bella Harris. Durante cada semana, estaremos  resentando estos trabajos ¡incluyendo el tuyo! a través de las redes sociales.

¿Buscas más aventuras? Explora la vida silvestre, plantas, y polinizadores en las actividades anteriores de “La naturaleza entre nosotros,” disponible en nuestro sitio web: fcmod.org/blog.

¿Te gustaría descargar esta actividad? Haz clic aquí para obtener un archivo PDF.

Para encontrar actividades, ideas y mucho más descubrimiento en casa, ¡síguenos!

Continue Reading

Fourth of July Celebrations in Colorado

Post written by Alex Ballou, Marketing Assistant.

Fourth of July Celebrations in Colorado

Knights of Columbus float in parade in Fourth of July Parade, Denver, Colorado. From Frank McCafferty scrapbook. Circa 1919.


William Clifford “Cliff” Brollier in front of the old Elks Building at the corner of Walnut and Linden Streets, Fort Collins, Colorado. Photo taken during the July 4 Celebration. The photo was donated by Doris (Brollier) Greenacre. Circa 1913.


Festive Fourth: Sara Hunt, Jill Kusa and Emma Payton join hands to dance to the sounds of Liz Masterson and band during Fourth of July events at City Park. Fort Collins, Colorado. Circa 1993.


Japanese men with parasols marching in Fourth of July Parade in Denver, Colorado. From Frank McCafferty scrapbook. Circa 1919.


Fourth of July parade in Denver – two women with parasols in floral decorated car. From Frank McCafferty scrapbook. Circa 1919.


Similar features adorn the miniature Statue of Liberty at City Park and Rocky Mountain High School senior Chris Olson, who wore his hair in “liberty spikes” during the Fourth of July celebration. Fort Collins, Colorado. Circa 1989.


Spectators and runners enjoy the Fourth of July Firecracker Five race near Horsetooth Reservior. (The Triangle Review, 1979/07/08, p.2)


Fireworks stand in semi-truck trailer near Fort Collins, Colorado. Circa 1979.


Local history lives here. Like us on Facebook to see more historical images and artifacts. Archival images are available for research, purchase, and more through the online Fort Collins History Connection website.

Continue Reading

Daily Discovery: Paper Plate Sundial

Post written by Sierra Tamkun, Learning Experiences Manager.

Daily Discovery: Paper Plate Sundial

Here comes the Sun… to tell us the time! Our closest star keeps Earth warm so life can grow and holds our whole solar system together! And before the invention of the mechanical clock, people used the Sun’s movement across the sky to tell time using sundials. Make your own sundial and test the oldest time-measuring tool for yourself!

Supplies:
• Paper plate
• Pencil
• Ruler
• Markers, crayons, or colored pencils
• Assorted craft supplies – stickers, glitter, pom poms, buttons, etc.

Instructions:
1. Flip your paper plate so the bottom is facing up. Write a “12” at the top of your plate.
2. Write a “6” along the bottom of your plate, directly below the “12.” Add a “3” along the right side, and a “9” on the left, directly across from each other.
3. Use the sharpened end of your pencil to poke a hole through the middle of the plate. Push the pencil all the way through.
4. Decorate the face of your sundial! Draw with markers or crayons, add color and shapes, glue on glitter, buttons, or attach stickers!
5. Take your paper plate and pencil outside on a sunny day! Place the plate on the ground with the “12” pointed North.
6. Place your pencil in the center hole so it is standing up with a slight tilt towards true North.
7. Use a clock to make sure the pencil shadow points to the correct time – you may need to rotate the plate slightly.
8. Now watch – as the sun moves across the sky, so does the pencil’s shadow on the sundial, showing the time throughout the day!

Want to download these directions? Click here for a handy PDF!

Follow along with our Daily Discovery! Click here for all activities that you can do at home.

Image credit: Rangerrick.com

Educational opportunities like this are supported in part by Fort Fund.


Continue Reading

Daily Discovery: Nature Among Us – Pollinators/ Descubrimiento en casa: La naturaleza entre nosotros – los polinizadores

Post written by Bella Harris, Discovery Agent.

Daily Discovery: Nature Among Us – Pollinators

Use your scientific skills to research pollinators around Fort Collins! All you need is a camera, a pen or pencil, and a love for exploration to be a pollinator researcher. Below is a table to check off different pollinator sightings around Fort Collins. Try to find as many as you can! You can print this table or simply use it as an online guide. When you finish, share a picture of your table and pictures from your natural place adventures on our social media pages listed below!

Here are some recommendations for natural places to look for pollinators:
● Butterfly Woods Natural Areas
● Soapstone Prairie
● Cathy Fromme Prairie Natural Areas
● Gardens on Spring Creek
● North Shields Ponds Natural Area
● Check out here for more natural places to explore!

Instructions:

  1. Put a check by every pollinator you find! Or fill out your own pollinator discovery at the bottom of the table. You can also document your discoveries on a piece of paper.

Please take about a week to fill out this worksheet. When you have completed as much of the table as possible, please take a photo of it! Be sure to photograph your exploration throughout natural places in Fort Collins, too!

You can upload your photos and share your adventures on the museum’s Facebook page. When creating your Nature Among Us post, please include a photo of your pollinator chart/list, photos of the natural places you visited, and a short description of where you went, what you saw, and how many times you explored. And don’t forget to use the hashtag #NatureAmongUs! You can also email your research results to Bella Harris.

Each week, we’ll highlight the work you have done! Stay tuned for next week’s Daily Discovery, where we will explore ourselves in Nature Among Us: Recreators.

Traducido por Károl de Rueda y Laura Vilaret-Tuma.

Descubrimiento en casa: La naturaleza entre nosotros – los polinizadores

¡Usa tus habilidades científicas para investigar los polinizadores que viven en tu área o en los alrededores de Fort Collins! Solo necesitas una cámara, algo para escribir, y el entusiasmo para explorar y convertirte en un/a investigador/a de estos insectos especiales. Debajo encontrarás una tabla para marcar avistamientos de polinizadores a tus alrededores. ¡Intenta encontrar tantos como puedas! Imprime esta actividad o simplemente úsala como una guía. Cuando termines, ¡comparte fotos de tus aventuras
en nuestras redes sociales!

Les recomendamos estos espacios naturales en Fort Collins para buscar polinizadores:
● Área natural de los bosques de mariposas (Butterfly Woods Natural Area)
● Pradera de piedra de jabón (Soapstone Prairie Natural Area)
● Área natural de la pradera de Cathy Fromme (Cathy Fromme Prairie Natural Area)
● Los jardines de Spring Creek (Gardens on Spring Creek)
● Área natural de los estanques de North Shields (North Shields Ponds Natural Area)
● Haz clic en el enlace ¡y encuentra más espacios naturales para explorar!

Antes de completar esta actividad, te invitamos a llenar una breve encuesta en tu propio idioma. Con tus respuestas, aprenderemos más sobre tus intereses y sobre las diversas formas en las que podríamos adaptar nuestros programas y actividades en el futuro. ¡Muchas gracias!

Instrucciones:

  1. Marca cada polinizador que veas. Si te topas con algún otro que no se encuentre en esta lista, puedes nombrarlo en los espacios de “nuevo descubrimiento” al final de la tabla, o también puedes documentar estas aventuras en cualquier hoja de papel o cuaderno.

Podrías completar esta actividad durante el curso de varios días. Cuando hayas terminado la mayor parte de la tabla, tómale una foto. También asegúrate de fotografiar tus exploraciones en los varios espacios naturales que visitaste en Fort Collins.

Puedes subir tus fotos y compartir tus aventuras en nuestra página de Facebook. Cuando estés escribiendo tu publicación, por favor incluye los resultados de la tabla más arriba, una pequeña descripción sobre los lugares a los que fuiste, lo que observaste, y el número de veces que visitaste un espacio natural. Podrías utilizar la etiqueta #NatureAmongUs.

Si quieres, también puedes mandar tus investigaciones por correo electrónico a Bella Harris. Durante cada semana, estaremos  resentando estos trabajos ¡incluyendo el tuyo! a través de las redes sociales.

Mantente sintonizado con nuestro próximo Descubrimiento en casa, titulado “La naturaleza entre nosotros: los recreadores.”

¿Te gustaría descargar esta actividad? Haz clic aquí para obtener un archivo PDF.

Para encontrar actividades, ideas y mucho más descubrimiento en casa, ¡síguenos!

Continue Reading

Daily Discovery: “On One Flower” Paper Flower Craft/Descubrimiento en casa: “Sobre Una Flor:” Flor de papel

Post written by Sierra Tamkun, Learning Experiences Manager.

Daily Discovery: On One Flower Paper Flower Craft

Follow along with FCMoD’s live stream Storytime in the Home: On One Flower. Then, make your very own paper flower garden!

Supplies:

• Paper cupcake liners
• Markers, crayons, or colored pencils
• Blue and green construction paper
• Glue
• Assorted craft supplies:

  • Beads
  • Chenille stems
  • Bits of colored paper

Instructions:

1. Choose 3-4 cupcake liners to be your flowers. Color the liners to make your flowers brighter!

2. Using scissors, cut lines along the edges of your cupcake liners to make flower petals.

3. Glue your flowers onto the blue construction paper.

4. Cut stems and leaves out of the green construction paper and glue them to your blue paper sheet. If you don’t have green paper, you can draw your flower stems and leaves!

5. Decorate the center of your flower with different beads, chenille stems, or pieces of paper.

6. Draw some bugs and butterflies around your paper flower garden!

Want to download these directions? Click here for a handy PDF!

Follow along with our Daily Discovery! Click here for all activities that you can do at home.

Image credit: onelittleproject.com

Traducido por Károl de Rueda y Laura Vilaret-Tuma.

Descubrimiento en casa: Sobre Una Flor – Flor de papel

Sigue nuestro programa de transmisión en vivo “Cuentos en Casa” (Storytime in the Home) a través de las redes sociales. En esta ocasión te presentamos la historia llamada “Sobre una Flor” (versión en inglés). Después, ¡construye tu propio jardín de flores!

Artículos necesarios:

  • Marcadores, crayones o lápices de colores
  • Papel de colores incluyendo verde
  • Pegamento
  • Tijeras
  • Materiales para decorar: abalorios, brillantina, retazos de papel, etc.

Instrucciones:

  1. Para formar los pétalos de la flor, usa papel de colores y con las tijeras corta unas formas como la fotografía de arriba.
  2. Une tus pétalos con pegamento.
  3. Usando el papel verde, corta tallos y hojas para tus flores y pégalos debajo de la flor. Si no tienes papel verde, dibújalos y coloréalos.
  4. Decora el centro de las flores con abalorios, brillantina, retazos de papel o lo que quieras.
  5. Dibuja algunos insectos o mariposas para tu jardín.
  6. ¡Llena tu casa de alegría decorándola con tus flores coloridas!

¿Te gustaría descargar esta actividad? Haz clic aquí para obtener un archivo PDF.

Para encontrar actividades, ideas y mucho más descubrimiento en casa, ¡síguenos!

Educational opportunities like this are supported in part by Buell Foundation. Their support helps make access to early childhood education at FCMoD possible for everyone in our community.

Continue Reading

It’s National Pollinator Week! ?

Post written by Alexa Leinaweaver, Live Animal Husbandry Coordinator.

?It’s National Pollinator Week!

June 22-28, 2020, is the 13th annual National Pollinator Week!

What Are Pollinators?

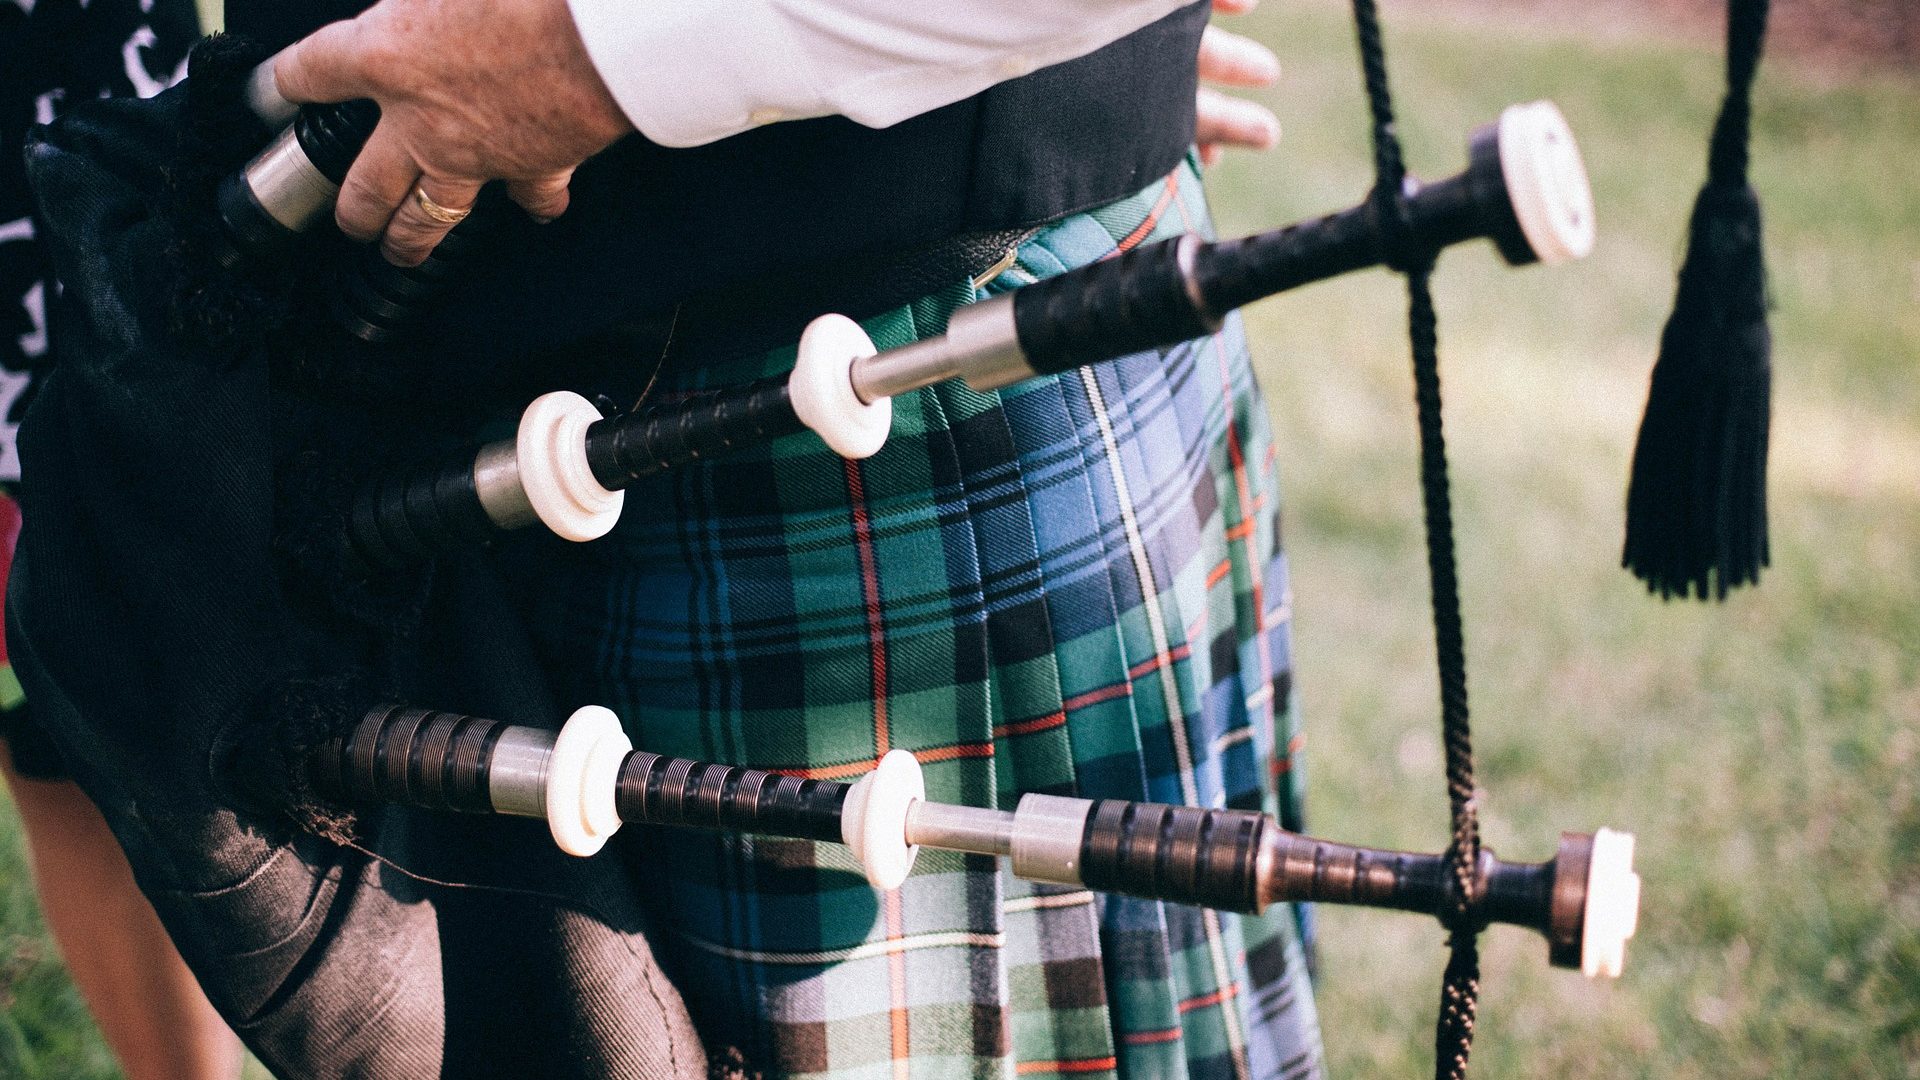
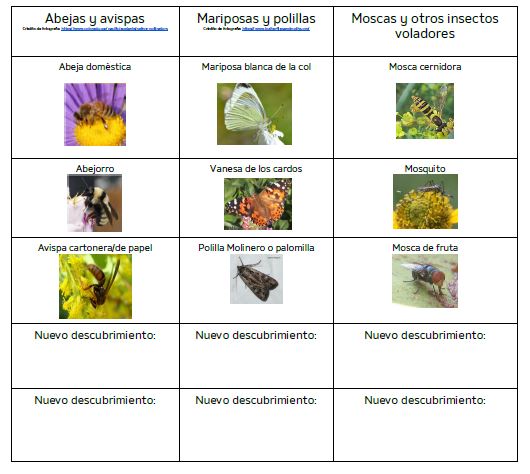
Pollinators are animals that move pollen from one flower to another flower of the same species in the first step toward the plant reproducing. While pollinators are primarily insects (bees, beetles, flies, moths, butterflies), there are also some birds and small mammals that pollinate plants too.

More than 70% — and possibly as much as 90%! — of flowering plants are dependent on pollination for creating seeds and fruit. It is estimated that one out of every three bites of food you eat was made possible by animal pollinators!

Many of the animals that pollinate are in decline. Pollinator habitats are shrinking or getting destroyed so they have no space to live or feed. In addition, overuse of pesticides, environmental pollution, and climate change are all adding risks to these animals.

Pollinators in Colorado

In Colorado, we have a wide range of habitats and extreme changes in altitude – different bees will thrive in each area. Because of that variety of habitat, Colorado is home to more than 900 species of bees! There are more than 200 bees in Larimer County alone. The smallest bee in Colorado is the Miner Bee (Perdita salacis) at 3.5mm/0.1in; the largest is the Nevada Bumblebee (Bombus nevadensis) at 26.5mm/1in. Colorado bees are colorful, too! Different species may be the usual yellow and black, or range to red, orange, green, blue, or brown.

Most bees in Colorado (and the rest of the world too) are solitary bees that don’t live in a colony like the familiar honeybee. Most of these solitary bees are ground nesters, digging burrows in the soil or using abandoned rodent burrows. Some of the bees here are cavity nesters, finding holes or cavities in twigs or logs.

In Colorado, bees are responsible for pollinating 80% of the crops in our state.

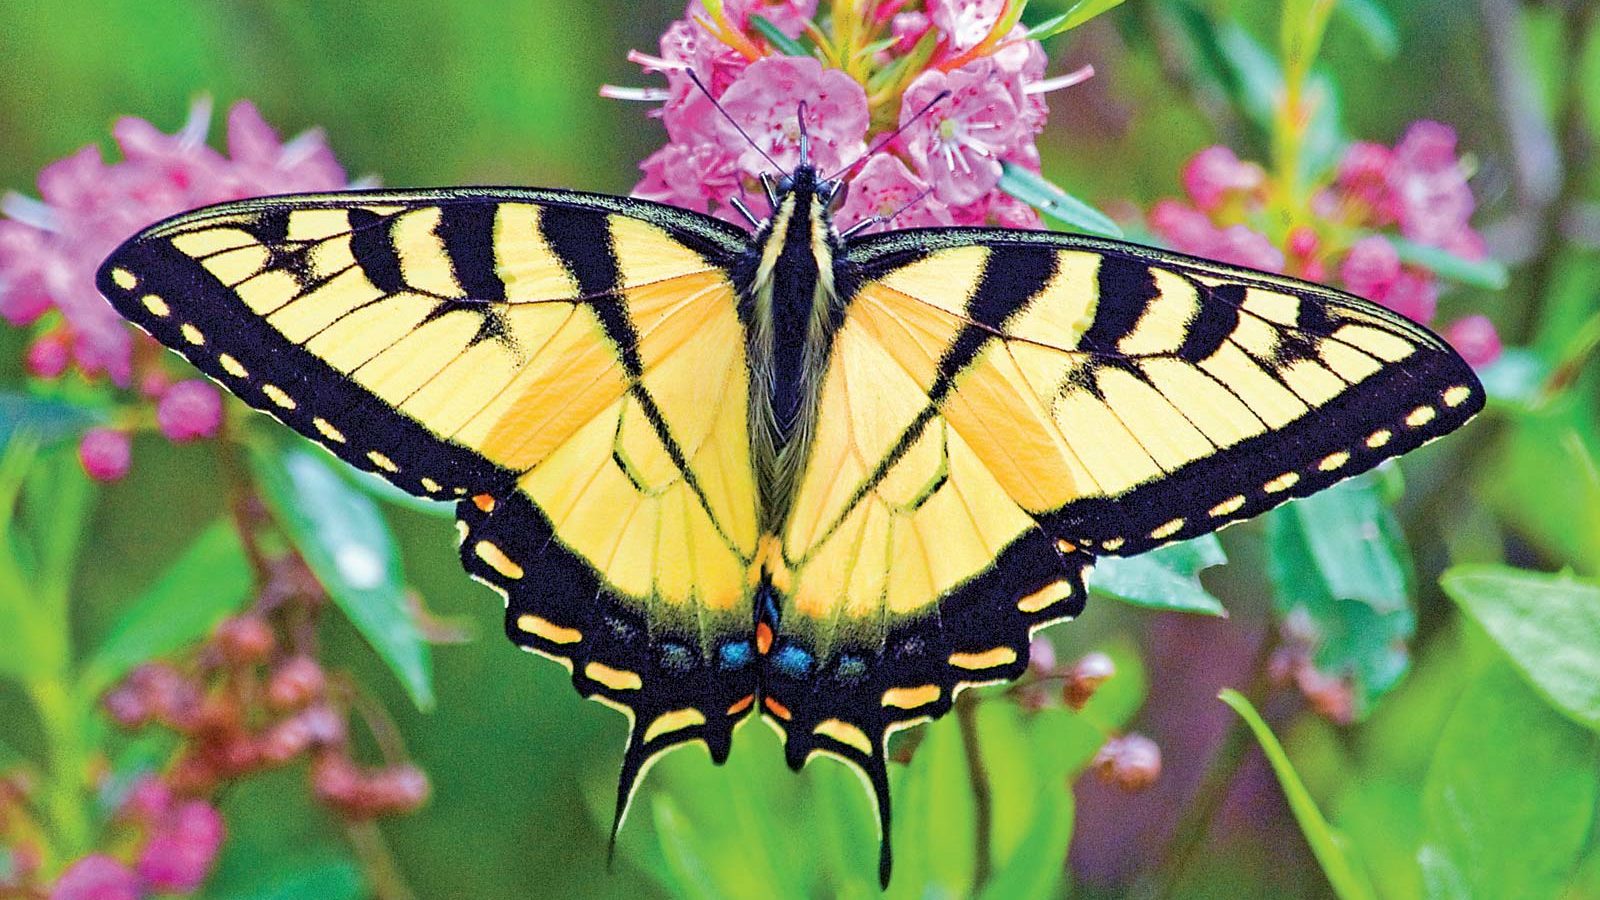
In addition to bees, other pollinators in Colorado include approximately 250 species of butterfly and more than 1,000 species of moth. There are also 11 species of hummingbird that migrate through the state from April through September.

How can you help pollinators?

Learn more about the pollinators in the space where you live. Spend some time outside and observe the animals that are visiting your garden. What kinds of animals do you see? What colors are they? How do they behave as they visit flowers?

Create good habitats for pollinators around your home. Whether you have acres of land or just a window box, you can help pollinators by offering them food and shelter. Plant a variety of flowering plants (preferably native – CSU has a great example list of native plants for pollinators) that offer food and nesting space. Provide several different kinds of blooming plants near each other, and use plants that have different bloom times, so that flowers are available to pollinators from early spring through late fall. Plant in sunny locations that are protected from the wind.

Don’t “clean up” your yard in the fall. Leave all the dormant or dead plants alone rather than trimming them back for the winter season — cavity nesting bees and other pollinating insects will use them as a safe home during the cold weather. Leave some leaf litter around for butterflies and moths to use as insulation over the winter, rather than raking it all up and dumping it in the landfill. If you can include materials in your yard such as logs or wood nesting blocks, you provide space for species that nest in wood to survive the snow. Leave some of the ground uncovered (i.e. don’t put mulch everywhere) for the native bees that nest in the bare dirt for the winter.

Reduce use of chemicals for controlling weeds and pests, as these can hurt or kill beneficial pollinators as well.

Protect natural habitat.

 Share what you know. Talk to your friends and family about what you have learned about pollinators and how and why you are helping them. Talk to your local and state government about how important it is to protect pollinators.


Continue Reading

Daily Discovery: Explore your State – Spelunking!

Post written by Hannah Curtis, Education Assistant.

Daily Discovery: Explore your State – Spelunking!

The recreational past-time hobby of cave exploration! It’s not every day you get to explore around in a dark, musky, million-year-old, nature made cavern, but when you do, you may be surprised what you see inside! Let’s explore together the history of caves in Colorado, and learn how they were formed!

History of Caves!

Spelunking, or caving, has been a hobby of enthusiasts as early as 1895 and became a part of important scientific explorations and research. Through caving, we know more about geological process and ecosystem science. Cave environments are fragile and animals that live in them can be easily disturbed. Cave formations can be damaged by the lightest touch and even one’s breath. Cave dwelling species such as cave shrimp and bats thrive in the constant temperature and humidity of caves and bats will use caves to hibernate during the winter season. Too much human contact inside caves with these species can be damaging to the cave environment and these vulnerable species.

You can visit a variety of caves throughout Colorado, but Cave of the Winds and the Glenwood Caverns are historically fascinating and beautiful. Cave of the Winds was founded in 1881 by two brothers, George and John Pickett, but the cave systems are millions of years old! After it’s discovery and continued excavation, tours of the cave began to the public and even electricity was installed in 1907. These caves are one of Colorado’s oldest and famous attractions!

Inside Iron Mountain, Glenwood Caverns is more than 16,000 feet long, and was opened to visitors in 1895 by Charles W. Darrow and his family, who homesteaded at the top of the mountain near the cave entrance.

Cave Formation!

The formation of caves is called speleogenesis, and it can happen under a variety of geological processes. They can be formed through chemical or water erosion, by tectonic forces, microorganisms, or pressure and atmospheric changes. The types of caves most often formed and many of the ones found in Colorado are called Karst Caves. These caves are made from limestone, which dissolves in acidic solutions such as groundwater that hold organic acids. Over time, this acidic ground water seeps through cracks, faults or joints in the ground dissolving the limestone and eventually enlarges into a cave.

This process continues inside the cave forming mineral deposits called speleothems. There are many different types of speleothems, some you may be familiar with. Stalactites are mineral deposit that form on the roof of caves when dissolved calcium bicarbonate (dissolved limestone) drips and crystalizes back into limestone, similar to how an icicle is formed in the winter. A stalagmite may form underneath a stalactite when the drippings fall to the cave floor and deposits the limestone into a cone shaped mound. You can usually find stalactites and stalagmites together, and they may even grow so large that they may combine into one big column. Other speleothems are flowstones, helictites, or soda straws, which all form in unique way based on how the calcium carbonate flows through down cave walls and ceiling.

Grow your own Stalactite and Cave Diorama!

Supplies:

Stalactite Formation

  • 2 plastic cups
  • String or yarn
  • Epsom salt, sugar or baking soda
  • Water
  • Paper

Cave Diorama

  • Cardboard box
  • Modeling clay
  • Colored paper
  • Natural elements (rocks, stones, grass, dirt)
  • Markers
  • Recycled materials (egg cartons, bottle caps, etc).
  • Glue or tape

Instructions:

  1. To begin forming your stalactite, heat up a quart of water on a stove. Make sure to have guardian supervision for this step.
  2. Once hot, pour your choice of Epsom salt, sugar or baking soda to the pot, stirring to dissolve. Continue adding gradually until you have dissolved 3 cups of your solvent. (Note: you can dissolve without hot water, this speeds up the process and allows you to dissolve more into your solution).
  3. Pour equal parts into the two cups.
  4. Cut a piece of string around 1 foot.
  5. On top of a piece of paper or paper plate, drape each end of the yarn into the cups so that each end is completely submerged. You can weigh your string down using a paper clip.
  6. Between the cups allow the string to slack in the middle creating a dip, this is where your stalactite will form forming.
  7. Over the course of a few hours to a few days the water will move from the cups to the string and begin dripping and crystalizing.
  8. If you wish, begin constructing your cave using materials you have handy in your home. If you wish to put your newly forming stalactite into your cave, use the flaps of a cardboard box to hide the cups and only your stalactite showing.

Want to download these directions? Click here for a handy PDF!

Follow along with our Daily Discovery! Click here for all activities that you can do at home.

Image Credit: uncovercolorado.com

Educational opportunities like this are supported in part by Fort Fund.


Continue Reading