Post written by Lea Mikkelsen, Early Childhood Coordinator.
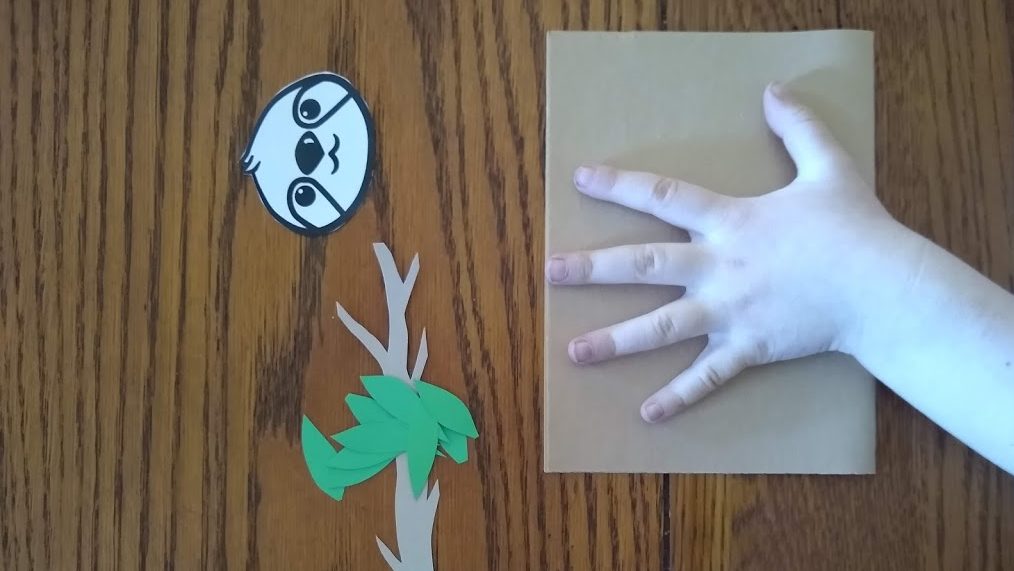
Daily Discovery: Over on a Mountain Diorama Craft
Follow along with FCMoD’s live stream Storytime in the Home: Over on a Mountain. Then take a walk in your neighborhood to see if you can find a good view of our very own Rocky Mountains. Look around for twigs, small stones, leaves, and dry grass for your Mountain Diorama.
Supplies:
- A paper plate OR a piece of cardboard
- Craft glue
- Scissors
- Craft paint OR scraps of colored paper
- Egg carton
- Natural materials such as twigs, stones, leaves, or dry grass
- A mountain animal Tip: if you can’t print out one of animals to cut out, try cutting one out a magazine or drawing one yourself!
Instructions:
- Place all your supplies on a clear surface with plenty of room to create.
- Cut out a mountain range from the egg carton bottom. Try using the pointy parts in the middle for tall peaks, or the round parts that hold the egg.
- Use a piece of cardboard or a paper plate to build your scene. Glue the egg carton mountains down.
- Use paint or little scraps of craft paper to decorate the scene. Green makes lovely plants, blue can make a nice river, and even white can make some stunning snowcapped peaks!
- Glue in your natural materials wherever you want them to be.
- Cut out your mountain animal and glue it into your scene! Tada!
Want to download these directions? Click here for a handy PDF!
Follow along with our Daily Discovery! Click here for all activities that you can do at home.
Image Credit: Dawn Publishing
Traducido por Károl de Rueda y Laura Vilaret-Tuma.
Descubrimiento en casa: Sobre una Montaña- maqueta de montañas
¿Sabías que en el museo contamos con programas de transmisión en vivo presentados en nuestras cuentas de redes sociales? Uno de ellos es Cuentos en Casa (Storytime in the Home), y en esta ocasión, te presentamos “Sobre una montaña” (Over on a Mountain). Inspirándonos en el libro y en las bellas Montañas Rocallosas, busca palitos, piedritas, hojas y hierba seca en tu patio o en algún otro lugar para crear una maqueta de montañas.
Artículos necesarios:
- Plato desechable de papel o un cartón
- Pegamento
- Tijeras
- Pinturas o retazos de papel colorido
- Materiales naturales como ramitas, palitos, hojas, o hierba seca
- Cartón de huevos vacío
- Juguetes de animales que vivan en las montañas (también podrías imprimir los dibujos de más abajo, recortar animales de una revista, ¡o dibujarlos!
Instrucciones:
- Usando la mitad inferior del cartón de huevos, construye un rango de montañas. Para formar cimas variadas, corta las partes puntiagudas del cartón o las partes redondas que sostienen el huevo.
- Ensambla y pega el rango de montañas sobre el plato desechable o cartón.
- Decora tu escena natural con pintura o retacitos de papeles de varios colores. El color verde sirve muy bien para la vegetación, azul para un río, y si quieres las cimas de tus montañas cubiertas de nieve, usa blanco.
- Sigue pegando los materiales naturales a tu gusto.
- Recorta los animales de tu preferencia y sitúalos en tu maqueta. ¡Listo! Aprende mientras te diviertes.
¿Te gustaría descargar esta actividad? Haz clic aquí para obtener un archivo PDF.
Para encontrar actividades, ideas y mucho más descubrimiento en casa, ¡síguenos!
Educational opportunities like this are supported in part by Buell Foundation. Their support helps make access to early childhood education at FCMoD possible for everyone in our community.

Continue Reading


