Post written by Lea Mikkelsen, Early Childhood Coordinator.
Daily Discovery: Squishy Soap
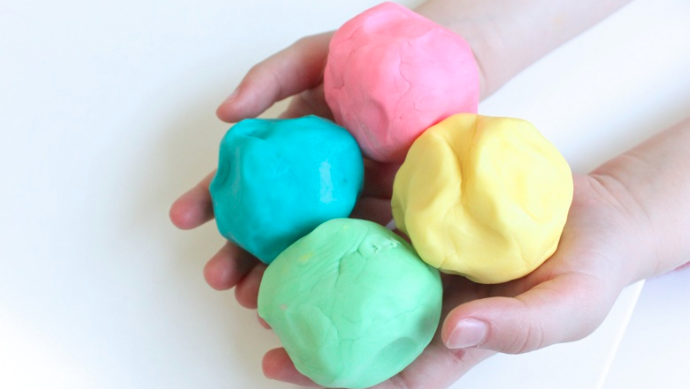
Use your rockin’ math skills to measure out different ingredients and make your own soap! Use your squishy soap to mold different shapes and keep it by the sink. Sing some songs or practice counting to 20 while you scrub!
You’ve never had this much fun washing your hands!
Supplies:
- ‘1/4 cup of cornstarch
- 2 tablespoons pure liquid castile soap (optional: try scented!)
- 2 teaspoons of oil (vegetable, almond, coconut)
- Optional – 1 to 2 drops of food coloring for fun!
- Bowl
- Spoon
- Tray
Instructions:
- Carefully measure each of the ingredients into a bowl and mix with a spoon.
- Dump the mixture onto a clean tray and knead until the soap is smooth and not sticky!
- To use, pull off a small piece of the soap, add water, and scrub for 20 seconds!
Tip: if soap is too sticky add a little more corn starch, if dough is too crumbly add a little more oil. Keep kneading and keep experimenting until you get it right!
Want to download these directions? Click here for a handy PDF!
Follow along with our Daily Discovery! Click here for all activities that you can do at home.
Photo Credit: https://mamapapabubba.com/
Traducido por Károl de Rueda y Laura Vilaret-Tuma.
Descubrimiento en casa: Jabón plastilina
Usa tus habilidades matemáticas para medir diferentes ingredientes y hacer ¡tu propio jabón plastilina! Moldéalo en diferentes formas divertidas y creativas, y úsalo la próxima vez que tengas que lavarte las manos, recordando el cantar algunas canciones o contar hasta 20 mientras las limpias. ¡Nunca ha sido tan divertido lavarse las manos!
Artículos necesarios:
- ¼ taza de fécula de maíz
- 2 cucharadas de jabón de castilla liquido (con o sin fragancia)
- 2 cucharaditas de algún aceite (por ejemplo, aceite vegetal, aceite de almendras, aceite de coco, etc.)
- Opcional – 1 o 2 gotas de colorante para alimentos
- Un recipiente para mezclar los ingredientes
- Una cuchara
- Una bandeja
Instrucciones:
- Une todos los ingredientes en el recipiente, y mézclalos con la cuchara hasta que todo esté incorporado y se forme una “masa.”
- Coloca esta mezcla sobre una bandeja limpia y comienza a amasarla hasta que llegue a una consistencia lisa y no pegajosa.
- Si quieres usar esto para lavarte las manos, simplemente arranca un pedacito del jabón plastilina, córrelo bajo el agua, ¡y comienza a frotarlo entre tus manos por 20 segundos!
Nota: Si la masa está muy pegajosa, agrégale un poco más de fécula de maíz. Si la masa está muy firme o desmoronadiza, agrégale un poco más de aceite. ¡Sigue mezclando y experimentando hasta que estés contento/a con la consistencia de tu jabón!
¿Te gustaría descargar esta actividad? Haz clic aquí para obtener un archivo PDF.
Para encontrar actividades, ideas y mucho más descubrimiento en casa, ¡síguenos!