Post written by Forrester Tamkun, Music & Sound Lab Assistant.
Daily Discovery: Women Who Rock
Throughout history there has always been amazing and strong women. Here are a few such woman who made their mark in the Music Industry.
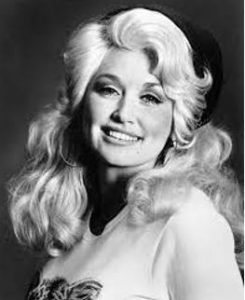
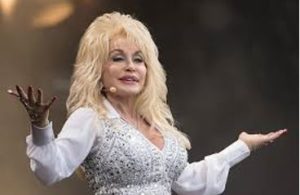
Dolly Parton
Dolly Rebecca Parton was born on January 19th, 1946, in Locust Ridge, Tennessee. She was the fourth of twelve children in a poor farming family. However, from a young age she showed a high aptitude toward music and would ultimately pioneer the emergence of fusing the genres of country and pop. Upon high school graduation, Dolly set off toward the music Mecca of Nashville, where here musical career began to blossom.
In Nashville, Parton became the protégée of Porter Wagoner, a star of the Grand Ole Opry. Working with Wagoner gathered attention toward Parton and she quickly became one of country’s most popular singers. Parton launched her solo career in 1974 and released her critically acclaimed song “Jolene.” She was chosen as female singer of the year by the Country Music Association (CMA) for 1975 and 1976. In 1978, Dolly began expressing her poppy side with her song “Here You Come Again,” which won her a Grammy. That same year she was declared entertainer of the year by CMA, speaking odes to her convergence of the two musical styles.
Click here to listen to “Jolene” by Dolly Parton.
Parton would continue to win Grammy’s and awards throughout her musical career and was inducted in 1999 into the Country Music Hall of Fame. Aside from heavy success in the musical realm, Parton has acted in several successful films as well as made guest appearances on many films and television shows.
She has also notably been very charitable in her life as well. In 1988 she created the Dollywood Foundation which aimed to provide educational resources and inspiration for children. She was named a Living Legend by the Library of Congress in 2004 for her enrichment of American cultural heritage.
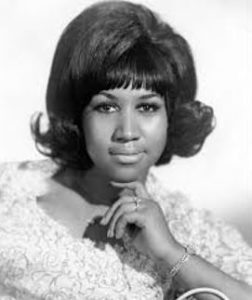
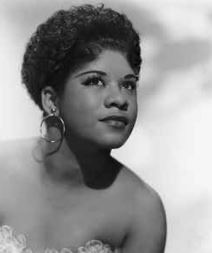
Aretha Franklin
Perhaps one of the most distinguishable female voices in music is Aretha Franklin. The Queen of Soul was born Aretha Louise Franklin in Memphis, Tennessee, on March 25th, 1942. Her father, C.L. Franklin was a Baptist minister at the New Bethel Baptist Church in Detroit for over thirty years. He was known to have a “Million-Dollar Voice” which seemingly passed onto Aretha as she grew up singing in church and learning to play the piano by ear, culminating in complete understanding of the correct tones and pitches.
Aretha signed with Columbia Records at the mere age of 18 and released her first song and album, reaching up to 10 on the billboard. In 1966 she signed with Atlantic Records and released her monumental hit song “Respect.” She released three more top ten hits through Atlantic Records and won her first two Grammy’s. Not only did Aretha achieve musical success, but she was consistently a voice that spread the importance of equality, peace, and justice for Americans.
Click here to listen to “Respect” by Arethra Franklin.
Aretha set history as the first woman to be inducted in the Rock ‘N Roll Hall of Fame. Her 1972 album, Amazing Grace, is the best-selling gospel album of all time. Franklin collaborated with countless other musicians throughout her life, including George Michael, Elton John, and James Brown. She too appeared in film, most famously alongside Ray Charles and James Brown in the hit feature film The Blues Brothers, in 1980.
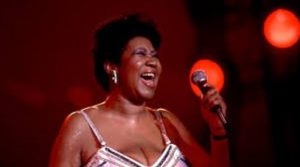
The Queen of Soul will always resonate as one of the most powerful voices in music history. Her music and what it stood for will echo the dire importance of racial equality and justice in society.

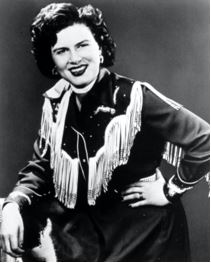
Joan Jett
Aretha set history as the first woman to be inducted in the Rock ‘N Roll Hall of Fame. Her 1972 album, Amazing Grace, is the best-selling gospel album of all time. Franklin collaborated with countless other musicians throughout her life, including George Michael, Elton John, and James Brown. She too appeared in film, most famously alongside Ray Charles and James Brown in the hit feature film The Blues Brothers, in 1980.
Click here to listen to “I Love Rock n’ Roll by Joan Jett.
The success of The Runaways helped Joan Jett go solo in the late 1970’s. However, it was the band she would form after her solo career that would really help Jett take off in music history. In 1980, Jett formed the group Joan Jett & the Blackhearts. The band’s most famous song, “I Love Rock N’ Roll,” is become a staple in the history of the genre. It was released in 1981 and was the top song on the Billboard charts for seven weeks straight. It is in fact Billboard’s number 56th song of all time and was inducted into the Grammy Hall of Fame in 2016.

Joan Jett herself was inducted into the Rock N’ Roll Hall of Fame in 2015. Her albums have achieved either gold or platinum awards. On top of achieved monumental fame and success in the music, she is also an inspiration for other realms. She has consistently been a prominent feminist icon and animal activist throughout her life. She will forever be a symbol of Rock N’ Rock and feminine strength that helped push the fresh roots of rock music into Earth.

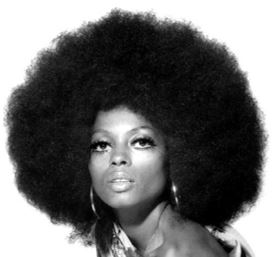
Joni Mitchell
Joni Mitchell was a Canadian experimental singer-songwriter who was once described as the “Yang to Bob Dylan’s Yin, equaling him in richness and profusion of imagery.” She was born on November 7, 1943, under the original name Roberta Joan Anderson, in Fort McLeod, Alberta, Canada. She studied art in her hometown until 1964 when she moved to Toronto. There she began performing at local clubs and coffeehouses, and had a brief manage to folksinger Chuck Mitchell. In 1967, Joni Mitchell relocated to New York City where she made her debut album, Songs to Seagull. Her first album was produced by David Crosby and was a massive success with much attention paid toward its maturity of lyrics.
With each following release Mitchell’s popularity and following grew. Clouds in 1969 won a Grammy for best folk performance and Blue in 1971 was her first million-selling album. Mitchell’s career has not slowed throughout her life. She has released a total of 19 studio albums and 3 live albums. She is without a doubt one of the first women in modern rock to achieve a longevity of critical recognition. She inspired countless artists including Bob Dylan, Prince, Suzanne Vega, and Alanis Morissette. She was inducted into the Rock N’ Roll hall of fame in 1997 and in 2002 won a Grammy Award for a lifetime achievement.
Click here to listen to “The Circle Game” by Joni Mitchell.
Follow along with our Daily Discovery! Click here for all activities that you can do at home.
Educational opportunities like this are supported in part by Bohemian.
![]()