Daily Discovery: Make your own Bee Buzzer!

Post written by Eisen Tamkun, Music Education Lead.

Daily Discovery: Make your own Bee Buzzer!

BZZZZZZZZZ! The bees are coming! Make your very own bee buzzer and rock out with these amazing pollinators.

Supplies:

  • Popsicle Stick
  • Tape- any will do!
  • Scissor
  • Index Card
  • Eraser Heads
  • Rubber Band
  • About two feet of string
  • Stapler
  • Color Pencils or Markers

Instructions:

  1. Take the index card and cut it into a square.
  2. Break out the color pencils and draw a bee on the index card.
  3. Once you’ve drawn your sweet honey bee, go ahead a staple
    the card to the popsicle stick.
  4. Next, tie and tape the string to the stick.
  5. Place the eraser heads on each end of the stick.
  6. Lastly, stretch the rubber band over each eraser.
  7. Voilà you have created your very own bee buzzer.

Take a firm grip of the string at about half way. Start swinging
building up speed until you hear you bee abuzzing.

Want to download these directions? Click here for a handy PDF!

Follow along with our Daily Discovery! Click here for all activities that you can do at home.

Educational opportunities like this are supported in part by Bohemian.

Continue Reading

Daily Discovery: Over on the Farm Finger Puppets

Post written by Lea Mikkelsen, Early Childhood Coordinator.

Daily Discovery: Over on the Farm Finger Puppets

Follow along with FCMoD’s live stream Storytime in the Home: Over on the Farm. Then grab your craft supplies and create some adorable farm finger puppets! Keep practicing your counting at home with the lovely flashcards featuring illustrations from the book.

Supplies:

  • Printed finger puppet activity sheet
  • Scissors
  • Crayons or markers
  • Glue (optional)

Instructions:

  1. Color the finger puppet activity sheet.
  2. Cut out the finger puppets.
  3. Cut a small slot to connect the paper ring that goes around your finger or use glue to close the ring.
  4. Have a farm animal finger puppet show! Tip: Try doing a video chat puppet show for your friends and family while you practice social distancing!
  5. Print out the additional coloring page and the farm animal flash cards to keep the discovery going!

Tip: Don’t have a printer? Try drawing and cutting out your own finger puppets from paper! Here is a tutorial!

Want to download these directions? Click here for a handy PDF!

Follow along with our Daily Discovery! Click here for all activities that you can do at home.

Image Credit: Arty Crafty Kids

Educational opportunities like this are supported in part by Buell Foundation. Their support helps make access to early childhood education at FCMoD possible for everyone in our community.

Continue Reading

Daily Discovery: Build Your Own Ball Run

Post written by Angela Kettle, School Programs Coordinator.

Daily Discovery: Build Your Own Ball Run

Missing the Ball Run at the museum? Sharpen those engineering skills, and use cardboard, paper, and whatever else you can find around your house to build your own version!

Supplies:

All supplies are optional – use what you have!

  • Large piece of cardboard or posterboard
  • Paper towel rolls
  • Cardstock paper
  • Hot glue
  • Duct tape
  • Scotch tape
  • Pipe cleaners
  • Marble
  • Yarn or string
  • Blank paper
  • Pencil

Instructions:

  1. Start by identifying a surface you can use to build your Ball Run on. For example, this might be a large piece of cardboard, or a piece of posterboard that you tape up on a wall (with an adult’s permission!).
  2. Gather up different supplies from around your house. Decide which supplies you would like to use for your Ball Run. Here are some ideas!
    a. Use paper towel tubes as slides for your ball. You can cut one paper towel tube into smaller tubes if you would like.
    b. Fold cardstock paper into thirds. Tape the top to make a triangular tube. If you don’t have cardstock paper, you can tape together several regular sheets of paper to make them thicker.
    c. Make your own tubes out of duct tape.
    d. Find other tube-shaped materials around your house!
    e. Find a marble to use for a ball. If you don’t have a marble, you can make a ball out of play-doh, clay, aluminum foil, or whatever else you can think of.
  3. . Keeping in mind the size of your surface, sketch your Ball Run. Where will your ball start and end? Which materials will you use for each portion? How will you make sure your ball has enough momentum to keep going until it has reached the end of the run?
  4. Using your sketch as a guideline, build your Ball Run! Lay it out so you can see it before you start attaching anything – that way, if you need to change anything, you can!
  5. Time to attach your pieces to your surface! There are lots of
    different ways to do this. You can use hot glue, tape, or one of the methods shown in the picture. Or, maybe, you’ll think of your own way!
  6. Try it! Place your ball at the top of your Ball Run. What  happens? Did it go as you expected? Why or why not? Make repairs as needed.
  7. Take a photo or video of your final project. With your adult’s
    permission, share it with us on social media using #DailyDiscovery. Great job, Engineer!

Want to download these directions? Click here for a handy PDF!

Follow along with our Daily Discovery! Click here for all activities that you can do at home.

Continue Reading

Daily Discovery: Map Making

Post written by Charlotte Conway, Public Programs Coordinator.

Daily Discovery: Map Making

Have you ever looked up your house on Google Maps? It can be pretty cool to see your own neighborhood from a different  perspective! You can also find all sorts of maps and photographs of your town from history through the local Archives and Collections at FCMoD! Check out maps from your own community, and then make a map of your own!

Supplies:

  • Graph paper or paper
  • Colored pencils
  • Pencils
  • Ruler

Instructions:

  1. Maps are a two-dimensional representation that records the natural and build world around them, usually from a “top-down” perspective. There are many different types of maps each with different uses and looks!
  2. Compare and contrast the maps provided from Fort Collins Museum of Discovery’s Archives and Collections. What do the maps have in common? What is different about them? How do the maps differ based on how people might use them? How do the maps make use of colors, symbols, or labels to communicate their meaning?
  3. Now, it’s time to start designing your map! First, select a place you would like to make a map of. It could be your own neighborhood, somewhere from a different city, or even a made-up place!
  4. Next, consider the purpose of your map. What is your map trying to communicate? Will it be a political or road map that focuses on man-made features? Will it be a physical map that shows natural features?
  5.  Now that you have your purpose in mind, plan out the other features of your map that will make it more effective for your users.
    a. Legend – This is a visual explanation of the symbols you use on your map. How will you show the contents of your world on your map? If you use symbols, how will people know what they represent?
    b. Scale – This is the relationship between distance on your map and the same distance you are trying to represent on the ground. How will you translate the scale of world into a map that will fit on the paper? How will people who see your map know how large your world really is?
    c. Labeling – This is how you will write labels so that they clearly identify the right features on your map. How will people know what your map is supposed to be showing? How will they know who made the map and when?
  6. Draw out your map. Get creative with your representation, but remember to keep your purpose in mind so that your map is useful too!
  7. Keep the exploration going! Did you know FCMoD houses artifacts and collections from Northern Colorado, including historic maps? Explore maps from Northern Colorado. Explore your town using the GPS applications on smart phones or Google Maps, and then explore the world! What will you discover?

Want to download these directions? Click here for a handy PDF!

Follow along with our Daily Discovery! Click here for all activities that you can do at home.

Photo Credit: BABYCCINO

Continue Reading

Enter the Zooniverse

Post written by Ben Gondrez, Digital Dome Manager.

Enter the Zooniverse

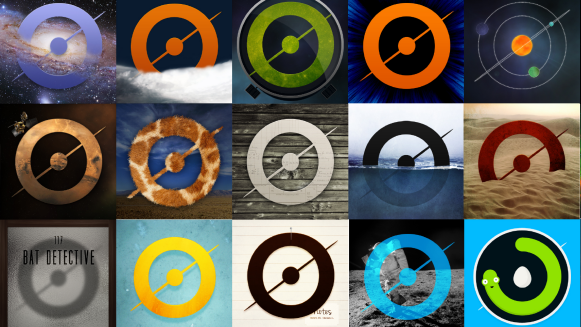
Have you ever wondered if there was an easy way to help scientists and researchers make new discoveries from your very own home? Well, whether you’ve had that thought or not, you can indeed be a vital participant in actual research through the Zooniverse! The Zooniverse is the world’s largest and most popular platform for people-powered research. By utilizing the power of volunteers – more than a million people around the world who come together to assist professional researchers – Zooniverse makes it easy for anyone, including you, to contribute to real academic research from their homes on their own computers. As many of us are spending more time than usual at home observing social distancing in response to COVID-19, now is the perfect time to become a citizen scientist and Zooniverse makes it easy for all ages of people to get involved. So how does Zooniverse work? Check out this short animation to learn more:

Ready to get started helping with real research projects from your own home? You can visit zooniverse.org to see all active projects including projects like Planet Four, a project exploring the surface and weather of Mar’s south polar region, or the project Bash The Bug, helping researchers find effective antibiotics to fight tuberculosis. Not sure where to start? Here are a couple of curated lists of projects and other links from Zooniverse to help you get started:

Designed for 5-12 year olds:

  • Curated list of age-appropriate Zooniverse projects for younger learners
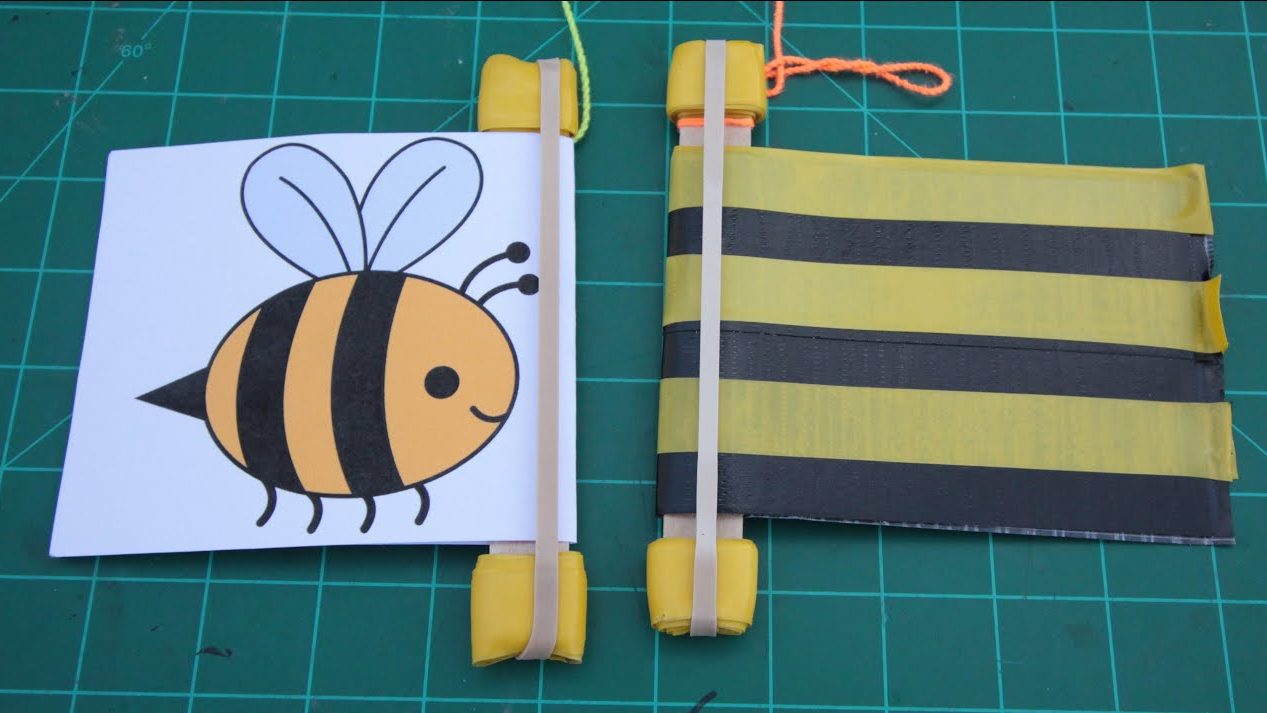
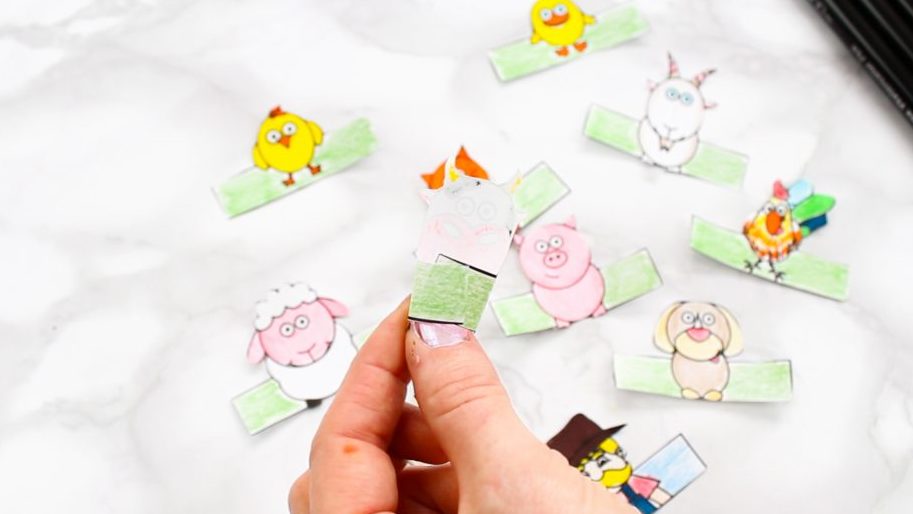
  • Zooniverse-based Activity for 5-12 year olds
  •  Classroom.zooniverse.org
    • Wildcam Labs
      • Designed for 11-13 year olds, but the content can easily scale down for younger audiences.
      • Great way to engage if you love looking at photos of wild animals and want to investigate ecological questions. The interactive map allows you to explore trail camera data and filter and download data to carry out analyses and test hypotheses.
      • Educators can set up private classrooms, invite students to join, curate data sets, and get access to the guided activities and supporting educational resources.
      • Individual explorers also welcome – you don’t need to be part of a classroom to participate. · Planet Hunters Educators Guide

Designed for 11-13 year olds:

Designed for teens and adults:

  • Curated list of Zooniverse projects
  • Zooniverse-based Lesson Plan for teens and adults
  • Classroom.zooniverse.org
    • Wildcam Labs
      • Designed for middle school classrooms, but the content can easily scale up for older audiences.
      • See description above.
    • Astro101 with Galaxy Zoo
      • Designed for undergraduate non-major introductory astronomy courses, but the content has been used in many high-school classrooms as well.
      • Students learn about stars and galaxies through 4 half-hour guided activities and a 15-20 hour research project experience in which they analyze real data (including a curated Galaxy Zoo dataset), test hypotheses, make plots, and summarize their findings.
      • Developed by Julie Feldt, Thomas Nelson, Cody Dirks, Dave Meyer, Molly Simon, and colleagues.
    • For both Wildcam and Astro101 Activities
      • Educators can set up private classrooms, invite students to join, curate data sets, and get access to the guided activities and supporting educational resources.
      • Individual explorers also welcome – you don’t need to be part of a classroom to participate.
  • Planet Hunters Educators Guide
    • Designed for 11-13 year olds, but the content can easily scale up for older audiences.
    • See description above.
  • Notes from Nature Activity
    • Designed for 11-13 year olds, but the content can easily scale up for older audiences.
    • See description above.
  • Snapshot Safari-based Lesson Plans and Interactive Timeline
    • Developed by University of Minnesota PhD student Jessica Dewey
  • Kelp Forest Ecology Lab
    • Through the Zooniverse FloatingForests.org project, researchers are striving to understand the impact of climate change on giant kelp forests, an indicator of the health of our oceans. In this lab, students analyze Floating Forest and other ocean data to explore their own research questions.
    • Developed by Cal State – Monterey Bay faculty Dr. Alison Haupt and colleagues
  • NEH Teacher’s Guide for Digital Humanities and Online Education
Continue Reading

Daily Discovery: Harness the Wind!

Post written by Hannah Curtis, Education Assistant.

Daily Discovery: Harness the Wind!

Wind! It doesn’t just blow silver tiles on the museum’s Wind Wall; it’s a natural renewable resource. Engineers develop ways to harness wind to help the modern and natural world. Build your own creation using the design process, materials in your home, and of course, the wind!

Supplies:

All supplies are optional – use what you have!

Pre-design supplies:

  • Scratch paper or graph paper
  • Writing utensil

Building Supplies

  • Plastic bottles and lids
  • Tin cans
  • Paper scraps or sticky notes
  • Pencils or pens
  • Straws
  • Disposable cups or containers
  • Cardboard
  • Yarn or string
  • Rubber bands
  • Natural materials (sticks or rocks)
  • Blank CD or floppy disks
  • Plastic spoons
  • Paper tubes
  • Old socks
  • Tissue paper
  • Scissors
  • Tape
  • Glue
  • Metal brads
  • Paper clips
  • Push pins
  • Magnets

Instructions:

  1. As an engineer, work through the design process to begin building! Follow the design process on the right, sketch out your design, and think creatively about what materials you can use inside your home.
    Use the following guiding questions to help you:
    a. What purpose will your design have? What is its function?
    b. Could your design be multifunctional?
    c. How will you ensure your design will hold up against heavy winds or other weather?
    d. How will you know your design was a success?
  2.  Test your design and adjust as necessary. Share your creation with family and friends through photos or videos!
  3. Wind isn’t the only renewable resource! What other renewable resources have helped other cultures and countries?
  4. Challenge yourself to build a new creation that reflects other sustainable energy sources! What do we utilize here in Fort Collins?

Want to download these directions? Click here for a handy PDF!

Follow along with our Daily Discovery! Click here for all activities that you can do at home.

Continue Reading

Daily Discovery: Make Your Own Bug Box

Post written by Lea Mikkelsen, Early Childhood Coordinator.

Daily Discovery: Make Your Own Bug Box

Creeping, crawling, flying, chirping… bugs are everywhere outside! Take a look down in the dirt and see if you can catch one for your very own bug observation box.

Supplies:

  • A clear plastic container. Tip: Try looking in your recycling! I used a produce container that had tomatoes in it. Try to find one without too many large holes.
  • Mesh or net with very small holes. Tip: I found a potato bag made of mesh.
  • Scissors
  • Tape
  • Insect, Myriapod, and Arthropod learning sheets

Instructions:

  1. Place all your supplies on a clear surface with plenty of room to work.
  2. Ask an adult for help with cutting the plastic or attaching the mesh to your container if you need it.
  3. Look at your container. Is there a lid or a way to open it to put your bug inside?
  4. Decide where to cut a hole for air. Tip: Some containers may already have a hole like my tomato container.
  5. Cut your mesh to fit the shape of the hole. Tip: I folded the mesh in half to make sure bugs could not get out!
  6. Use tape to attach the mesh to the container.
  7. Make sure there are no holes around the mesh or in the container that could let a bug out! Cover any
    big holes with a little extra tape.
  8. Go outside and fill your bug box with dirt, leaves, and sticks for your bug to climb on.
  9. Finally, catch a bug to observe in your bug box! Be sure you let them go back outside after a few hours.
  10. Learn about the differences between Insects, Myriapods, and Arthropods, on the learning sheets and try to determine what kind of bug you caught!

Want to download these directions? Click here for a handy PDF!

Follow along with our Daily Discovery! Click here for all activities that you can do at home.

Image credit: supersimple.com “Bug Hotel”

Continue Reading

Daily Discovery: Black-Footed Ferret Masks!

Post written by Hannah Curtis, Education Assistant.

Daily Discovery: Black-Footed Ferret Masks!

Stay connected to BFFs Stevie Nicks and Patty Ann while at home! Head over to our ferret cams to see what they’re up to throughout the day, and night. During your virtual visit, get creative and create your own ferret mask!

Supplies:

  • BFF mask template
  • Crayons, markers or colored pencils
  • Scissors
  • String or yarn

Instructions:

  1. Print out the BFF mask template or design your own template.
  2. Color and decorate your mask.
  3. Cut out two side holes to attach your sting, and don’t forget to cut out the eyes!

Want to download these directions? Click here for a handy PDF!

Follow along with our Daily Discovery! Click here for all activities that you can do at home.

Continue Reading

Daily Discovery: Make Your Own Harmonica!

Post written by Eisen Tamkun, Music Education Lead.

Daily Discovery: Make Your Own Harmonica!

Is it a Harmonica or a Kazoo? Who knows but it sure is fun to play!

Supplies:

  • Tongue depressors/ jumbo craft sticks
  • Tape – duct or scotch tape
  • Wide rubber band
  • Scissors
  • Stiff paper – cardstock or flashcard

Instructions:

  1. Once you have all the supplies, cut two strips of paper half an
    inch thick and two inches long.
  2. Place both craft sticks together and wrap both strips of paper
    around them. Tape the paper strips closed around the sticks
    creating sleeves (do not tape them to the sticks). Slide both
    sleeves off the craft sticks.
  3. Next, place the rubber band lengthwise on one of the craft
    sticks.
  4. Replace the sticks together and slide the sleeves back one.
  5. Finally, duct tape each end of the harmonica.
  6. Congratulations you have your own harmonica!

Place your lips on the harmonica and blow until the rubber band starts to vibrate creating noise. Try moving the sleeves closer or farther apart. How does this change the sound?

Want to download these directions? Click here for a handy PDF!

Follow along with our Daily Discovery! Click here for all activities that you can do at home.

Image credit: TUK Crafts

Educational opportunities like this are supported in part by Bohemian.

Continue Reading

Daily Discovery: Nature Diorama/Descubrimiento en casa: Maqueta de la naturaleza

Post written by Lea Mikkelsen, Early Childhood Coordinator.

Daily Discovery: Nature Diorama

With supplies from your backyard, you can bring nature indoors and create a beautiful diorama! Take inspiration from our own Rocky Mountains and prairies or ask an adult to help you research other animal habitats.

Supplies:

  • Cardboard box
  • Colored paper (or paint)
  • Scissors
  • Glue
  • Clay (if you have it)
  • Natural materials: rocks, sticks, pine cones, dry grass, leaves, etc.
  • A plastic animal toy for your habitat: bear, fox, deer, etc. Tip: Don’t have one? Try cutting out a picture from a magazine or drawing your own!

Instructions:

  1. Take a nature walk or visit your backyard to collect materials!
  2. Turn the cardboard box on it’s side.
  3. Use colored paper or paint to decorate the background of your nature scene.
  4. Use clay to make the ground and press your natural materials into it. Tip: Use glue if you don’t have clay.
  5. Get CREATIVE! Then, when you are ready, place (or glue) your plastic or paper animal into the diorama!
  6. Share a photo of your nature scene with us on social media using #dailydiscovery

Want to download these directions? Click here for a handy PDF!

Follow along with our Daily Discovery! Click here for all activities that you can do at home.


Traducido por Károl de Rueda y Laura Vilaret-Tuma.

Descubrimiento en casa: Maqueta de la naturaleza

Podemos reproducir una maqueta de la naturaleza con muy pocos materiales. Busca inspiración en nuestro propio Parque Nacional Rocky Mountain, en las praderas de Fort Collins, en un jardín, o en cualquier lugar natural. Hasta podrías hacer investigaciones sobre hábitats de animales diversos.

Artículos necesarios:

  • Una caja de cartón/de zapatos
  • Papel de colores (o pinturas)
  • Tijeras
  • Pegamento
  • Plastilina o arcilla
  • Materiales naturales: piedritas, palitos, conos de pino, hierba seca, hojas, etc.
  • Un juguete plástico de un animal para tu hábitat: un oso, un zorro, un venado/ciervo, etc. Consejo: también podrías cortar una foto de una revista, hacerlo con plastilina ¡o dibujarlo!

Instrucciones:

  1. Visita un área natural o tu patio para colectar los materiales naturales que usarías en tu maqueta. También los puedes dibujar, recortar de revistas, o hacer con plastilina.
  2. Gira tu caja de cartón para que esté de lado, como la foto de arriba.
  3. Pinta o pega papel de colores en el fondo de tu maqueta para crear una escena natural.
  4. Usa plastilina/arcilla para formar el suelo de tu escena y para añadir más materiales. También podrías utilizar pegamento.
  5.  ¡Usa tu creatividad! Decora a tu gusto. Para el toque final, sitúa (o pega) el animal de tu elección en la escena de tu maqueta.
  6. Comparte una foto de tu obra maestra con nosotros a través de las redes sociales usando la etiqueta #descubrimientoencasa, y ¡continúa aprendiendo sobre la naturaleza!

¿Te gustaría descargar esta actividad? Haz clic aquí para obtener un archivo PDF.

Para encontrar actividades, ideas y mucho más descubrimiento en casa, ¡síguenos!

Continue Reading