Daily Discovery: Fancy Rats / Descubrimiento en casa: Ratas de compañía

Post written by Hannah Curtis, Education Assistant.

Daily Discovery: Fancy Rats

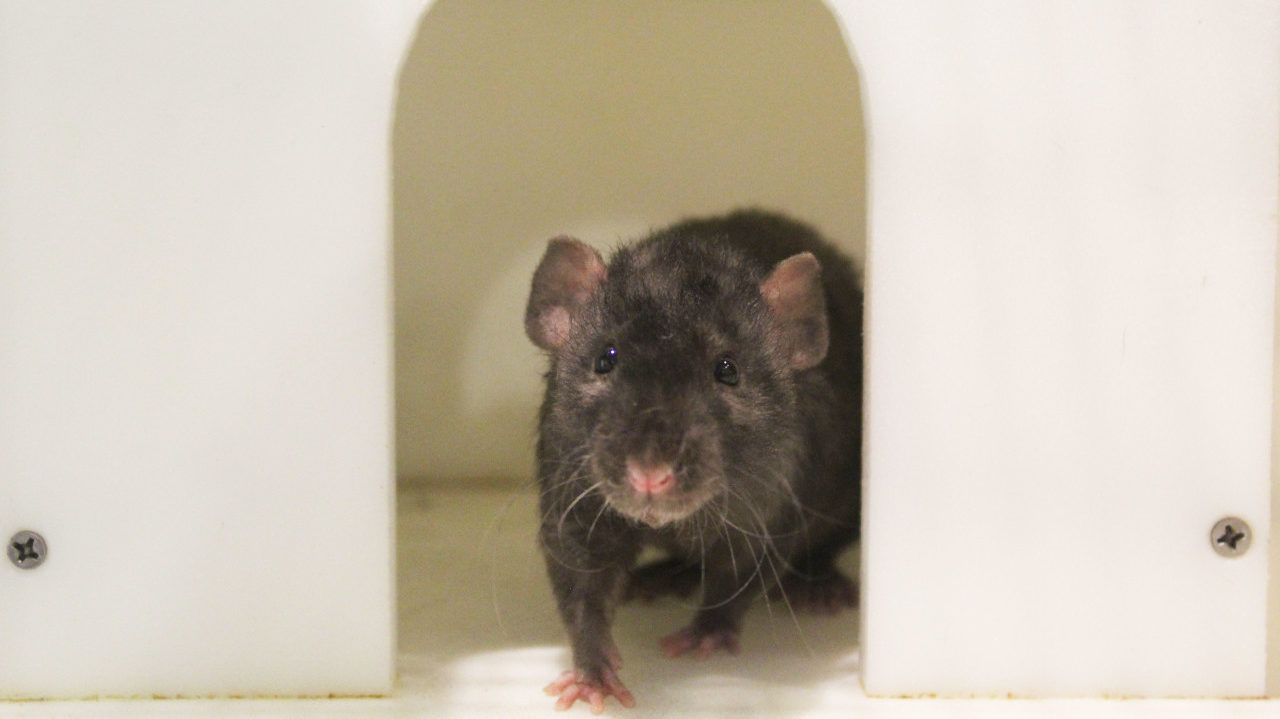
FCMoD’s fancy rats ( Rattus norvegicus domestica ) are some of the museum’s most charismatic animals, but are they really all that fancy? Learn more about these furry creatures and channel your inner zoologist as you observe animals in your own backyard!

Fancy Rat Life History:

Being a fancy rat simply means that they are domesticated; they are tame animals and common household pets. The word “fancy” means that humans “appreciate or like” them more than the non-domesticated brown rats. What other animals are considered domestic? Do you have pets or farm animals that live with you? What animals do not make good pets?

Physical Characteristics:  Rats are mammals and vertebrates. This means they are warm-blooded, have hair or fur, and have a backbone. Fancy rats have a wide range of different colors of fur, unlike wild rats who are usually dark brown (an adaptation to help them blend into their environment). All rats have a long, furless tail that are used for balance when they are climbing and exploring their habitat.

Habitat: Wild rats can live almost anywhere! They are found on all continents except Antarctica. If they are not living in people’s homes as pets, they prefer living in damp environments where they can tunnel.

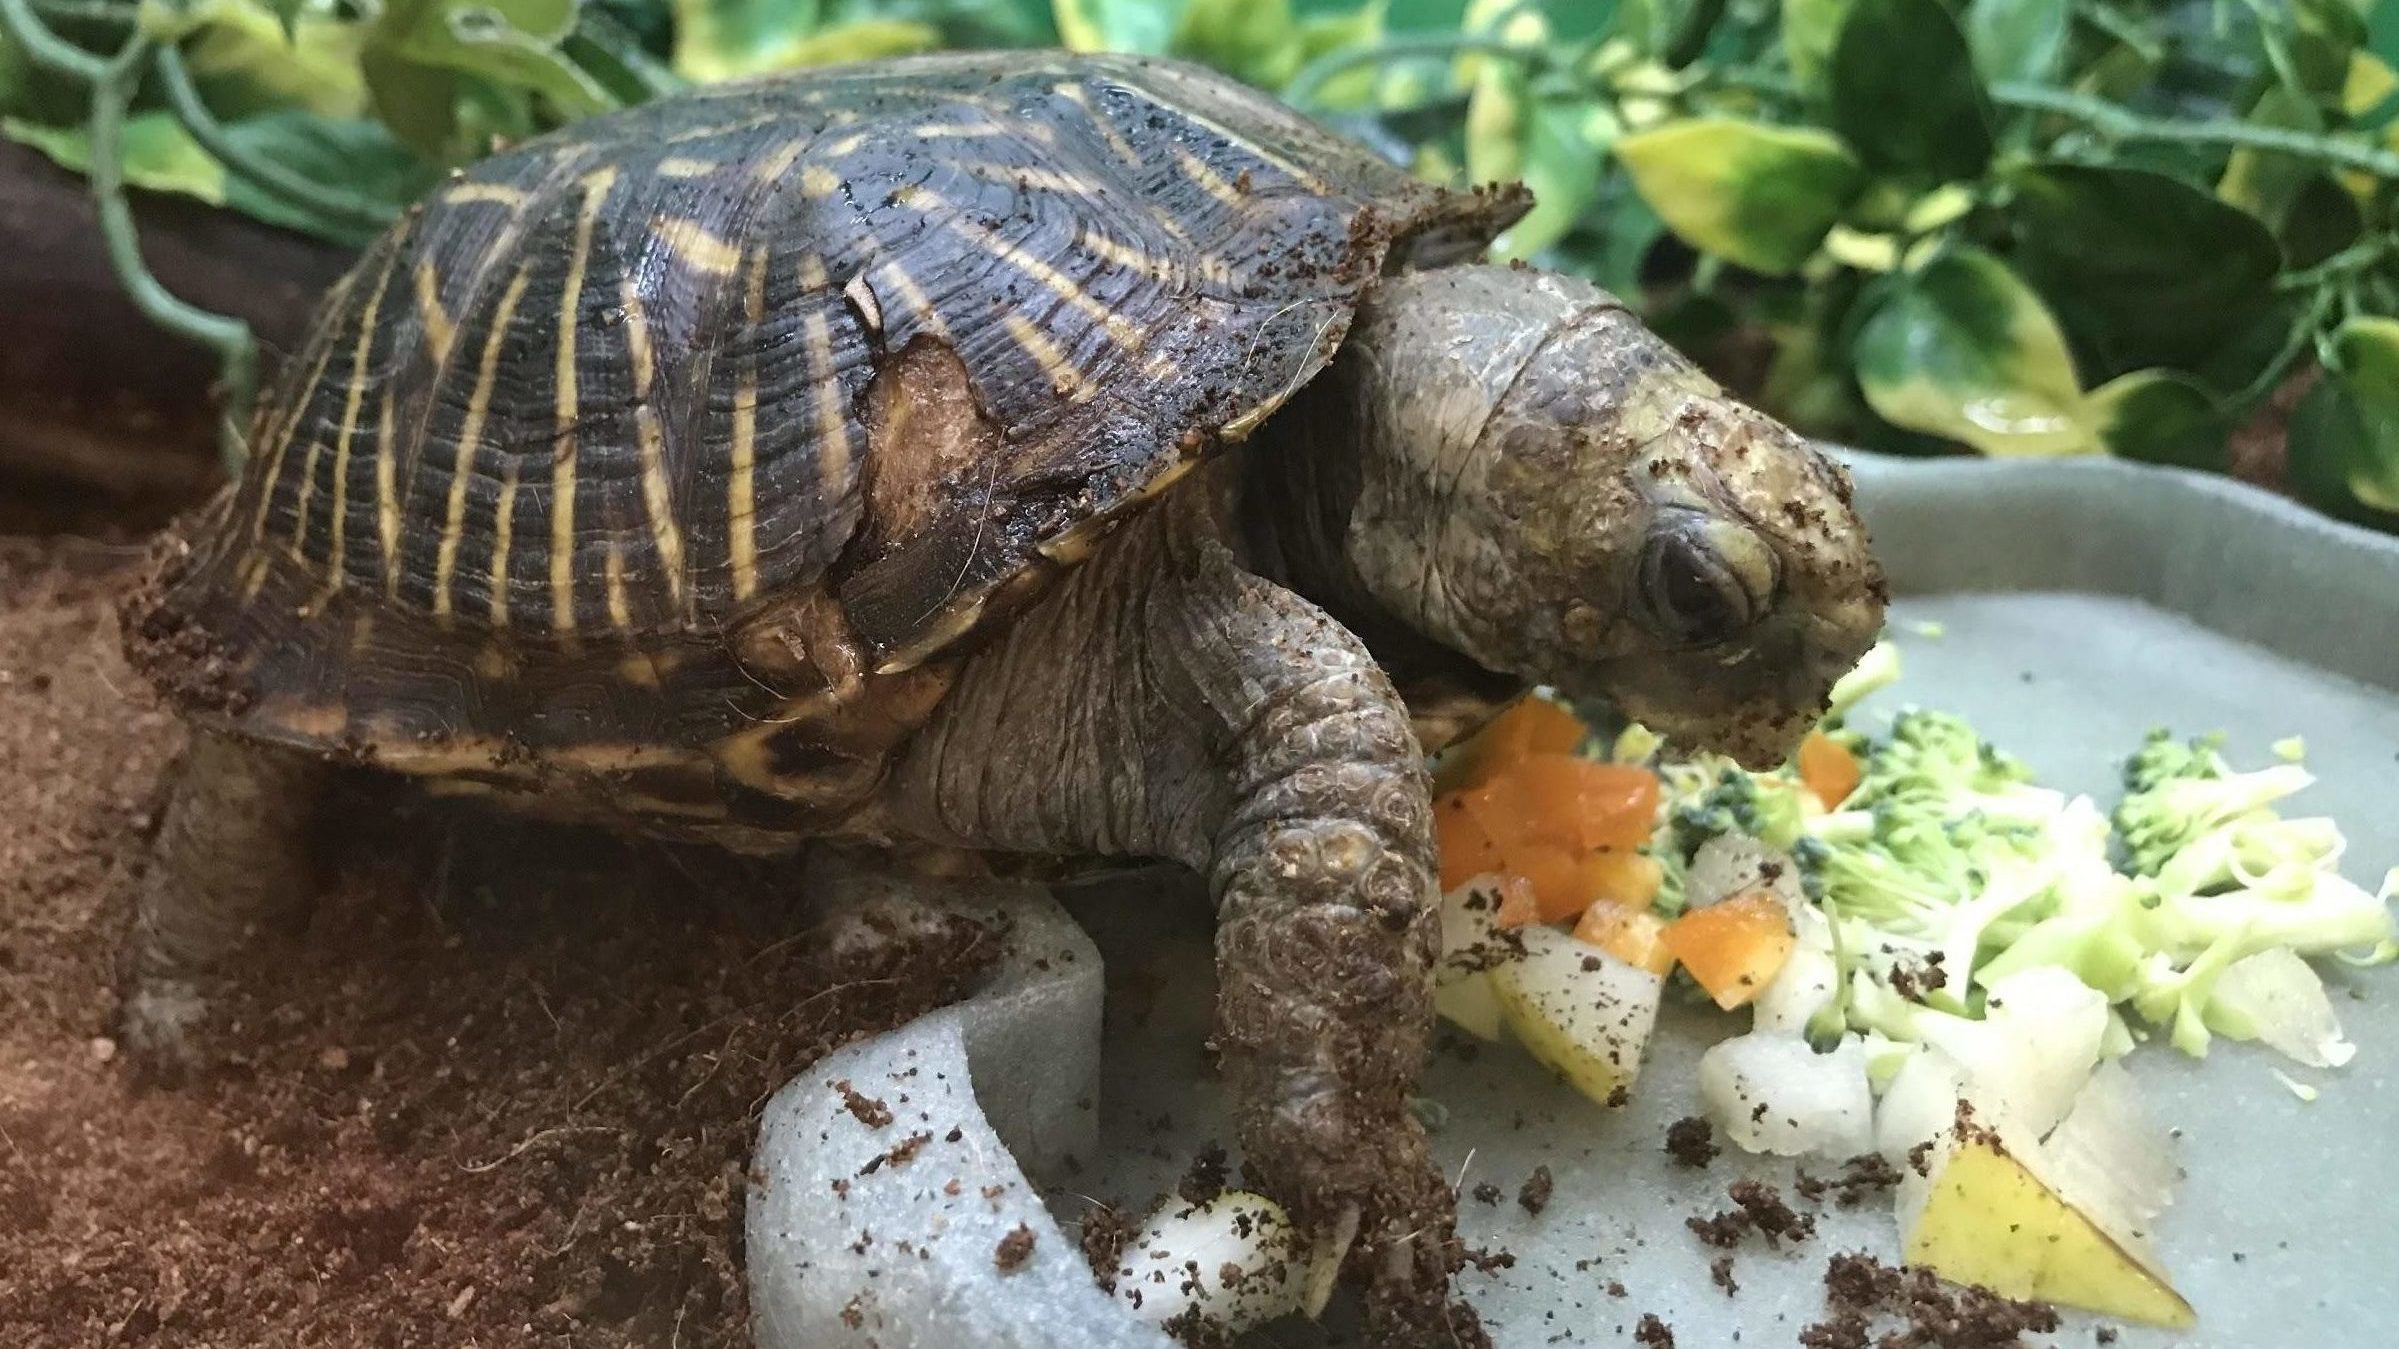
Diet: Rats are omnivores – they’ll eat almost anything! In the wild, they eat a mixture of plants and small animals. At FCMoD, our fancy rats eat a bunch of fruits and vegetables. Naturally, they are scavengers who love to seek out food, which is why they like to live around humans – to break into food storage and help themselves!

Fun Facts:  Rats are often stereotyped in untrue ways, but they can be affectionate, intelligent and clean. They are highly social animals and at the museum, the rats are all siblings and love to snuggle while they nap!

Backyard Observations: Pets!

Whether it is in your backyard, neighborhood, or at a Natural Area, animals can be observed just about anywhere! Zoologists use science to observe animals and learn about their behaviors and their habitat. You can be a backyard zoologist and observe similar domesticated animals like the museum’s fancy rats and record what you discover!

Supplies: 

  • Writing utensil
  • Paper
  • Computer and Internet Access (optional)

Instructions: 

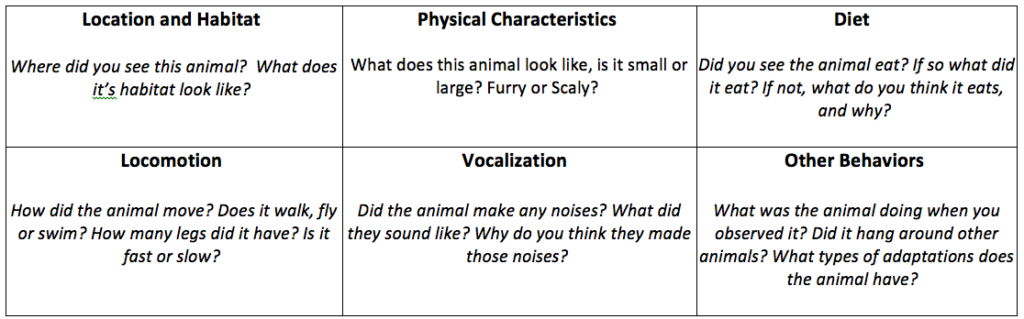
  1. Create a way to record your animal observations and behaviors. You can write a journal entry or maybe create an observation chart, or use our guiding questions to think deeper about the animals you see!
  2. If you have a pet who live with you at home, watch them throughout the day and record what they do. If you have multiple, compare and contrast their behaviors.
  3. If you don’t have any pets, take a walk with your family and look for pets, farm animals or other domesticated animals on your walk. You can also visit https://explore.org/livecams/farm-sanctuary/wisconsin-pasture-farm-sanctuary to observe farm animals though camera live streams!

Guiding Questions:

Want to download these directions? Click here for a handy PDF!

Follow along with our Daily Discovery! Click here for all activities that you can do at home.


Traducido por Károl de Rueda y Laura Vilaret-Tuma.

Descubrimiento en casa: Ratas de compañía

¡Bienvenidos al descubrimiento en casa!

Nosotros en el Museo del Descubrimiento de Fort Collins estamos muy contentos de invitarlos a visitar nuestro contenido lleno de actividades, creatividad, conocimiento ¡y mucho más! Con ideas nuevas cada semana, descubran un mundo mágico lleno de aprendizaje y diversión ¡para toda la familia y en su propio idioma!

Las ratas de compañía (Rattus norvegicus domestica) son uno de los animales más carismáticos que viven dentro del Museo del Descubrimiento de Fort Collins (FCMoD). En general, las ratas no tienen buena reputación, entonces, ¿por qué tenemos algunas de ellas como mascotas? ¿En realidad, hay alguna diferencia entre los diferentes tipos de ratas? Vamos a aprender más de estas criaturas peludas. ¡Encuentra a tu zoólogo interno mientras observas a los animales que hay a tu alrededor!

La historia de las ratas de compañía:

¿Cuál es la diferencia entre una rata salvaje y una rata de compañía? Las ratas de compañía son animales que pueden ser domesticados; son dóciles y comúnmente se vuelven mascotas que se llevan bien con los humanos. ¿Puedes pensar en otros animales que también son domésticos? ¿Tienes mascotas o animales de granja que viven contigo? ¿Puedes observar cuáles animales no podrían ser mascotas?

Características físicas: Las ratas son mamíferos y vertebrados. Esto significa que tienen sangre caliente, pelo o pelaje y una columna vertebral que les ayuda a mantener su cuerpo recto. Las ratas de compañía pueden variar en el color de su pelaje, mientras que el de las ratas salvajes usualmente es de color marrón oscuro. Las ratas salvajes adoptaron este color para poder ocultarse en su medio ambiente. Todas las ratas tienen una cola larga y sin pelo, y esta parte del cuerpo les ayuda a trepar y mantener el equilibrio, superando obstáculos mientras exploran su ambiente.

Ambiente natural/hábitat: ¡Las ratas salvajes pueden vivir casi dondequiera! Se pueden encontrar en todos los continentes excepto en la Antártida. Cuando no están viviendo en nuestros hogares, prefieren vivir en un ambiente húmedo donde puedan cavar túneles y hacer sus escondrijos.

Dieta: Las ratas son omnívoras—¡comen casi de todo! En la naturaleza, comen una variedad de plantas y animales pequeños. En el museo, nuestras ratas comen muchas frutas y vegetales. En su estado natural son carroñeras y les encanta buscar comida, por eso les gusta vivir alrededor de los seres humanos. ¡Así pueden colarse en nuestras despensas y tener todo un banquete!

Datos curiosos: A menudo, a las ratas se les da un estereotipo falso, sin embargo, son cariñosas, inteligentes y limpias. Son animales muy sociables y, en el museo, todas las ratas son hermanas. ¡Les encanta acurrucarse cuando se duermen!

Observación al aire libre: ¡Mascotas!

Ya sea en tu patio, en tu cuadra o en un área natural, se pueden observar animales en cualquier sitio. Los zoólogos utilizan la ciencia para aprender sobre los comportamientos y hábitat de ciertos animales. ¡Tú también puedes ser zoólogo empezando en tu propia área! Observa a los animales domesticados que hay alrededor -como las ratas del museo- ¡y apunta lo que descubres sobre ellos!

Artículos necesarios: 

  • Algo para escribir (lápiz, pluma o marcador)
  • Papel
  • Computadora y acceso al Internet (opcional)

Instrucciones:

  1. Observa el comportamiento de algún animal. Puedes escribir tus notas en un diario o hasta hacer un dibujo. Si deseas, usa la guía de preguntas que está abajo para pensar más profundamente sobre los animales que estudias.
  2. Si tienes una mascota en tu casa, obsérvala durante el día y toma nota de lo que hace. Si tienes más de una mascota, compara sus comportamientos y su interacción.
  3. Si no tienes ningún animal en casa, da un paseo por los alrededores con tu familia y observa algunas mascotas, animales de granja u otros animales domesticados.
  4. También puedes visitar el sitio web: https://explore.org/livecams/farm-sanctuary/wisconsin-pasture-farm-sanctuary  para observar videos de animales de granja ¡en vivo!
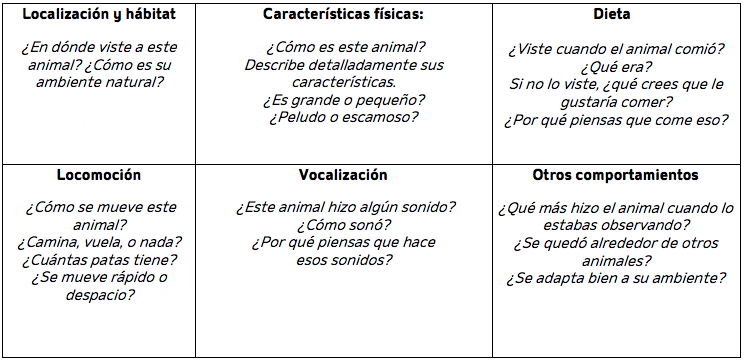
Guía de preguntas: 

¿Te gustaría descargar esta actividad? Haz clic aquí para obtener un archivo PDF.

Para encontrar actividades, ideas y mucho más descubrimiento en casa, ¡síguenos!

Continue Reading

Daily Discovery: 3-D Constellation

Post written by Sierra Tamkun, Learning Experiences Manager.

Daily Discovery: 3-D Constellation

Twinkle twinkle little star… I wonder how far away you are! From Earth, stars in constellations look like they grouped together in the same area of space. In reality, they are at different distances from us, and only look grouped together because of our perspective. Make your own 3-D constellation and see how close (and far away!) the different stars in the constellation Orion are to Earth!

Supplies:

  • Piece of cardboard or cardstock
  • Thin string or thread
  • 8 small beads (pony beads work well!) or buttons
  • Tape
  • Orion constellation images (attached)
  • Needle or pushpin
  • Pen or pencil
  • Ruler

Instructions:

  1. Draw out the constellation Orion on your piece of cardboard, or print the constellation provided and glue it on. Tip: if drawing the constellation, don’t forget to add the names of the stars!
  2. Poke a hole through the cardboard where each star is located.
  3. Cut 8 pieces of string. Each piece should be about 18 inches long.
  4. Tie a bead onto the end of each piece of string. These will be your stars!
  5. Thread the end without a bead through each of the holes on your cardboard.
  6. Using your ruler and the chart below, pull your string through until the bead is the correct distance from the cardboard. This distance will be different for each star. Place a piece of tape over the back of the string to keep it in place at the right length!
  7. Hold your constellation board above your head and allow the beads to hang towards you as you look up. From this perspective, the beads align to form the constellation Orion, just like on Earth!
  8. Now hold the board in front of you, allowing the beads to hang towards the floor. From this different perspective, see how the stars are not on the same plane but all in different locations in 3D space!

Want to download these directions? Click here for a handy PDF!

Follow along with our Daily Discovery! Click here for all activities that you can do at home.

Continue Reading

Meet Tara, FCMoD’s Ornate Box Turtle!

Post written by Willow Sedam, Live Animal Husbandry Team Member.

Meet Tara, FCMoD’s Ornate Box Turtle!

Have you met our Ornate Box Turtle, Tara?

Ornate Box Turtles are a species of box turtle native to the great plains of the midwest – including Colorado! Our Tara was a wild turtle who was taken in by the museum after she was hit by a car and her shell was cracked – look closely and you can see the places where the scutes (the separate bits of hard keratin covering a turtle’s shell) are scarred from her injury.

But how do cold-blooded animals – who can’t warm themselves up on their own like we can – survive the harsh Colorado winters we get if they don’t have a museum to live in?

When it gets cold, reptiles will go through a process much like hibernation, called brumation. Unlike hibernating animals, who are asleep for the whole winter season, brumation only occurs in cool temperatures, and if it warms up enough, even in the middle of winter, brumating animals will wake up, go about their business, and go back to brumating when it’s cold again. In the wild, Ornate Box Turtles spend most of their winter cuddled up in a nice pile of soil, deep enough below the ground that frost can’t reach them.

And while Tara lives inside the museum, where it’s the same warm temperature all year-round, she will sometimes brumate, too! Even though she’s not having to hide away from the cold, she can tell that it’s time for her to brumate because of how short the winter days are.

But Tara is a true Colorado native, and once it warms up, she’s ready to go outside. As part of her care, the Animal Encounters team take her out for regular walks for exercise and enrichment. You wouldn’t think a turtle of all things would need walking, but what Tara lacks in speed she makes up for in energy and determination.

Sometimes she spends her time walking around the museum indoors, especially if it’s still a little chilly out for a cold-blooded animal like her. But her favorite walks are outside walks – in the museum’s Big Backyard! She’ll spend as much time as she can exploring the yard, digging in the dirt, and doing her best to sneak away from her caretakers, often by blending in with rocks and bushes like a camouflage master.

Ornate Box Turtles are opportunistic omnivores – meaning they’ll eat just about anything they can find, including plants, bugs, and even carrion. When Tara’s out in the backyard, she likes to forage for extra snacks, trying to catch and eat any ants and beetles she sees. While we see a tiny, cute, turtle, many bugs see a hungry predator! But the funniest thing she likes to do when she’s out on a walk is to pick things up in her beak. She does it with rocks, sticks, and bark chips – she’ll search around for the perfect something, pick it up, and just hold it in her mouth while she wanders!

So next time you’re out enjoying the warm weather, keep an eye out for Colorado’s native reptiles who may also be soaking up the sunshine! You might even see one of Tara’s cousins out in the wild, eating ants and basking in the sun.

Continue Reading

Background in History!

Post written by Lesley Struc, Curator of the Archive.

Background in History!

Feeling the need to add a little historical zing to your online video meetings? Well, the Archive at Fort Collins Museum of Discovery has you covered. Feel free to download these images of Fort Collins’ past and use them as your virtual backdrop during your next online meeting or chat; impress your friends and coworkers with your fervor for local history!

Welcome to Camp Collins, circa 1865, looking southwest from the Poudre River toward the fort’s parade ground and buildings. This would have been near present-day Linden and Jefferson Streets. Download photo.

Fisticuffsmanship! Well, not exactly. This is wrestling match that took place circa 1908 on the east side of the 200 block of Mountain Avenue. All the people are looking at you, waiting for you to finish your meeting so they can start the bout. Download photo.

Meet your new officemate H.C. Lighter, Justice of the Peace for Larimer County, in his office at the Avery Block in Old Town, circa 1908. Download photo.

Your new office has a great view of the west side of North College Avenue, circa 1904. Download photo.

Now you’re on top of a streetcar in 1908, looking down North College toward Mountain Avenue. Check out all the cars in Fort Collins at that time and what is believed to be the earliest photo of the trolley. Download photo.

Finally, some color! Here’s a view of Pingree Park from a hand-tinted lantern slide from the 1910s. Ahhh, so peaceful. Download photo.

Nice office! Get things done here in the Poudre Valley Bank offices at 401 South College in 1967. This building is now home to Wells Fargo Bank. Download photo.

You can hold an important meeting in this stylish board room, also from the Poudre Valley Bank, 1967. Can you spy the Safeway out of the window? That building now houses Lucky’s Market at 425 South College Avenue. Download photo.

The Northern Hotel is looking bright and cheery in this postcard from 1958. Download photo.

Lounge around at the Safari Club, once located at 400 Link Lane in Fort Collins, where you could enjoy “Cocktails, Steaks, Prime Rib, Seafood and European Delicacies. Piano Lounge, Live Music, and Ballroom Dancing.” This image is from a circa 1975 postcard. Download photo.


Voila! Now boring video meetings will be a thing of the past… literally! Check out even more awesome local history photo background options by visiting the Fort Collins History Connections website: history.fcgov.com.

Continue Reading

Daily Discovery: Sensory Scavenger Hunt

Post written by Angela Kettle, School Programs Coordinator.

Daily Discovery: Sensory Scavenger Hunt

Did you know that you can find little pieces of our museum all around your home? Explore different colors, sounds, shapes, light qualities, and sizes in this sensory scavenger hunt, based on the exhibits at FCMoD! When you find an item, check it off the list. Show us your completed scavenger hunt on social media with #DailyDiscovery.

Want to download these directions? Click here for a handy PDF!

Follow along with our Daily Discovery! Click here for all activities that you can do at home.

Continue Reading

At Home Workout Resources

Post written by Alex Ballou, Marketing Assistant.

At Home Workout Resources

Here at FCMoD, we believe in the importance of working your mind and your body. And during times like this, we want to provide resources to continue exploring together.

In this blog post, we’ve compiled a list of our recommended at home workout resources during this time. Learn more below!

  • Here are some fun ways to get active as a family!
  • Let’s get the whole family moving – together! Here are 10 ways to exercise as a family.
  • Have a backyard? Here are some outdoor activities to get the family working out with no-equipment necessary!
  • Trying to stay in shape while working at home with the kids? Here are some fun at-home workouts that everyone will enjoy!

Even though the museum is closed, we want to continue to inspire creativity and encourage hands-on learning for all!

Image Credit: WellnessMama.com

Continue Reading

Daily Discovery: Gobble Gobble Pinecone Craft

Post written by Lea Mikkelsen, Early Childhood Coordinator.

Daily Discovery: Gobble Gobble Pinecone Craft

Follow along with FCMoD’s live stream Storytime in the Home: Gobble Gobble. Then take a walk in your neighborhood. Use your naturalist skills to keep an eye out for animal  tracks! You might even find a pinecone on the ground. If you pick it up and bring it home, turn it into this awesome turkey craft.

Supplies:

  • A pinecone
  • Glue (hot glue or craft glue)
  • Feathers or craft paper
  • Googly eyes or craft paper
  • Felt or craft paper
  • No pinecone? No problem! Cut the whole turkey out of paper!

Instructions:

  1. If you picked a pinecone from outside, be sure to have an adult help you file down or cut off the sharp bits. Tip: If you bake the pinecone at 150 to 200 degrees for 90 min you will bake off any bugs, mold, or mildew that could make your pinecone yucky!
  2. Place all your supplies on a clear surface with plenty of room to create.
  3. If you don’t have feathers on hand, make your own! You can cut them out of colored paper or even paint white paper bright colors and then cut them out! You can also make eyes and a beak out of paper if you want!
  4. Glue your turkey eyes and beak to the flattest end of the pinecone to make the turkey head.
  5. Glue the feathers or paper feathers into the other end of the pinecone to make the turkey tail.
  6. Print out the animal tracks activity sheets to keep the discovery going – here and here!

Want to download these directions? Click here for a handy PDF!

Follow along with our Daily Discovery! Click here for all activities that you can do at home.

Image credit: simplybeingmommy.com

Educational opportunities like this are supported in part by Buell Foundation. Their support helps make access to early childhood education at FCMoD possible for everyone in our community.

Continue Reading

Daily Discovery: Egg-cellent Egg-tivities – Part 2

Post written by Lea Mikkelsen, Early Childhood Coordinator & Charlotte Conway, Public Programs Coordinator.

Daily Discovery: Egg-cellent Egg-tivities – Part 2

Let’s learn all about eggs! What are eggs, anyway? What animals do they come from? What are the different parts made of? What can we do with eggs?

Glowing Egg

People who raise chicks use a technique called candling to determine if an egg is fertilized and has a chick growing inside of it. Your eggs from your refrigerator at home will not have a chick growing inside, but this is a really neat way to look inside an egg!

Supplies:

  • One egg
  • Flashlight
  • Dark room

Instructions:

  1. Hold the egg gently in your hand (or ask an adult to help you) and press the flashlight carefully against the eggshell.
  2. Carefully rotate the egg to see it from different angles.
  3. What can you see? Do you see the spots in the egg shell? Do you see the air cell?
    a. The egg shell is almost entirely composed of calcium carbonate. There are pores in the egg shell that allow some breathability to the shell.
    b. The air cell forms when the egg is laid. You can see where the air cell was when you look at the flat end of a boiled egg.

Floating Egg

Learn about density and buoyancy through this floating egg  experiment. Don’t forget to make your hypothesis about what will happen to each egg!

Supplies:

  • Two eggs
  • Water
  • Two tall drinking glasses
  • Three tablespoons of salt

Instructions:

  1. Fill one glass ¾ of the way with water.
  2. Make a hypothesis about what will happen to the first egg.
  3. Carefully place the egg into the glass of water and observe. What happened to the egg?
  4. Fill a second glass ¾ of the way with water.
  5. Add 3 tablespoons of salt and stir.
  6. Make a hypothesis about what will happen to the second egg.
  7. Carefully place the second egg into the second glass of water and observe. What happened to the egg?

Tip: If an egg floats in water without adding salt, the egg is likely old. The air cell has grown inside the egg, making it buoyant. Check the egg for a bad smell before you eat it.

Want to download these directions? Click here for a handy PDF!

Follow along with our Daily Discovery! Click here for all activities that you can do at home.

Image credit: bonappetit.com

Continue Reading

Daily Discovery: Egg-cellent Egg-tivities – Part 1

Post written by Lea Mikkelsen, Early Childhood Coordinator & Charlotte Conway, Public Programs Coordinator.

Daily Discovery: Egg-cellent Egg-tivities – Part 1

Let’s learn all about eggs! What are eggs, anyway? What animals do they come from? What are the different parts made of? What can we do with eggs?

Egg Carton Art

Save that egg carton! It can be upcycled and turned into so many amazing things. You can cut it, glue it, build with it, paint it, use it to hold small loose things like beads or pretty rocks. There are endless possibilities!

This activity will show you how to cut apart an egg carton to make upcycled flowers. Share your egg carton creations with #dailydiscovery!

Supplies:

  • Egg carton(s)
  • Scissors
  • Glue, decorative paper, paint, paintbrush (optional)

Instructions:

  1. Ask an adult to help you cut out the center pointy pieces of the egg carton. Be sure to leave plenty of the “petals” on them.
  2. Use the scissors to cut out the petals of the flower. Try cutting them in different shapes!
  3. Cut a long sturdy stem piece with a little tab on one end from a flat part of the egg carton.
  4. Make a hole in the base of the flower and thread your stem through the hole with the tab resting inside the flower. That will keep the stem from sliding out of the flower. Optional: use glue to keep the stem in the flower.
  5. Use paint (if you have some) to decorate your flowers. Be creative! You can also use paper to make leaves or more petals on the flower. Let the flowers dry and then pop them in a vase to bring cheer!

Natural Egg Dying: Cooking with Science!

Experiment with these natural dyes to make beautiful, colorful eggs that are totally edible! The best part is, you can make these dyes using items you have in your kitchen, and you don’t have to waste any food in the process.

Adult supervision is required for this activity.

Supplies:

  • Hard-boiled eggs
  • Saucepan
  • Water
  • White Vinegar
  • Clean kitchen or paper towels
  • Slotted spoon
  • Small bowls
  • Cheesecloth, fine sieve, or strain
  • Natural dying materials from your kitchen (Suggestions: beets, ground turmeric, coffee, spinach, yellow onion skins, red cabbage, yellow delicious apple peels)

Instructions:

  1. Gather materials for your natural dyes. This is a great opportunity to reduce, reuse, and recycle! Try using your kitchen waste like yellow onion skins, any stale coffee, or apple peels for dyes! If you use fresh produce, like a beet or red cabbage, think about how you might eat the boiled vegetables afterwards.
  2. Now comes the fun part! Experimenting with different natural materials can produce surprising colors, and don’t hold back from mixing 2 or more materials together to achieve new colors.
  3. Prepare your natural materials into liquid dyes according to which materials you are using. Always use adult supervision when you are using the stove or chopping vegetables.
    a. For the whole vegetables, like red cabbage or beets, chop them into smaller pieces first(around one inch). Place 1 cup of desired material in your saucepan and cover with 1 quart of water. Simmer the mixture for 30 minutes, or until desired color is achieved. Strain mixture and reserve the liquid.
    b. For the spinach, onion skins, or apple peels, place about 2 cups of desired material in saucepan and cover with 1 quart of water. Simmer the mixture for 30 minutes, or until desired color is achieved. Strain the mixture and reserve the liquid.
    c. For the ground turmeric, place 2 tablespoons of turmeric in 1 quart of water. Simmer the mixture for 30 minutes. Strains the mixture if you are using cheesecloth, otherwise, don’t worry about straining. Reserve the liquid.
    d. If you are using stale coffee, there are no preparations needed. Skip ahead to the next step!
  4. Place reserved liquids in individual small bowls. Stir in 2 tablespoons of white vinegar per every cup of liquid dye.
  5. Retrieve your hard-boiled eggs when you are ready to dye. Make sure to keep them refrigerated at all times when you are not using them!
  6. Use a slotted spoon to slowly lower your hard-boiled egg into desired color dye. Refrigerate the bowl to let the dye soak into the eggshell.
  7.  Time for the big reveal! After at least 30 minutes, use your slotted spoon to remove the egg from the dye.
  8. Pat the egg dry using paper towels or a clean kitchen towel. To mix colors, you can soak an egg first in one colored dye for 30 minutes or more, followed by a second soak in another colored dye for 30 minutes to an hour. Get creative and experiment with different soak times and color mixtures to achieve a whole spectrum of colors!
    a. Note that natural dyes will produce a subtler color than artificial dyes. For more vibrant natural colors, you can soak your eggs in the refrigerator overnight.
  9. Store the colored eggs in an egg carton in the refrigerator until you are ready for an egg-celent snack.

Want to download these directions? Click here for a handy PDF!

Follow along with our Daily Discovery! Click here for all activities that you can do at home.

Continue Reading

Daily Discovery: Rain Stick Craft

Post written by Lea Mikkelsen, Early Childhood Coordinator.

Daily Discovery: Rain Stick Craft

Have you ever wondered why it rains? Water vapor rises into the atmosphere. As it cools, it condenses and combines with tiny particles to form clouds. If the water droplets get big enough, they fall to the earth as rain! Capture the sound of rain and bring it inside with this awesome rain stick craft.

Supplies:

  • Paper towel tube
  • Tape
  • Scissors
  • Paper
  • Tin foil
  • Dry beams. rice, or popcorn
  • Markers, crayons, paint, stickers, ribbon, or whatever else you want to decorate with!

Instructions:

  1. Place all your supplies on a clear surface with plenty of room to create.
  2. Cut out two small pieces of paper to wrap over the ends of your tube, and one larger piece of paper to decorate and cover your tube. Ask an adult to help if you need it!
  3. Using art supplies, decorate your paper however you want. Be creative!
  4. Tape a small piece of paper around the end of your paper towel tube.
  5. Scrunch the tin foil to make a snake like coil and put it inside the tube.
  6. Fill the tube with beans, rice, or popcorn! Tip: Try using a funnel or a cone of paper to fill the tube.
  7. Tape the second small piece of paper to the end of the tube.
  8. Wrap the tube in your decorated paper and tape it in place. Optional: Add more décor! Try ribbon, string, jewels, or feathers!
  9. Turn your stick over and listen to the sweet sound of rain falling!

Want to download these directions? Click here for a handy PDF!

Follow along with our Daily Discovery! Click here for all activities that you can do at home.

Image credit: supersimple.com

Continue Reading