Daily Discovery: Drawing Music/ Descubrimiento en casa: “Dibujando” música

Post written by Eisen Tamkun, Music Programming Lead.

Daily Discovery: Drawing Music

Music has the power to influence our emotions. Have you ever gotten a chill or thrill while listening to your favorite music? Listening to music is an easy way to alter your mood or relieve stress. Gain a deeper understanding of how music influences us by drawing!

Supplies:

  • Drawing Paper
  • Favorite drawing utensils: pens, pencils, paint, etc.
  • Listening device: iPhone, Computer, etc.

Instructions:

1. Take your paper and divide it into four sections. Label each section 1-4 in the top right corner.
2. Once you are ready to start drawing in section 1, begin playing Blowin’ in the Wind by Bob Dylan. Be sure there are no noises besides the song (works best with headphones). Continue drawing until the song is completely over. Listen and let the song guide your drawing. It can be shapes, images, or anything in between. If need be play through the song a second time (or more if you want!)
3. Move to section 2 on your paper and play Für Elise by Beethoven. Repeat Step 2 and listen to the whole song through letting it guide your drawing!
4. For section 3 listen to Walking on Sunshine by Katrina and the Waves. Repeat Step 2.
5. Lastly, for section 4 play Take Me Home, Country Roads by John D. Repeat Step 2.

Now see if one of your family members can guess which one of your drawings match each song!

Want to download these directions? Click here for a handy PDF!

Follow along with our Daily Discovery! Click here for all activities that you can do at home.

Educational opportunities like this are supported in part by Bohemian.

Traducido por Károl de Rueda y Laura Vilaret-Tuma.

Descubrimiento en casa: “Dibujando” música

La música tiene el poder de influir en nuestras emociones. ¿Haz sentido alguna sensación de alegría o emoción mientras escuchas tu música favorita? Esta puede cambiarnos el humor y aliviar el estrés. Aprendamos cómo la música nos puede inspirar ¡mientras dibujamos!

Artículos necesarios:

  •  Hojas de papel
  • Utensilios para dibujar: plumas, lápices de color, pinturas, marcadores, etc.
  • Algún aparato para poder escuchar música: teléfono, computadora, radio, etc.
  • Opcional: audífonos

Instrucciones:

  1. Divide un papel en cuatro secciones. Numera del 1 al 4 la esquina superior derecha de cada sección.
  2.  Comienza a escuchar tu canción favorita, asegurándote de que no haya ningún otro ruido a tu alrededor (esta actividad funciona mejor con audífonos), y utilizando la sección número 1 del papel, comienza a dibujar lo que quieras mientras la escuchas. Deja que la música te guíe. Puedes trazar figuras, imágenes o cualquier cosa que sientas. Escucha la canción las veces que quieras mientras continúas expresándote por medio de lo que dibujas.
  3. Para el papel número 2, pon otra canción. Repite lo que hiciste anteriormente y escucha la canción entera mientras esta te guía para crear arte.
  4. Para los papeles números 3 y 4, escucha otras canciones que te gusten.
  5. Estas son algunas recomendaciones de nuestras canciones favoritas:
    • Foo Foo por Santana
    • Octopus’s Garden por The Beatles
    • Etude Op. 25 No. 11 (Winter Wind) por Chopin
    Tu rumba por iLe
    • Tu canción preferida.
    Para terminar, podrías ver si alguno de tus familiares puede adivinar las canciones que representan tus dibujos.

¿Te gustaría descargar esta actividad? Haz clic aquí para obtener un archivo PDF.

Para encontrar actividades, ideas y mucho más descubrimiento en casa, ¡síguenos!

Educational opportunities like this are supported in part by Bohemian.

Continue Reading

Daily Discovery: Egg Carton Art / Descubrimiento en casa: Arte hecho con cartón de huevos

Post written by Lea Mikkelsen, Early Childhood Coordinator.

Daily Discovery: Egg Carton Art

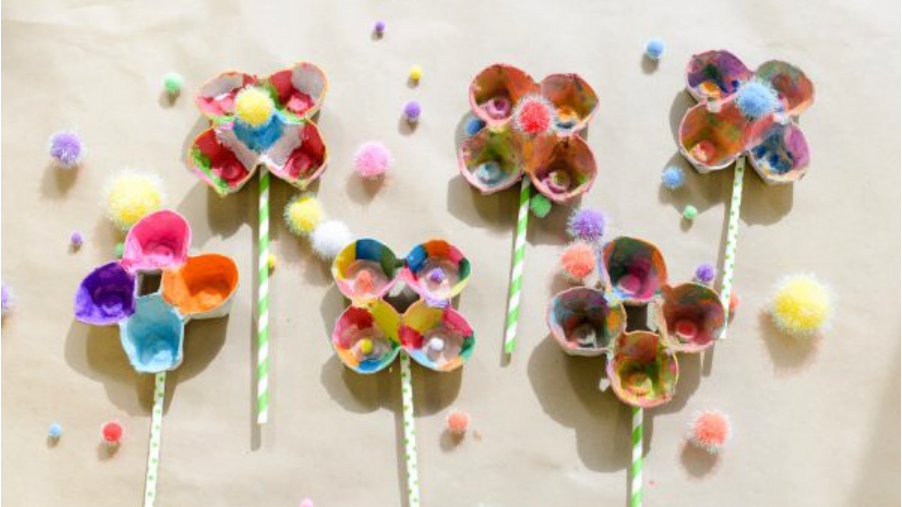
Save that egg carton! It can be upcycled and turned into so many amazing things. You can cut it, glue it, build with it, paint it, use it to hold small loose things like beads or pretty rocks. There are endless possibilities!

This activity will show you how to cut apart an egg carton to make upcycled flowers. Share your egg carton creations with #DailyDiscovery!

Supplies:

  • Egg carton(s)
  • Scissors
  • Optional: Glue, decorative paper, paint, paintbrush

Instructions:

  1. Ask an adult to help you cut out the center pointy pieces of the egg carton. Be sure to leave plenty of the “petals” on them.
  2. Use the scissors to cut out the petals of the flower. Try cutting them in different shapes!
  3. Cut a long sturdy stem piece with a little tab on one end from a flat part of the egg carton.
  4. Make a hole in the base of the flower and thread your stem through the hole with the tab resting inside the flower. That will keep the stem from sliding out of the flower. Optional: use glue to keep the stem in the flower.
  5. Use paint (if you have some) to decorate your flowers. Be creative! You can also use paper to make leaves or more petals on the flower. Let the flowers dry and then pop them in a vase to bring cheer!

Want to download these directions? Click here for a handy PDF!

Follow along with our Daily Discovery! Click here for all activities that you can do at home.


Traducido por Károl de Rueda y Laura Vilaret-Tuma.

Descubrimiento en casa: Arte hecho con cartón de huevos

¡No tires ese cartón de huevos vacío! Se puede reciclar y, con tu imaginación, ¡volverse en algo maravilloso! Puedes cortarlo, pegarlo, pintarlo, construir algo con él o usarlo para contener cosas
pequeñas como tus piedras favoritas. ¡Las posibilidades son infinitas!

Esta actividad te enseñará cómo cortar un cartón de huevos para hacer flores recicladas. ¡Comparte tu creación a través de las redes sociales usando la etiqueta #Descubrimientoencasa!

Artículos necesarios:

  • Cartón de huevos
  • Tijeras
  • Opcional: pegamento, algún tipo de papel decorativo,
    papel blanco, pinturas, brocha

Instrucciones:

  1. Pídele a un adulto que te ayude a cortar las partes más puntiagudas del centro del cartón de huevos. Asegúrate de dejar bastante espacio alrededor para formar los “pétalos.”
  2. Usando las tijeras, corta los bordes de cada flor para hacer estos pétalos. ¡Prueba cortándolos en diferentes formas!
  3. Corta un tallo largo y fuerte para cada flor usando una parte plana del cartón.
  4. Haz un hueco en la base de la flor, mete el tallo y dóblalo dentro para asegurarte que no se mueva. Opcional: usa un poco de pegamento para adherir el tallo a la flor.
  5. Si quieres, utiliza pinturas para decorar tus flores. Si las pintas, deja que las flores se sequen completamente. ¡Usa tu creatividad! Con papel decorativo podrías construir hojas o pétalos adicionales. ¡Ponlas en un florero para traer alegría a tu casa!

¿Te gustaría descargar esta actividad? Haz clic aquí para obtener un archivo PDF.

Para encontrar actividades, ideas y mucho más descubrimiento en casa, ¡síguenos!

Image credit: Thinkery Austin

Continue Reading

Daily Discovery: Walking Rainbows

Post written by Hannah Curtis, Education Assistant.

Daily Discovery: Walking Rainbows

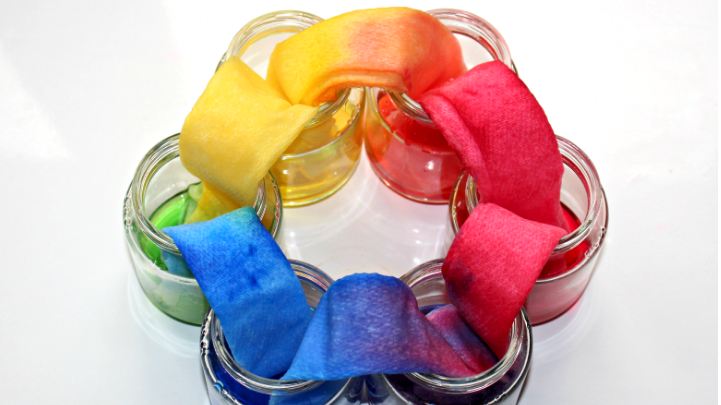
Put your lab coat on; we’re getting scientific! With this experiment, discover how colors interact to form rainbows and observe the natural process of capillary motion in action!

Supplies:

  • Time
  • 6 full sheets of paper towels
  • 6 mason jars (clear if possible). If you don’t have jars use cups or bowls
  • Red, blue, and yellow food coloring

Instructions:

Before you get started, review the color wheel on page two and remember the colors you need to form a rainbow. Feel free to experiment to see how mixing certain colors will create different colors. Together, determine how you will create a rainbow using only red, blue and yellow.

  1. Fill three jars full of water. Add red food coloring to one, blue
    to another and yellow to another, 4-6 drops each.
  2. To form a circle place the empty jars between the red, yellow
    and blue jars.
  3. Roll each sheet of paper towel into tubes. Drape one side into
    a full jar and the other into an empty jar until each jar is
    connected with paper towels.
  4. Start your timer to see how long it takes for the colored water
    to move from one jar to the next. Water will begin absorbing
    right away, but the whole process will take around 48 hours,
    so check back every few hours to see how it has changed.

Want to download these directions? Click here for a handy PDF!

Follow along with our Daily Discovery! Click here for all activities that you can do at home.

Image credit: Messy Little Monster

Continue Reading

Daily Discovery: Map Making

Post written by Charlotte Conway, Public Programs Coordinator.

Daily Discovery: Map Making

Have you ever looked up your house on Google Maps? It can be pretty cool to see your own neighborhood from a different  perspective! You can also find all sorts of maps and photographs of your town from history through the local Archives and Collections at FCMoD! Check out maps from your own community, and then make a map of your own!

Supplies:

  • Graph paper or paper
  • Colored pencils
  • Pencils
  • Ruler

Instructions:

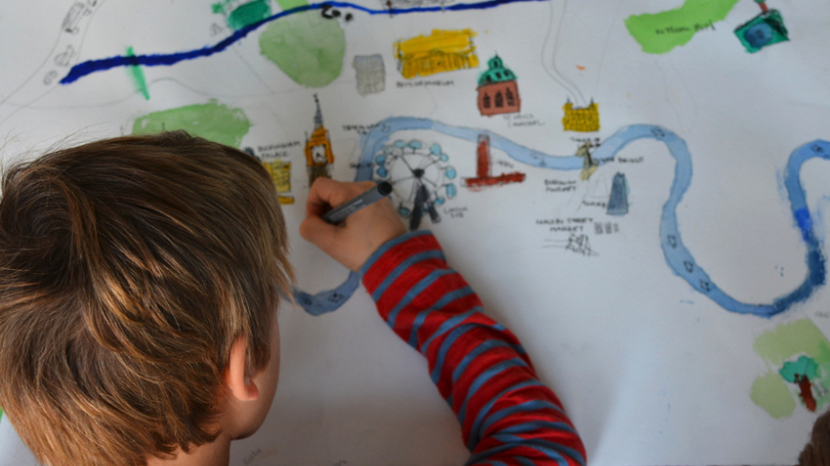
  1. Maps are a two-dimensional representation that records the natural and build world around them, usually from a “top-down” perspective. There are many different types of maps each with different uses and looks!
  2. Compare and contrast the maps provided from Fort Collins Museum of Discovery’s Archives and Collections. What do the maps have in common? What is different about them? How do the maps differ based on how people might use them? How do the maps make use of colors, symbols, or labels to communicate their meaning?
  3. Now, it’s time to start designing your map! First, select a place you would like to make a map of. It could be your own neighborhood, somewhere from a different city, or even a made-up place!
  4. Next, consider the purpose of your map. What is your map trying to communicate? Will it be a political or road map that focuses on man-made features? Will it be a physical map that shows natural features?
  5.  Now that you have your purpose in mind, plan out the other features of your map that will make it more effective for your users.
    a. Legend – This is a visual explanation of the symbols you use on your map. How will you show the contents of your world on your map? If you use symbols, how will people know what they represent?
    b. Scale – This is the relationship between distance on your map and the same distance you are trying to represent on the ground. How will you translate the scale of world into a map that will fit on the paper? How will people who see your map know how large your world really is?
    c. Labeling – This is how you will write labels so that they clearly identify the right features on your map. How will people know what your map is supposed to be showing? How will they know who made the map and when?
  6. Draw out your map. Get creative with your representation, but remember to keep your purpose in mind so that your map is useful too!
  7. Keep the exploration going! Did you know FCMoD houses artifacts and collections from Northern Colorado, including historic maps? Explore maps from Northern Colorado. Explore your town using the GPS applications on smart phones or Google Maps, and then explore the world! What will you discover?

Want to download these directions? Click here for a handy PDF!

Follow along with our Daily Discovery! Click here for all activities that you can do at home.

Photo Credit: BABYCCINO

Continue Reading

Daily Discovery: Cardboard Box Creations

Post written by Lea Mikkelsen, Early Childhood Coordinator.

Daily Discovery: Cardboard Box Creations

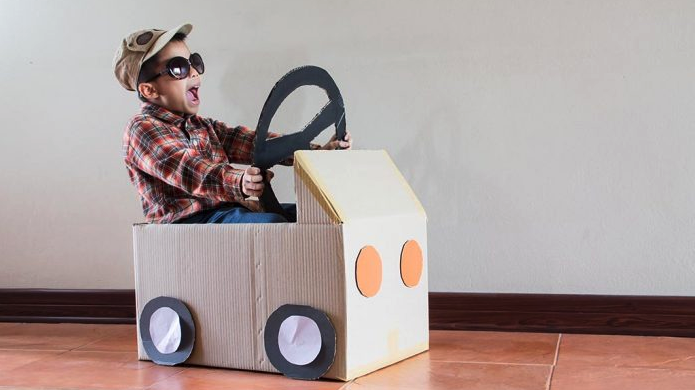
Have you ever wondered what a box could become? Follow along with Rabbit in the story Not a Box by Antoinette Portis, to imagine all the things a box can become!

Then create and take your own amazing box on an adventure at home!

Supplies:

  • A cardboard box
  • Tape
  • Scissors
  • Hole punch
  • Glue
  • Markers, paint, stickers
  • Metal brads, paper clips, clothespins
  • Loose parts such as: lids and bottle caps, sticks and leaves, beads, buttons, pipe cleaners, string, cardboard tubes, recyclables, any old junk around the house!

Instructions:

  1. Place all your supplies on a clear surface with plenty of room to create.
  2. Brainstorm some ideas for what your box could become. Tip: try drawing your idea on a piece of paper!
  3.  Build and create with all your loose materials. Use your imagination!
  4.  Ask an adult for help with cutting or attaching things to your box if you need it.

Want to download these directions? Click here for a handy PDF!

Follow along with our Daily Discovery! Click here for all activities that you can do at home.

Image credit: parenting.firstcry.com

Continue Reading

Daily Discovery: Tall Tall Tree Craft

Post written by Lea Mikkelsen, Early Childhood Coordinator.

Daily Discovery: Tall Tall Tree Craft

Did you ever wish you could live in a tree? Many different animals live in and around trees. Can you look out your window and spot them? How many can you name?

Some of the most amazing trees are called Redwoods. They can grow to incredible heights; one is taller than the Statue of Liberty! Here is a wonderful video of a redwood forest so you can see these trees from home.

Here is a fun craft to make your very own tall tree at home!

Supplies:

  • A stick with skinny “branches”
  • A paper plat (or piece of cardboard)
  • Clay
  • Glue
  • Decorations: beads, yarn, pom poms, glitter glue, paint, leaves, or whatever you find in your home!

Instructions:

  1. Place all your supplies on a clear surface with plenty of room to create.
  2. Mold the clay around the base of your stick to hold your “tree” upright on the plate.
  3. Decorate with all your craft materials. Be creative!
  4. Share your creation with us on social media using #dailydiscovery

Want to download these directions? Click here for a handy PDF!

Follow along with our Daily Discovery! Click here for all activities that you can do at home.

Educational opportunities like this are supported in part by Buell Foundation. Their support helps make access to early childhood education at FCMoD possible for everyone in our community.

Continue Reading

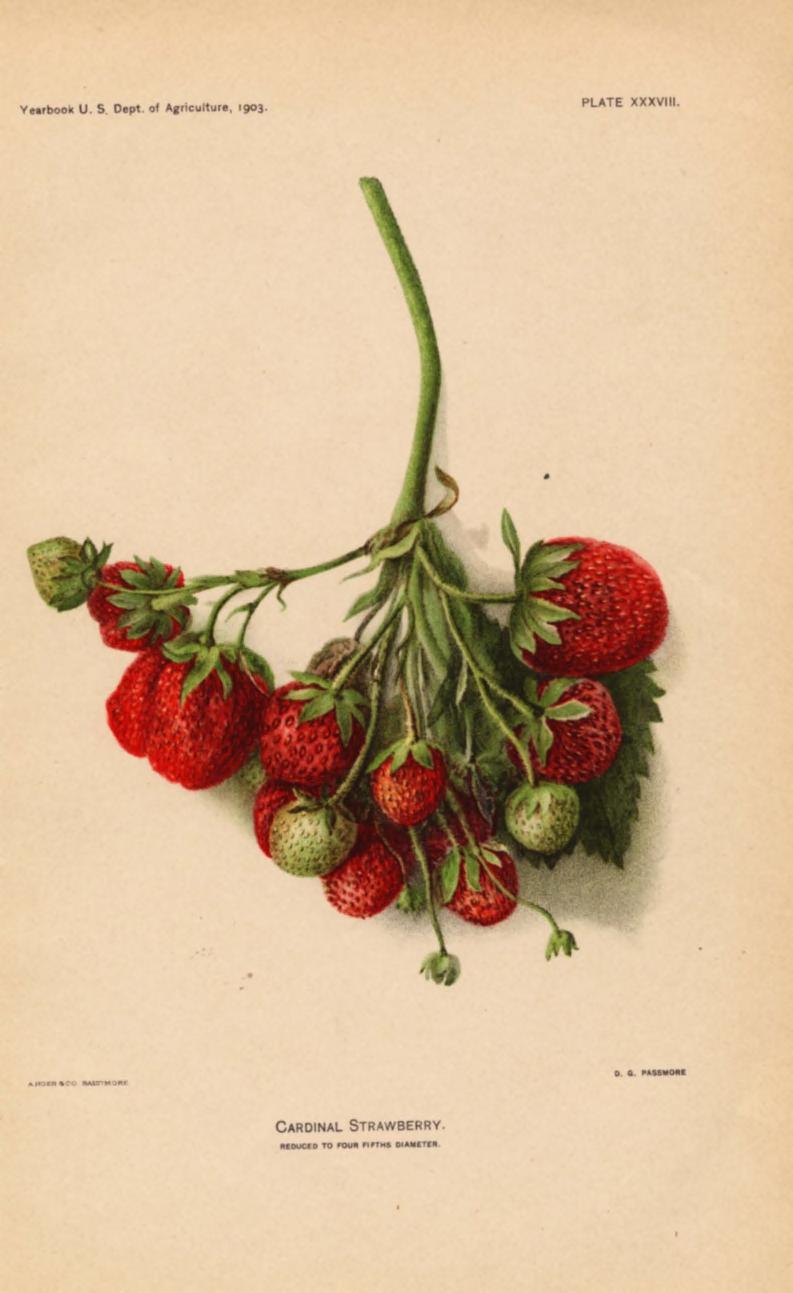
Fun with Fruit

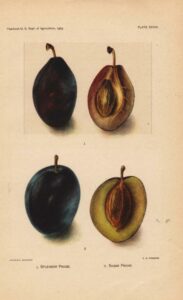
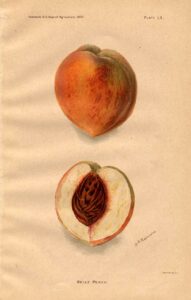
As I was processing a collection of agricultural yearbooks (1902-1998), I didn’t expect much in the way of beauty.

But amidst the descriptions of foot-and-mouth disease, insect infestation, and state-by-state parameters for “a bushel,” I found these delightful color plates.

Enjoy the fruits of my labor – all from The Yearbook of Agriculture: 1902 (published by the US Department of Agriculture).

Continue Reading

Art as Science: Early Botanical Artists

RARE II – at FCMoD from May 6 to August 6 – is an exhibit of contemporary botanical illustrations depicting globally imperiled plants found in Colorado. Members of the Rocky Mountain Society of Botanical Artists created these works of art using the Master List of Rare Plants (produced by the Colorado Natural Heritage Program). I hope you have a chance to see this rare combination of scientific accuracy, aesthetic appeal, and technical mastery.

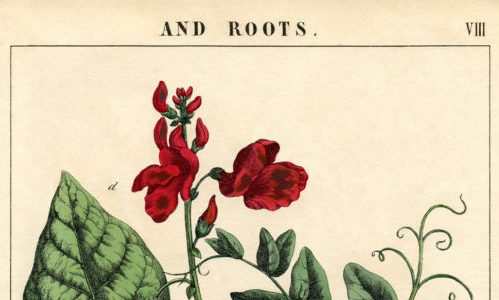
Which brings me to my subject today:  a glimpse at the role botanical illustration played in the early history of science.

Surgeons traveling with the Roman army – including Greeks Dioscorides (circa 40-90 AD) and Galen (131-200 AD) – compiled herbals (text + drawings) that remained the primary materia medica texts for centuries (by some accounts, at least 1500 years). Herbalism traditions were preserved through the middle ages in the monasteries of Britain and Europe, where monks copied and translated works of  Hippocrates, Dioscorides, Galen, and non-Western scientists like Ibn Sina (aka Avicenna). The advent of the printing press in the mid-fifteenth century created unprecedented access to mass-produced books, some of which included botanical illustration. (Details in this paragraph drawn from the University of Virginia’s Claude Moore Health Sciences Library, exhibits.hsl.virginia.edu/herbs/brief-history/ ).

So, Printing press + Woodcut illustrations (later lithographs) = Beautiful botanical books of both scientific and aesthetic value.

For more details about the background of botanical illustration, check out these folks:

  • 16th century, Leonhart Fuchs
  • 17th century, Maria Sibylla Merian
  • 18th century, Pierre-Joseph Redouté
  • 19th century, Pieter de Pannemaeker (Ghent) and Emily Stackhouse (Cornwall)

And enjoy the Rare II exhibit!

Continue Reading