Daily Discovery: Over on the Farm Finger Puppets

Post written by Lea Mikkelsen, Early Childhood Coordinator.

Daily Discovery: Over on the Farm Finger Puppets

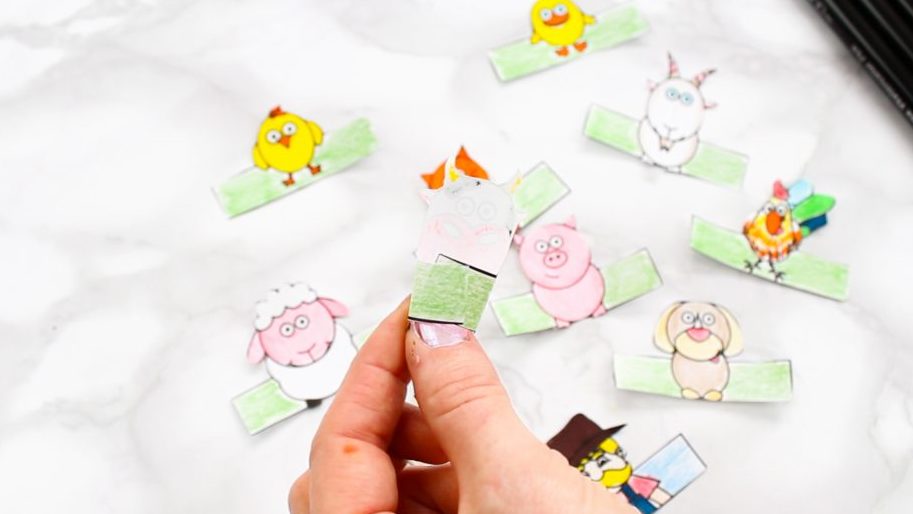
Follow along with FCMoD’s live stream Storytime in the Home: Over on the Farm. Then grab your craft supplies and create some adorable farm finger puppets! Keep practicing your counting at home with the lovely flashcards featuring illustrations from the book.

Supplies:

  • Printed finger puppet activity sheet
  • Scissors
  • Crayons or markers
  • Glue (optional)

Instructions:

  1. Color the finger puppet activity sheet.
  2. Cut out the finger puppets.
  3. Cut a small slot to connect the paper ring that goes around your finger or use glue to close the ring.
  4. Have a farm animal finger puppet show! Tip: Try doing a video chat puppet show for your friends and family while you practice social distancing!
  5. Print out the additional coloring page and the farm animal flash cards to keep the discovery going!

Tip: Don’t have a printer? Try drawing and cutting out your own finger puppets from paper! Here is a tutorial!

Want to download these directions? Click here for a handy PDF!

Follow along with our Daily Discovery! Click here for all activities that you can do at home.

Image Credit: Arty Crafty Kids

Educational opportunities like this are supported in part by Buell Foundation. Their support helps make access to early childhood education at FCMoD possible for everyone in our community.

Continue Reading

Daily Discovery: Build Your Own Ball Run

Post written by Angela Kettle, School Programs Coordinator.

Daily Discovery: Build Your Own Ball Run

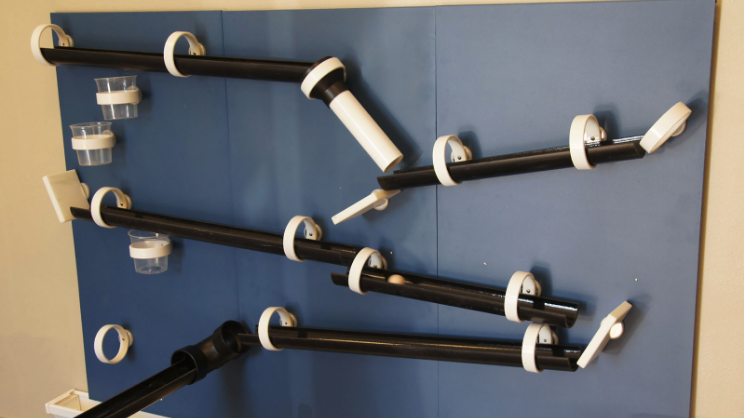
Missing the Ball Run at the museum? Sharpen those engineering skills, and use cardboard, paper, and whatever else you can find around your house to build your own version!

Supplies:

All supplies are optional – use what you have!

  • Large piece of cardboard or posterboard
  • Paper towel rolls
  • Cardstock paper
  • Hot glue
  • Duct tape
  • Scotch tape
  • Pipe cleaners
  • Marble
  • Yarn or string
  • Blank paper
  • Pencil

Instructions:

  1. Start by identifying a surface you can use to build your Ball Run on. For example, this might be a large piece of cardboard, or a piece of posterboard that you tape up on a wall (with an adult’s permission!).
  2. Gather up different supplies from around your house. Decide which supplies you would like to use for your Ball Run. Here are some ideas!
    a. Use paper towel tubes as slides for your ball. You can cut one paper towel tube into smaller tubes if you would like.
    b. Fold cardstock paper into thirds. Tape the top to make a triangular tube. If you don’t have cardstock paper, you can tape together several regular sheets of paper to make them thicker.
    c. Make your own tubes out of duct tape.
    d. Find other tube-shaped materials around your house!
    e. Find a marble to use for a ball. If you don’t have a marble, you can make a ball out of play-doh, clay, aluminum foil, or whatever else you can think of.
  3. . Keeping in mind the size of your surface, sketch your Ball Run. Where will your ball start and end? Which materials will you use for each portion? How will you make sure your ball has enough momentum to keep going until it has reached the end of the run?
  4. Using your sketch as a guideline, build your Ball Run! Lay it out so you can see it before you start attaching anything – that way, if you need to change anything, you can!
  5. Time to attach your pieces to your surface! There are lots of
    different ways to do this. You can use hot glue, tape, or one of the methods shown in the picture. Or, maybe, you’ll think of your own way!
  6. Try it! Place your ball at the top of your Ball Run. What  happens? Did it go as you expected? Why or why not? Make repairs as needed.
  7. Take a photo or video of your final project. With your adult’s
    permission, share it with us on social media using #DailyDiscovery. Great job, Engineer!

Want to download these directions? Click here for a handy PDF!

Follow along with our Daily Discovery! Click here for all activities that you can do at home.

Continue Reading

Daily Discovery: Map Making

Post written by Charlotte Conway, Public Programs Coordinator.

Daily Discovery: Map Making

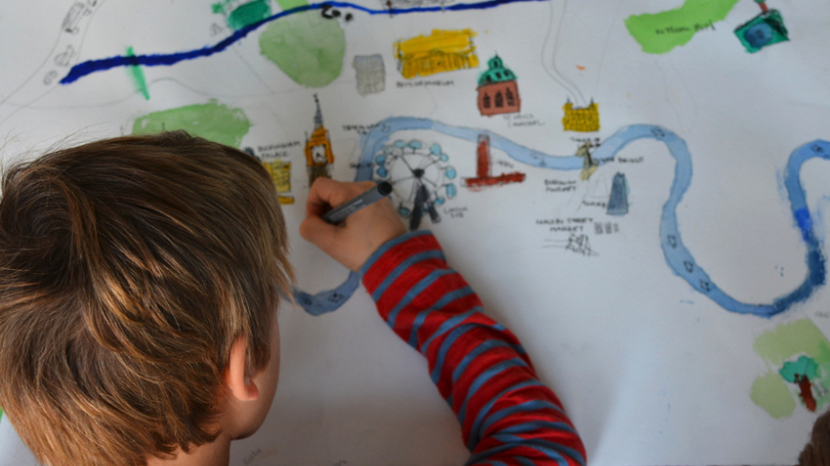
Have you ever looked up your house on Google Maps? It can be pretty cool to see your own neighborhood from a different  perspective! You can also find all sorts of maps and photographs of your town from history through the local Archives and Collections at FCMoD! Check out maps from your own community, and then make a map of your own!

Supplies:

  • Graph paper or paper
  • Colored pencils
  • Pencils
  • Ruler

Instructions:

  1. Maps are a two-dimensional representation that records the natural and build world around them, usually from a “top-down” perspective. There are many different types of maps each with different uses and looks!
  2. Compare and contrast the maps provided from Fort Collins Museum of Discovery’s Archives and Collections. What do the maps have in common? What is different about them? How do the maps differ based on how people might use them? How do the maps make use of colors, symbols, or labels to communicate their meaning?
  3. Now, it’s time to start designing your map! First, select a place you would like to make a map of. It could be your own neighborhood, somewhere from a different city, or even a made-up place!
  4. Next, consider the purpose of your map. What is your map trying to communicate? Will it be a political or road map that focuses on man-made features? Will it be a physical map that shows natural features?
  5.  Now that you have your purpose in mind, plan out the other features of your map that will make it more effective for your users.
    a. Legend – This is a visual explanation of the symbols you use on your map. How will you show the contents of your world on your map? If you use symbols, how will people know what they represent?
    b. Scale – This is the relationship between distance on your map and the same distance you are trying to represent on the ground. How will you translate the scale of world into a map that will fit on the paper? How will people who see your map know how large your world really is?
    c. Labeling – This is how you will write labels so that they clearly identify the right features on your map. How will people know what your map is supposed to be showing? How will they know who made the map and when?
  6. Draw out your map. Get creative with your representation, but remember to keep your purpose in mind so that your map is useful too!
  7. Keep the exploration going! Did you know FCMoD houses artifacts and collections from Northern Colorado, including historic maps? Explore maps from Northern Colorado. Explore your town using the GPS applications on smart phones or Google Maps, and then explore the world! What will you discover?

Want to download these directions? Click here for a handy PDF!

Follow along with our Daily Discovery! Click here for all activities that you can do at home.

Photo Credit: BABYCCINO

Continue Reading

Enter the Zooniverse

Post written by Ben Gondrez, Digital Dome Manager.

Enter the Zooniverse

Have you ever wondered if there was an easy way to help scientists and researchers make new discoveries from your very own home? Well, whether you’ve had that thought or not, you can indeed be a vital participant in actual research through the Zooniverse! The Zooniverse is the world’s largest and most popular platform for people-powered research. By utilizing the power of volunteers – more than a million people around the world who come together to assist professional researchers – Zooniverse makes it easy for anyone, including you, to contribute to real academic research from their homes on their own computers. As many of us are spending more time than usual at home observing social distancing in response to COVID-19, now is the perfect time to become a citizen scientist and Zooniverse makes it easy for all ages of people to get involved. So how does Zooniverse work? Check out this short animation to learn more:

Ready to get started helping with real research projects from your own home? You can visit zooniverse.org to see all active projects including projects like Planet Four, a project exploring the surface and weather of Mar’s south polar region, or the project Bash The Bug, helping researchers find effective antibiotics to fight tuberculosis. Not sure where to start? Here are a couple of curated lists of projects and other links from Zooniverse to help you get started:

Designed for 5-12 year olds:

  • Curated list of age-appropriate Zooniverse projects for younger learners
  • Zooniverse-based Activity for 5-12 year olds
  •  Classroom.zooniverse.org
    • Wildcam Labs
      • Designed for 11-13 year olds, but the content can easily scale down for younger audiences.
      • Great way to engage if you love looking at photos of wild animals and want to investigate ecological questions. The interactive map allows you to explore trail camera data and filter and download data to carry out analyses and test hypotheses.
      • Educators can set up private classrooms, invite students to join, curate data sets, and get access to the guided activities and supporting educational resources.
      • Individual explorers also welcome – you don’t need to be part of a classroom to participate. · Planet Hunters Educators Guide

Designed for 11-13 year olds:

Designed for teens and adults:

  • Curated list of Zooniverse projects
  • Zooniverse-based Lesson Plan for teens and adults
  • Classroom.zooniverse.org
    • Wildcam Labs
      • Designed for middle school classrooms, but the content can easily scale up for older audiences.
      • See description above.
    • Astro101 with Galaxy Zoo
      • Designed for undergraduate non-major introductory astronomy courses, but the content has been used in many high-school classrooms as well.
      • Students learn about stars and galaxies through 4 half-hour guided activities and a 15-20 hour research project experience in which they analyze real data (including a curated Galaxy Zoo dataset), test hypotheses, make plots, and summarize their findings.
      • Developed by Julie Feldt, Thomas Nelson, Cody Dirks, Dave Meyer, Molly Simon, and colleagues.
    • For both Wildcam and Astro101 Activities
      • Educators can set up private classrooms, invite students to join, curate data sets, and get access to the guided activities and supporting educational resources.
      • Individual explorers also welcome – you don’t need to be part of a classroom to participate.
  • Planet Hunters Educators Guide
    • Designed for 11-13 year olds, but the content can easily scale up for older audiences.
    • See description above.
  • Notes from Nature Activity
    • Designed for 11-13 year olds, but the content can easily scale up for older audiences.
    • See description above.
  • Snapshot Safari-based Lesson Plans and Interactive Timeline
    • Developed by University of Minnesota PhD student Jessica Dewey
  • Kelp Forest Ecology Lab
    • Through the Zooniverse FloatingForests.org project, researchers are striving to understand the impact of climate change on giant kelp forests, an indicator of the health of our oceans. In this lab, students analyze Floating Forest and other ocean data to explore their own research questions.
    • Developed by Cal State – Monterey Bay faculty Dr. Alison Haupt and colleagues
  • NEH Teacher’s Guide for Digital Humanities and Online Education
Continue Reading

Daily Discovery: Harness the Wind!

Post written by Hannah Curtis, Education Assistant.

Daily Discovery: Harness the Wind!

Wind! It doesn’t just blow silver tiles on the museum’s Wind Wall; it’s a natural renewable resource. Engineers develop ways to harness wind to help the modern and natural world. Build your own creation using the design process, materials in your home, and of course, the wind!

Supplies:

All supplies are optional – use what you have!

Pre-design supplies:

  • Scratch paper or graph paper
  • Writing utensil

Building Supplies

  • Plastic bottles and lids
  • Tin cans
  • Paper scraps or sticky notes
  • Pencils or pens
  • Straws
  • Disposable cups or containers
  • Cardboard
  • Yarn or string
  • Rubber bands
  • Natural materials (sticks or rocks)
  • Blank CD or floppy disks
  • Plastic spoons
  • Paper tubes
  • Old socks
  • Tissue paper
  • Scissors
  • Tape
  • Glue
  • Metal brads
  • Paper clips
  • Push pins
  • Magnets

Instructions:

  1. As an engineer, work through the design process to begin building! Follow the design process on the right, sketch out your design, and think creatively about what materials you can use inside your home.
    Use the following guiding questions to help you:
    a. What purpose will your design have? What is its function?
    b. Could your design be multifunctional?
    c. How will you ensure your design will hold up against heavy winds or other weather?
    d. How will you know your design was a success?
  2.  Test your design and adjust as necessary. Share your creation with family and friends through photos or videos!
  3. Wind isn’t the only renewable resource! What other renewable resources have helped other cultures and countries?
  4. Challenge yourself to build a new creation that reflects other sustainable energy sources! What do we utilize here in Fort Collins?

Want to download these directions? Click here for a handy PDF!

Follow along with our Daily Discovery! Click here for all activities that you can do at home.

Continue Reading

Daily Discovery: Social Distancing – How Long Is Six Feet?

Post written by Angela Kettle, School Programs Coordinator.

Daily Discovery: Social Distancing – How Long Is Six Feet?

We have an important job to do together – and that job is staying apart! As COVID-19 spreads, the Center for Disease Control and Prevention urges people to stay at least six feet away from those who live outside of our homes whenever possible.

What does six feet actually mean, though? Go on an adventure inside your home to see what objects (stacked together or on their own) are at least six feet long! Then, use these objects to help you picture what six feet means when you are out in public.

Supplies:

  • Measuring tape (if you don’t have one, you can print a template at the end of this document, or you can download an app like Measure from Google on a smartphone or tablet)
  • Pencil and paper to record measurements
  • Camera (optional)

Instructions:

  1. Write down six things on your paper that you would like to measure. These should be things that are already in your house. These things can be big, or small! (At the bottom of this, you can see some of the things one of our FCMoD educators measured at her house!)
  2. Get out your measuring tape, and release six feet of tape. Observe what that distance looks like on the measuring tape.
  3. Make a prediction about how long you think each of the household objects that you wrote down will be: shorter than 6 feet, 6 feet, or longer than 6 feet.
  4. Time to measure! Make sure to be safe – if you are not tall enough to reach something, ask someone taller than you to help. Write down each measurement in inches as you go.
  5. Now look at your results! Six feet is the same as 72 inches. Were your items longer than, shorter than, or equal to six feet?
  6. Math Bonus: See how many of the item you would need to make six feet!a.
    • If your object was shorter than 72 inches, divide 72 inches by the length of your object in inches. For example, since our educator’s cat was 27 inches, she would divide 72 inches by 27 inches to get 2.6 cats. So, she would need to put 2-and-a-half of her cats (stretched out!) between her and another person to practice proper social distancing.
    • If your object was longer than 72 inches, you will still divide 72 by the length of your object. However, you should get an answer that is less than 1 (a decimal). For example, our educator’s closet door was 78 inches. If you divide 72 inches by 78 inches, you get .92. So, she would need almost her entire closet door’s length – 92% of it – between her and another person to practice proper social distancing.
    •  Now, any time you have to be out in public, picture one of your items that was close to six feet long. In your imagination, place that object between you and any people around you. Share your objects with us on social media with the hashtag #DailyDiscovery to help others picture six feet, too!

Want to download these directions? Click here for a handy PDF!

Follow along with our Daily Discovery! Click here for all activities that you can do at home.

Image credit: CalMatters.org

Continue Reading

Daily Discovery: What Does it Mean to “Flatten the Curve?”

Post written by Angela Kettle, School Programs Coordinator.

Daily Discovery: Slowing the Spread – What Does it Mean to “Flatten the Curve?”

Note for Caregivers: This activity is meant to help older children (and adults!) better understand how quickly diseases like COVID-19 can spread. Most importantly, though, it is meant to start a conversation about what we can do to slow the spread through social distancing and healthy habits. Recommendations by the Center for Disease Control and Prevention state that giving  children factual, age-appropriate information, along with providing action steps they can take, can help children cope with stressful information. Therefore, we recommend this activity for ages 10+, with the guidance and reassurance of a caregiver, though we encourage you to use your discretion. You know your child best! More tips on talking with children about COVID-19 are available here!

Mathematicians use statistical models to make predictions about the future. These predictions help people like you and me make decisions about how we should behave, and they also help policy makers create policies that are in the best interest of the public.

Right now, many mathematicians are making statistical models to predict the spread of COVID-19, or coronavirus. These models help us predict how human behavior will affect the spread of the virus. Let’s make our own model to see how it works! (Bonus: you get to tear up paper into tiny pieces!)

Definitions to Know:

  • Statistical Model: An equation used to predict what could happen under a certain set of circumstances. Statistical models range from quite simple to very complex.
  • COVID-19: According to the World Health Organization, “COVID-19 is the infectious disease caused by the most recently discovered coronavirus. This new virus and disease were unknown before the outbreak began in Wuhan, China, in December 2019.”
  • Social Distancing: Social distancing is intentionally increasing the physical space between people to avoid spreading illness (most sources recommend 6 feet minimum between people). Examples include staying away from large gatherings of people, canceling school, and encouraging employees to work
    from home.
  • Rate of Reproduction: Often seen as R0 and pronounced “R-nought,” this figure helps scientists explain how intense an outbreak is. It predicts how many other people will catch the virus from one infected person.
  • Infectious Period: The time during which an infected person can spread the disease to others. This is often different than the total time a person feels sick.  Sometimes, the infectious period begins before a person starts showing symptoms whatsoever. The infectious period differs for each disease.
  • Disease: Illness or sickness characterized by specific signs and symptoms.
  • Virus: A microorganism that cannot grow or reproduce apart from a living cell. Viruses cause human infections, and infections often result in disease.

Supplies:

  • 1 piece of paper for experiment (we recommend scratch paper if you have it)
  • 1 piece of paper for graph
  • Pen or pencil
  • A calculator
  • A straight-edge (optional)

Instructions:

  1. We are going to make a model for the spread of an imaginary disease. Technical note: Scientists usually call the disease caused by a virus something different than the virus itself. For example, the name of the virus that causes the disease COVID-19 is actually SARS-CoV-2. Let’s call our imaginary virus IMAGINATION-1, and the disease caused by the virus  IMAGINE-1. We’ll say that with no social distancing measures in place, IMAGINATION-1 has a Rate of Reproduction (abbreviated R0) of 2 – meaning that every person who catches the virus will spread it to 2 other people during their infectious period. We’ll also say that the infectious period for IMAGINATION-1 is 24 hours, or 1 day.
  2. We are going to make a graph to chart how many new cases of IMAGINE-1 (the disease) there are each day. Draw a graph by making a large L-shape on a piece of paper (use a straight edge if desired). Title your graph so that others know what it represents (a good title might be “New Cases of IMAGINE-1 per Day”). Label the x-axis (the line going sideways) with your unit of measurement – in this case, Time in Days. Place 7 tick marks along this line. Label these tick marks from Day 1 to Day 7. Label the y-axis (the line going up and down) with your unit of measurement – in this case, Cases of IMAGINE-1. Place 20 tick marks. Label each tick mark, counting up from 5 (5, 10, 15, etc.).
  3. Let’s say that 1 person caught the first-ever case of IMAGINE-1. Find Day 1 on your x-axis. Find the value 1 on your y-axis (just barely up from the bottom of your graph). Place a dot where the x-axis and y-axis meet. This shows that on Day 1, there is 1 new case of IMAGINE-1.
  4. Now, we’ll move on to Day 2. Based on our R0 of 2, the first infected person would spread the disease to 2 other people during their infectious period. Now it’s time to tear up some paper! Get out your blank sheet of paper. Tear your sheet in half, representing that 2 new people now have the disease. Find Day 2 on your X-Axis, find where the value 2 falls on your Y-Axis, and plot this on your graph with a dot.
  5. Tear your 2 pieces of paper in half again. How many pieces of paper do you have now? Plot this number above Day 3.
  6. Repeat tearing your pieces and plotting your points for Days 4, 5, 6, and 7 (Note: Want to check if you’re on track? Look at the end of this document for the number of new cases each day.) Draw a line to connect one point to the next point.
  7. Now it’s time to get out your calculator! Multiply Day 7’s result by 2 to get your new number of cases on Day 8. Multiply that number by 2 to find your new cases on Day 9. Continue this process. How many new cases do you have on Day 15?
  8. This model just showed us how many new cases there were on each day — not the total number of cases over the whole 15 days. Find the total number of cases by adding together all the new cases for each day.
  9. Save your little pieces of paper for other crafts and activities!

Want to download these directions? Click here for a handy PDF!

Follow along with our Daily Discovery! Click here for all activities that you can do at home.

Image credit: MilwaukeeMag.com

Continue Reading

Daily Discovery: Make Your Own Bug Box

Post written by Lea Mikkelsen, Early Childhood Coordinator.

Daily Discovery: Make Your Own Bug Box

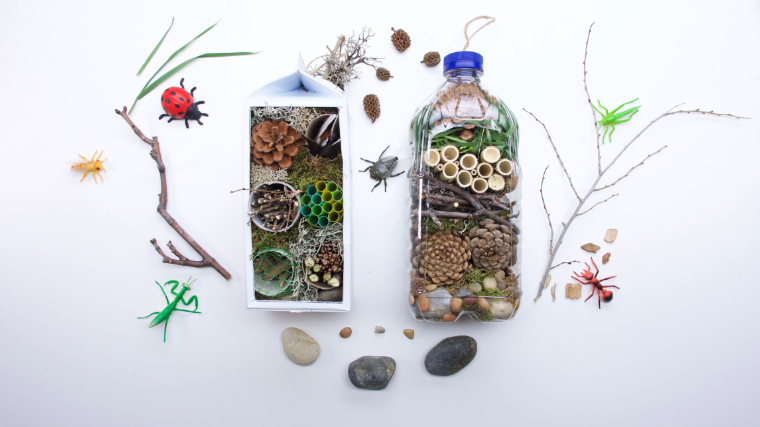
Creeping, crawling, flying, chirping… bugs are everywhere outside! Take a look down in the dirt and see if you can catch one for your very own bug observation box.

Supplies:

  • A clear plastic container. Tip: Try looking in your recycling! I used a produce container that had tomatoes in it. Try to find one without too many large holes.
  • Mesh or net with very small holes. Tip: I found a potato bag made of mesh.
  • Scissors
  • Tape
  • Insect, Myriapod, and Arthropod learning sheets

Instructions:

  1. Place all your supplies on a clear surface with plenty of room to work.
  2. Ask an adult for help with cutting the plastic or attaching the mesh to your container if you need it.
  3. Look at your container. Is there a lid or a way to open it to put your bug inside?
  4. Decide where to cut a hole for air. Tip: Some containers may already have a hole like my tomato container.
  5. Cut your mesh to fit the shape of the hole. Tip: I folded the mesh in half to make sure bugs could not get out!
  6. Use tape to attach the mesh to the container.
  7. Make sure there are no holes around the mesh or in the container that could let a bug out! Cover any
    big holes with a little extra tape.
  8. Go outside and fill your bug box with dirt, leaves, and sticks for your bug to climb on.
  9. Finally, catch a bug to observe in your bug box! Be sure you let them go back outside after a few hours.
  10. Learn about the differences between Insects, Myriapods, and Arthropods, on the learning sheets and try to determine what kind of bug you caught!

Want to download these directions? Click here for a handy PDF!

Follow along with our Daily Discovery! Click here for all activities that you can do at home.

Image credit: supersimple.com “Bug Hotel”

Continue Reading

Daily Discovery: Black-Footed Ferret Masks!

Post written by Hannah Curtis, Education Assistant.

Daily Discovery: Black-Footed Ferret Masks!

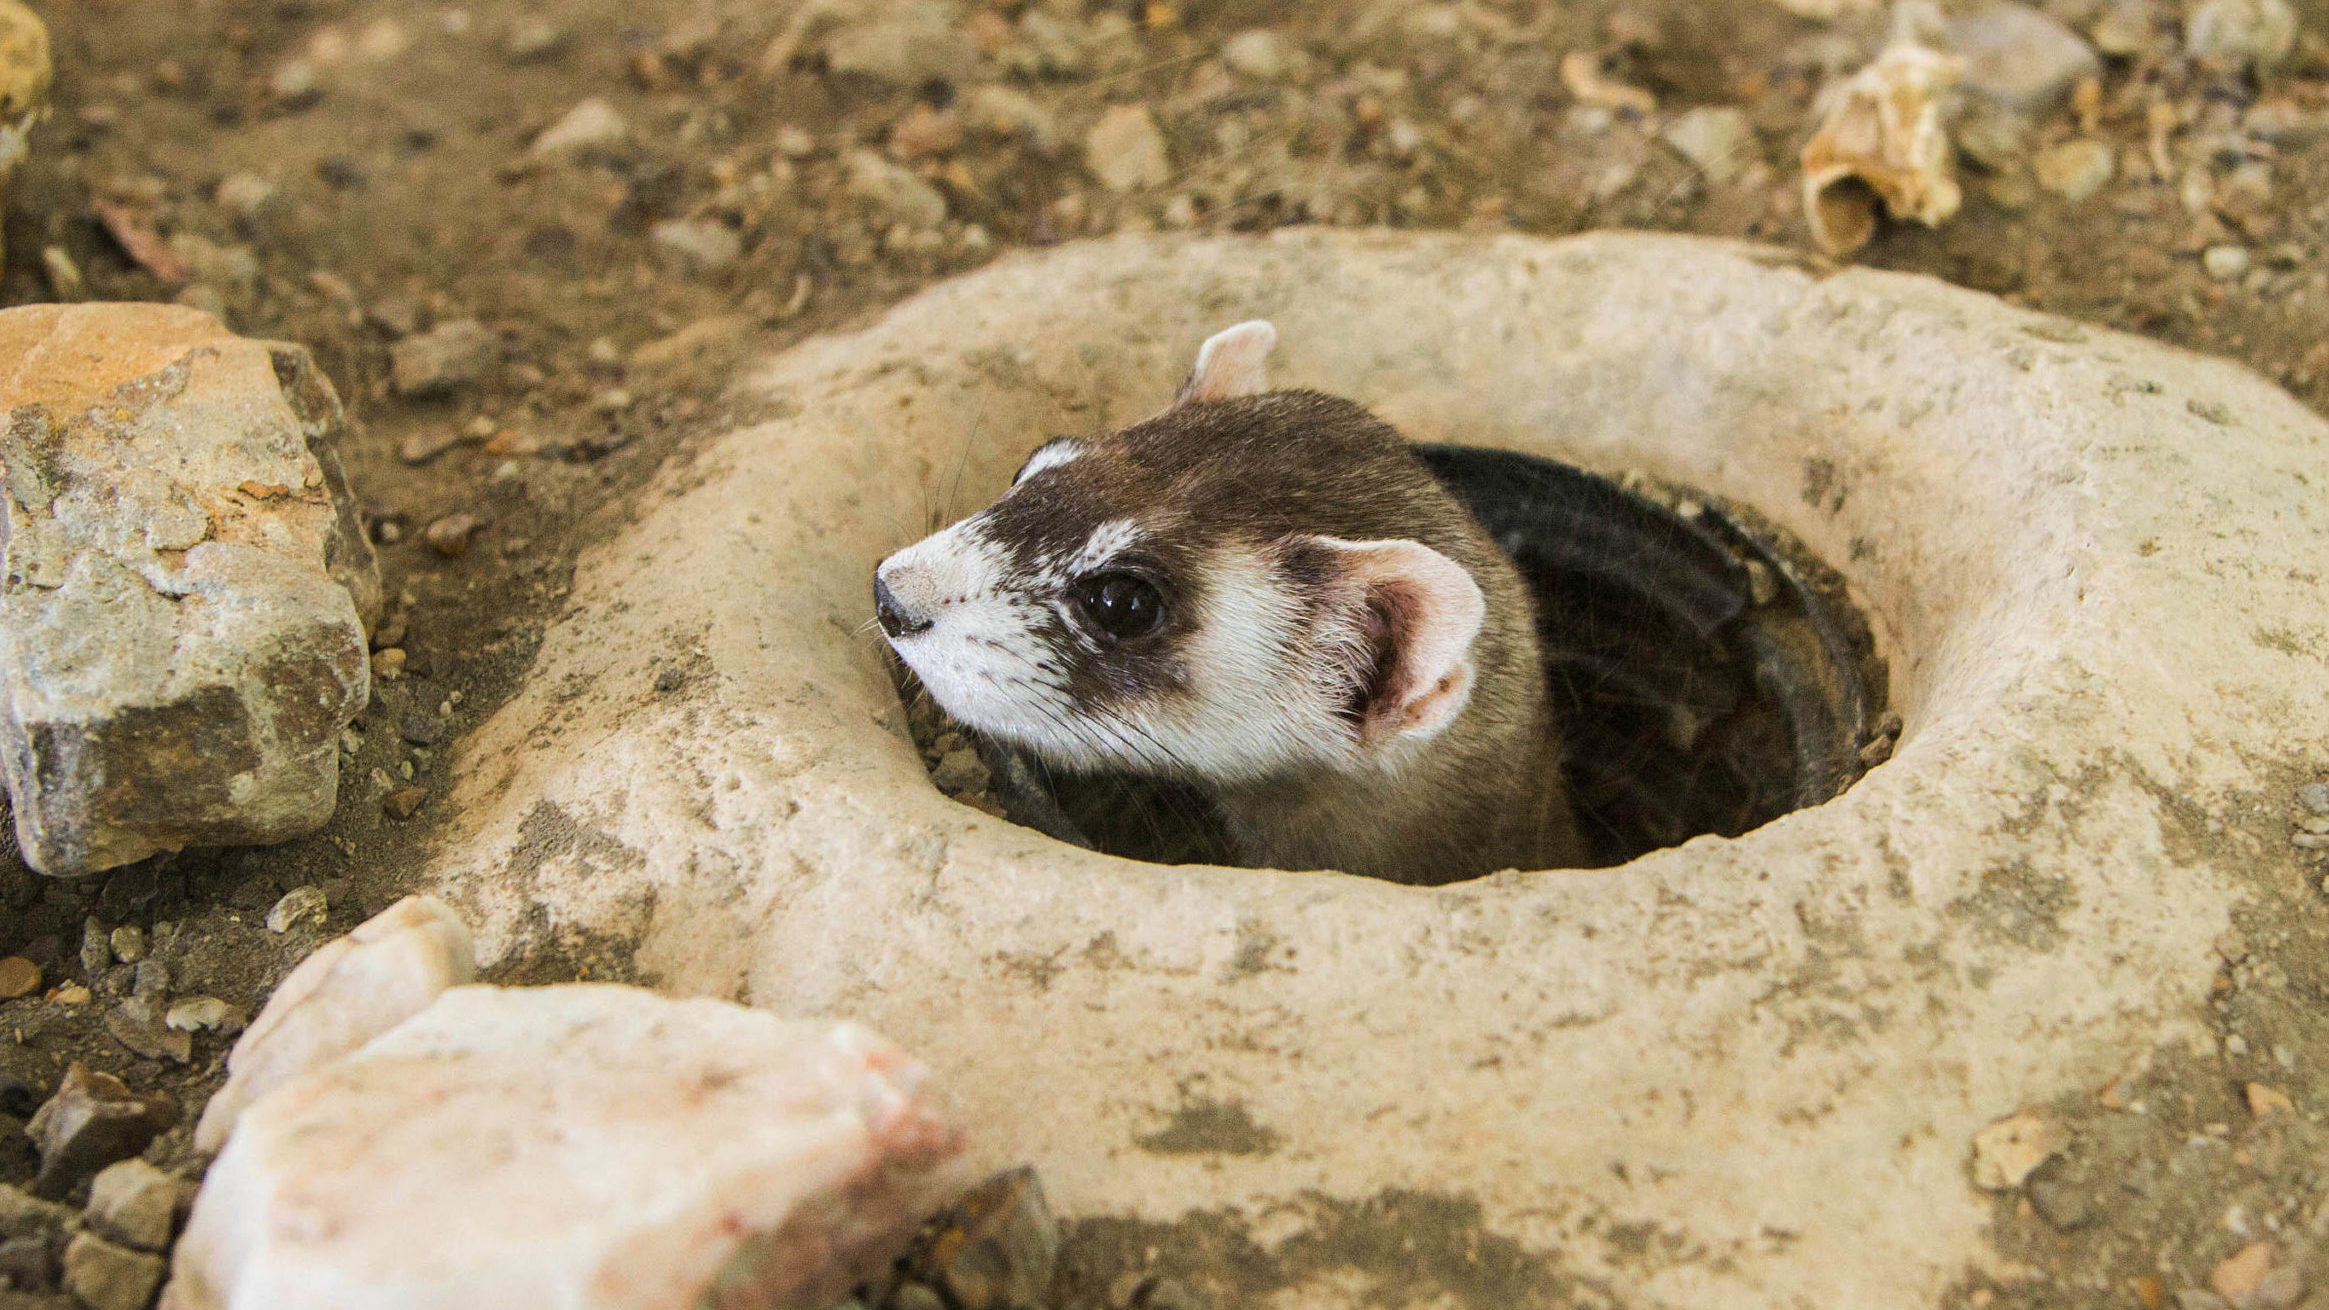
Stay connected to BFFs Stevie Nicks and Patty Ann while at home! Head over to our ferret cams to see what they’re up to throughout the day, and night. During your virtual visit, get creative and create your own ferret mask!

Supplies:

  • BFF mask template
  • Crayons, markers or colored pencils
  • Scissors
  • String or yarn

Instructions:

  1. Print out the BFF mask template or design your own template.
  2. Color and decorate your mask.
  3. Cut out two side holes to attach your sting, and don’t forget to cut out the eyes!

Want to download these directions? Click here for a handy PDF!

Follow along with our Daily Discovery! Click here for all activities that you can do at home.

Continue Reading

Daily Discovery: Make Your Own Harmonica!

Post written by Eisen Tamkun, Music Education Lead.

Daily Discovery: Make Your Own Harmonica!

Is it a Harmonica or a Kazoo? Who knows but it sure is fun to play!

Supplies:

  • Tongue depressors/ jumbo craft sticks
  • Tape – duct or scotch tape
  • Wide rubber band
  • Scissors
  • Stiff paper – cardstock or flashcard

Instructions:

  1. Once you have all the supplies, cut two strips of paper half an
    inch thick and two inches long.
  2. Place both craft sticks together and wrap both strips of paper
    around them. Tape the paper strips closed around the sticks
    creating sleeves (do not tape them to the sticks). Slide both
    sleeves off the craft sticks.
  3. Next, place the rubber band lengthwise on one of the craft
    sticks.
  4. Replace the sticks together and slide the sleeves back one.
  5. Finally, duct tape each end of the harmonica.
  6. Congratulations you have your own harmonica!

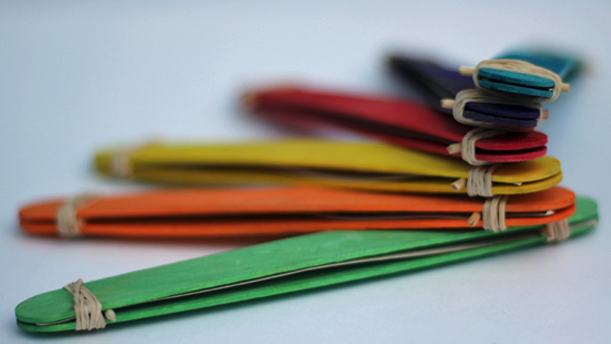
Place your lips on the harmonica and blow until the rubber band starts to vibrate creating noise. Try moving the sleeves closer or farther apart. How does this change the sound?

Want to download these directions? Click here for a handy PDF!

Follow along with our Daily Discovery! Click here for all activities that you can do at home.

Image credit: TUK Crafts

Educational opportunities like this are supported in part by Bohemian.

Continue Reading