Daily Discovery: Egg-cellent Egg-tivities – Part 2

Post written by Lea Mikkelsen, Early Childhood Coordinator & Charlotte Conway, Public Programs Coordinator.

Daily Discovery: Egg-cellent Egg-tivities – Part 2

Let’s learn all about eggs! What are eggs, anyway? What animals do they come from? What are the different parts made of? What can we do with eggs?

Glowing Egg

People who raise chicks use a technique called candling to determine if an egg is fertilized and has a chick growing inside of it. Your eggs from your refrigerator at home will not have a chick growing inside, but this is a really neat way to look inside an egg!

Supplies:

  • One egg
  • Flashlight
  • Dark room

Instructions:

  1. Hold the egg gently in your hand (or ask an adult to help you) and press the flashlight carefully against the eggshell.
  2. Carefully rotate the egg to see it from different angles.
  3. What can you see? Do you see the spots in the egg shell? Do you see the air cell?
    a. The egg shell is almost entirely composed of calcium carbonate. There are pores in the egg shell that allow some breathability to the shell.
    b. The air cell forms when the egg is laid. You can see where the air cell was when you look at the flat end of a boiled egg.

Floating Egg

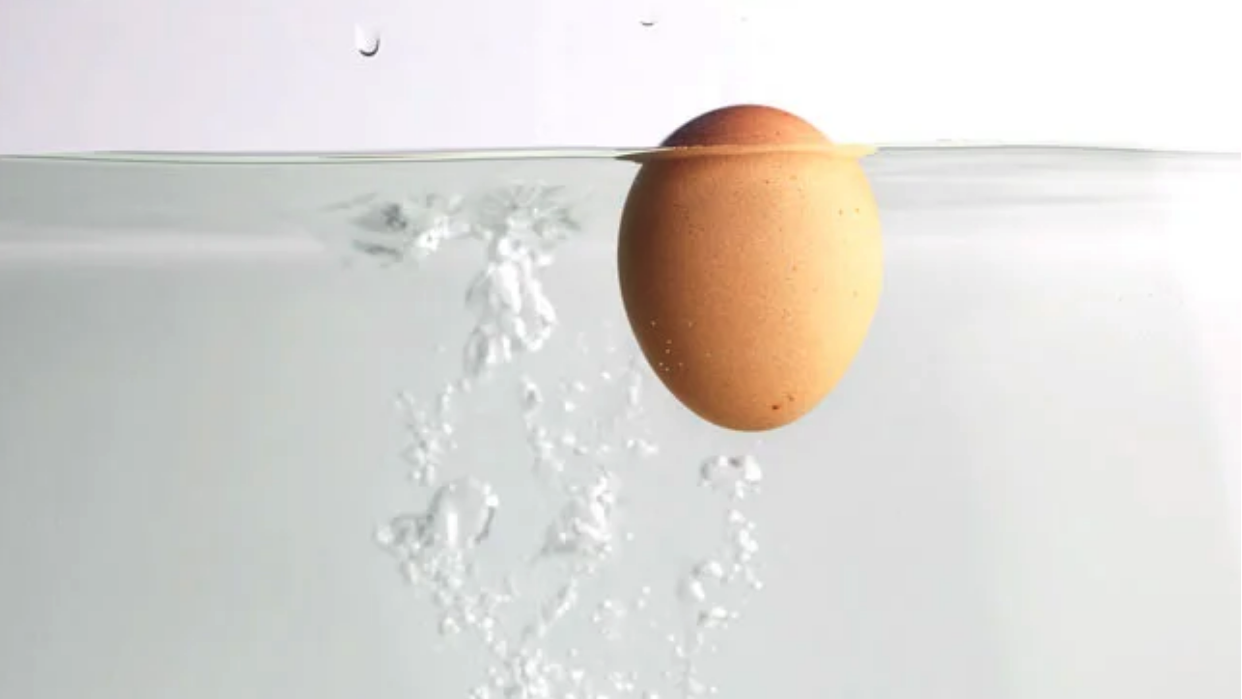
Learn about density and buoyancy through this floating egg  experiment. Don’t forget to make your hypothesis about what will happen to each egg!

Supplies:

  • Two eggs
  • Water
  • Two tall drinking glasses
  • Three tablespoons of salt

Instructions:

  1. Fill one glass ¾ of the way with water.
  2. Make a hypothesis about what will happen to the first egg.
  3. Carefully place the egg into the glass of water and observe. What happened to the egg?
  4. Fill a second glass ¾ of the way with water.
  5. Add 3 tablespoons of salt and stir.
  6. Make a hypothesis about what will happen to the second egg.
  7. Carefully place the second egg into the second glass of water and observe. What happened to the egg?

Tip: If an egg floats in water without adding salt, the egg is likely old. The air cell has grown inside the egg, making it buoyant. Check the egg for a bad smell before you eat it.

Want to download these directions? Click here for a handy PDF!

Follow along with our Daily Discovery! Click here for all activities that you can do at home.

Image credit: bonappetit.com

Continue Reading

Daily Discovery: Egg-cellent Egg-tivities – Part 1

Post written by Lea Mikkelsen, Early Childhood Coordinator & Charlotte Conway, Public Programs Coordinator.

Daily Discovery: Egg-cellent Egg-tivities – Part 1

Let’s learn all about eggs! What are eggs, anyway? What animals do they come from? What are the different parts made of? What can we do with eggs?

Egg Carton Art

Save that egg carton! It can be upcycled and turned into so many amazing things. You can cut it, glue it, build with it, paint it, use it to hold small loose things like beads or pretty rocks. There are endless possibilities!

This activity will show you how to cut apart an egg carton to make upcycled flowers. Share your egg carton creations with #dailydiscovery!

Supplies:

  • Egg carton(s)
  • Scissors
  • Glue, decorative paper, paint, paintbrush (optional)

Instructions:

  1. Ask an adult to help you cut out the center pointy pieces of the egg carton. Be sure to leave plenty of the “petals” on them.
  2. Use the scissors to cut out the petals of the flower. Try cutting them in different shapes!
  3. Cut a long sturdy stem piece with a little tab on one end from a flat part of the egg carton.
  4. Make a hole in the base of the flower and thread your stem through the hole with the tab resting inside the flower. That will keep the stem from sliding out of the flower. Optional: use glue to keep the stem in the flower.
  5. Use paint (if you have some) to decorate your flowers. Be creative! You can also use paper to make leaves or more petals on the flower. Let the flowers dry and then pop them in a vase to bring cheer!

Natural Egg Dying: Cooking with Science!

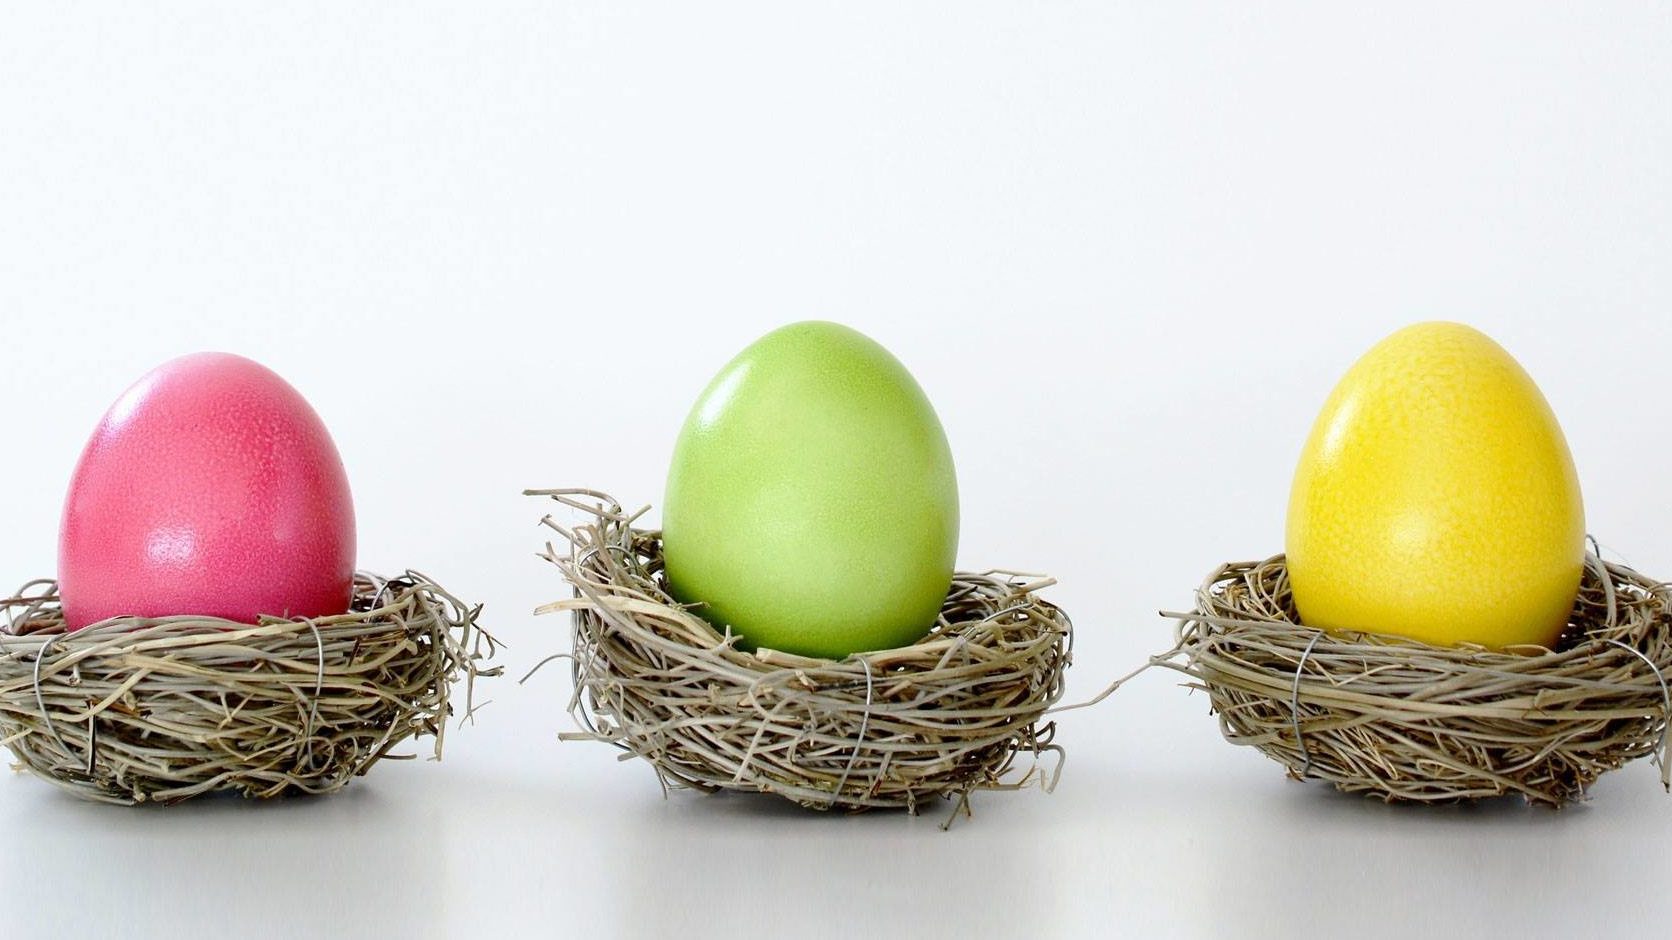
Experiment with these natural dyes to make beautiful, colorful eggs that are totally edible! The best part is, you can make these dyes using items you have in your kitchen, and you don’t have to waste any food in the process.

Adult supervision is required for this activity.

Supplies:

  • Hard-boiled eggs
  • Saucepan
  • Water
  • White Vinegar
  • Clean kitchen or paper towels
  • Slotted spoon
  • Small bowls
  • Cheesecloth, fine sieve, or strain
  • Natural dying materials from your kitchen (Suggestions: beets, ground turmeric, coffee, spinach, yellow onion skins, red cabbage, yellow delicious apple peels)

Instructions:

  1. Gather materials for your natural dyes. This is a great opportunity to reduce, reuse, and recycle! Try using your kitchen waste like yellow onion skins, any stale coffee, or apple peels for dyes! If you use fresh produce, like a beet or red cabbage, think about how you might eat the boiled vegetables afterwards.
  2. Now comes the fun part! Experimenting with different natural materials can produce surprising colors, and don’t hold back from mixing 2 or more materials together to achieve new colors.
  3. Prepare your natural materials into liquid dyes according to which materials you are using. Always use adult supervision when you are using the stove or chopping vegetables.
    a. For the whole vegetables, like red cabbage or beets, chop them into smaller pieces first(around one inch). Place 1 cup of desired material in your saucepan and cover with 1 quart of water. Simmer the mixture for 30 minutes, or until desired color is achieved. Strain mixture and reserve the liquid.
    b. For the spinach, onion skins, or apple peels, place about 2 cups of desired material in saucepan and cover with 1 quart of water. Simmer the mixture for 30 minutes, or until desired color is achieved. Strain the mixture and reserve the liquid.
    c. For the ground turmeric, place 2 tablespoons of turmeric in 1 quart of water. Simmer the mixture for 30 minutes. Strains the mixture if you are using cheesecloth, otherwise, don’t worry about straining. Reserve the liquid.
    d. If you are using stale coffee, there are no preparations needed. Skip ahead to the next step!
  4. Place reserved liquids in individual small bowls. Stir in 2 tablespoons of white vinegar per every cup of liquid dye.
  5. Retrieve your hard-boiled eggs when you are ready to dye. Make sure to keep them refrigerated at all times when you are not using them!
  6. Use a slotted spoon to slowly lower your hard-boiled egg into desired color dye. Refrigerate the bowl to let the dye soak into the eggshell.
  7.  Time for the big reveal! After at least 30 minutes, use your slotted spoon to remove the egg from the dye.
  8. Pat the egg dry using paper towels or a clean kitchen towel. To mix colors, you can soak an egg first in one colored dye for 30 minutes or more, followed by a second soak in another colored dye for 30 minutes to an hour. Get creative and experiment with different soak times and color mixtures to achieve a whole spectrum of colors!
    a. Note that natural dyes will produce a subtler color than artificial dyes. For more vibrant natural colors, you can soak your eggs in the refrigerator overnight.
  9. Store the colored eggs in an egg carton in the refrigerator until you are ready for an egg-celent snack.

Want to download these directions? Click here for a handy PDF!

Follow along with our Daily Discovery! Click here for all activities that you can do at home.

Continue Reading

Daily Discovery: Rain Stick Craft

Post written by Lea Mikkelsen, Early Childhood Coordinator.

Daily Discovery: Rain Stick Craft

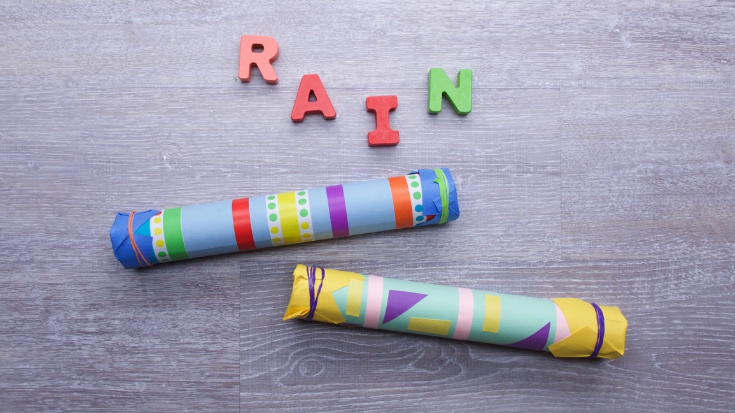
Have you ever wondered why it rains? Water vapor rises into the atmosphere. As it cools, it condenses and combines with tiny particles to form clouds. If the water droplets get big enough, they fall to the earth as rain! Capture the sound of rain and bring it inside with this awesome rain stick craft.

Supplies:

  • Paper towel tube
  • Tape
  • Scissors
  • Paper
  • Tin foil
  • Dry beams. rice, or popcorn
  • Markers, crayons, paint, stickers, ribbon, or whatever else you want to decorate with!

Instructions:

  1. Place all your supplies on a clear surface with plenty of room to create.
  2. Cut out two small pieces of paper to wrap over the ends of your tube, and one larger piece of paper to decorate and cover your tube. Ask an adult to help if you need it!
  3. Using art supplies, decorate your paper however you want. Be creative!
  4. Tape a small piece of paper around the end of your paper towel tube.
  5. Scrunch the tin foil to make a snake like coil and put it inside the tube.
  6. Fill the tube with beans, rice, or popcorn! Tip: Try using a funnel or a cone of paper to fill the tube.
  7. Tape the second small piece of paper to the end of the tube.
  8. Wrap the tube in your decorated paper and tape it in place. Optional: Add more décor! Try ribbon, string, jewels, or feathers!
  9. Turn your stick over and listen to the sweet sound of rain falling!

Want to download these directions? Click here for a handy PDF!

Follow along with our Daily Discovery! Click here for all activities that you can do at home.

Image credit: supersimple.com

Continue Reading

Daily Discovery: Story Detectives!

Post written by Heidi Fuhrman, Discovery Camp Coordinator.

Daily Discovery: Story Detectives!

Did you know you can be a story detective?! Think about someone you love, what stories do they have that can give clues to the past? Use these detective questions to find out more about that story and create a graphic novel or creative project to share what you learned!

Supplies:

  • Pencil & Paper

Optional:

  • Investigation sheet (included in the PDF)
  • Access to phone or laptop
  • Crayons/ colored pencils/ markers
  • Construction paper & blank paper
  • Graphic novel template (included in the PDF)

Instructions:

Real stories from real people give us important clues about the past and you can help discover and investigate those stories by becoming a story detective! Since stories disappear along with their owners, by learning these stories you are becoming a story keeper too!

  1. Think of someone you know that has a story you want to know more about or who has had a different life than yours. . . Maybe a parent, a grandparent, a friend, or a sibling!
    • Level Up: Create a detective team! Choose a story partner. Plan to investigate their story and then have them investigate a story in your life!
  2. Now that you have a person in mind, think about a story that person has that you want to know more about.
    • Here are some ideas:
       What life was like when they were growing up?
       Did they move to this country/city/state from somewhere else? What was the
      place they moved from like?
       Have they seen a really interesting event from the past? (Maybe people
      walking on the moon, the Civil Rights Movement, WWII, or right before
      computers were invented)!
       Do they have an interesting object or picture you’re curious about? What is
      the story behind it?
  3. Next, plan your investigative interview. Think about what questions you can ask them. Using our detective sheet (included at end), write them down. A good story detective is always ready for an interview!
    • Here are some ideas of good detective questions:
       What was it like when you were my age?
       What were your favorite things to eat when you were my age?
       What kind of things did you do for fun?
       How did you travel around your city?
       What is one thing we have now that you didn’t have as a kid?
       What is the most amazing thing you’ve seen in your life?
       What is one thing we have now you never thought would be invented?
       You saw ________. What was that like?
       Where did you live before ________. What did it look like? What was your favorite place there?
       What was it like to live through/before ___________ [event].
  4. With a grown-ups’ help, hold your interview! Call the person on the phone or video call them on a computer. If they live with you, you can interview them in person!
    • Level Up: If you want, you can film or record the interview so you can save it forever! It’s very special to have the story even when the person is gone!
  5. During the interview listen carefully. Sometimes the person will give you clues to other questions! Be sure to write these clues and any other facts down on your detective sheet!
    • During the interview these are good clue questions to ask!
       Why did . . . .?
       Tell me about. . . .?
       Describe __________ . . .
       What did . . .?
       How did . . .?
  6. Remember, a good story detective:
     Always listens . . .you never know when you’re going to get a clue!
     Respects the story teller. Remember, this is their story! You get to be the detective who hears it and keeper who saves it.
     Avoids yes/no questions. You want to know as much of the story as possible!
     Says, “Thank you for sharing your story with me.”
  7. Whew! You aced that interview! Now, finish your detective job! Think about your interview:
     What do you want to know more about?
     What is the most interesting thing you learned?
     How does this change the way you think about the past?

    • Level Up: Interview two people about the same event. What did they say that was the same? What did they say that was different?
  8. Finally, share your investigation with your family and friends!
    Create a graphic novel or picture book about the story you learned more about!

Want to download these directions? Click here for a handy PDF!

Follow along with our Daily Discovery! Click here for all activities that you can do at home.

Continue Reading

Daily Discovery: Make Your Own Observation Journal

Post written by Sierra Tamkun, Learning Experiences Manager.

Daily Discovery: Make Your Own Observation Journal

Scientists, engineers, naturalists, writers… they all need space to record their ideas, plans, experiments, and observations! Make your own observation journal to record all your at-home exploration!

Supplies:

  • Paper (white or lined)
  • Decorative/Construction Paper
  • Staples or a hole punch
  • String, yarn, or ribbon
  • Glue
  • Brightly colored tape or paper
  • Markers, crayons, or colored pencils

Instructions:

  1. Plan out how many sections you want in your notebook, and how many pages you will need per section. Design the pages yourself, use the templates provided at the end of these instructions, or keep your pages blank for flexibility. Tip: You can always add more pages later if you need them!
    a. Our four sections are: Experiments, Invent and Build, Explore Your World, and Stories. What sections do you need in your observation journal?
  2. Line up your section pages with your cover paper. Cut along the edge until your cover paper is the same size. Tip: If you cover paper is the same size as your inside pages, you can skip this step.
  3. Place your cover paper on top of your other pages. Staple or hole punch the left side of your sheets to create a binding. If using a hole punch, tie the pages together with string, yarn, or ribbon.
  4. Use colorful tape, paper, or markers to create page tabs and label the different sections inside your journal.
  5. Now it’s time to label the front of your journal! Cut a rectangle out of the paper of your choice to glue to the front of your journal, and add a title.
  6. Start exploring, observing, and recording! Record your experiments, make notes about the world around you, record a family story, or design your own invention!

Want to download these directions? Click here for a handy PDF!

Follow along with our Daily Discovery! Click here for all activities that you can do at home.

Continue Reading

Daily Discovery: Constellation Scope/ Descubrimiento en casa: ¡Observa las constelaciones!

Post written by Sierra Tamkun, Learning Experiences Manager.

Daily Discovery: Constellation Scope

Have you ever searched the night sky for patterns in the stars? For thousands of years, humans have used easily recognizable star patterns, or constellations, to guide mythology, storytelling, and travels. Explore some well-known patterns in the night sky by making your very own constellation scope!

Supplies:

  • Toilet paper tube
  • Dark construction paper
  • Tape
  • Push pin
  • Constellation patterns (attached in PDF)

Instructions:

  1. Using your toilet paper tube, trace a circle on your dark-colored construction paper. Draw a larger circle around the outside – this is how we will attach the paper to the toilet paper tube!
  2. Cut along the outside circle. Fold the edges of your paper circle over the top of your toilet paper tube and attach it with tape. Tip: cut slashes along the edge of your paper circle to fold them over more easily!
  3. Place your constellation pattern on top the paper circle. Using a push pin, poke holes where the “stars” are.
  4.  Look through your viewer at a light source to see a shining constellation. Tonight, head outside and see if you can find this same constellation in the night sky!

Want to download these directions? Click here for a handy PDF!

Follow along with our Daily Discovery! Click here for all activities that you can do at home.

Traducido por Károl de Rueda y Laura Vilaret-Tuma.

Descubrimiento en casa: ¡Observa las constelaciones!

¿Alguna vez has podido observar alguna de las constelaciones en el cielo nocturno? Una constelación es un grupo de estrellas en una región celeste que forma una figura determinada. Por miles de años, los seres humanos las han usado para guiar viajes, contar historias y crear mitologías. Crea tu propia mira telescópica y ¡encuentra algunas constelaciones famosas en el cielo!

Artículos necesarios:

  • Tubos de cartón (p. ej. de papel higiénico o de toalla de papel)
  • Papel de construcción o cartulina (de color oscuro)
  • Cinta adhesiva
  • Tijeras
  • Chincheta o tachuela
  • Plantillas de constelaciones (incluidas en la segunda página)

Instrucciones:

  1. Traza un círculo sobre el papel usando el tubo de cartón como guía. Luego dibuja un círculo mucho más grande a su alrededor, para que este sea el borde que nos va a ayudar a adjuntarlo al tubo de cartón.
  2. Recorta el círculo más grande y envuélvelo alrededor de uno de los extremos del tubo, fijándolo con cinta adhesiva. Consejo: Es más fácil doblar el papel si le haces unas cortadas paralelas.
  3. Imprime o dibuja las plantillas de las constelaciones que puedes encontrar más abajo. Corta y pega una de ellas sobre el papel que adheriste al tubo, y haz agujeros sobre los puntos negros, o “estrellas” que corresponden a cada constelación con la ayuda de la tachuela o chincheta. Puedes hacer una, o todas las constelaciones utilizando diferentes tubos de cartón.
  4. Apunta tu mira telescópica hacia cualquier fuente de luz para mirar una constelación simulada y aprender sobre ella. Esta noche, ¡puedes tratar de buscar la misma constelación en el cielo!

¿Te gustaría descargar esta actividad? Haz clic aquí para obtener un archivo PDF.

Para encontrar actividades, ideas y mucho más descubrimiento en casa, ¡síguenos!

Continue Reading

Daily Discovery: Tube Sock Black-footed Ferret!/Descubrimiento en casa: Muñeco de hurón patinegro hecho con calcetines

Post written by Hannah Curtis, Education Assistant.

Daily Discovery: Tube Sock Black-Footed Ferret!

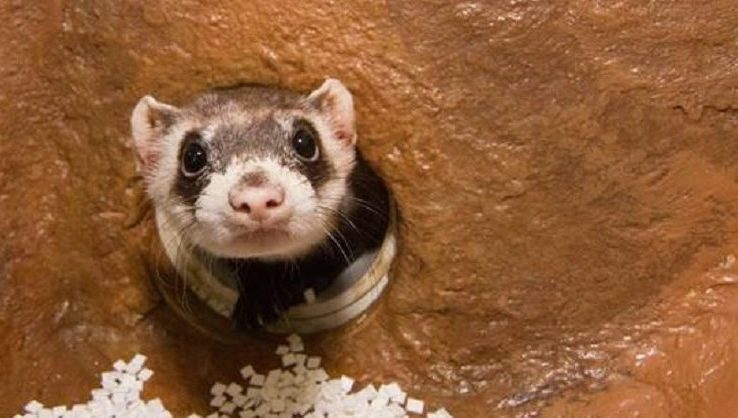
It’s time to get cuddly! Using your knowledge on BFFs and reference photos, create your own black-footed ferret (BFF) stuffy to have and to hold!

Supplies:

  • Tube Sock(s)
  • Newspaper
  • Cotton balls
  • Tissue paper
  • Sticks
  • Small rocks
  • Buttons
  • Glue
  • Scrap fabric
  • Markers or paint

Instructions:

  1. Using what you know about BFFs, create your own black-footed ferret stuffy! Get crafty with unexpected things in your house; this ferret was colored by rolling it in used coffee grounds!
  2. If you have the matching sock try making a tube sock prairie dog or maybe a BFF sock puppet!.

Want to download these directions? Click here for a handy PDF!

Follow along with our Daily Discovery! Click here for all activities that you can do at home.

Traducido por Károl de Rueda y Laura Vilaret-Tuma.

Descubrimiento en casa: Muñeco de hurón patinegro hecho con calcetines

Usando tu conocimiento sobre el hurón de patas negras o patinegro, y con la ayuda de algunos materiales caseros y fotos para referenciar, haz tu propio muñeco ¡y acurrúcate con él!

Artículos necesarios:

  • Calcetines/medias
  • Papel periódico
  • Bolas de algodón
  • Papel de tisú/seda
  • Palitos
  • Piedritas
  • Botones
  • Pegamento
  • Retazos de tela
  • Marcadores o pintura

Instrucciones:

  1. Después de leer los datos sobre los hurones patinegros -también llamados hurones de patas negrasque incluimos más abajo, utiliza este nuevo conocimiento y empieza a crear tu peluche. Para construir su forma y obtener su semejanza, usa cosas inesperadas que ya tengas en casa. Por ejemplo, puedes teñir tu peluche usando café molido desechado, como en la foto más abajo.
  2. Si tienes el otro calcetín, utilízalo para hacer un amigo (podría ser otro animal como un perrito de la pradera) para tu peluche; otro hurón o también podrías hacer un títere.

Aprende más sobre los hurones patinegros.

El hurón de patas negras o patinegro es la única especie de hurón nativo de Norteamérica, y también la única que vive en las praderas de pastos cortos en Fort Collins. Son uno de los mamíferos que están bajo peligro de extinción en el continente, por lo tanto, están protegidos bajo la Ley de Especies en Peligro de Extinción (Endangered Species Act). En el año 1979, pensábamos que el hurón de patas negras ya estaba extinto, pero en 1981 fueron redescubiertos en Meeteetse, Wyoming, y afortunadamente, un programa desarrollado para criarlos en cautividad salvó esta especie de su extinción. Hoy día, con la ayuda de muchos colegas y socios, los hurones de pies negros ¡están en vías de recuperación! En el Museo del Descubrimiento de Fort Collins (FCMoD), estamos orgullosos de apoyar los esfuerzos para la recuperación de los hurones de patas negras, e incluso cuidamos a dos de ellos en nuestra exhibición permanente. ¡Nos encantaría que los visitaras!

Aunque parecieran un lugar sin mucha vida, las praderas de pastos cortos están llenas de biodiversidad. Ahí hay muchos hogares de animales diversos, incluyendo el búho llanero, las serpientes toro, los sapos Woodhouse. También se podrían encontrar antílopes, zorros, halcones, liebres, reptiles, diferentes insectos, tortugas y perros de la pradera. Estos últimos son la especie clave que apoya los muchos animales que viven en este ecosistema, especialmente los hurones de patas negras. Más del 90% de la dieta del hurón consiste en perritos de la pradera, y usan sus madrigueras como su hogar para protegerse del clima y de los depredadores, pasando prácticamente ahí toda su vida.

Para más información sobre los hurones patinegros y su ecosistema respectivo, visita el sitio web https://blackfootedferret.org/, y/o sigue la página del Centro Nacional para la Conservación de Hurones de Patas Negras (National Black-footed Ferret Conservation Center) en inglés aquí: https://www.facebook.com/FerretCenter/.

¿Te gustaría descargar esta actividad? Haz clic aquí para obtener un archivo PDF.

Para encontrar actividades, ideas y mucho más descubrimiento en casa, ¡síguenos!

Continue Reading

Daily Discovery: My Museum

Post written by Heidi Fuhrman, Discovery Camps Coordinator.

Daily Discovery: My Museum

Become a curator and create your very own at home museum! Will your museum be a history museum, science museum, art museum, or a little bit of everything? What will you discover and teach to your visitors?

Supplies:

  • Your museum objects
  • Paper & markers (optional)

Instructions:

What is a museum, anyway?

A museum is a place where collections of objects are stored and displayed for people from all over the world to learn from. Many museums focus on one area like science, history, or art. Some museums focus on a single topic like baseball, or cowboys, or modern art. The Fort Collins Museum of Discovery focuses on many different areas—science, history, music, animals—but we have one big topic… discovery!

What kinds of museums have you been to? Which museum is your favorite? Why?

When you visit a museum, you see exhibits. These are created by many different people who work at a museum. They are made so that you can see and learn about some of the many amazing objects and specimens a museum stores and takes care of. But did you know that you’re only seeing a teeny tiny glimpse into a museum? Most museums have thousands to millions of objects that aren’t on display! Curators— people who take care of museum objects—carefully store them so that someday they can be displayed. But they don’t just put the objects on a shelf and leave them. Nope! They use those objects and specimens to learn more about history, art, and science so they can teach people through exhibits! Today your challenge is to become a curator and create your very own at home museum!

Decide what kind of museum you’re going to create. Is it going to be a history museum? A science museum? An art museum? A topical museum (maybe sports or superheroes or legos or a museum about you)? Maybe you’re going to make a museum like FCMoD and it will have a little bit of everything!

Next Steps:

In the linked PDF below, discover how to approach creating your museum depending on the type! From there, follow instructions for how to make your exhibit. Ready, set, go!

Continue Reading

Daily Discovery: Walking Rainbows

Post written by Hannah Curtis, Education Assistant.

Daily Discovery: Walking Rainbows

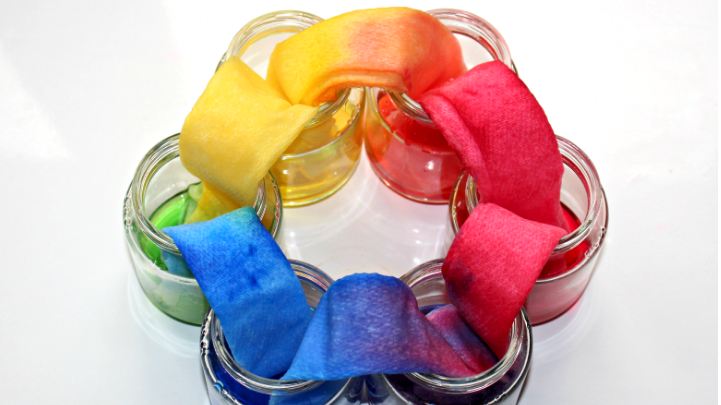
Put your lab coat on; we’re getting scientific! With this experiment, discover how colors interact to form rainbows and observe the natural process of capillary motion in action!

Supplies:

  • Time
  • 6 full sheets of paper towels
  • 6 mason jars (clear if possible). If you don’t have jars use cups or bowls
  • Red, blue, and yellow food coloring

Instructions:

Before you get started, review the color wheel on page two and remember the colors you need to form a rainbow. Feel free to experiment to see how mixing certain colors will create different colors. Together, determine how you will create a rainbow using only red, blue and yellow.

  1. Fill three jars full of water. Add red food coloring to one, blue
    to another and yellow to another, 4-6 drops each.
  2. To form a circle place the empty jars between the red, yellow
    and blue jars.
  3. Roll each sheet of paper towel into tubes. Drape one side into
    a full jar and the other into an empty jar until each jar is
    connected with paper towels.
  4. Start your timer to see how long it takes for the colored water
    to move from one jar to the next. Water will begin absorbing
    right away, but the whole process will take around 48 hours,
    so check back every few hours to see how it has changed.

Want to download these directions? Click here for a handy PDF!

Follow along with our Daily Discovery! Click here for all activities that you can do at home.

Image credit: Messy Little Monster

Continue Reading

Daily Discovery: Make your own Bee Buzzer!

Post written by Eisen Tamkun, Music Education Lead.

Daily Discovery: Make your own Bee Buzzer!

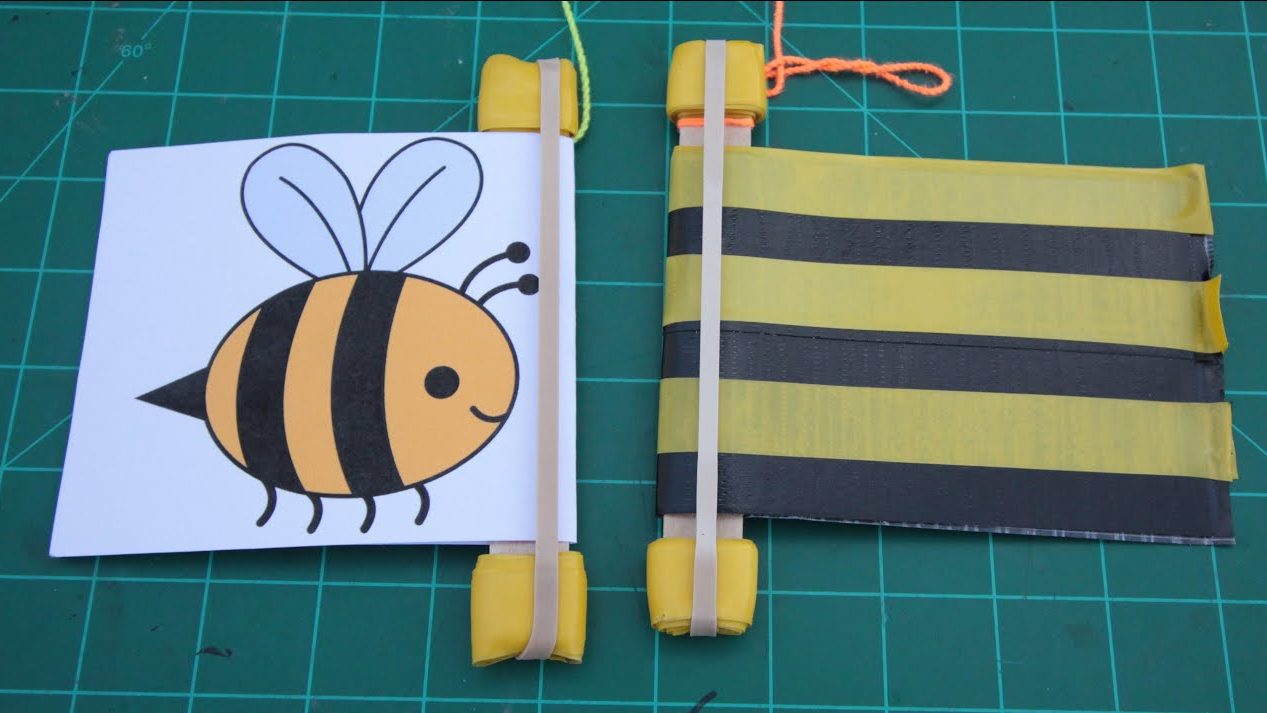
BZZZZZZZZZ! The bees are coming! Make your very own bee buzzer and rock out with these amazing pollinators.

Supplies:

  • Popsicle Stick
  • Tape- any will do!
  • Scissor
  • Index Card
  • Eraser Heads
  • Rubber Band
  • About two feet of string
  • Stapler
  • Color Pencils or Markers

Instructions:

  1. Take the index card and cut it into a square.
  2. Break out the color pencils and draw a bee on the index card.
  3. Once you’ve drawn your sweet honey bee, go ahead a staple
    the card to the popsicle stick.
  4. Next, tie and tape the string to the stick.
  5. Place the eraser heads on each end of the stick.
  6. Lastly, stretch the rubber band over each eraser.
  7. Voilà you have created your very own bee buzzer.

Take a firm grip of the string at about half way. Start swinging
building up speed until you hear you bee abuzzing.

Want to download these directions? Click here for a handy PDF!

Follow along with our Daily Discovery! Click here for all activities that you can do at home.

Educational opportunities like this are supported in part by Bohemian.

Continue Reading