It’s National Pollinator Week! ?

Post written by Alexa Leinaweaver, Live Animal Husbandry Coordinator.

?It’s National Pollinator Week!

June 22-28, 2020, is the 13th annual National Pollinator Week!

What Are Pollinators?

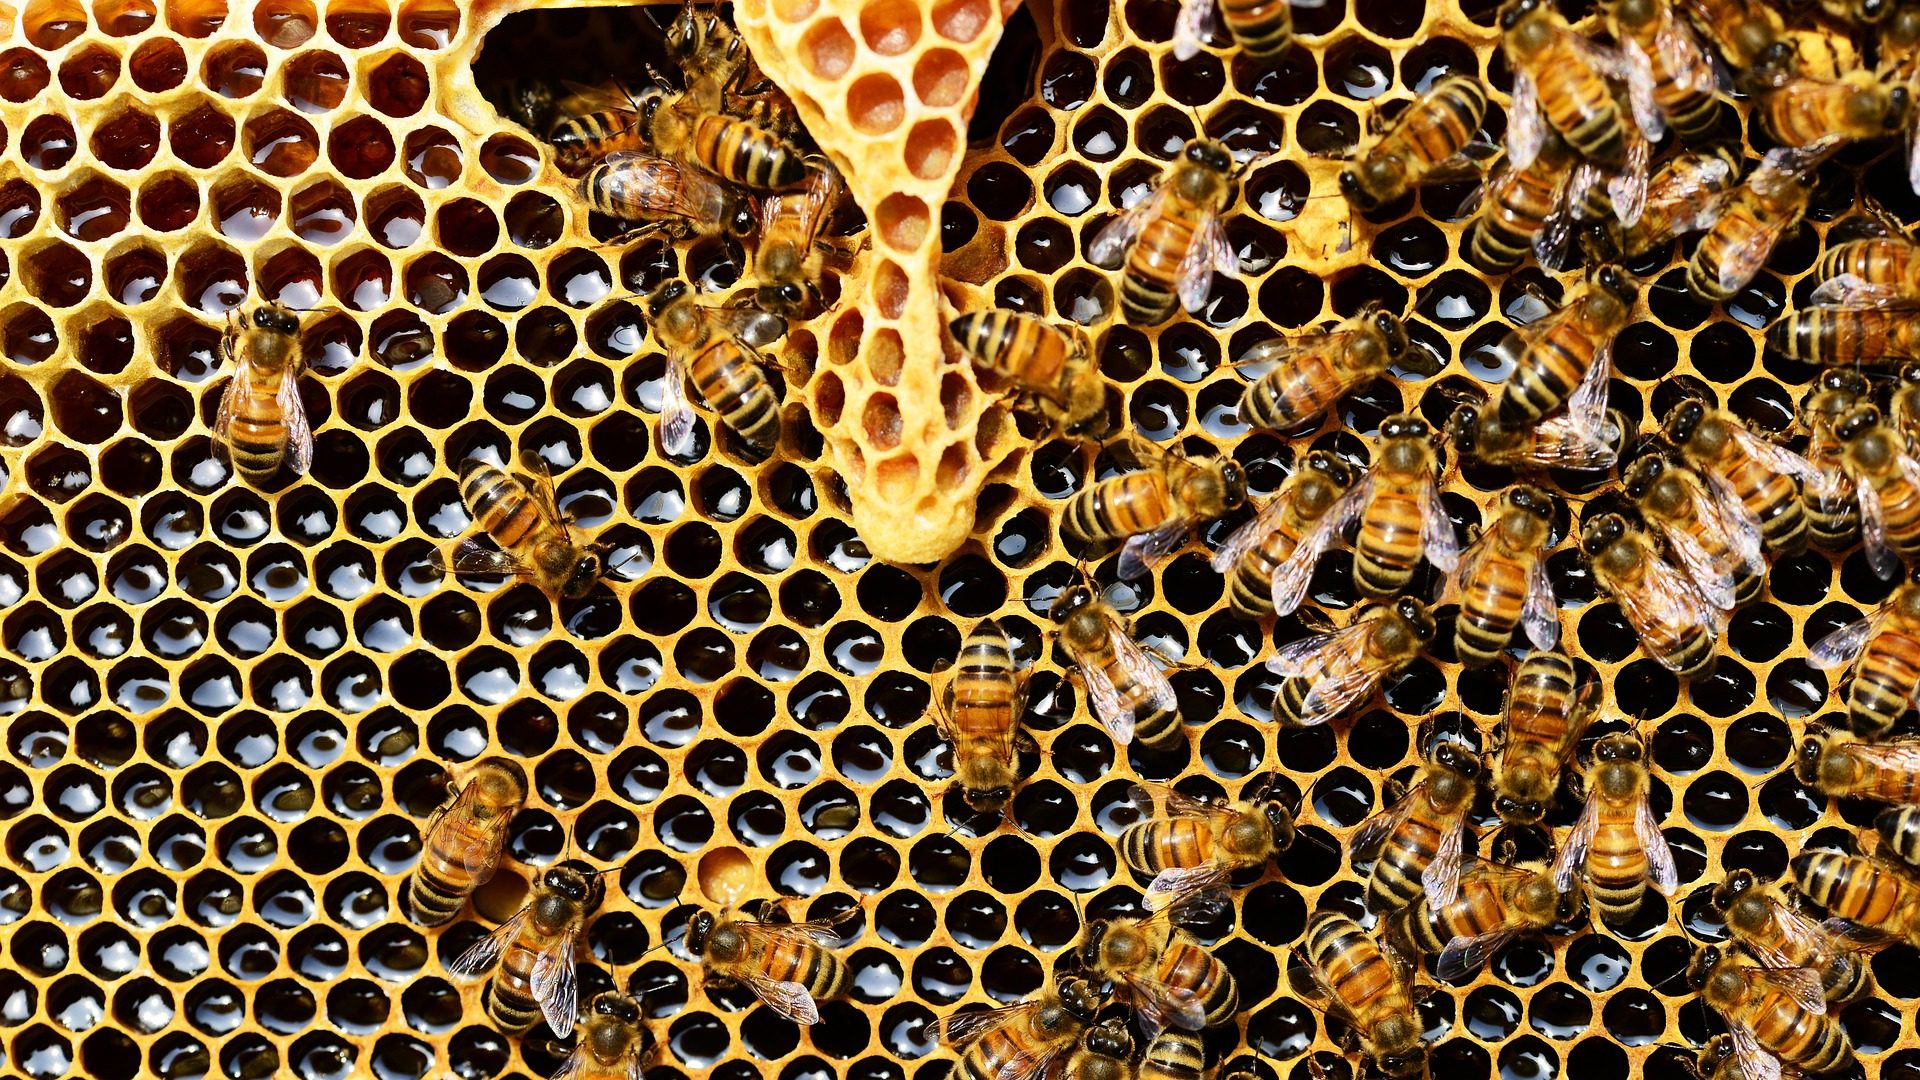
Pollinators are animals that move pollen from one flower to another flower of the same species in the first step toward the plant reproducing. While pollinators are primarily insects (bees, beetles, flies, moths, butterflies), there are also some birds and small mammals that pollinate plants too.

More than 70% — and possibly as much as 90%! — of flowering plants are dependent on pollination for creating seeds and fruit. It is estimated that one out of every three bites of food you eat was made possible by animal pollinators!

Many of the animals that pollinate are in decline. Pollinator habitats are shrinking or getting destroyed so they have no space to live or feed. In addition, overuse of pesticides, environmental pollution, and climate change are all adding risks to these animals.

Pollinators in Colorado

In Colorado, we have a wide range of habitats and extreme changes in altitude – different bees will thrive in each area. Because of that variety of habitat, Colorado is home to more than 900 species of bees! There are more than 200 bees in Larimer County alone. The smallest bee in Colorado is the Miner Bee (Perdita salacis) at 3.5mm/0.1in; the largest is the Nevada Bumblebee (Bombus nevadensis) at 26.5mm/1in. Colorado bees are colorful, too! Different species may be the usual yellow and black, or range to red, orange, green, blue, or brown.

Most bees in Colorado (and the rest of the world too) are solitary bees that don’t live in a colony like the familiar honeybee. Most of these solitary bees are ground nesters, digging burrows in the soil or using abandoned rodent burrows. Some of the bees here are cavity nesters, finding holes or cavities in twigs or logs.

In Colorado, bees are responsible for pollinating 80% of the crops in our state.

In addition to bees, other pollinators in Colorado include approximately 250 species of butterfly and more than 1,000 species of moth. There are also 11 species of hummingbird that migrate through the state from April through September.

How can you help pollinators?

Learn more about the pollinators in the space where you live. Spend some time outside and observe the animals that are visiting your garden. What kinds of animals do you see? What colors are they? How do they behave as they visit flowers?

Create good habitats for pollinators around your home. Whether you have acres of land or just a window box, you can help pollinators by offering them food and shelter. Plant a variety of flowering plants (preferably native – CSU has a great example list of native plants for pollinators) that offer food and nesting space. Provide several different kinds of blooming plants near each other, and use plants that have different bloom times, so that flowers are available to pollinators from early spring through late fall. Plant in sunny locations that are protected from the wind.

Don’t “clean up” your yard in the fall. Leave all the dormant or dead plants alone rather than trimming them back for the winter season — cavity nesting bees and other pollinating insects will use them as a safe home during the cold weather. Leave some leaf litter around for butterflies and moths to use as insulation over the winter, rather than raking it all up and dumping it in the landfill. If you can include materials in your yard such as logs or wood nesting blocks, you provide space for species that nest in wood to survive the snow. Leave some of the ground uncovered (i.e. don’t put mulch everywhere) for the native bees that nest in the bare dirt for the winter.

Reduce use of chemicals for controlling weeds and pests, as these can hurt or kill beneficial pollinators as well.

Protect natural habitat.

 Share what you know. Talk to your friends and family about what you have learned about pollinators and how and why you are helping them. Talk to your local and state government about how important it is to protect pollinators.


Continue Reading

Daily Discovery: Explore your State – Spelunking!

Post written by Hannah Curtis, Education Assistant.

Daily Discovery: Explore your State – Spelunking!

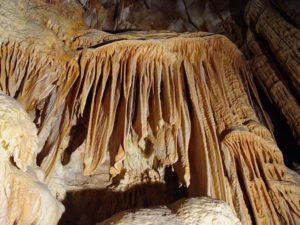
The recreational past-time hobby of cave exploration! It’s not every day you get to explore around in a dark, musky, million-year-old, nature made cavern, but when you do, you may be surprised what you see inside! Let’s explore together the history of caves in Colorado, and learn how they were formed!

History of Caves!

Spelunking, or caving, has been a hobby of enthusiasts as early as 1895 and became a part of important scientific explorations and research. Through caving, we know more about geological process and ecosystem science. Cave environments are fragile and animals that live in them can be easily disturbed. Cave formations can be damaged by the lightest touch and even one’s breath. Cave dwelling species such as cave shrimp and bats thrive in the constant temperature and humidity of caves and bats will use caves to hibernate during the winter season. Too much human contact inside caves with these species can be damaging to the cave environment and these vulnerable species.

You can visit a variety of caves throughout Colorado, but Cave of the Winds and the Glenwood Caverns are historically fascinating and beautiful. Cave of the Winds was founded in 1881 by two brothers, George and John Pickett, but the cave systems are millions of years old! After it’s discovery and continued excavation, tours of the cave began to the public and even electricity was installed in 1907. These caves are one of Colorado’s oldest and famous attractions!

Inside Iron Mountain, Glenwood Caverns is more than 16,000 feet long, and was opened to visitors in 1895 by Charles W. Darrow and his family, who homesteaded at the top of the mountain near the cave entrance.

Cave Formation!

The formation of caves is called speleogenesis, and it can happen under a variety of geological processes. They can be formed through chemical or water erosion, by tectonic forces, microorganisms, or pressure and atmospheric changes. The types of caves most often formed and many of the ones found in Colorado are called Karst Caves. These caves are made from limestone, which dissolves in acidic solutions such as groundwater that hold organic acids. Over time, this acidic ground water seeps through cracks, faults or joints in the ground dissolving the limestone and eventually enlarges into a cave.

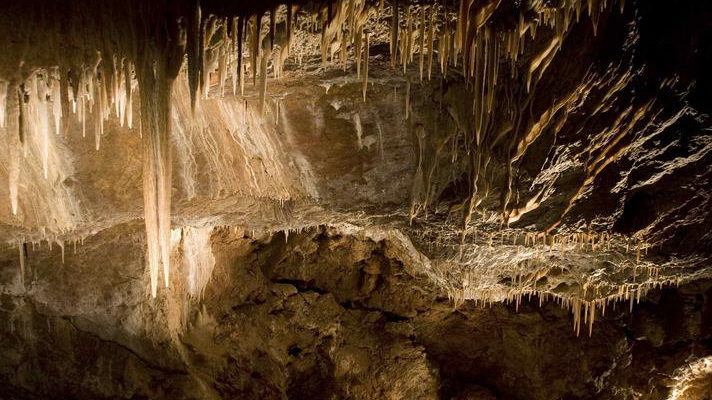
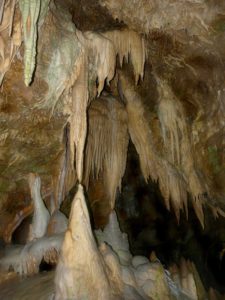
This process continues inside the cave forming mineral deposits called speleothems. There are many different types of speleothems, some you may be familiar with. Stalactites are mineral deposit that form on the roof of caves when dissolved calcium bicarbonate (dissolved limestone) drips and crystalizes back into limestone, similar to how an icicle is formed in the winter. A stalagmite may form underneath a stalactite when the drippings fall to the cave floor and deposits the limestone into a cone shaped mound. You can usually find stalactites and stalagmites together, and they may even grow so large that they may combine into one big column. Other speleothems are flowstones, helictites, or soda straws, which all form in unique way based on how the calcium carbonate flows through down cave walls and ceiling.

Grow your own Stalactite and Cave Diorama!

Supplies:

Stalactite Formation

  • 2 plastic cups
  • String or yarn
  • Epsom salt, sugar or baking soda
  • Water
  • Paper

Cave Diorama

  • Cardboard box
  • Modeling clay
  • Colored paper
  • Natural elements (rocks, stones, grass, dirt)
  • Markers
  • Recycled materials (egg cartons, bottle caps, etc).
  • Glue or tape

Instructions:

  1. To begin forming your stalactite, heat up a quart of water on a stove. Make sure to have guardian supervision for this step.
  2. Once hot, pour your choice of Epsom salt, sugar or baking soda to the pot, stirring to dissolve. Continue adding gradually until you have dissolved 3 cups of your solvent. (Note: you can dissolve without hot water, this speeds up the process and allows you to dissolve more into your solution).
  3. Pour equal parts into the two cups.
  4. Cut a piece of string around 1 foot.
  5. On top of a piece of paper or paper plate, drape each end of the yarn into the cups so that each end is completely submerged. You can weigh your string down using a paper clip.
  6. Between the cups allow the string to slack in the middle creating a dip, this is where your stalactite will form forming.
  7. Over the course of a few hours to a few days the water will move from the cups to the string and begin dripping and crystalizing.
  8. If you wish, begin constructing your cave using materials you have handy in your home. If you wish to put your newly forming stalactite into your cave, use the flaps of a cardboard box to hide the cups and only your stalactite showing.

Want to download these directions? Click here for a handy PDF!

Follow along with our Daily Discovery! Click here for all activities that you can do at home.

Image Credit: uncovercolorado.com

Educational opportunities like this are supported in part by Fort Fund.


Continue Reading

Daily Discovery: Nature Among Us – Plants/ Descubrimiento en casa: La naturaleza entre nosotros – las plantas

Post written by Bella Harris, Discovery Agent.

Daily Discovery: Nature Among Us – Plants

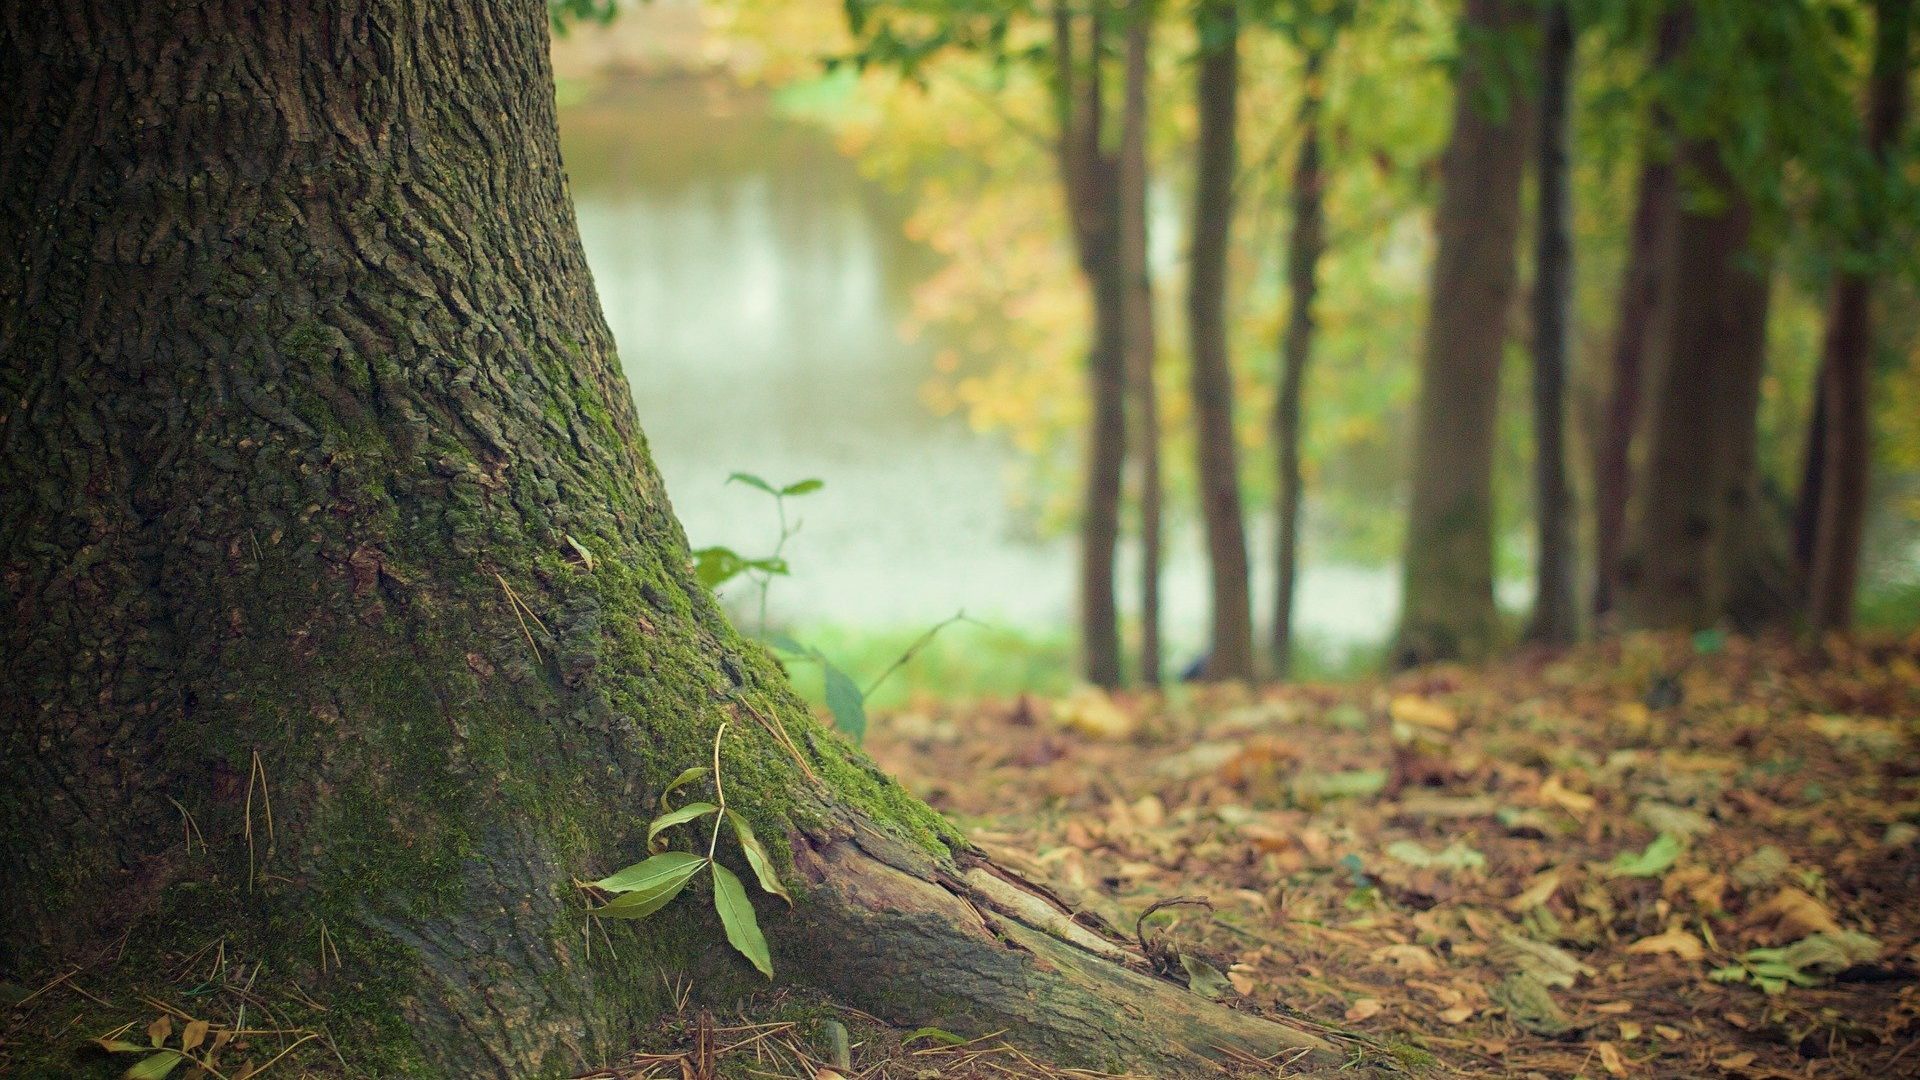
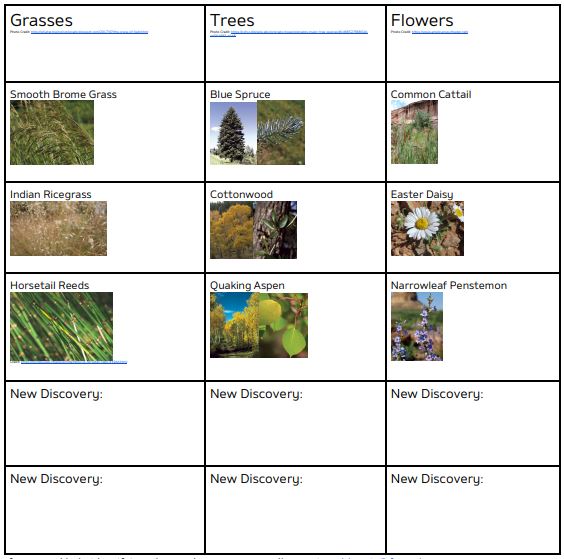
Use your scientific skills to research plants around Fort Collins! All you need is a camera, a pen or pencil, and a love for exploration to be a plant researcher. Below is a table to check off different plant sightings around Fort Collins. Try to find as many as you can! You can print this table or simply use it as an online guide. When you finish, share a picture of your table and pictures from your natural place adventures on our social media pages listed below!

Here are some recommendations for natural places to look for plants:
● Maxwell Natural Area
● Soapstone Prairie
● Coyote Ridge Natural Area
● Reservoir Ridge Natural Areas
● Lory State Park
● Check out here for more natural places to explore!

Instructions:

  1. Put a check by every plant you find! Or fill out your own plant discovery at the bottom of the table. You can also document your discoveries on a piece of paper.

Please take about a week to fill out this worksheet. When you have completed as much of the table as possible, please take a photo of it! Be sure to photograph your exploration throughout natural places in Fort Collins, too!

You can upload your photos and share your adventures on the museum’s Facebook page. When creating your Nature Among Us post, please include a photo of your plants chart/list, photos of the natural places you visited, and a short description of where you went, what you saw, and how many times you explored. And don’t forget to use the hashtag #NatureAmongUs! You can also email your research results to Bella Harris.

Each week, we’ll highlight the work you have done! Stay tuned for next week’s Daily Discovery, where we will explore our buzzing, flying neighbors in Nature Among Us: Pollinators.

Want to download these directions? Click here for a handy PDF!

Follow along with our Daily Discovery! Click here for all activities that you can do at home.

Learn more about local plants!

Traducido por Károl de Rueda y Laura Vilaret-Tuma.

Descubrimiento en casa: La naturaleza entre nosotros – las plantas

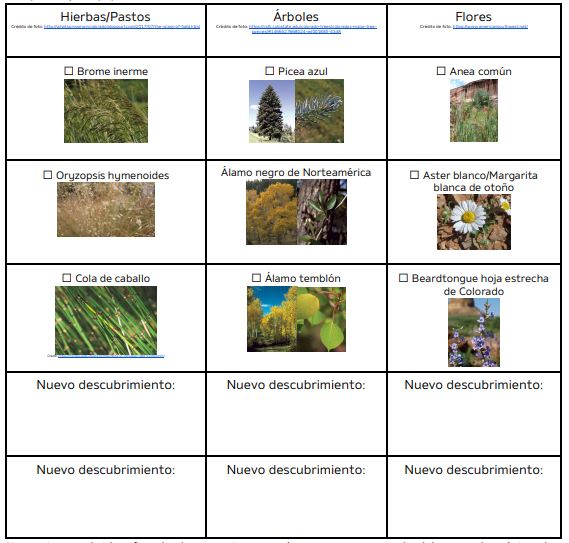
¡Usa tus habilidades científicas para investigar plantas que existen en tu área o en los alrededores de Fort Collins! Solo necesitas una cámara, algo para escribir, y el entusiasmo para explorar y convertirte en un/a investigador/a de las plantas. Debajo encontrarás una tabla para marcar avistamientos de plantas nativas a tus alrededores. ¡Intenta encontrar tantas como puedas! Imprime esta actividad o simplemente úsala como una guía. Cuando termines, ¡comparte fotos de tus aventuras en nuestras redes sociales!

Les recomendamos estos espacios naturales en Fort Collins para buscar plantas:
● Área Natural de Maxwell (Maxwell Natural Area)
● Pradera de piedra de jabón (Soapstone Prairie)
● Área Natural de la cresta del coyote (Coyote Ridge Natural Area)
● Área Natural “Reservoir Ridge” (Reservoir Ridge Natural Areas)
● Parque Estatal de Lory (Lory State Park)
● Haz clic en el enlace ¡y encuentra más espacios naturales para explorar!

Antes de completar esta actividad, te invitamos a llenar una breve encuesta en tu propio idioma. Con tus respuestas, aprenderemos más sobre tus intereses y sobre las diversas formas en las que podríamos adaptar nuestros programas y actividades en el futuro. ¡Muchas gracias!

Instrucciones:

  1. Marca cada planta que veas. Si te topas con algún otra que no se encuentra en esta lista, puedes nombrarla en los espacios de “nuevo descubrimiento” al final de la tabla, o también puedes documentar estas aventuras en cualquier hoja de papel o cuaderno.

Podrías completar esta actividad durante el curso de varios días. Cuando hayas terminado la mayor parte de la tabla, tómale una foto. También asegúrate de fotografiar tus exploraciones en los varios espacios naturales que visitaste en Fort Collins.

Puedes subir tus fotos y compartir tus aventuras en nuestra página de Facebook. Cuando estés escribiendo tu publicación, por favor incluye los resultados de la tabla más arriba, una pequeña descripción sobre los lugares a los que fuiste, lo que observaste, y el número de veces que visitaste un espacio natural. Podrías utilizar la etiqueta #NatureAmongUs.

Si quieres, también puedes mandar tus investigaciones por correo electrónico a Bella Harris. Durante cada semana, estaremos  resentando estos trabajos ¡incluyendo el tuyo! a través de las redes sociales.

Mantente sintonizado con nuestro próximo Descubrimiento en casa, donde observaremos nuestros amigos que zumban y vuelan, en “La naturaleza entre nosotros: los polinizadores.”

¿Te gustaría descargar esta actividad? Haz clic aquí para obtener un archivo PDF.

Para encontrar actividades, ideas y mucho más descubrimiento en casa, ¡síguenos!

Continue Reading
Daily Discovery: Water Week – Clean It Up!/ Descubrimiento en casa: Semana del agua- ¡Fíltrala!

Post written by Heidi Fuhrman, Discovery Camp Coordinator.

Daily Discovery: Water Week – Clean It Up!

Water is important to life on Earth but how can we make it safe to use and can we re-use it? Learn about the importance of water and take on a challenge to create your own filtration system and clean up some polluted water!

Supplies:

  • Water
  • Plastic bottle, milk jug, or other clear container
  • Assortment of “filtration” materials:
    • Napkins
    • Paper towels
    • Coffee filters
    • Cotton balls
    • Clay
    • Sand
    • Gravel/small pebbles
  • Assortment of “pollution” materials:
    • Dirt
    • Small objects like paperclips
    • Food scraps like peels
    • Pieces of leaves/grass
    • Food coloring
    • Oil
    • Salt/other spices
  • Tape or rubber bands
  • Scissors

Importance of Water

How have you used water today? Stop and think about it! Make a list!

You probably thought of things like drinking or cooking or taking a shower, but did you think about things like brushing your teeth? Going swimming? Watering your yard? Giving your pets a drink? Flushing the toilet? Water is very important to our life on earth, we need it to survive! In fact, you can survive several weeks without food but only a few days without water! And we use a LOT of water each day. The average American uses 80-100 gallons of water each day. . .that’s 2-3 bathtubs full for just one person! How many people live in your house? How many bathtubs full of water are you using each day?

We use a lot of water each day, but there isn’t a lot of usable water in the world. Even though our planet is covered with water (over 70% of Earth is water!) only about 3% of the water on Earth is not salt water. . . and only about 1% of that 3% freshwater is usable (not locked up in glaciers, ice, the soil, or too polluted)! We have just a tiny amount of water to share with this whole globe, and as population and pollution increase that amount gets smaller and smaller! In dry or arid places (like here in Colorado and other parts of the American West) water is even more valuable!

Since water is so valuable it’s important to use every last drop! But water that flows in our rivers and streams isn’t usable for drinking, cooking, and cleaning right away. . .it contains pollutants and microorganisms that are harmful to humans. Is there a way to clean this water so it is safe to drink and use? We also waste a lot of
water down our sinks, drains, and toilets. . . is there a way to clean and re-use this water too?

There sure is a way to clean and re-use our water! Filtration is one of the best ways to start cleaning up our water so it’s safe to use. Filtration is the process of removing particles and pollutants from a liquid, and it’s how we start cleaning up our water (we also use safe chemicals and other to kill microorganisms an make the water potable which means “safe to drink”). While anyone can build a simple filtration system, Civil Engineers1 help design and build water treatment plants for our cities to help filter our water and make it safe for us to use. Today in our engineering challenge see if you can come up with a filtration system that can filter your polluted water! (Check out the worksheet at the end to help guide you!)

Note: The filtration methods used in this activity are a simple demonstration and the water should not be considered safe for drinking.

Engineering Challenge: Design A Water Filtration System!

Start by thinking about some sources of water pollution. If you turned on your faucet and no water came out, where would you find water near your house to use? What do those places look like? What could be polluting that water? Would you be okay drinking it?

Instructions:

  1. Thinking about the things that can pollute our water, mix up some polluted water of your own! Fill a jar or cup with some water and add pollutants! You could use bits of grass and leaves, dirt, oil, spices, small objects like paperclips, and food coloring. Ew! Gross!
  2. Gather your filtration supplies. You can use a variety of items, but we suggest a combination of napkins, coffee filters, paper towels, cotton balls, clay, sand, and gravel.
  3. Create your filtration system base. Cut the top off a plastic bottle, jug, or carton several inches below the top. A 2 liter soda bottle works best, but you can use a water bottle, juice jug, or even the top of a milk jug or carton. Place the top of your bottle inside the bottom or suspend over a pitcher or jar. Secure the two together with tape.
  4. Now we’re ready to start thinking like an Engineer and designing our filtration system! We’re going to use the Engineering Design Process to help us reach a solution today! (see steps on left). First, let’s think about what is the problem that we’re trying to solve? (Our water is polluted, and we need it clean!) Look at that polluted water you made:
    • What types of pollutants do we need to filter out?
    • Which of the filtration materials we have could help filter them out?
    • What are some possible solutions to our problem? How could you design your filtration system?
    Next, draw your idea for your design.
  5. Build your filtration system! Using the materials create layers in the top half of your filtration system base. At the end you’ll be pouring your polluted water into the top and watching it go through your filters to drip into the bottom. You want the water in the end to be as clean as possible! Think about:
    • Which materials can filter which size pollutants?
    • How can you order the layers to work the best?
    • Predict which layer will filter which pollutants.
  6. Once you’re done designing it’s time to test your filtration systems! Give your polluted water a mix and then pour it in the top! Watch the water move through your filtration
    system. Observe what the water looks like at the end.
    • Does the water look cleaner?
    • Are there any pollutants you weren’t able to filter out?
    • Are there pollutants you can’t see but are probably still there (e.g. oil)?
    • How could you remove the pollutants that you can’t see or couldn’t filter?
    • How would you feel about drinking this water? Do you think you’d get sick? What about microscopic pollutants and organisms?
    NOTE: The filtration methods used in this activity are simple demonstration and the water should not be considered safe for drinking.
  7. Take apart your filter and look at each of the different layers. Can you tell what each material filtered out? Did any of the materials surprise you by doing a better (or worse) job than you expected?

Level Up:

  1. Real engineers learn from their tests and try again to create an even better system! Empty the bottle, throw out your old filter materials, wipe out the bottle and try again! See if you can make the water even cleaner!
  2. Challenge someone! Make a big batch of polluted water and see who can filter it best!

Want to download these directions? Click here for a handy PDF!

Follow along with our Daily Discovery! Click here for all activities that you can do at home.


Traducido por Károl de Rueda y Laura Vilaret-Tuma.

Descubrimiento en casa: Semana del agua – ¡Fíltrala!

El agua es básica para sostener la vida, pero ¿cómo podemos hacerla más segura para nuestro uso? ¿Es posible reutilizarla? Aprende más sobre su importancia y además ¡crea tu propio prototipo de un sistema de filtración para purificar agua contaminada!

Artículos necesarios:

  • Un vaso con agua
  • Botella, galón de leche o cualquier otro recipiente transparente de plástico
  • Cinta adhesiva o bandas elásticas (ligas)
  • Tijeras
  • Variedad de materiales para filtrar el agua:
    • Servilletas
    • Toallas de papel
    • Filtros para café
    • Bolitas de algodón
    • Arcilla/barro
    • Arena
    • Grava o piedritas
  • Variedad de materiales para “contaminar el agua”:
    •  Tierra
    • Objetos pequeños como clips para papeles
    •  Desechos de comida como cáscaras
    • Hojas o hierba
    • Colorante vegetal
    • Aceite
    • Sal/otras especias

La importancia del agua

¿En qué formas has usado el agua durante el día de hoy? Haz una lista.

Probablemente escribiste algunas maneras típicas de usarla, como para bañarte o para tomarla. Pero también usamos el agua en maneras menos obvias, como por ejemplo, para lavarte los dientes, al nadar, al regar las plantas, al darles agua a tus mascotas, ¡y hasta descargando el inodoro! Este elemento es muy importante para nuestro planeta, y definitivamente la necesitamos para poder sobrevivir. Es cierto que los humanos podríamos subsistir muchas semanas sin comida, ¡pero solamente unos días sin agua! ¿Y cuánta usamos generalmente? La persona promedio en Estados Unidos usa aproximadamente 80-100 galones de agua ¡en un solo día! Lo que equivale a 2-3 bañeras o tinas llenas de agua por persona. ¿Cuántas personas viven en tu casa? ¿Cuántas bañeras de agua están usando cada día? ¡Vamos a averiguar!

Usamos bastante agua todos los días, pero ¿puedes creer que en el mundo hay muchas fuentes de agua que no se pueden utilizar? Aunque nuestro planeta está cubierto con agua (más del 70% de la Tierra está compuesto de ella) solamente 3% es agua dulce. . . y solo 1% es utilizable (o sea, no es salada, no está en glaciares, congelada, en la tierra, o contaminada), así que tenemos un suministro finito de agua para compartir con el globo entero. Mientras la población y la polución ascienden, la cantidad de agua disminuye. En lugares secos o áridos (como aquí en Colorado) ¡el agua es todavía más valiosa!

Como el agua es un recurso tan precioso, es importante aprovecharla bien. Cuando este elemento fluye en ríos y arroyos no se puede usar inmediatamente para tomar, cocinar o limpiar, porque contiene contaminantes y microbios que son dañinos para los humanos. ¿Conoces alguna manera de purificarla y hacerla segura para su consumo? Además, también gastamos mucha agua potable a través del fregadero, en los drenajes y en el inodoro. . . ¿Habrá alguna manera para purificar y reutilizar esta agua?

¡Afortunadamente, la respuesta es sí! La filtración es una de las mejores maneras para limpiar nuestra agua y hacerla segura para su uso, ya que es el proceso utilizado para remover partículas y contaminantes de un líquido, siendo este el paso básico para empezar a purificar el agua (también se usan químicos seguros para eliminar microorganismos, lo que hace que el agua sea potable, o segura para consumir.)

Mientras que cualquier persona puede construir un sistema de filtración básica, los ingenieros civiles diseñan y construyen plantas purificadoras de agua para nuestras ciudades.

El reto de esta actividad incluye el que te conviertas en un ingeniero al diseñar tu propio prototipo de sistema de filtración para purificar el agua de tu casa. (Puedes utilizar la guía de abajo para facilitar esta actividad).

Aviso: Los métodos de filtración usados en esta actividad son únicamente para propósitos de demonstración y el agua resultante no debería ser considerada segura para consumir.

Reto de ingeniería: Diseña un filtro purificador de agua

Inicia pensando en las diferentes maneras en que se contamina el agua. Si no hubiera agua en tu casa, ¿a dónde irías para encontrarla? ¿Cómo sería ese lugar? ¿Aceptarías tomarla?

Instrucciones:

  1. Vamos a hacer nuestra propia “agua contaminada.” A tu vaso con agua, agrégale unos “contaminantes.” Puedes usar hierba, hojas, tierra, aceite, especias, objetos pequeños, colorante para alimentos, etc. ¡Ahora sí quedó muy sucia!
  2. Reúne los artículos que vas a usar para filtrar tu agua contaminada. Puedes utilizar una variedad de cosas, pero sugerimos una combinación de servilletas, filtros para café, toallas de papel, bolitas de algodón, arcilla, arena, o piedritas.
  3. Crea la base para tu sistema de filtración. Usando las tijeras, corta 10-15 centímetros de la parte superior de algún recipiente transparente. Una botella de 2 litros sirve mejor, pero también podrías usar cualquier otra o hasta un galón de leche. Pon la parte cortada de tu botella bocabajo dentro de la otra parte, y pégalas con cinta adhesiva o únelas con una liga.
  4. ¡Estamos listos para pensar como un ingeniero y diseñar nuestro propio sistema de filtración! Vamos a usar el proceso del diseño de ingeniería (el gráfico a tu izquierda) para
    llegar a una solución. ¿Cuál es el problema que estamos tratando de resolver? El que nuestra agua está contaminada y necesitamos purificarla. Pensando en el agua contaminada que creaste, pregúntate lo siguiente:
    • ¿Cuáles contaminantes tenemos que filtrar?
    • ¿Cuáles de los materiales de filtración que tienes disponibles crees que puedan ser más eficientes para purificar el agua?
    • ¿Cuáles son algunas soluciones posibles, y cómo podrías diseñar tu sistema para mejor resolver el problema?
    Después, dibuja tu diseño.
  5. Construye tu propio prototipo de sistema de filtración. Pon los materiales (descritos en el paso #2) en forma de capas dentro de la base. Luego vierte el agua por encima de ellas y observa cómo se van filtrando los contaminantes. ¡El agua filtrada debe de aparecer lo más clara posible!
    • ¿Qué materiales pueden filtrar eficientemente contaminantes según su tamaño?
    • ¿En qué orden podrías reorganizar los materiales para que filtren mejor?
    • Predice las capas que podrían filtrar a ciertos contaminantes.
  6. Después de fabricar tu filtro purificador, ¡es hora de ponerlo a prueba! Mezcla tu agua contaminada otra vez para incorporar todos los ingredientes y viértela por encima de tu sistema. Observa al agua pasando a través de las capas y también al agua que sale al fondo.
    • ¿El agua filtrada parece más limpia?
    • ¿Hay algún contaminante que no se pudo filtrar?
    • ¿Crees que todavía hay contaminantes en el agua filtrada que no se pueden ver a simple vista, como por ejemplo, el aceite?
    • ¿Cómo podrías eliminar los contaminantes que todavía existen o no se ven en el agua filtrada?
    • ¿Cómo te sentirías si tuvieras que tomar esta agua? ¿Crees que te enfermarías?
    ¿Crees que quedan contaminantes y microbios microscópicos?
    Aviso: Recuerda que los métodos de filtración usados en esta actividad son únicamente para propósitos de demonstración y el agua resultante no debería ser considerada segura para consumir.
  7. Empieza a desarmar tu filtro y observa cada una de las capas. ¿Puedes decir cuál de ellas filtró cada material? ¿Cuál funcionó mejor (o peor) de lo que esperabas?

Al siguiente nivel:

  1. ¿Sabías que los ingenieros verdaderamente utilizan este tipo de pruebas mientras continúan investigando para mejorar los sistemas que están diseñando? Ahora, vacía tus recipientes, límpialos bien, ¡y prueba otra vez! ¿Puedes lograr que el agua sea aún más limpia?
  2. ¡Convierte este experimento en un juego divertido y educativo para todos! Reta a tus familiares para averiguar quién puede crear el prototipo de filtración más eficiente. Y ahora que ya sabes más sobre el agua, ¡a seguirla cuidado!

¿Te gustaría descargar esta actividad? Haz clic aquí para obtener un archivo PDF.

Para encontrar actividades, ideas y mucho más descubrimiento en casa, ¡síguenos!

Continue Reading
Daily Discovery: Meet the Arthropods!/ Descubrimiento en casa: Conoce al animal- ¡los artrópodos!

Post written by Hannah Curtis, Education Assistant.

Daily Discovery: Meet the Arthropods!

Tarantulas, cockroaches, and millipedes, oh my! These “creepy” crawly animals are often characterized as gross, scary, or straight up “eww,” but they all have unique traits and play an important role in their wild ecosystems. Meet FCMoD’s arthropods and become an entomologist in your own backyard!

What are arthropods?

Arthropods are characterized as invertebrate animals, mean they don’t have a spine but they do have an exoskeleton. Their body is segmented by a head, thorax and abdomen. Insects, arachnids (spider species), myriapods (millipedes and centipedes) and crustaceans (crabs, lobsters, shrimp) are all part of the arthropod (Arthropoda) phylum.

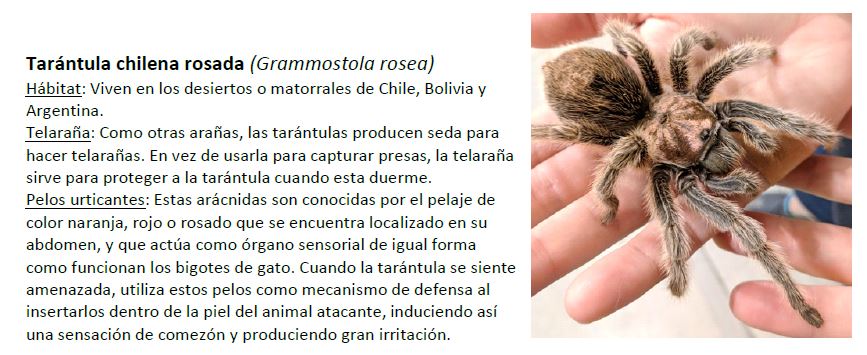
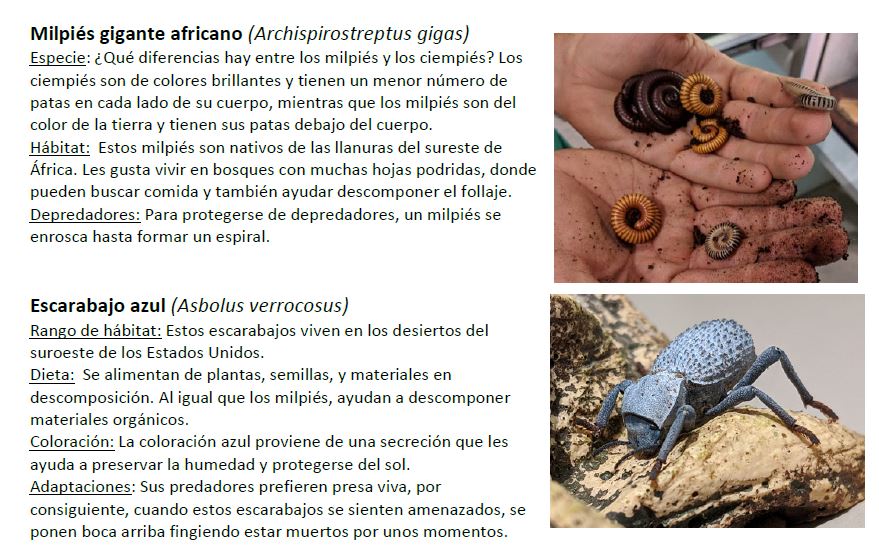
At FCMoD we care for a variety of arthropods such as the Madagascar Hissing Cockroaches, Whip Scorpion, Assassin Bugs, and many more! Check out some of their individual life histories!

Observations in the Backyard!

Whether it is in your backyard, neighborhood or at a Natural Area, animals can be observed just about anywhere! Entomologists are scientists who study all types of insects. They study and observe these animals in the wild to learn about their behaviors and identify their role within the ecosystem. You can be a backyard entomologist to observe similar animals as the museum’s arthropods and record what you discover!

Many arthropods are decomposers, which means they break down organic material, flesh of dead animals, poop, rotting leaves and other foliage. This process provides nutrients to the soil which is essential for plants to grow. Without this process, the organic material and waste would pile up and take longer to decompose.

Supplies:

  • Writing utensil
  • Paper
  • Computer and internet access (optional)

Instructions:

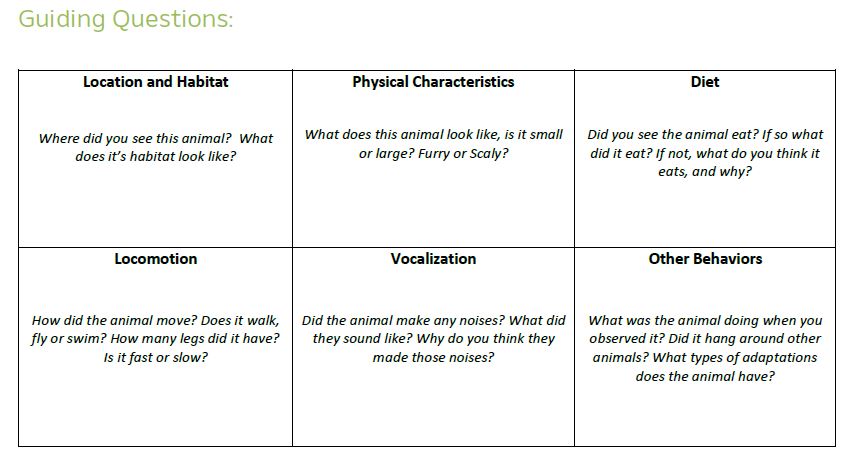
  1.  If you created an observational chart, write down your animal observations in the “explore your world” section. If not, create your own observational chart, using the provided guiding questions.
  2. Head out to your backyard or take a walk to explore some of the smallest animals that live near you. Check under rocks, in the grass and even in the trees.
  3. Check out this BBC Earth video:  and see how the Garden Orb Weave spider weaves their web.

Want to download these directions? Click here for a handy PDF!

Follow along with our Daily Discovery! Click here for all activities that you can do at home.


Traducido por Károl de Rueda y Laura Vilaret-Tuma.

Descubrimiento en casa: Conoce al animal – ¡los artrópodos!

Tarántulas, cucarachas, y milpiés, ¡ay, ay, ay! Estos animales tienen la reputación de dar miedo y de ser “repugnantes,” pero en realidad sus características únicas sirven un rol importante en el ecosistema. Conoce a los artrópodos del Museo del Descubrimiento de Fort Collins (FCMoD) y ¡sé un entomólogo en tu propio patio!

¿Qué son los artrópodos?

Los artrópodos son animales invertebrados, lo que significa que no tiene columna vertebral pero sí tienen un exoesqueleto. Su cuerpo está compuesto de una anatomía segmentada: una cabeza, un tórax y un abdomen. Los insectos, los arácnidos (especie de arañas), los miriápodos (milpiés, ciempiés), y los crustáceos (cangrejos,
langostas, camarones) son parte del filo artrópodo (Arthropoda).

En el museo, cuidamos a una variedad de artrópodos incluyendo a cucarachas gigantes de Madagascar, a escorpiones látigo o vinagrillos, a chinches asesinas ¡y muchos más! Conoce la historia de algunos de ellos.

Observaciones a tu alrededor

Estos tipos de animales se pueden observar en un patio, en un jardín, en un área natural o ¡en cualquier sitio! Los entomólogos son científicos que estudian una variedad de insectos, observándolos en su medio ambiente para aprender sobre sus comportamientos e identificar su rol en el ecosistema. Observa animales similares a los artrópodos del museo ¡y documenta lo que descubres!

Muchos artrópodos son descomponedores, lo que significa que ayudan a desintegrar materiales orgánicos como la carne de animales muertos, excrementos, hojas podridas y otro follaje. Este proceso provee nutrientes necesarios para la tierra y es vital para el crecimiento de las plantas. Sin estos animales, materiales y residuos orgánicos se acumularían en grandes cantidades y tomarían más tiempo para descomponerse.

Artículos necesarios:

  • Algo para escribir (lápiz, pluma, marcador, etc.)
  • Papel y/o cuaderno
  • Computadora y acceso al Internet (opcional)

Instrucciones:

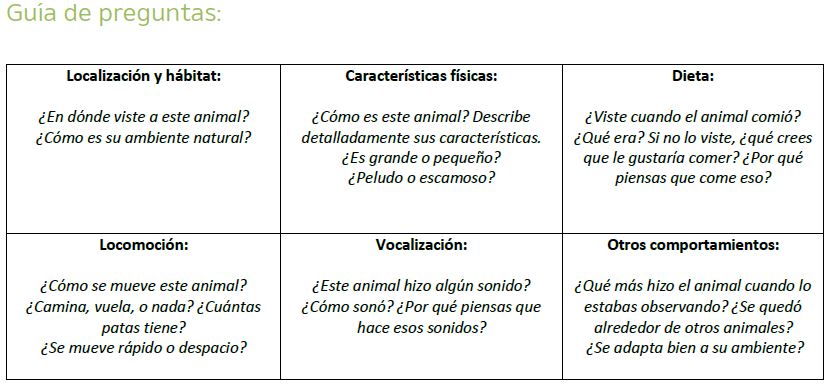
  1. Crea una tabla de observaciones usando la guía de preguntas que puedes encontrar más abajo. Anótalas en un cuaderno, un diario o en hojas de papel.
  2. Da un paseo con tu familia por los alrededores o ve a tu patio para observar algunos de los artrópodos que viven cerca de ti. Encuéntrenlos bajo las piedras, en la hierba, o inclusive viviendo entre las ramas de los árboles.
  3. Si quieres aprender más sobre algunos artrópodos, haz clic en este enlace:  ¡Ahí puedes ver cómo la araña de seda dorada construye su telaraña!

¿Te gustaría descargar esta actividad? Haz clic aquí para obtener un archivo PDF.

Para encontrar actividades, ideas y mucho más descubrimiento en casa, ¡síguenos!

Continue Reading
Daily Discovery: Drawing Music/ Descubrimiento en casa: “Dibujando” música

Post written by Eisen Tamkun, Music Programming Lead.

Daily Discovery: Drawing Music

Music has the power to influence our emotions. Have you ever gotten a chill or thrill while listening to your favorite music? Listening to music is an easy way to alter your mood or relieve stress. Gain a deeper understanding of how music influences us by drawing!

Supplies:

  • Drawing Paper
  • Favorite drawing utensils: pens, pencils, paint, etc.
  • Listening device: iPhone, Computer, etc.

Instructions:

1. Take your paper and divide it into four sections. Label each section 1-4 in the top right corner.
2. Once you are ready to start drawing in section 1, begin playing Blowin’ in the Wind by Bob Dylan. Be sure there are no noises besides the song (works best with headphones). Continue drawing until the song is completely over. Listen and let the song guide your drawing. It can be shapes, images, or anything in between. If need be play through the song a second time (or more if you want!)
3. Move to section 2 on your paper and play Für Elise by Beethoven. Repeat Step 2 and listen to the whole song through letting it guide your drawing!
4. For section 3 listen to Walking on Sunshine by Katrina and the Waves. Repeat Step 2.
5. Lastly, for section 4 play Take Me Home, Country Roads by John D. Repeat Step 2.

Now see if one of your family members can guess which one of your drawings match each song!

Want to download these directions? Click here for a handy PDF!

Follow along with our Daily Discovery! Click here for all activities that you can do at home.

Educational opportunities like this are supported in part by Bohemian.

Traducido por Károl de Rueda y Laura Vilaret-Tuma.

Descubrimiento en casa: “Dibujando” música

La música tiene el poder de influir en nuestras emociones. ¿Haz sentido alguna sensación de alegría o emoción mientras escuchas tu música favorita? Esta puede cambiarnos el humor y aliviar el estrés. Aprendamos cómo la música nos puede inspirar ¡mientras dibujamos!

Artículos necesarios:

  •  Hojas de papel
  • Utensilios para dibujar: plumas, lápices de color, pinturas, marcadores, etc.
  • Algún aparato para poder escuchar música: teléfono, computadora, radio, etc.
  • Opcional: audífonos

Instrucciones:

  1. Divide un papel en cuatro secciones. Numera del 1 al 4 la esquina superior derecha de cada sección.
  2.  Comienza a escuchar tu canción favorita, asegurándote de que no haya ningún otro ruido a tu alrededor (esta actividad funciona mejor con audífonos), y utilizando la sección número 1 del papel, comienza a dibujar lo que quieras mientras la escuchas. Deja que la música te guíe. Puedes trazar figuras, imágenes o cualquier cosa que sientas. Escucha la canción las veces que quieras mientras continúas expresándote por medio de lo que dibujas.
  3. Para el papel número 2, pon otra canción. Repite lo que hiciste anteriormente y escucha la canción entera mientras esta te guía para crear arte.
  4. Para los papeles números 3 y 4, escucha otras canciones que te gusten.
  5. Estas son algunas recomendaciones de nuestras canciones favoritas:
    • Foo Foo por Santana
    • Octopus’s Garden por The Beatles
    • Etude Op. 25 No. 11 (Winter Wind) por Chopin
    Tu rumba por iLe
    • Tu canción preferida.
    Para terminar, podrías ver si alguno de tus familiares puede adivinar las canciones que representan tus dibujos.

¿Te gustaría descargar esta actividad? Haz clic aquí para obtener un archivo PDF.

Para encontrar actividades, ideas y mucho más descubrimiento en casa, ¡síguenos!

Educational opportunities like this are supported in part by Bohemian.

Continue Reading
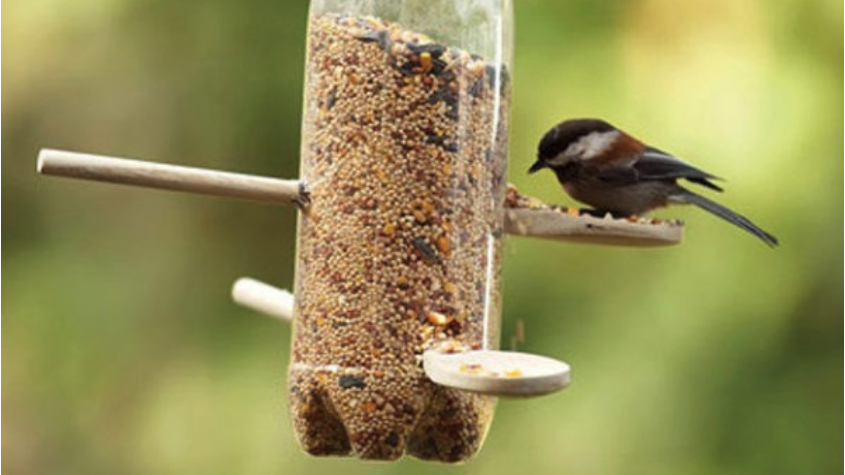
Daily Discovery: Recycled Bird Feeder / Descubrimiento en casa: Reciclando – Comedero para pájaros

Post written by Lea Mikkelsen, Early Childhood Coordinator.

Daily Discovery: Recycled Bird Feeder

Are you enjoying watching the birds from your window at home? Take a look in your recycling and imagine what you can re-use to make a bird feeder. An oatmeal container? A plastic bottle? How about a milk carton? Let’s practice upcycling and turn that container into a beautiful bird feeder to hang in your yard!

Supplies:

  • A medium to large container from your recycling
  • Materials to decorate with. Try colored paper, stickers, bright colored or patterned tape, paint, tissue paper, leaves and  ticks, or other recycled materials.
  • A stick, dowel, or other similar item for the birds to perch on.
  • Scissors
  • String or a pipe cleaner
  • You might need tape or glue
  • Birdseed

Instructions:

  1. Place all your supplies on a clear surface with plenty of room to create.
  2. Brainstorm some ideas for what your birdfeeder could look like. Tip: try drawing your idea out on a piece of paper first.
  3. Ask an adult to help you cut a few doors into your container, a hole for the stick for the bird to sit on, and a place for the string to loop through to hang the feeder.
  4. Decorate your birdfeeder using your amazing creativity!
  5. Fill the birdfeeder with seed and hang it outside to watch from your window!

Want to download these directions? Click here for a handy PDF!

Follow along with our Daily Discovery! Click here for all activities that you can do at home.

Image credit: saronti.com

Traducido por Károl de Rueda y Laura Vilaret-Tuma.

Descubrimiento en casa: Reciclando – Comedero para pájaros

¿Te gusta observar a los pajaritos cantar y volar desde la ventana de tu casa? En el contenedor de basura reciclable, podría haber objetos necesarios para construir un comedero especial para ellos. ¡Imagina todas las posibilidades! ¿Una botella de agua vacía? ¿O quizás un cartón de leche? Vamos a reciclar en una manera creativa y convertir lo que era basura ¡en un bello comedero para pájaros!

Artículos necesarios:

  • Un recipiente reciclable vacío, mediano o grande
  • Materiales para decorarlo. Por ejemplo, papel de colores, de construcción, cinta adhesiva colorida, pintura, hojas y ramitas secas, u otros materiales reciclados.
  • Una varita, palito u otra plataforma para que los pájaros puedan aterrizar
  • Tijeras
  • Hilo de estambre o algún tipo de cuerda para colgarlo
  • Pegamento
  • Semillas para aves

Instrucciones:

  1. . Reúne todos tus materiales.
  2. Imagina, crea y diseña tu comedero de pájaros. Consejo: dibuja y boceta tus ideas en un papel antes de empezar.
  3. Pídele a un adulto que te ayude a cortar unas aberturas en el contenedor, incluyendo un área para que los pájaros puedan entrar a comer, un orificio para el palito o cualquier otra plataforma, y un lugar para colgar el hilo de estambre.
  4. Decora tu comedero de pájaros. ¡Usa tu creatividad!
  5. Coloca algunas semillas dentro y cuélgalo en algún lugar donde lo puedas observar desde tu ventana. ¡Observa el festín!

¿Te gustaría descargar esta actividad? Haz clic aquí para obtener un archivo PDF.

Para encontrar actividades, ideas y mucho más descubrimiento en casa, ¡síguenos!

Image credit: earth911

Continue Reading
Daily Discovery: Meet the Amphibians! / Descubrimiento en casa: Conoce al animal – ¡los anfibios!

Post written by Hannah Curtis, Education Assistant.

Daily Discovery: Meet the Amphibians!

Metamorphic, ectothermic, and ecological indicators! What kind of animal has these terms in common? That’s right, amphibians: toads, frogs, salamanders, and newts! Meet FCMoD’s amphibians, and become a herpetologist in your own backyard!

What are Amphibians?

Amphibians are characterized as ectothermic (cold-blooded) vertebrates. They require water or moist environments to survive and for laying eggs. The skin on amphibians is very thin and permeable, so liquids and gases are absorbed through their skin, allowing them to breath underwater! Some small frogs and salamanders don’t even have lungs and rely only on this adaptation to breathe through their skin!

Almost all amphibians go through the process of metamorphosis. Adult females lay their eggs and once the larvae hatch, they have gills and resemble fish. Through metamorphosis they grow four legs and air breathing lungs!

At FCMoD we care for a variety of amphibians. Check out a few of their individual life histories!

Threats from Water Pollution

Amphibians play an important role in their wild ecosystems, but they – and their water-based habitats – become threatened due to water toxicity and pollution. Because frogs, toads and salamanders spend most of their time in or around water environments, they will come into contact with any toxic chemicals in the water or abnormal rising temperatures.

Amphibians are like sponges! They absorb and breathe in whatever is in the water. Due to their easy susceptibility to unhealthy water conditions, they are a great indicator species for an ecosystem; they can be used to infer conditions in a particular habitat. If there is clean, fresh water, frogs and toads are going to be healthy. If there is trash, chemical waste like pesticides or oil spillage, or food processing waste in the water, the animals breathe in these bad, unhealthy things and are at high risk of dying.

You can help amphibians in the wild by remembering a few things:

  1. If you see a frog or toad, try not to touch it without gloves or clean hands (no hand sanitizer), as you could expose them to germs and chemicals.
  2. Always remember to dispose of your trash properly; if you see trash in a natural area or in a body of water, set an example for others in your community by cleaning it up!
  3. Buy and eat organic food. This reduces the use of harmful pesticides and insecticides that can leak into water sources, and don’t use pesticides on your own yard or garden.
  4. If you have a pet amphibian, protect them from noise and disturbance from other pets in your house.
  5. Share with others about what you learned about amphibians, and all the ways we can protect them!
  6. Remember that if you take care of the earth, the earth will take care of you and all the wildlife too!

Observations in the Backyard!

Whether it is in your backyard, neighborhood or at a Natural Area, animals can be observed just about anywhere! Herpetologists are scientists who study amphibians, as well as reptiles. They study and observe these animals in the wild to learn about their behaviors and identify their role within the ecosystem. Be a backyard herpetologist and observe animals similar to the museum’s amphibians and record what you discover!

Supplies:

  • Writing utensil
  • Paper
  • Computer and internet access (optional)

Instructions:

  1. If you created an observational journal, write down your animal observations in the “explore your world” section. If not, create your own observational chart, using the provided guiding questions.
  2. Head out to your backyard or take a walk to a natural area with a water source to explore amphibians and their habitats.
  3. Check out FrogWatch USA to learn about the frogs and toads native to Colorado and listen to their unique croaks and calls!

Want to download these directions? Click here for a handy PDF!

Follow along with our Daily Discovery! Click here for all activities that you can do at home.


Traducido por Károl de Rueda y Laura Vilaret-Tuma.

Descubrimiento en casa: Conoce al animal – ¡los anfibios!

Son metamórficos, ectotérmicos e indicadores ecológicos. ¿Cuáles animales comparten estas características? ¡Los anfibios por supuesto! Estos incluyen sapos, ranas, salamandras y tritones. Conoce a los anfibios del Museo del Descubrimiento de Fort Collins (FCMoD) y ¡sé un herpetólogo en tu propio patio!

¿Qué son los anfibios?

Los anfibios son ectotérmicos y vertebrados. Esto significa que tienen sangre fría y una columna vertebral. Por resultado, necesitan vivir en el agua o en un ambiente húmedo para poder poner sus huevos y para sobrevivir. La piel de un anfibio es muy fina y permeable, por lo tanto, los líquidos y gases de su ambiente se absorben fácilmente a través de su piel. Esta peculiaridad les permite ¡respirar bajo el agua! La adaptación de “respirar” por medio de su piel ha logrado una evolución en algunas ranas y salamandras a tal grado, que algunas de ellas ¡no tienen pulmones!

Casi todos los anfibios experimentan el proceso de metamorfosis. Las hembras adultas ponen sus huevos en el agua y, cuando las larvas o los renacuajos salen del cascarón, estos nacen con branquias y parecen peces. Pero con el tiempo, y a través de la metamorfosis, ¡les nacen cuatro patas y dos pulmones que les ayudarán a respirar aire fresco!

En el museo, cuidamos a una variedad de anfibios.

La contaminación del agua y sus daños

Los anfibios poseen un rol importante en el ecosistema, pero ellos, al igual que sus ambientes acuáticos, son amenazados por la contaminación y la toxicidad del agua. Debido a que las ranas, salamandras, y los sapos pasan la mayor parte de su tiempo dentro o cerca de ambientes acuáticos, absorben los contaminantes en el agua o sufren con sus temperaturas anormalmente altas.

Los anfibios ¡son como esponjas! Absorben y respiran químicos presentes en el agua. Su susceptibilidad a condiciones insalubres sirve para ser una especie indicadora para el ecosistema. Los científicos usan esta clase de animales para determinar la condición de un hábitat particular. En agua fresca y limpia, las ranas o sapos vivirán sanos. Si hay basura, residuos químicos como pesticidas, derrame de petróleo, o desechos de residuos de alimentos, los animales respirarán estos contaminantes y estarán en alto riesgo de morir.

Tú puedes ayudar a los anfibios en la naturaleza simplemente recordando algunas cosas:

  1.  Si ves alguna rana o un sapo, trata de no tocarlos con manos sucias o sin guantes. No uses desinfectante de manos, porque este puede exponerlos a gérmenes o químicos.
  2. Recuerda eliminar tu basura apropiadamente. Si ves basura en un área natural o en un cuerpo de agua, recógela y ¡sé un ejemplo para otros en tu comunidad!
  3. Trata de no usar pesticidas e insecticidas en tu jardín debido a que estos químicos pueden filtrarse en cuerpos de agua y dañar a los anfibios. Otra manera de ayudar es consumiendo comida orgánica.
  4. Si tienes una mascota anfibia, protégela de los ruidos o molestias de otras mascotas en tu casa.
  5. Comparte con los demás lo que has aprendido sobre los anfibios, incluyendo las maneras en las que los podemos proteger.
  6. Recuerda que si cuidamos a nuestro planeta, ¡el planeta nos cuidará a nosotros y a toda la vida salvaje!

Observaciones a tu alrededor

Los animales se pueden observar en un patio, en los jardines, en un área natural o en cualquier sitio. Los herpetólogos son científicos que estudian anfibios y reptiles, observándolos en su medio ambiente para aprender sobre sus comportamientos e identificarsu rol en el ecosistema. ¡Tú también puedes ser herpetólogo! Observa animales similares a los anfibios del museo ¡y documenta lo que descubres!

Artículos necesarios:

  • Algo para escribir (lápiz, pluma o marcador)
  • Papel y/o cuaderno
  • Computadora y acceso al Internet (opcional)

Instrucciones:

  1. Crea una tabla de observaciones usando la guía de preguntas que puedes encontrar más abajo. Anótalas en un cuaderno, un diario o en hojas de papel.
  2. Da un paseo con tu familia por los alrededores donde haya algún cuerpo de agua (lago, río, etc.) y busca algunos anfibios. Observa sus comportamientos y medio ambiente. Si quieres aprender más sobre las ranas y sapos nativos de Colorado, haz clic en este enlace: FrogWatch USA ¡Ahí también puedes escuchar los sonidos que hacen

¿Te gustaría descargar esta actividad? Haz clic aquí para obtener un archivo PDF.

Para encontrar actividades, ideas y mucho más descubrimiento en casa, ¡síguenos!

Continue Reading

BFFs: Black-footed Ferrets or Best Friends Forever

Post written by Kim Fraser, Black Footed Ferret Program Coordinator.

BFFs: Black-footed Ferrets or Best Friends Forever

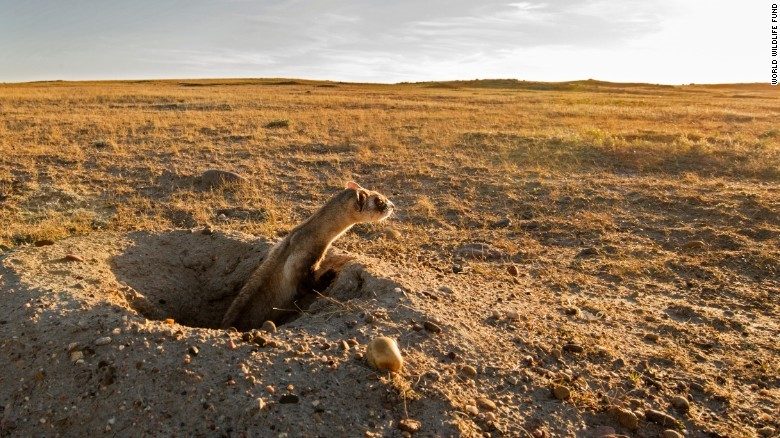
The Black-footed Ferret (BFF) (Mustela nigripes) is the only ferret native to North America and lives on the short grass prairie of the Great Plains. BFFs are members of the Mustelidae family which is often referred to as the weasel family, and includes mink, badger, marten, otter, weasel, fisher, wolverine, and domestic ferret. They are nocturnal, solitary, require large expanses of landscape, and spends their whole life on prairie dog colonies. In the prairie dog burrow systems they seek shelter from predators and weather, eat, sleep, and raise their young. Over 90% of their diet is prairie dog and they eat over 100 per year. BFFs are called fossorial predators, meaning they hunt underground. Their home range is in 12 Western states including Canada and Mexico. Considered one of the most endangered mammals in North America it has been federally protected for over 40 years.  The BFF Recovery Program is one of the most successful recovery programs with over 50 State, Federal, Tribal, NGOs and private landowner partners that all participate in recovery efforts.

Why should we protect black-footed ferrets?

In 1974 when the Endangered Species Act was enacted the Black-footed Ferret was in the top 10 species listed for protection. No one knew then how difficult or easy saving a species from extinction would be. Today, we know recovering an endangered species involves many partners, time, and effort. Since the ESA became law some species have had survival success and some have not. Many people have asked is it worth it?  Is preventing the extinction of an iconic species like the black-footed ferret worth the effort? The answer is yes, it is worth it, and here’s why. The BFF is an important member of the prairie ecosystem and their presence indicates a healthy habitat that supports many other species. Without black-footed ferret conservation efforts, prairie dogs and other associated species such as burrowing owls, swift fox, mountain plovers, ferruginous hawks, prairie rattlesnakes, and many others could easily succumb to current threats. So by conserving black-footed ferrets, we have to conserve prairie dog habitat and that saves an entire ecosystem and its inhabitants that call the short grass prairie home!


Why should people care and help save this species from extinction?

Maybe it’s because BFFs capture the imagination that there’s this rarely seen and secretive animal living on the short grass prairie underground. And even though it is one of the most endangered mammals, most Americans will never have the opportunity to see a live BFF.  It’s like a fairytale character of the prairie that represents the wild, and people are passionate about the wild and fascinated about the animals that live there.  When folks learn about BFFs they are amazed that something so cool lives right in their backyard- in America.  We all know about other species that are in trouble across the globe, like elephants, tigers, chimpanzees and rhinos. And it is good to care about what happens to all species on our planet because we are a global living place. Every day we hear about how these other species are doing and how we can help them and that’s important.  But here is an animal that makes its home right here, it belongs to us as Americans as one of our native species. We should care and protect BFFs so they will remain part of the wilds of North America.  One way to help save BFFs is by learning all you can about them.  Because by learning you will come to care about them, and when you care, you will want to help save them. So you see by caring and helping to save them from extinction you are being a BFF or Best Friend Forever not just to black-footed ferrets but to future generations so they too will have BFFs living wild and free on the prairie.

The museum is proud to have two black-footed ferrets on-site in partnership with the National Black-footed Ferret Conservation Center. You can see what our BFFs are up to while we’re closed via our Ferret Cam: fcmod.org/ferret-cam!

Continue Reading
Amazing Amphibians

Post written by Willow Sedam, Live Animal Husbandry Team Member.

Amazing Amphibians

Did you know that amphibians were the first animals to live on land? Or that they swallow by blinking and pushing the backs of their eyes into their throat?

Today, we’re looking at the amazing world of amphibians!

What is an amphibian?

Toads, frogs, and salamanders are all amphibians. While amphibians are a wide and varied class of animals, they all have a few things in common.

Amphibians have slimy skin which they can breathe and drink through and has to be kept damp at all times. Amphibians lay squishy, shell-less eggs in water. And they all start out life as aquatic larvae, later metamorphosing (like a caterpillar turning into a butterfly) into their adult form, growing legs and shedding their tails!

Because water is so important to amphibians, they are often found around ponds, streams and marshes. But spending so much time in water means they can often be the first animals affected by a change in water quality. Amphibians can be the first warning that something is wrong with an environment, as they are very sensitive to pollutants, and a decline in amphibian populations can be a clue to scientists that something is wrong. But when amphibians are doing well, that means the environment around them is, too – which is why they are such important animals to learn about and protect!

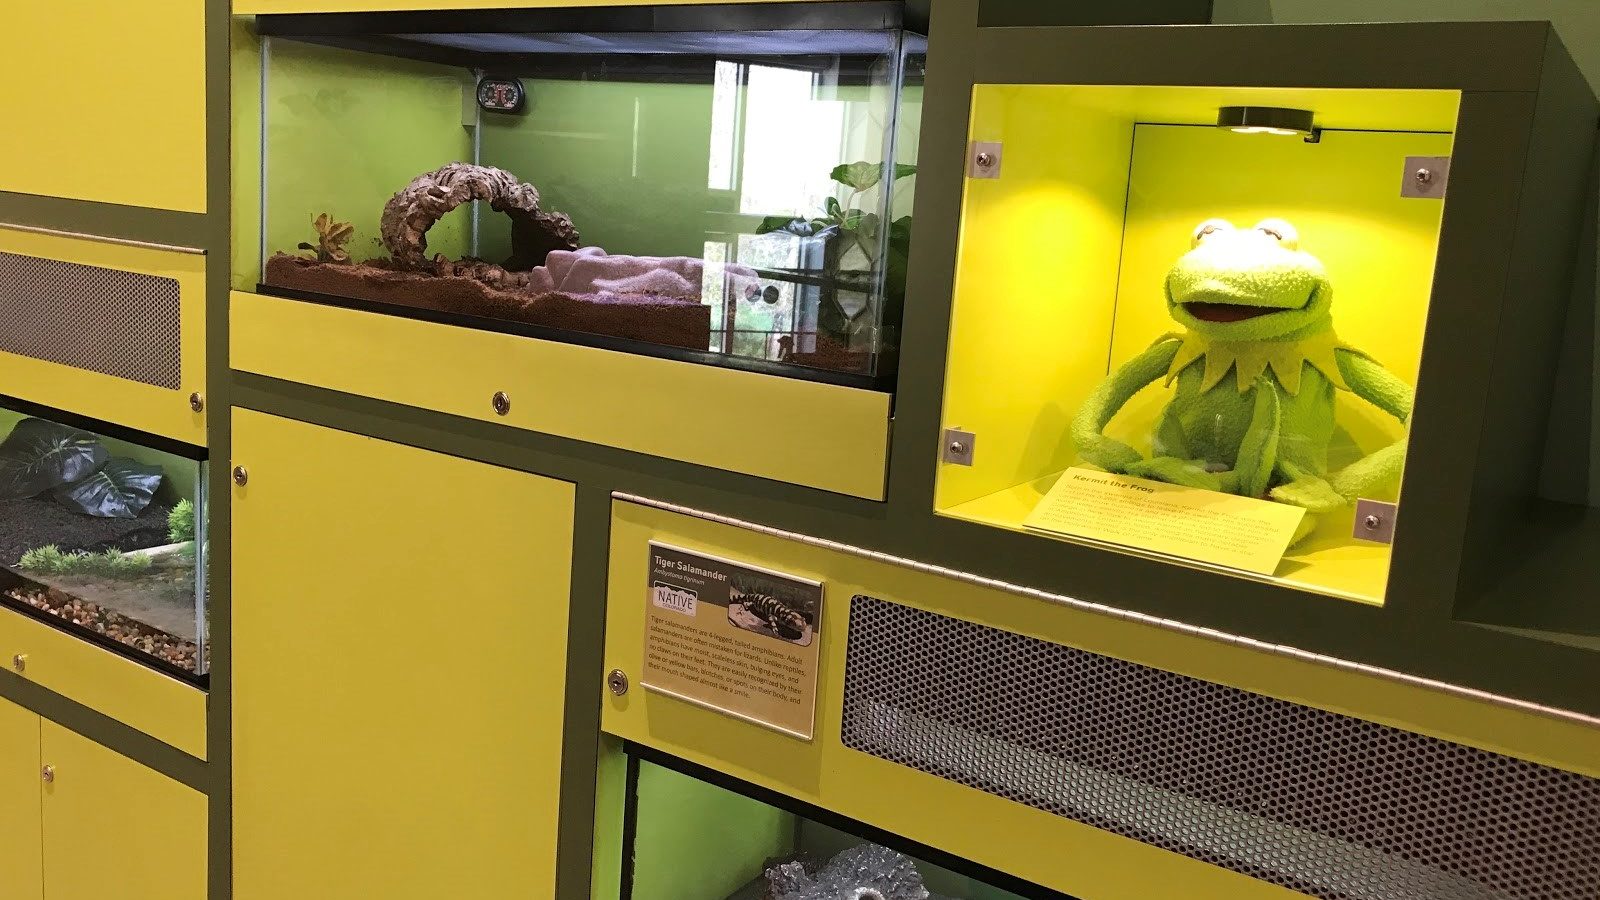
At the museum, we have four species of amphibians on display, two of which are native to the US, and one that can be found right here in Colorado!

Fire-bellied toad

Despite being called toads, these Eurasian amphibians are technically frogs – you can tell by their long legs and preference for swimming.

These amphibians display two interesting types of coloration at once: camouflage, which blends them into their environment, and aposematism, which warns predators that they might be dangerous. Much like poison dart frogs, fire-bellied toads are brightly colored to warn predators that they are toxic. However, while poison dart frogs are bright all over, fire-bellied toads limit their bright warning coloration to their bellies. When a predator looks down on a frog, it sees only the green and black camouflage on its back, and might not notice it. But if the frog is threatened, it can rear up on its back and show off it’s bright belly that acts just like caution tape and says: stay away from me!

This behavior, called an unken reflex, actually gets its name from fire-bellied toads and the German name for their species, Unke.

Southern toad

Our southern toad is actually more of a southeastern toad, hailing from the warmer and wetter parts of the American east coast, from North Carolina to Mississippi. These amphibians are true toads – warty, with short legs ill-equipped for swimming and jumping but built perfectly to dig. They actually have claw-like spurs on their back legs that help them build burrows to stay safe and moist when the weather gets too hot, too cold, or too dry for them.

Like all amphibians, they lay their eggs in open water – about 3,000 of them per season! After only a couple of days, these eggs hatch into tadpoles, which undergo metamorphosis when they’re barely half an inch long!

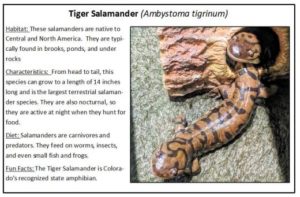
Tiger salamander

These salamanders are a Colorado native and can be found in marshes and ponds right here in Fort Collins! But they’re not picky about where they live – they’re actually the most wide-spread salamander species in North America, ranging from Canada all the way to Mexico! Their name comes from the yellow and black splotches on their skin, which look a little bit like tiger stripes. Like tigers, they are also ferocious predators – even if they don’t look like it. When they emerge from their burrows to hunt, they look for anything they can eat – worms, spiders, and beetles, even frogs and smaller salamanders are all fair game!

Our salamanders at the museum get so excited during feeding time, that sometimes they’ll even try and bite their caretaker’s fingers! Unlike frogs, salamanders actually have teeth – lucky for the people feeding them, they aren’t very sharp.

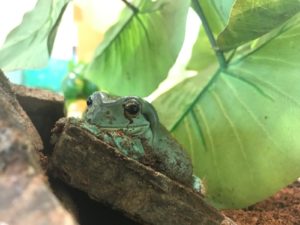
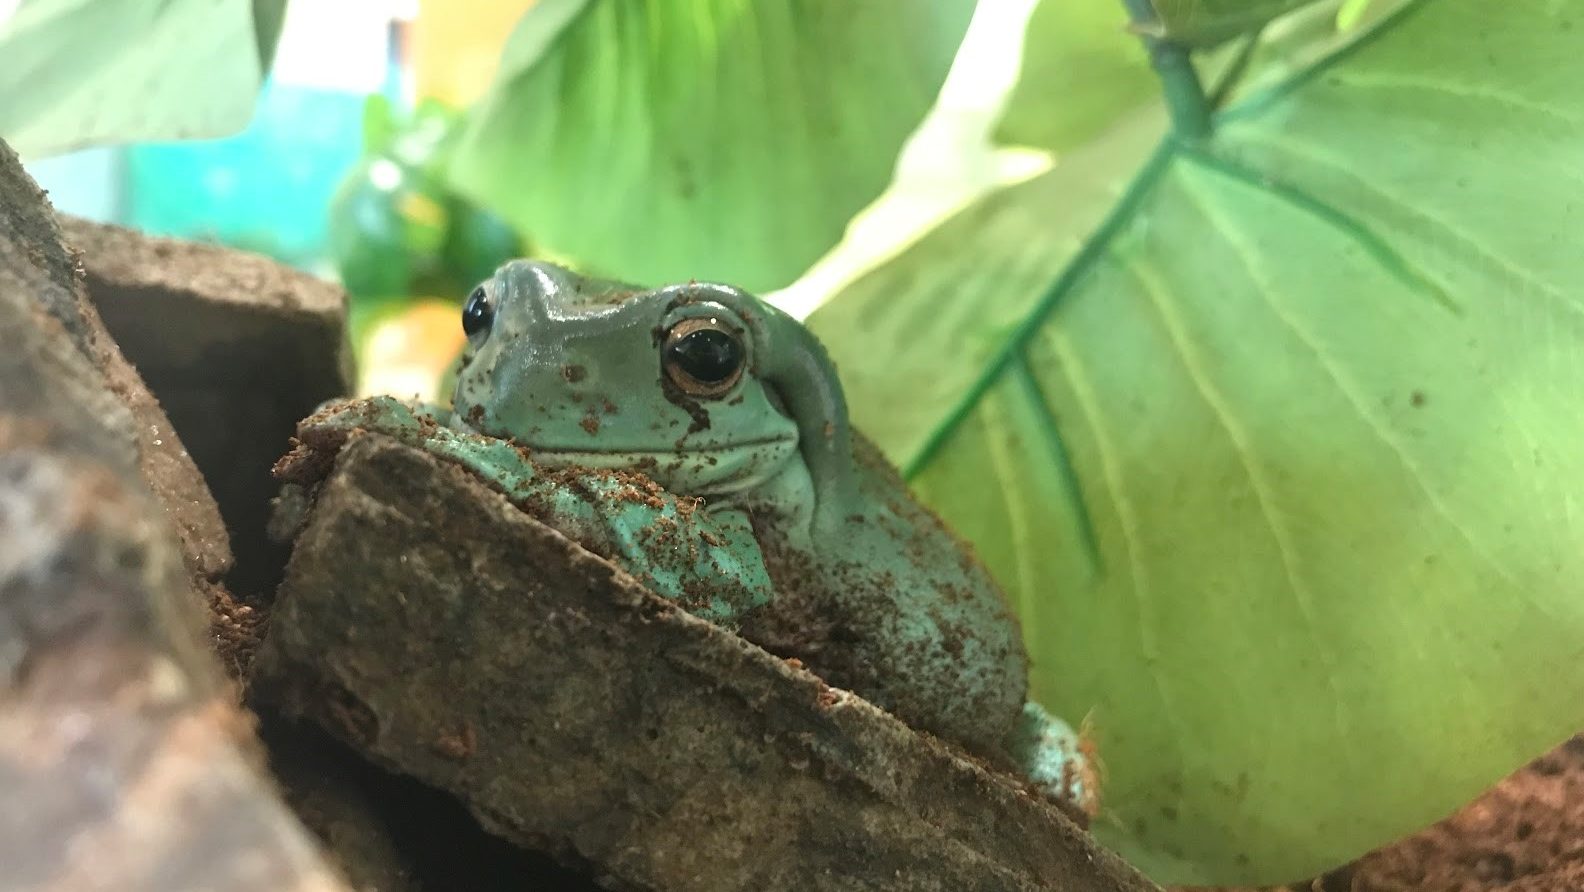
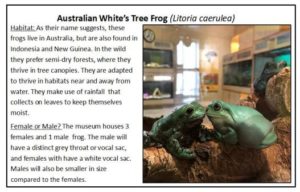
White’s tree frog

These Australian frogs are very popular in the pet trade because of how calm they are around humans – even wild frogs will find their way into people’s sinks, laundry roo

rooms, and bathtubs, no matter if they’re occupied!

Unlike some frogs, White’s tree frogs do not have long sticky tongues that they use to catch prey. Their preferred method of hunting is close-range. Once they’re close enough to a bug or other tasty morsel, they lunge at it with their mouth open wide and scoop it up into their gob with their hands.

These frogs are also very unique for the way they protect their delicate amphibian skin. They secrete a goo from their skin that is antibacterial, antiviral, and antifungal, allowing them to stay safe and free from disease even when they’re living in places that are mucky and full of germs. The virus-fighting ability they possess is so impressive, it’s even being studied for use in human medicine!

Amphibians are amazing animals, coming in so many different shapes and sizes. From legless, soil-dwelling caecilians to flying tree frogs, they all play an important part in our ecosystem!

Continue Reading