Daily Discovery: “If You Love Honey” Bee Headband Craft

Post written by Lea Mikkelsen, Early Childhood Coordinator.

Daily Discovery: Storytime in the Home – If You Love Honey  Bee Headband Craft

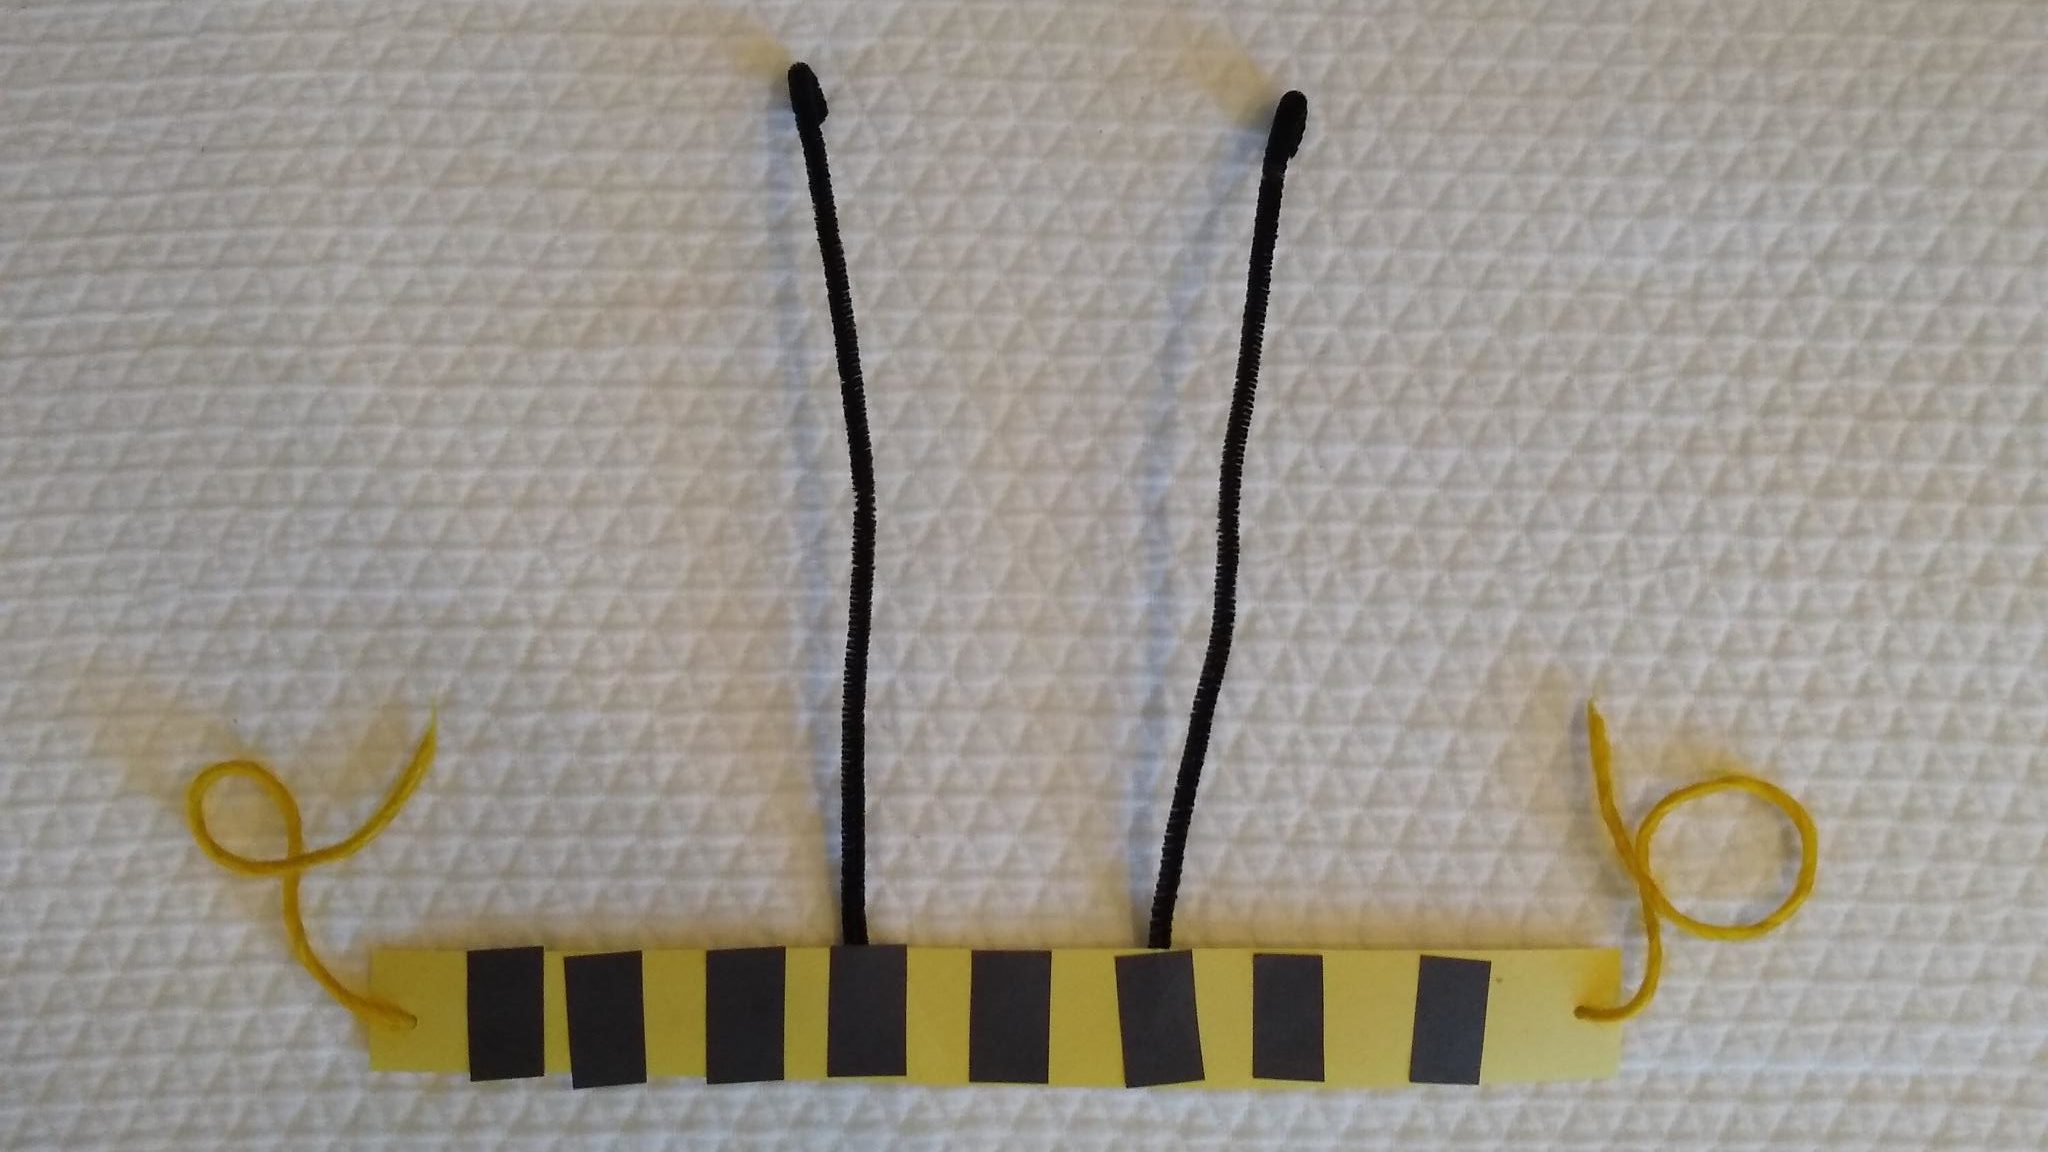
Follow along with FCMoD’s live stream Storytime in the Home: If You Love Honey: Nature’s Connections. Then gather all your supplies to create this adorable honeybee headband. Buzz Buzz!

Supplies:

  • Yellow and Black craft paper
  • Pipe cleaners
  • Glue
  • Tape
  • Scissors
  • Yarn
  • Hole punch

Instructions:

  1. Place all your supplies on a clear surface with plenty of room to create.
  2. Cut a long strip of yellow craft paper.
  3. Cut a second strip of black craft paper and cut that into small bee stripes.
  4. Glue the black bee stripes to the yellow strip of craft paper leaving some yellow bits in between.
  5. Punch a hole in the ends of the strip and thread the yarn through to use as a tie.
  6. Curl one end of each pipe cleaner to make a small ball.
  7. Tape the pipe cleaners to the inside of the headband where you want each antenna to go.
  8. Tie your headband on and do a honeybee dance! BUZZZZZzzzz!

Want to download these directions? Click here for a handy PDF!

Follow along with our Daily Discovery! Click here for all activities that you can do at home.

Continue Reading

Daily Discovery: Bending Light and Eyesight

Post written by Angela Kettle, School Programs Coordinator.

Daily Discovery: Bending Light and Eyesight

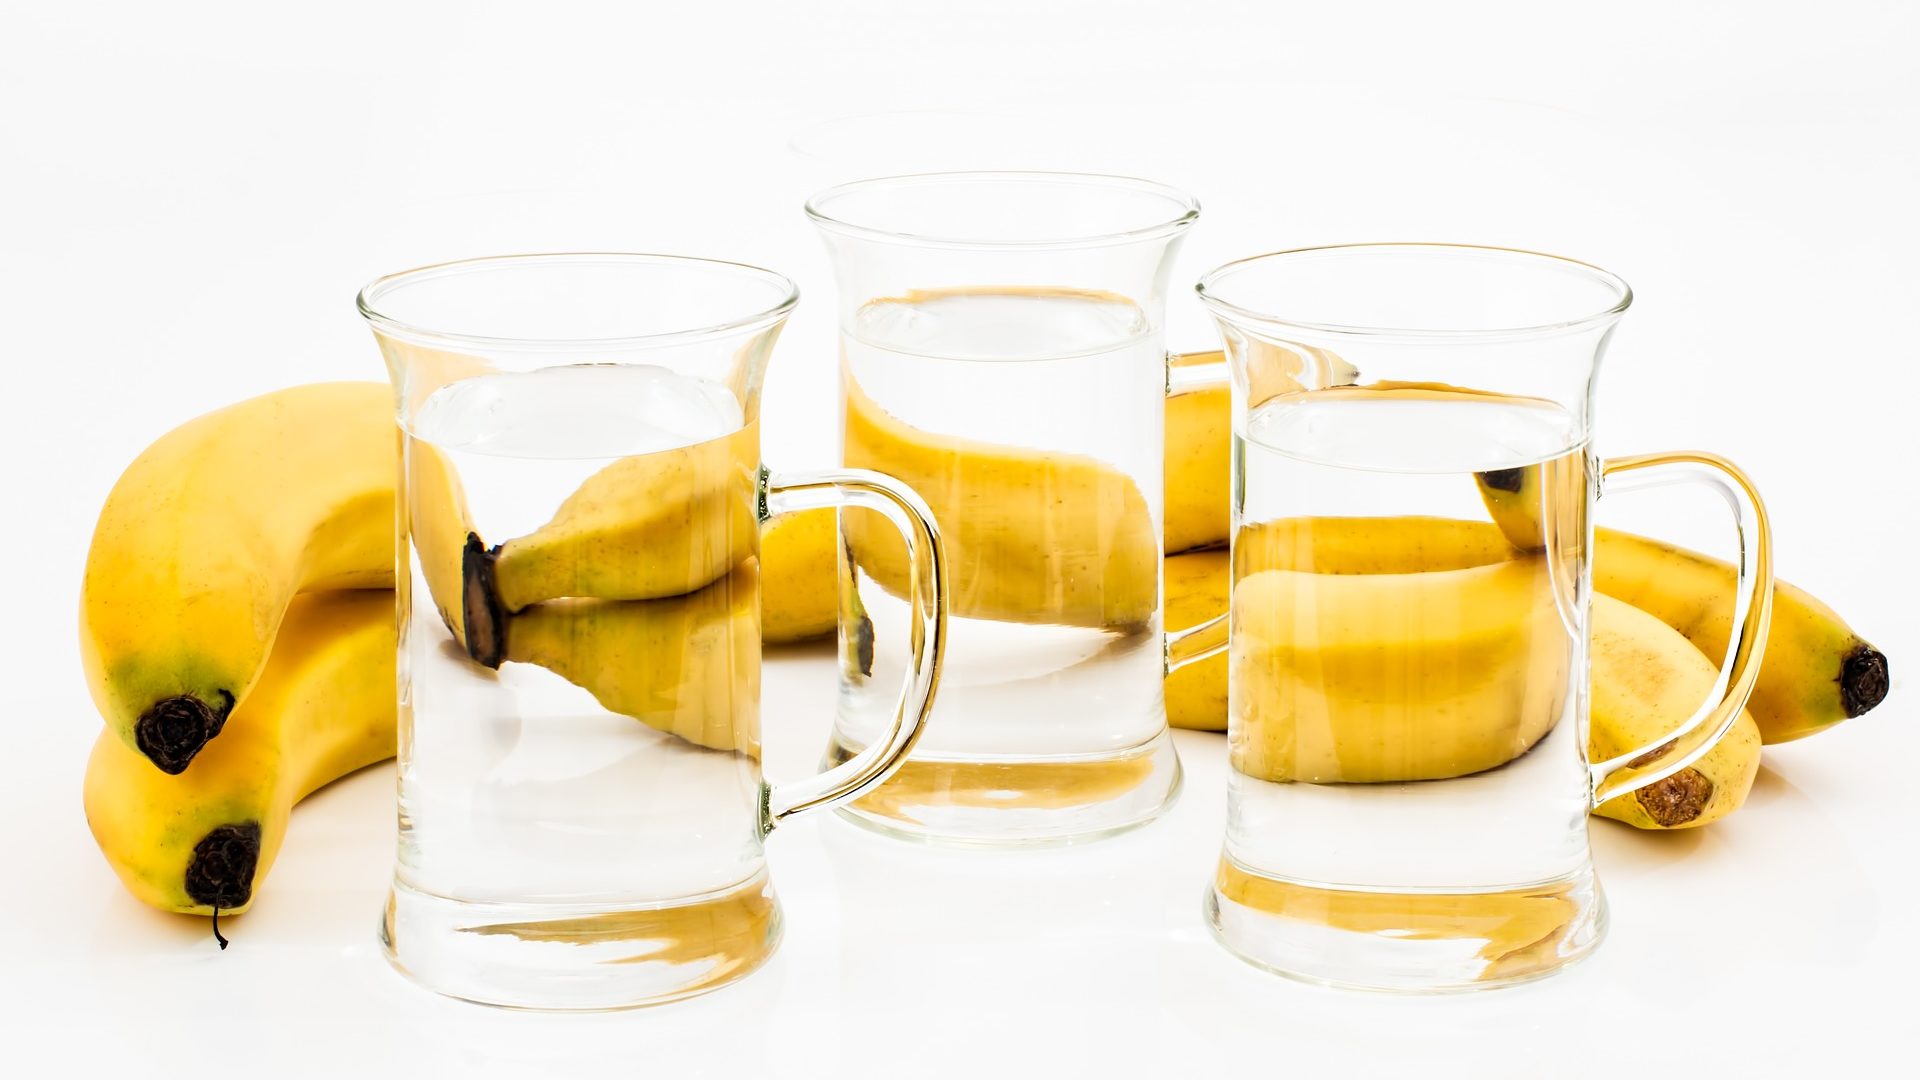
Have you ever noticed that your legs look out of place when you dangle them in the pool, or that the straw in a glass of water looks bent? This is called refraction. Refraction occurs when light bends as it passes from one medium to another – for example, from the front of a glass, to the water inside, to the back of a glass. Experiment with refraction for yourself in the activity below!

Supplies:

  • Paper
  • Pencil
  • Crayons, colored pencils, or markers (optional)
  • 2+ different kinds of drinking glasses, filled with water – make sure the glasses are transparent
  • Your Observation Journal (find out how to make one here), or use another sheet of paper to record your findings

Instructions:

Part 1

  1. Draw an arrow on a sheet of paper. Note which way the arrow is facing (right, left, up, or down).
  2. Fill up a glass of water.
  3. Put your glass of water down, and put yourself at eye level with the water in the glass. Hold your drawing at arm’s length, so that you can see it through the glass. What do you notice about the way your drawing looks now? What about if you look at the image through the glass from a different angle?
  4. Repeat the experiment, this time with a different kind of glass. Does the image stay the same as the last glass, or does it change?
  5. Write or draw your findings in your Observation Journal.

Part 2

  1. Draw something new – whatever you like! Make sure that whatever you draw has certain parts facing one way or another (for example, you could draw a face with the eyes looking left, or a cat with its tail on the right side of the paper and its head on the left side).
  2. Look at your drawing through your glass of water, like you did with the arrows. What do you notice?
  3. Play around with your drawing and your glass. Try looking at the image from lots of different angles, through as many different kinds of drinking glasses as you can. How many different images can you create from your original image, just by experimenting with refraction?
  4. Record your findings in your Observation Journal. Share what you find by tagging us on social media and using #DailyDiscovery.

From Drinking Glasses to Eyeglasses

Refraction might seem like a fun magic trick, but did you know that refraction is what makes it possible for humans to see? Light is refracted as it passes through the cornea and the lens of the eye. This allows the light to come into focus on the retina, where it is converted into a message that the brain can understand.

Sometimes, though, refraction can go wrong, causing what’s called nearsightedness or farsightedness. When people are nearsighted, it means they can see things that are close to them, but not far away. Usually, this is caused by the eye being too long, causing light to focus in front of the retina. When people are farsighted, it means they can see things that are far away, but not things that are close. Usually, this is caused by the eye being too short, causing light to focus behind the retina. Both nearsightedness and farsightedness can also be caused by problems with the shape of the eye’s lens.

Thankfully, errors in refraction can be corrected with eyeglasses. First, an eye doctor (an optometrist) tests a patient’s vision to figure out her prescription (a way of measuring a person’s vision). From there, an engineer uses this prescription to make unique lenses. This lens is engineered to refract light so that it focuses in just the right spot on the retina, allowing the patient to see clearly.

Eyeglasses through the Ages

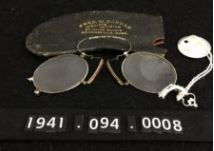
Eyeglasses have undergone many changes as engineers have figured out more efficient ways to craft them… and as fashion has changed, too! Here are a few historical photos from our Archive and a piece from our Collection at the museum! You can learn more about eyeglasses and fashion from our recent blog post, parts of which are adapted below:

The museum’s artifact collections offer a retrospective look (which is 20/20, of course) at the history of innovation in eyewear. Pince-nez spectacles, which had no earpieces and stayed in place with a nose clip were quite popular early in the 20th century but fell out of fashion as they became associated with older generations.

Want to download these directions? Click here for a handy PDF!

Follow along with our Daily Discovery! Click here for all activities that you can do at home.

References & Additional Resources

Educational opportunities like this are supported in part by Fort Fund.

Continue Reading

Daily Discovery: Drawing Music/ Descubrimiento en casa: “Dibujando” música

Post written by Eisen Tamkun, Music Programming Lead.

Daily Discovery: Drawing Music

Music has the power to influence our emotions. Have you ever gotten a chill or thrill while listening to your favorite music? Listening to music is an easy way to alter your mood or relieve stress. Gain a deeper understanding of how music influences us by drawing!

Supplies:

  • Drawing Paper
  • Favorite drawing utensils: pens, pencils, paint, etc.
  • Listening device: iPhone, Computer, etc.

Instructions:

1. Take your paper and divide it into four sections. Label each section 1-4 in the top right corner.
2. Once you are ready to start drawing in section 1, begin playing Blowin’ in the Wind by Bob Dylan. Be sure there are no noises besides the song (works best with headphones). Continue drawing until the song is completely over. Listen and let the song guide your drawing. It can be shapes, images, or anything in between. If need be play through the song a second time (or more if you want!)
3. Move to section 2 on your paper and play Für Elise by Beethoven. Repeat Step 2 and listen to the whole song through letting it guide your drawing!
4. For section 3 listen to Walking on Sunshine by Katrina and the Waves. Repeat Step 2.
5. Lastly, for section 4 play Take Me Home, Country Roads by John D. Repeat Step 2.

Now see if one of your family members can guess which one of your drawings match each song!

Want to download these directions? Click here for a handy PDF!

Follow along with our Daily Discovery! Click here for all activities that you can do at home.

Educational opportunities like this are supported in part by Bohemian.

Traducido por Károl de Rueda y Laura Vilaret-Tuma.

Descubrimiento en casa: “Dibujando” música

La música tiene el poder de influir en nuestras emociones. ¿Haz sentido alguna sensación de alegría o emoción mientras escuchas tu música favorita? Esta puede cambiarnos el humor y aliviar el estrés. Aprendamos cómo la música nos puede inspirar ¡mientras dibujamos!

Artículos necesarios:

  •  Hojas de papel
  • Utensilios para dibujar: plumas, lápices de color, pinturas, marcadores, etc.
  • Algún aparato para poder escuchar música: teléfono, computadora, radio, etc.
  • Opcional: audífonos

Instrucciones:

  1. Divide un papel en cuatro secciones. Numera del 1 al 4 la esquina superior derecha de cada sección.
  2.  Comienza a escuchar tu canción favorita, asegurándote de que no haya ningún otro ruido a tu alrededor (esta actividad funciona mejor con audífonos), y utilizando la sección número 1 del papel, comienza a dibujar lo que quieras mientras la escuchas. Deja que la música te guíe. Puedes trazar figuras, imágenes o cualquier cosa que sientas. Escucha la canción las veces que quieras mientras continúas expresándote por medio de lo que dibujas.
  3. Para el papel número 2, pon otra canción. Repite lo que hiciste anteriormente y escucha la canción entera mientras esta te guía para crear arte.
  4. Para los papeles números 3 y 4, escucha otras canciones que te gusten.
  5. Estas son algunas recomendaciones de nuestras canciones favoritas:
    • Foo Foo por Santana
    • Octopus’s Garden por The Beatles
    • Etude Op. 25 No. 11 (Winter Wind) por Chopin
    Tu rumba por iLe
    • Tu canción preferida.
    Para terminar, podrías ver si alguno de tus familiares puede adivinar las canciones que representan tus dibujos.

¿Te gustaría descargar esta actividad? Haz clic aquí para obtener un archivo PDF.

Para encontrar actividades, ideas y mucho más descubrimiento en casa, ¡síguenos!

Educational opportunities like this are supported in part by Bohemian.

Continue Reading

Fort Collins & The Flu: 1918-1919

Post written by Sarah Frahm, Archive Assistant.

Fort Collins & The Flu: 1918-1919

What did Fort Collins look like the last time the city faced a widespread shutdown? From the fall of 1918 through the early spring of 1919 the citizens of Fort Collins found themselves under varying stages of quarantine due to the influenza epidemic. One document, currently at the Archive, that gives some insight into how the city officials handled the epidemic and quarantining of the population is a “Summary of Advisory Committee Recommendations.”

Fort Collins Quarantine Recommendations

Most telling about the problems the city faced in managing the flu epidemic is that the advisory committee was not even formed until December 1918, despite influenza raging in the city since at least October. According to an October 18th article in The Weekly Courier the state board of health had ordered the closing of “everything” in Colorado  but that those in charge of the college campus, where men were still doing military training, would not close the campus. The previous week an editorial had appeared in the newspaper demanding a “rigid quarantine be established” and that the city should be “shut down tight” like Boulder and Greeley. By the end of the October both the college and the city had enacted some form of closure, although without official documents it is a challenge to tell just how strenuous the shutdown was. Another article mid-November from The Weekly Courier complains that “quarantine has not been very rigid of late” with November seeing both elections and the armistice ending World War One and that these events and gatherings led to a rising in the number of flu cases.


The convening of a citizen advisory committee to the city board of health seems to be a recognition that the previous handling of the flu epidemic had been somewhat ad hoc and unclear (the November issues of The Weekly Courier discuss whether masks should be worn, or not, and if quarantine would be lifted, or not) and in need of some sort of codification.

But how did these regulations, once adopted, affect the citizens of Fort Collins? The first two points recommended by the advisory committee were not all that different from the quarantining, done before and after the influenza epidemic, for other diseases, like measles or scarlet fever. However, the third recommendation of shutting down schools and “ordinary public gatherings” was different. Social and fraternal clubs closed, such as the Elks (in April 1919, The Fort Collins Courier reports that the lodge was in remarkable good financial health despite having been closed for nearly three months. The women’s gymnasium, on the other hand, found itself struggling to have enough members in March.) The superintendent of the school district reported in the summer of 1919 that the school year had been full of “anxiety, hindrance, and depression” and that many of the plans for academic work had to be abandoned.

 The Elks Lodge was located at 202 Linden Street and was closed during the influenza quarantine.

If the lack of proper schooling and a severe curtail on social life were not bad enough, the fourth recommendation from the advisory committee was an extreme frustration to many in Fort Collins. Shortly after the requirement limiting the number of people in any place of business came out The Weekly Courier wrote an editorial telling people to quit complaining, pointing out that they too had to deal with these restrictions upon their office (if someone was to visit the newspaper office, a member of staff would have to leave in order to maintain the proper number of people per square footage). The editorial admonished the people the writer considered to be “knockers” to take the disease more seriously for the sake of the survival of the city.

While the committee was extremely serious on the subject of loafing on the streets (how else does a recommendation get to be written not only in capital letters but also underlined and starred?) the record of impact on peoples’ lives of that specific order is currently unknown. Rather it is the suborder that bares out most in the historical record. The committee called for a special officer to be appointed. The man who became “Quarantine Officer” was Orrin J. Watrous, then the secretary of the Fort Collins Commercial Club. According to The Fort Collins Express writing about the official vote of thanks put forth by the city government to Watrous, Mr. Watrous daily visited between “a dozen to twenty houses in his quarantine rounds” in order to ensure people were properly following the orders of the city.

Orrin Watrous, pictured here at the far right with a cigar in his mouth and boxing gloves on his hands.

When people did not follow quarantine regulations, there were consequences. One farmer, a Mr. Tom Hale, accused of breaking the quarantine on his house, had to go to court on December 27th and face trial. The Weekly Courier reported that Mr. Hale’s case was dismissed. While it is not clear what kind of fine or other penalty Mr. Hale would have had if he had been found guilty, his case is still an example of the added difficulties of living life under quarantine.

It is difficult to know, exactly, how people felt about the restrictions placed upon them by the city government. Currently there is only access to a weekly newspaper (even though the newspaper also ran dailies, Archive staff cannot get to them right now) and while there are potentially useful items held in the Archive collection, with our own doors closed, a lot of the details will have to remain unknown for the current time.

Continue Reading

Daily Discovery: Baking with History – Fort Collins Brownies/ Descubrimiento en casa: Recetas con historia – bizcochos de chocolate (brownies) de Fort Collins

Post written by Charlotte Conway, Public Programs Coordinator.

Daily Discovery: Baking with History – Fort Collins Brownies

Have you ever had trouble getting a brownie recipe to rise? High altitude baking requires special adjustments to get the same results as lower altitudes. Lucky for us, people from FoCo history have already developed recipes perfect for baking in our Colorado high altitude.

Learn about Dr. Inga Allison, a figure from Fort Collins history, who developed the science for high altitude baking, and then grab a parent to help you bake through history!

Dr. Inga Allison’s High Altitude Brownies Recipe

Inga Allison joined the Home Economics Department at Fort Collins’ Colorado Agriculture College from 1903 to 1908, at a time when several faculty members were starting to study the unique effects of high altitude on both crop growth and food preparation. Lacking an established lab, Allison conducted her experiments in cooking at altitude with improvised equipment in challenging conditions – baking, for example, in a rough Estes Park shanty located at 11,800 feet above sea level!

You can thank Dr. Allison for most brownie recipes that work here in Fort Collins – they most likely take into account the science developed by Dr. Allison! Follow along with her original brownie recipe on the next page!

Want to download these directions? Click here for a handy PDF!

Follow along with our Daily Discovery! Click here for all activities that you can do at home.


Traducido por Károl de Rueda y Laura Vilaret-Tuma.

Descubrimiento en casa: Recetas con historia – bizochos de chocolate (brownies) de Fort Collins

¿Alguna vez has tenido algún problema siguiendo recetas de brownies? En Colorado -y en lugares con gran altitud- el hornear ciertos platillos requiere ajustes especiales para obtener los mismos resultados que en lugares con altitudes más bajas. Pero por suerte, existen recetas locales comprobadas que sirven para hornear con éxito en nuestra área.

Conoce a la Dra. Inga Allison; una figura histórica de nuestra ciudad que descubrió la ciencia para hornear en elevaciones altas. Con la ayuda de un adulto, usa esta receta histórica ajustada por ella para hacer unos brownies, ¡y comparte el delicioso resultado con tu familia!

Horneando pasteles con diferentes alturas.

Columna A – Pasteles horneados al nivel del mar sin ningún ajustamiento.

Columna B – Pasteles horneados al nivel del mar con ajustamiento de levadura en polvo.

Columna C – Pasteles horneados con recetas correctamente balanceadas para elevaciones altas.

Un archivo de la colección del museo que representa el experimento de una misma receta horneada a diferentes niveles de altura. A 3,048 metros (10,000 pies), a 1,524 metros (5,000 pies), y al nivel del mar. Observa cómo cambia la estructura de cada postre.

Receta de brownies ajustada por la Dra. Inga Allison

Inga Allison se unió al Departamento de Economía Doméstica en el Colegio Universitario de Agricultura de Fort Collins de 1903 a 1908. En aquel entonces, muchos miembros de la facultad empezaron a estudiar los efectos de la altura en el crecimiento de los cultivos y la preparación de alimentos. El colegio no tenía un laboratorio disponible, por tanto, Allison comenzó sus experimentos sobre la cocción en elevaciones altas con equipos improvisados y bajo condiciones difíciles; por ejemplo, horneaba en una cabina desgastada localizada en el pueblo de Estes Park, que está a unos 3,596 metros (aproximadamente 11,800 pies) de altura.

Podemos agradecerle a la Dra. Allison por desarrollar la ciencia que influye en la mayoría de las recetas de brownies creadas aquí en Fort Collins. ¡Sigue su receta original traducida en la página siguiente!

Receta para hacer bizcochos de chocolate (brownies) de Fort Collins:

Ingredientes:

  •  2/3 taza de harina de trigo
  • 1/2 cucharadita de levadura en polvo
  • 1/4 cucharadita de sal
  • 1/3 taza de manteca vegetal
  • 2 barras de chocolate sin azúcar
  • 1 taza de azúcar blanca
  • 2 huevos batidos
  • 1/2 taza de nueces
  • 1 cucharadita de vainilla
  • Para alturas de 2,286 metros (aproximadamente 7,500 pies) o de 3,048 metros (10,000 pies) sobre el nivel del mar, añade 1/4 cucharadita de levadura en polvo

Instrucciones:

Derrite la manteca vegetal junto con el chocolate a baño maría. En otro recipiente, agrega gradualmente el azúcar a los huevos batidos hasta que estén completamente mezclados. Agrégales la mezcla de chocolate y bate. Adjunta todos los ingredientes secos y mézclalos hasta que estén incorporados. Incluye las nueces y la vainilla. Coloca la mezcla en un refractario engrasado tamaño 20x20x5 centímetros (8x8x2 pulgadas) y hornea por 35 minutos a 180ºC (350ºF). Cuando esté todavía caliente, corta en forma de cuadros. Retíralos del recipiente y déjalos enfriar. Rinde para 2 docenas de brownies.

¿Te gustaría descargar esta actividad? Haz clic aquí para obtener un archivo PDF.

Para encontrar actividades, ideas y mucho más descubrimiento en casa, ¡síguenos!

Continue Reading

Daily Discovery: Agriculture in Action!

Post written by Hannah Curtis, Education Assistant.

Daily Discovery: Agriculture in Action!

Agriculture and farming have a long history in Fort Collins and all over the globe. Most of the time we only see the end product, the fruits and vegetables at the grocery store. With this activity, see what happens under the dirt through experimentation with the scientific method!

Follow along through Facebook and Instagram with museum educator Hannah as she demonstrates this experiment in her own home. Happy Farming!

Supplies:

General:

  • Water
  • Indoor space with sunlight
  • Sharpie or marker
  • Paper and pencil to record daily observations
  • Potting soil and planter (optional)

Growing Produce from seeds:

  • Seeds (dried beans, flower seeds, other fruit or vegetable seeds)
  • Baking tray or cutting board
  • Paper towels
  • Spray bottle (optional)
  • Ziploc bags

Re-Growing Produce from Kitchen Scraps:

  • Kitchen scraps (celery base, lettuce heart, green onion base, yellow onion top)
  • Small bowls or containers
  • Sharp kitchen knife and adult supervision

Instructions:

For ages 3-5:

  1. Review what plants and flowers need to grow and walk through the stages of plant growth.
  2. The Ziploc bag method can be easily monitored and observed, but we recommend setting up a method together that works best for your household. See procedures below.
  3. Ask your young scientist what they think will happen to the produce or seeds? Talk about different plants they have seen and discuss how they grow or where their favorite fruits and vegetables come from.
  4. Observe and talk about what is happening to your produce or seeds every day.

For ages 6 and up:

  1. Review what plants and flowers need to grow and walk through the stages of plant growth.
  2. Work through the scientific process before proceeding with the experiment. Decide on an experiment you want to test.
  3. Write down your answers for the scientific process and create your method for observation.
  4. Depending on your growing method, follow the procedures below.
  5. Record your observations every day in an observational chart, farming journal or a photo archive. As your produce grows you can look back on previous days, predict what will happen next and share with family and friends!
  6.  Follow along with Hannah as she tests her experiment in her home.

Want to download these directions? Click here for a handy PDF!

Follow along with our Daily Discovery! Click here for all activities that you can do at home.

Educational opportunities like this are supported in part by Fort Fund.

Continue Reading

Daily Discovery: What’s Up With Yeast?

Post written by Heidi Furhman, Discovery Camp Coordinator.

Daily Discovery: What’s Up With Yeast?

What is yeast? How does it work? Why is it important for making the breads and treats we all love? Learn about yeast through our video “What’s Up With Yeast” and conduct this experiment to observe yeast at work for yourself!

Supplies:

  • Clear Bottle (water bottles work well)
  • Warm water
  • Package of Yeast
  • Sugar
  • Balloon

What is Yeast?

Check out our video “What’s Up With Yeast?” to discover the connection between bread and balloons, and explore what yeast is, how it works in bread dough, and what kinds of yeast people have been using for hundreds of years.

As you watch, conduct this experiment along with our educator Heidi!

Instructions:

  1. Gather your supplies! You’ll need a clear bottle, a balloon, warm water, sugar, and a package of yeast.
  2. Stretch out your balloon. Try blowing it up a couple of times to loosen it up.
  3. Add one to two inches of warm water to a clear bottle. Make sure the water is warm to the touch but not hot! If your water is too hot you’ll kill the yeast. A good test is to hold your wrist under the running water. If you can’t stand it the water is too hot! Which purposes does the warm water serve to help the yeast thrive? (Moisture and warmth).
  4. Add the package of yeast to the bottle. It will work if you use less than the whole package just adjust the sugar in ratio. (Note: A smaller amount of yeast will take longer to blow up the balloon). Mix up the water and yeast.
  5. Add about 1 Tablespoon of sugar to the yeast and water mixture and stir it around (or about equal parts yeast and sugar). What purpose does the sugar serve to help the yeast thrive? (Food).
  6.  Stretch the balloon over the top of the opening and set in a warm place for about 15-20 minutes.
  7. Observe what happened? What do you notice about the yeast mixture? Does it look different than when you put it in? What about the balloon has it expanded? What does that tell you about the yeast? What is causing the balloon to expand (carbon dioxide released by the yeast is filling the balloon!)
  8. You can leave your experiment alone for several hours or days and keep observing! Does your balloon keep expanding? What about the yeast? What happens to it? At some point the yeast will consume all the food and stop releasing carbon dioxide. Your balloon will likely deflate.
  9. You can try the experiment again! Try adding more yeast and sugar or less yeast and sugar. How does that impact the time it takes for the balloon to inflate? Try using hot water or cold water. What happens then? Is your yeast able to grow? If yes, does it grow faster or slower? If no, why do you think your yeast was unable to grow? (Packaged yeast needs warm water to reactivate since it’s suspended in a forced hibernation state. Too cold, and your yeast will not be reactivated, too hot and you’ll kill it!

Sourdough Starters

You can try making your own sourdough starter at home to observe living yeast! Remember it can take some practice and a whole lot of patience to get it right, but just about anyone can do it! If it doesn’t work the first time try again!

You’ll need flour, water, and a glass jar to get started.

Try this to get you started or google “Sourdough Starter” for many amazing resources and recipes to get you started.

Want to download these directions? Click here for a handy PDF!

Follow along with our Daily Discovery! Click here for all activities that you can do at home.

Continue Reading

Daily Discovery: Solar System String Model

Post written by Sierra Tamkun, Learning Experiences Manager. This activity was adapted from NASA/JPL.

Daily Discovery: Solar System String Model

How big is our solar system? Really, REALLY big! Astronomers use a unit of measurement called an Astronomical Unit, or AU, to calculate the distances of different planets from the sun and measure the size of our solar system. One AU is equal to the distance from the sun to Earth, about 93 million miles (150 million kilometers)! Use the chart in the linked PDF of relative distances provided to build your very own to-scale model of our solar system and planets!

Supplies:

  • Measuring tape with centimeter markings
  • 4.5-meter-long piece of string
  • Large craft pony beads (or other craft beads) in various colors
  • Small piece of cardboard or wood to wrap solar system string around

Instructions:

  1. Pick out different beads to represent each planet and the sun! Look for beads that are roughly the same colors – blue for Earth, red for Mars, green for Uranus, etc.
  2. Tie the bead representing your sun to the end of your string.
  3. Using the distances (in centimeters) in the chart below, measure the distance from the sun to the first planet, Mercury.
  4. Tie Mercury in place on your sting. Tip: ask an adult to help you to make sure it stays in place!
  5. Repeat steps 3 and 4 for each planet.
  6. Lay your sting out on the floor to see the relative distance between all the planets in our solar system!

On your solar system string, all the planets are in a line so we can see the distances between them, but in space, the planets all orbit around the sun. Want to see your string of planets in orbiting action? Have a friend or family member hold the sun, while you stand apart from them holding the end. With the string pulled tight, walk counter-clockwise around your friend to see how the planets circle the sun in outer space!

This activity was adapted from NASA/JPL. Explore more at https://www.jpl.nasa.gov/.

Want to download these directions? Click here for a handy PDF!

Follow along with our Daily Discovery! Click here for all activities that you can do at home.

Continue Reading

Daily Discovery: Recycled Bird Feeder / Descubrimiento en casa: Reciclando – Comedero para pájaros

Post written by Lea Mikkelsen, Early Childhood Coordinator.

Daily Discovery: Recycled Bird Feeder

Are you enjoying watching the birds from your window at home? Take a look in your recycling and imagine what you can re-use to make a bird feeder. An oatmeal container? A plastic bottle? How about a milk carton? Let’s practice upcycling and turn that container into a beautiful bird feeder to hang in your yard!

Supplies:

  • A medium to large container from your recycling
  • Materials to decorate with. Try colored paper, stickers, bright colored or patterned tape, paint, tissue paper, leaves and  ticks, or other recycled materials.
  • A stick, dowel, or other similar item for the birds to perch on.
  • Scissors
  • String or a pipe cleaner
  • You might need tape or glue
  • Birdseed

Instructions:

  1. Place all your supplies on a clear surface with plenty of room to create.
  2. Brainstorm some ideas for what your birdfeeder could look like. Tip: try drawing your idea out on a piece of paper first.
  3. Ask an adult to help you cut a few doors into your container, a hole for the stick for the bird to sit on, and a place for the string to loop through to hang the feeder.
  4. Decorate your birdfeeder using your amazing creativity!
  5. Fill the birdfeeder with seed and hang it outside to watch from your window!

Want to download these directions? Click here for a handy PDF!

Follow along with our Daily Discovery! Click here for all activities that you can do at home.

Image credit: saronti.com

Traducido por Károl de Rueda y Laura Vilaret-Tuma.

Descubrimiento en casa: Reciclando – Comedero para pájaros

¿Te gusta observar a los pajaritos cantar y volar desde la ventana de tu casa? En el contenedor de basura reciclable, podría haber objetos necesarios para construir un comedero especial para ellos. ¡Imagina todas las posibilidades! ¿Una botella de agua vacía? ¿O quizás un cartón de leche? Vamos a reciclar en una manera creativa y convertir lo que era basura ¡en un bello comedero para pájaros!

Artículos necesarios:

  • Un recipiente reciclable vacío, mediano o grande
  • Materiales para decorarlo. Por ejemplo, papel de colores, de construcción, cinta adhesiva colorida, pintura, hojas y ramitas secas, u otros materiales reciclados.
  • Una varita, palito u otra plataforma para que los pájaros puedan aterrizar
  • Tijeras
  • Hilo de estambre o algún tipo de cuerda para colgarlo
  • Pegamento
  • Semillas para aves

Instrucciones:

  1. . Reúne todos tus materiales.
  2. Imagina, crea y diseña tu comedero de pájaros. Consejo: dibuja y boceta tus ideas en un papel antes de empezar.
  3. Pídele a un adulto que te ayude a cortar unas aberturas en el contenedor, incluyendo un área para que los pájaros puedan entrar a comer, un orificio para el palito o cualquier otra plataforma, y un lugar para colgar el hilo de estambre.
  4. Decora tu comedero de pájaros. ¡Usa tu creatividad!
  5. Coloca algunas semillas dentro y cuélgalo en algún lugar donde lo puedas observar desde tu ventana. ¡Observa el festín!

¿Te gustaría descargar esta actividad? Haz clic aquí para obtener un archivo PDF.

Para encontrar actividades, ideas y mucho más descubrimiento en casa, ¡síguenos!
Image credit: earth911

Continue Reading

Daily Discovery: Meet the Amphibians! / Descubrimiento en casa: Conoce al animal – ¡los anfibios!

Post written by Hannah Curtis, Education Assistant.

Daily Discovery: Meet the Amphibians!

Metamorphic, ectothermic, and ecological indicators! What kind of animal has these terms in common? That’s right, amphibians: toads, frogs, salamanders, and newts! Meet FCMoD’s amphibians, and become a herpetologist in your own backyard!

What are Amphibians?

Amphibians are characterized as ectothermic (cold-blooded) vertebrates. They require water or moist environments to survive and for laying eggs. The skin on amphibians is very thin and permeable, so liquids and gases are absorbed through their skin, allowing them to breath underwater! Some small frogs and salamanders don’t even have lungs and rely only on this adaptation to breathe through their skin!

Almost all amphibians go through the process of metamorphosis. Adult females lay their eggs and once the larvae hatch, they have gills and resemble fish. Through metamorphosis they grow four legs and air breathing lungs!

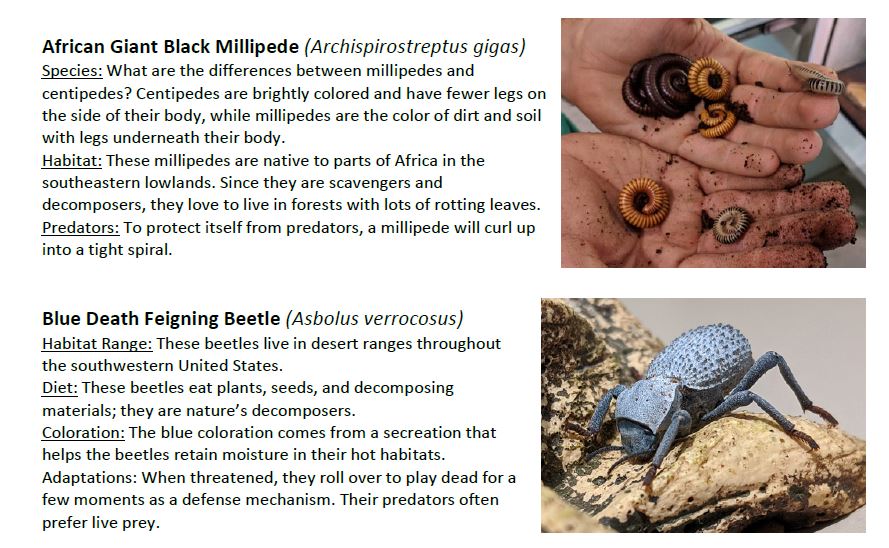
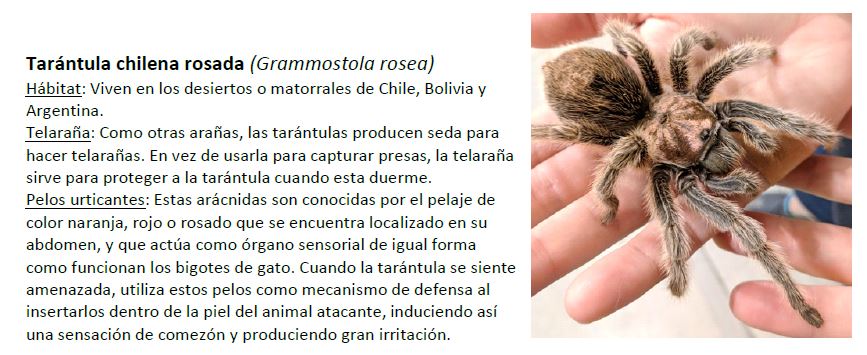
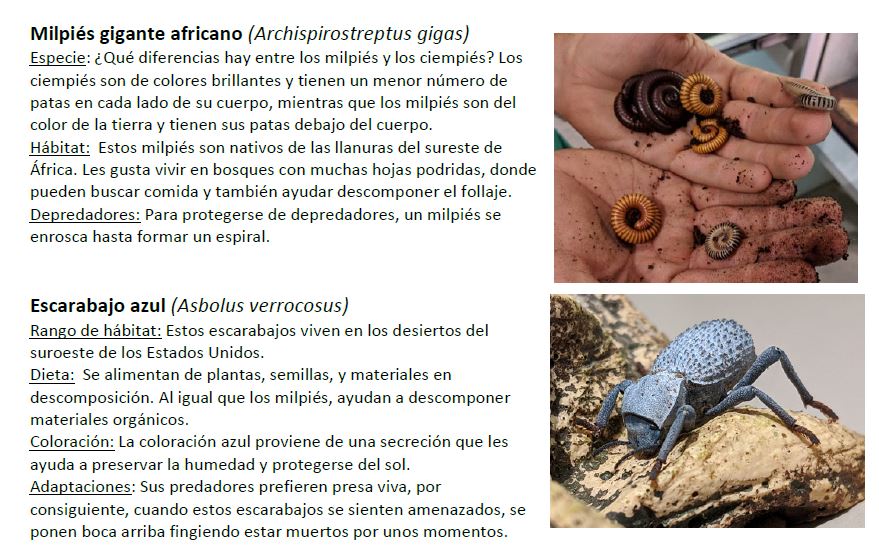
At FCMoD we care for a variety of amphibians. Check out a few of their individual life histories!

Threats from Water Pollution

Amphibians play an important role in their wild ecosystems, but they – and their water-based habitats – become threatened due to water toxicity and pollution. Because frogs, toads and salamanders spend most of their time in or around water environments, they will come into contact with any toxic chemicals in the water or abnormal rising temperatures.

Amphibians are like sponges! They absorb and breathe in whatever is in the water. Due to their easy susceptibility to unhealthy water conditions, they are a great indicator species for an ecosystem; they can be used to infer conditions in a particular habitat. If there is clean, fresh water, frogs and toads are going to be healthy. If there is trash, chemical waste like pesticides or oil spillage, or food processing waste in the water, the animals breathe in these bad, unhealthy things and are at high risk of dying.

You can help amphibians in the wild by remembering a few things:

  1. If you see a frog or toad, try not to touch it without gloves or clean hands (no hand sanitizer), as you could expose them to germs and chemicals.
  2. Always remember to dispose of your trash properly; if you see trash in a natural area or in a body of water, set an example for others in your community by cleaning it up!
  3. Buy and eat organic food. This reduces the use of harmful pesticides and insecticides that can leak into water sources, and don’t use pesticides on your own yard or garden.
  4. If you have a pet amphibian, protect them from noise and disturbance from other pets in your house.
  5. Share with others about what you learned about amphibians, and all the ways we can protect them!
  6. Remember that if you take care of the earth, the earth will take care of you and all the wildlife too!

Observations in the Backyard!

Whether it is in your backyard, neighborhood or at a Natural Area, animals can be observed just about anywhere! Herpetologists are scientists who study amphibians, as well as reptiles. They study and observe these animals in the wild to learn about their behaviors and identify their role within the ecosystem. Be a backyard herpetologist and observe animals similar to the museum’s amphibians and record what you discover!

Supplies:

  • Writing utensil
  • Paper
  • Computer and internet access (optional)

Instructions:

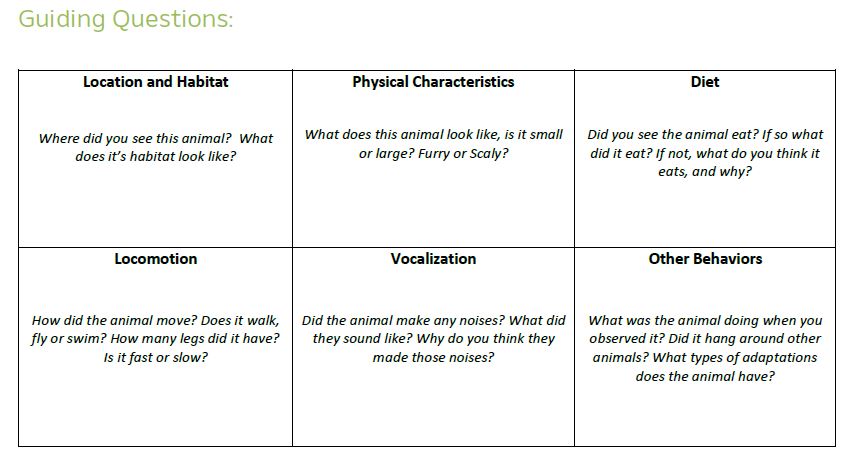
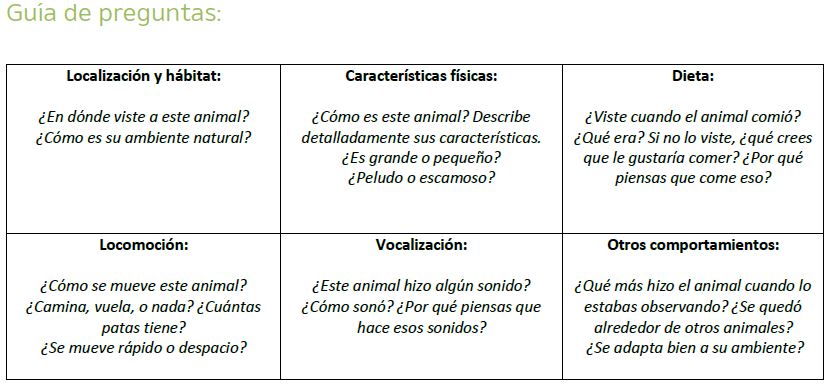
  1. If you created an observational journal, write down your animal observations in the “explore your world” section. If not, create your own observational chart, using the provided guiding questions.
  2. Head out to your backyard or take a walk to a natural area with a water source to explore amphibians and their habitats.
  3. Check out FrogWatch USA to learn about the frogs and toads native to Colorado and listen to their unique croaks and calls!

Want to download these directions? Click here for a handy PDF!

Follow along with our Daily Discovery! Click here for all activities that you can do at home.


Traducido por Károl de Rueda y Laura Vilaret-Tuma.

Descubrimiento en casa: Conoce al animal – ¡los anfibios!

Son metamórficos, ectotérmicos e indicadores ecológicos. ¿Cuáles animales comparten estas características? ¡Los anfibios por supuesto! Estos incluyen sapos, ranas, salamandras y tritones. Conoce a los anfibios del Museo del Descubrimiento de Fort Collins (FCMoD) y ¡sé un herpetólogo en tu propio patio!

¿Qué son los anfibios?

Los anfibios son ectotérmicos y vertebrados. Esto significa que tienen sangre fría y una columna vertebral. Por resultado, necesitan vivir en el agua o en un ambiente húmedo para poder poner sus huevos y para sobrevivir. La piel de un anfibio es muy fina y permeable, por lo tanto, los líquidos y gases de su ambiente se absorben fácilmente a través de su piel. Esta peculiaridad les permite ¡respirar bajo el agua! La adaptación de “respirar” por medio de su piel ha logrado una evolución en algunas ranas y salamandras a tal grado, que algunas de ellas ¡no tienen pulmones!

Casi todos los anfibios experimentan el proceso de metamorfosis. Las hembras adultas ponen sus huevos en el agua y, cuando las larvas o los renacuajos salen del cascarón, estos nacen con branquias y parecen peces. Pero con el tiempo, y a través de la metamorfosis, ¡les nacen cuatro patas y dos pulmones que les ayudarán a respirar aire fresco!

En el museo, cuidamos a una variedad de anfibios.

La contaminación del agua y sus daños

Los anfibios poseen un rol importante en el ecosistema, pero ellos, al igual que sus ambientes acuáticos, son amenazados por la contaminación y la toxicidad del agua. Debido a que las ranas, salamandras, y los sapos pasan la mayor parte de su tiempo dentro o cerca de ambientes acuáticos, absorben los contaminantes en el agua o sufren con sus temperaturas anormalmente altas.

Los anfibios ¡son como esponjas! Absorben y respiran químicos presentes en el agua. Su susceptibilidad a condiciones insalubres sirve para ser una especie indicadora para el ecosistema. Los científicos usan esta clase de animales para determinar la condición de un hábitat particular. En agua fresca y limpia, las ranas o sapos vivirán sanos. Si hay basura, residuos químicos como pesticidas, derrame de petróleo, o desechos de residuos de alimentos, los animales respirarán estos contaminantes y estarán en alto riesgo de morir.

Tú puedes ayudar a los anfibios en la naturaleza simplemente recordando algunas cosas:

  1.  Si ves alguna rana o un sapo, trata de no tocarlos con manos sucias o sin guantes. No uses desinfectante de manos, porque este puede exponerlos a gérmenes o químicos.
  2. Recuerda eliminar tu basura apropiadamente. Si ves basura en un área natural o en un cuerpo de agua, recógela y ¡sé un ejemplo para otros en tu comunidad!
  3. Trata de no usar pesticidas e insecticidas en tu jardín debido a que estos químicos pueden filtrarse en cuerpos de agua y dañar a los anfibios. Otra manera de ayudar es consumiendo comida orgánica.
  4. Si tienes una mascota anfibia, protégela de los ruidos o molestias de otras mascotas en tu casa.
  5. Comparte con los demás lo que has aprendido sobre los anfibios, incluyendo las maneras en las que los podemos proteger.
  6. Recuerda que si cuidamos a nuestro planeta, ¡el planeta nos cuidará a nosotros y a toda la vida salvaje!

Observaciones a tu alrededor

Los animales se pueden observar en un patio, en los jardines, en un área natural o en cualquier sitio. Los herpetólogos son científicos que estudian anfibios y reptiles, observándolos en su medio ambiente para aprender sobre sus comportamientos e identificarsu rol en el ecosistema. ¡Tú también puedes ser herpetólogo! Observa animales similares a los anfibios del museo ¡y documenta lo que descubres!

Artículos necesarios:

  • Algo para escribir (lápiz, pluma o marcador)
  • Papel y/o cuaderno
  • Computadora y acceso al Internet (opcional)

Instrucciones:

  1. Crea una tabla de observaciones usando la guía de preguntas que puedes encontrar más abajo. Anótalas en un cuaderno, un diario o en hojas de papel.
  2. Da un paseo con tu familia por los alrededores donde haya algún cuerpo de agua (lago, río, etc.) y busca algunos anfibios. Observa sus comportamientos y medio ambiente. Si quieres aprender más sobre las ranas y sapos nativos de Colorado, haz clic en este enlace: FrogWatch USA ¡Ahí también puedes escuchar los sonidos que hacen

¿Te gustaría descargar esta actividad? Haz clic aquí para obtener un archivo PDF.

Para encontrar actividades, ideas y mucho más descubrimiento en casa, ¡síguenos!
Continue Reading