Daily Discovery: What’s With Weather? – Wind

Post written by Heidi Fuhrman, Discovery Camp Coordinator.

Daily Discovery: What’s With Weather? – Wind

You’re on your way to becoming a junior meteorologist! Today we’re going to learn more about another ingredient for weather—wind! Learn what causes wind, why it’s important, how scientists learn about wind before doing your own experiment to see what’s blowing in your neighborhood, and building another tool for your weather station! (If you haven’t checked out “What’s With Weather: Forecast It!” you might start there first!)

Supplies:

For Wind Experiment

  • A few plastic lids
  • petroleum jelly
  • Yarn
  • Hole punch
  • Magnifying glass (optional)
  • A windy day!

For Anemometer:

  • 5 small dixie cups OR 1 egg carton
  • Scissors
  • Hole punch
  • Tape
  • 2 straws OR wooden dowels
  • 1 push pin
  • 1 pencil (with eraser)
  • Electric fan (optional)

What’s With Wind?

We’ve already learned that weather is the mix of events that happen each day in our atmosphere. We know that there are many different pieces that make up weather, but temperature, atmospheric pressure, wind, humidity, precipitation, and cloudiness are especially important! We’ve also learned that meteorologists are
scientists who study and forecast—predict—the weather and learned about some of the tools they use to make accurate forecasts! [TIP: If you haven’t tried out “What’s With Weather: Forecast It!, you might want to try that Discovery at Home first!]

Today we’re going to learn about one of those important pieces for weather—wind!

Wind is air in motion, but what causes it? The Sun’s rays heat up Earth’s surface and its atmosphere. . .but don’t heat it all evenly. Some parts of Earth’s surface warm quicker. Warm air weighs less than cold air, so the warm air rises up and it is replaced by cool air. This movement—caused by uneven heating—is wind! If you remember from What’s With Weather: Forecast It!, our weather is also caused by differences in atmospheric pressure (remember, that’s what we measure with our barometer). Atmospheric pressure is also a part of wind! Warmer air is usually found in low pressure systems (L on our weather maps!) and cold air is usually found in high pressure systems (H on our weather maps) so wind usually blows from high pressure to low pressure systems! Land formations can also affect wind. Mountains, valleys, lakes, and deserts will all change how the atmosphere warms and can funnel how wind blows. Humans can also impact wind! Skyscrapers and other all buildings close together can impact air pressure and funnel wind between them!

But the land doesn’t just shape wind, wind shapes the land! Over
time wind can cause erosion and even quickly change landscapes,
such as sand dunes! You can experience this yourself if you ever
visit Colorado’s Great Sand Dunes National Park!

Your Turn

Now that you know a bit about wind it’s your turn to track information about wind in your neighborhood! Conduct an experiment to see what’s blowing around your house and add your own anemometer to your meteorologist tool kit!

Experiment: What’s In The Wind?

Wind transports all sorts of things around the world—precipitation, pollution, pollen and more! You can see some of what is blowing through your neighborhood! Set up this experiment to discover what’s in the wind!

Instructions:

  1. Gather your supplies! You’ll need some plastic lids, a hole punch, scissors, string, and petroleum jelly.
  2. . Punch a hole near the edge of all your lids and tie a string through the hole to create a hanger.
  3. Cover both sides of your lids with petroleum jelly…careful this can get messy!
  4. Hang your lids in different locations around your yard on a windy or breezy day. Hypothesize: What do you think will get caught on your lid?
  5. Leave your lids outside for a few hours to collect whatever’s blowing in the wind. Then bring them inside. Place them on a paper towel or cookie sheet and observe!

Observe

Observe with your eyes.
• What got caught to your wind sample tools?
• Do you see anything that surprises you?
• Does it match your hypothesis?
Get out your magnifying glass.
• Do you see anything you didn’t notice with your plain eyes?
• What does this tell you about what’s blowing through your neighborhood?

This tool can’t catch everything that the wind might be carrying. It’s hard to catch things like smoke or pollution or precipitation, but you might see dust, leaves, seeds, maybe even insects or pollen!

Make Your Own Anemometer

Meteorologists and other scientists use a tool called an anemometer to measure wind speed. While tools like windsocks and  weathervanes can tell us which direction the wind is blowing, anemometers can help us measure the velocity of the wind too and help us make better forecasts and see if wind speeds might cause damage. Add your anemometer to the weather station you might have built from “What’s With Weather: Forecast It!”

  1. Gather your supplies! You’ll need tape, a push pin, scissors, a hole punch, a pencil, two straws (or wooden dowels) and five small dixie cups…if you don’t have cups on
    hand (like us!) you can use an egg crate instead!
  2. If you’re using an egg carton instead of small cups, start by cutting off the four corners of the carton and one other carton piece. These will serve as your
    cups! (If you have cups skip to step 3).
  3. Lay out four cups/carton pieces in this pattern and punch a hole on the inside side of each cup/piece.
  4. With your last cup/piece poke a hole in the bottom. Add holes on all four sides (you may only need to punch one hole in your carton piece.)
  5. Push your straws through the holes middle cup/piece to form an X. If you have a carton piece you may be able to cradle the X in the spaces. Poke the ends of the straws through your 4 outside cups/pieces. You may need to secure them together with tape or glue.
  6. Poke your pencil (eraser side up!) through the bottom hole, using a push pin, secure through the two straws into the eraser. Your anemometer is now complete!
  7. Make sure all four cups/pieces are facing in the same direction! Your pencil will also need to spin freely, so it is best to simply hold it between your fingers, however, you can also try weighting a bottle with sand or rocks and placing your pencil inside to create a stand.

Calibrate & Observe:
Hold the pencil between your fingers in a windy place (you can also use a fan indoors). What happens? Why does the anemometer spin? Why does it spin only one direction? What will happen if you set the fan to a higher speed or the wind blows stronger?

Want to download these directions? Click here for a handy PDF!

Follow along with our Daily Discovery! Click here for all activities that you can do at home.

Continue Reading

Daily Discovery: Be a Noise Control Engineer – Quiet that Phone!

Post written by Eisen Tamkun, Music Education Lead.

Daily Discovery: Be a Noise Control Engineer – Quiet that Phone!

Pollution. We often hear about the different kinds, from air and water to light pollution. But have you ever heard of sound pollution? Sound pollution can have harmful effects on both our health and the environment. It is the job of Noise Control Engineers to design and test noise insulation technologies and sound-adsorbent materials to help limit the harmful impacts of noise and sound pollution. Try your own hand at being a Noise Control Engineer and quiet that phone!

Supplies:

  • Smart Phone
  • Box or container large enough to hold phone and surrounding
    materials
  • Materials- A variety of should be gathered. Start with clothes, plastic bags, bubble wrap, blankets, rain jackets, and anything else that comes to mind
  • Song to play during testing
  • Pen and paper for recording

Instructions:

  1.  Once you have gathered a variety of materials it is time to begin! Start by picking only one kind of material such as t-shirts.
  2. Begin playing that rocking song you chose.
  3. Next, surround the phone with the t-shirts and place it in your container. Try to have the phone be positioned in the very center of the box with equal amount of t-shirt material on all sides. If the phone is touching one side of the container the whole experiment is off.
  4. Close the lid and listen. Did the music get quieter or not? Go ahead and record with your pen and paper the material you used (t-shirts) and how successful it was in quieting the phone on a scale of 1-10. 10 being you can’t hear the music at all and 1 being no change in sound level.
  5. Chose another material and repeat steps 1-4.
  6. Repeat step 5.
  7.  Repeat step 5 again.
  8. Now instead of using only one kind of material switch it up and try combining the materials together. Perhaps both t-shirts and plastic bags or bubble wrap and rain jackets. The possibilities are endless! Just don’t forget to record your results.
  9. Once you are finished testing each materials and combinations of materials got back and check out your recordings. Which material did the best in canceling out noise? Why do you think that is? What other materials do you think might work better? These are questions Noise Control Engineers ask themselves.

Want to download these directions? Click here for a handy PDF!

Follow along with our Daily Discovery! Click here for all activities that you can do at home.
Continue Reading

Daily Discovery: Pitter and Patter Rain Cloud Craft

Post written by Lea Mikkelsen, Early Childhood Coordinator.

Daily Discovery: Pitter and Patter Rain Cloud Craft

Follow along with FCMoD’s live stream Storytime in the Home: Pitter and Patter. Then gather your supplies to make your very own cloud! Think about what we learned from the story about the water cycle and how far a drop of rain can travel!

Supplies:

  • A paper plate
  • Scissors
  • Watercolor paint or other coloring supplies
  • String or yarn
  • Tape

Instructions:

  1. Place all your supplies on a clear surface with plenty of room to create.
  2. Cut your paper plate in half. Tip: Cut some bumps on top of one half to make a cloud shape and paint it
    if you want!
  3. Paint or color the other half of the paper plate blue or whatever color you would like your raindrops to be. You can be creative! Then, let the wet paint dry.
  4. Cut raindrops out of the painted plate.
  5. Hang the raindrops from string and tape them to the cloud.
  6. Hang up your cloud for everyone to enjoy!

Want to download these directions? Click here for a handy PDF!

Follow along with our Daily Discovery! Click here for all activities that you can do at home.

Image credit: Redtedart.com

Educational opportunities like this are supported in part by Buell Foundation. Their support helps make access to early childhood education at FCMoD possible for everyone in our community.

Continue Reading

Daily Discovery: Egg-cellent Egg-tivities – Part 2

Post written by Lea Mikkelsen, Early Childhood Coordinator & Charlotte Conway, Public Programs Coordinator.

Daily Discovery: Egg-cellent Egg-tivities – Part 2

Let’s learn all about eggs! What are eggs, anyway? What animals do they come from? What are the different parts made of? What can we do with eggs?

Glowing Egg

People who raise chicks use a technique called candling to determine if an egg is fertilized and has a chick growing inside of it. Your eggs from your refrigerator at home will not have a chick growing inside, but this is a really neat way to look inside an egg!

Supplies:

  • One egg
  • Flashlight
  • Dark room

Instructions:

  1. Hold the egg gently in your hand (or ask an adult to help you) and press the flashlight carefully against the eggshell.
  2. Carefully rotate the egg to see it from different angles.
  3. What can you see? Do you see the spots in the egg shell? Do you see the air cell?
    a. The egg shell is almost entirely composed of calcium carbonate. There are pores in the egg shell that allow some breathability to the shell.
    b. The air cell forms when the egg is laid. You can see where the air cell was when you look at the flat end of a boiled egg.

Floating Egg

Learn about density and buoyancy through this floating egg  experiment. Don’t forget to make your hypothesis about what will happen to each egg!

Supplies:

  • Two eggs
  • Water
  • Two tall drinking glasses
  • Three tablespoons of salt

Instructions:

  1. Fill one glass ¾ of the way with water.
  2. Make a hypothesis about what will happen to the first egg.
  3. Carefully place the egg into the glass of water and observe. What happened to the egg?
  4. Fill a second glass ¾ of the way with water.
  5. Add 3 tablespoons of salt and stir.
  6. Make a hypothesis about what will happen to the second egg.
  7. Carefully place the second egg into the second glass of water and observe. What happened to the egg?

Tip: If an egg floats in water without adding salt, the egg is likely old. The air cell has grown inside the egg, making it buoyant. Check the egg for a bad smell before you eat it.

Want to download these directions? Click here for a handy PDF!

Follow along with our Daily Discovery! Click here for all activities that you can do at home.
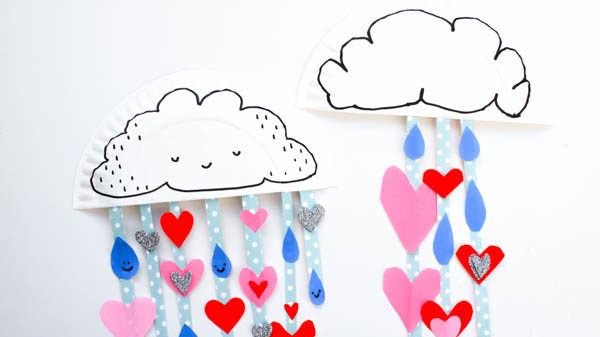
Image credit: bonappetit.com

Continue Reading

Daily Discovery: Egg-cellent Egg-tivities – Part 1

Post written by Lea Mikkelsen, Early Childhood Coordinator & Charlotte Conway, Public Programs Coordinator.

Daily Discovery: Egg-cellent Egg-tivities – Part 1

Let’s learn all about eggs! What are eggs, anyway? What animals do they come from? What are the different parts made of? What can we do with eggs?

Egg Carton Art

Save that egg carton! It can be upcycled and turned into so many amazing things. You can cut it, glue it, build with it, paint it, use it to hold small loose things like beads or pretty rocks. There are endless possibilities!

This activity will show you how to cut apart an egg carton to make upcycled flowers. Share your egg carton creations with #dailydiscovery!

Supplies:

  • Egg carton(s)
  • Scissors
  • Glue, decorative paper, paint, paintbrush (optional)

Instructions:

  1. Ask an adult to help you cut out the center pointy pieces of the egg carton. Be sure to leave plenty of the “petals” on them.
  2. Use the scissors to cut out the petals of the flower. Try cutting them in different shapes!
  3. Cut a long sturdy stem piece with a little tab on one end from a flat part of the egg carton.
  4. Make a hole in the base of the flower and thread your stem through the hole with the tab resting inside the flower. That will keep the stem from sliding out of the flower. Optional: use glue to keep the stem in the flower.
  5. Use paint (if you have some) to decorate your flowers. Be creative! You can also use paper to make leaves or more petals on the flower. Let the flowers dry and then pop them in a vase to bring cheer!

Natural Egg Dying: Cooking with Science!

Experiment with these natural dyes to make beautiful, colorful eggs that are totally edible! The best part is, you can make these dyes using items you have in your kitchen, and you don’t have to waste any food in the process.

Adult supervision is required for this activity.

Supplies:

  • Hard-boiled eggs
  • Saucepan
  • Water
  • White Vinegar
  • Clean kitchen or paper towels
  • Slotted spoon
  • Small bowls
  • Cheesecloth, fine sieve, or strain
  • Natural dying materials from your kitchen (Suggestions: beets, ground turmeric, coffee, spinach, yellow onion skins, red cabbage, yellow delicious apple peels)

Instructions:

  1. Gather materials for your natural dyes. This is a great opportunity to reduce, reuse, and recycle! Try using your kitchen waste like yellow onion skins, any stale coffee, or apple peels for dyes! If you use fresh produce, like a beet or red cabbage, think about how you might eat the boiled vegetables afterwards.
  2. Now comes the fun part! Experimenting with different natural materials can produce surprising colors, and don’t hold back from mixing 2 or more materials together to achieve new colors.
  3. Prepare your natural materials into liquid dyes according to which materials you are using. Always use adult supervision when you are using the stove or chopping vegetables.
    a. For the whole vegetables, like red cabbage or beets, chop them into smaller pieces first(around one inch). Place 1 cup of desired material in your saucepan and cover with 1 quart of water. Simmer the mixture for 30 minutes, or until desired color is achieved. Strain mixture and reserve the liquid.
    b. For the spinach, onion skins, or apple peels, place about 2 cups of desired material in saucepan and cover with 1 quart of water. Simmer the mixture for 30 minutes, or until desired color is achieved. Strain the mixture and reserve the liquid.
    c. For the ground turmeric, place 2 tablespoons of turmeric in 1 quart of water. Simmer the mixture for 30 minutes. Strains the mixture if you are using cheesecloth, otherwise, don’t worry about straining. Reserve the liquid.
    d. If you are using stale coffee, there are no preparations needed. Skip ahead to the next step!
  4. Place reserved liquids in individual small bowls. Stir in 2 tablespoons of white vinegar per every cup of liquid dye.
  5. Retrieve your hard-boiled eggs when you are ready to dye. Make sure to keep them refrigerated at all times when you are not using them!
  6. Use a slotted spoon to slowly lower your hard-boiled egg into desired color dye. Refrigerate the bowl to let the dye soak into the eggshell.
  7.  Time for the big reveal! After at least 30 minutes, use your slotted spoon to remove the egg from the dye.
  8. Pat the egg dry using paper towels or a clean kitchen towel. To mix colors, you can soak an egg first in one colored dye for 30 minutes or more, followed by a second soak in another colored dye for 30 minutes to an hour. Get creative and experiment with different soak times and color mixtures to achieve a whole spectrum of colors!
    a. Note that natural dyes will produce a subtler color than artificial dyes. For more vibrant natural colors, you can soak your eggs in the refrigerator overnight.
  9. Store the colored eggs in an egg carton in the refrigerator until you are ready for an egg-celent snack.

Want to download these directions? Click here for a handy PDF!

Follow along with our Daily Discovery! Click here for all activities that you can do at home.

Continue Reading

The Giant Screen at Home

Post written by Ben Gondrez, Digital Dome Manager.

The Giant Screen at Home

As we all practice social distancing at this time to curb the spread of COVID-19, many parents are now tasked with keeping up their children’s education while away from school. If you are in this situation and are looking for some ways to not only keep your children informed but also entertained Giant Screen Films (GSF) has provided some amazing resources just for you. They are now offering free streaming of three of their films including Mummies: Secrets of the Pharaohs, Dinosaurs Alive!, and Wild Ocean. Along with the films GSF has provided an Educator Guide for each show that includes in-depth background information, hands-on activities, and more! These films will be available for free through June 15, so discover something new today!

Mummies: Secrets of the Pharaohs

Part historic journey and part forensic adventure, Mummies: Secrets of the Pharaohs follows researchers and explorers as they piece together the archaeological and genetic clues of Egyptian mummies. Through ambitious computer graphics and dramatic reconstructions, the film tells the story of one of the greatest finds in modern history: the late 19th century discovery of a cache of forty mummies, including twelve Kings of Egypt, among them the legendary Rameses the Great. Narrated by Christopher Lee.

Click Here to Watch in English

Click Here to Watch in Spanish

Click Here to Watch in French

Download Educator Guide

Dinosaurs Alive!

Dinosaurs Alive! is a global adventure of science and discovery – featuring the earliest dinosaurs of the Triassic Period to the monsters of the Cretaceous, “reincarnated” life-sized for the giant screen. Audiences will journey with some of the world’s preeminent paleontologists as they uncover evidence that the descendants of dinosaurs still walk (or fly) among us. Narrated by Michael Douglas.

Click Here to Watch in English

Click Here to Watch in Spanish

Click Here to Watch in French

Download Educator Guide


Wild Ocean

Wild Ocean is an award-winning, action-packed adventure exploring the interplay between man and our endangered ocean ecosystem. The film highlights one of nature’s greatest migration spectacles, plunging viewers into an underwater feeding frenzy, an epic struggle for survival where whales, sharks, dolphins, seals, gannets and billions of fish collide with the most voracious sea predator, mankind.

Click Here to Watch in English

Click Here to Watch in Spanish

Click Here to Watch in French

Download Educator Guide

Continue Reading

Daily Discovery: Walking Rainbows

Post written by Hannah Curtis, Education Assistant.

Daily Discovery: Walking Rainbows

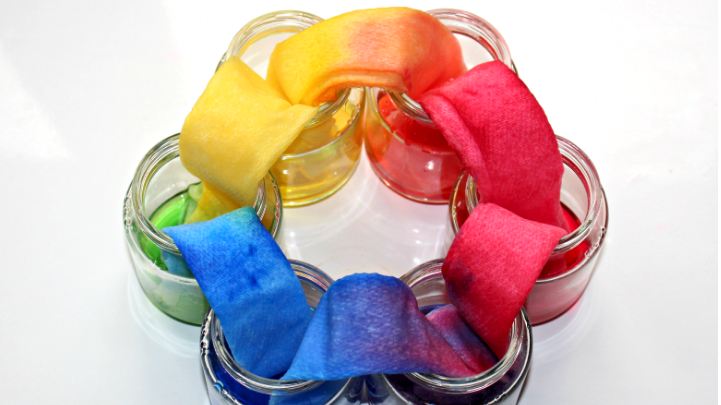
Put your lab coat on; we’re getting scientific! With this experiment, discover how colors interact to form rainbows and observe the natural process of capillary motion in action!

Supplies:

  • Time
  • 6 full sheets of paper towels
  • 6 mason jars (clear if possible). If you don’t have jars use cups or bowls
  • Red, blue, and yellow food coloring

Instructions:

Before you get started, review the color wheel on page two and remember the colors you need to form a rainbow. Feel free to experiment to see how mixing certain colors will create different colors. Together, determine how you will create a rainbow using only red, blue and yellow.

  1. Fill three jars full of water. Add red food coloring to one, blue
    to another and yellow to another, 4-6 drops each.
  2. To form a circle place the empty jars between the red, yellow
    and blue jars.
  3. Roll each sheet of paper towel into tubes. Drape one side into
    a full jar and the other into an empty jar until each jar is
    connected with paper towels.
  4. Start your timer to see how long it takes for the colored water
    to move from one jar to the next. Water will begin absorbing
    right away, but the whole process will take around 48 hours,
    so check back every few hours to see how it has changed.

Want to download these directions? Click here for a handy PDF!

Follow along with our Daily Discovery! Click here for all activities that you can do at home.
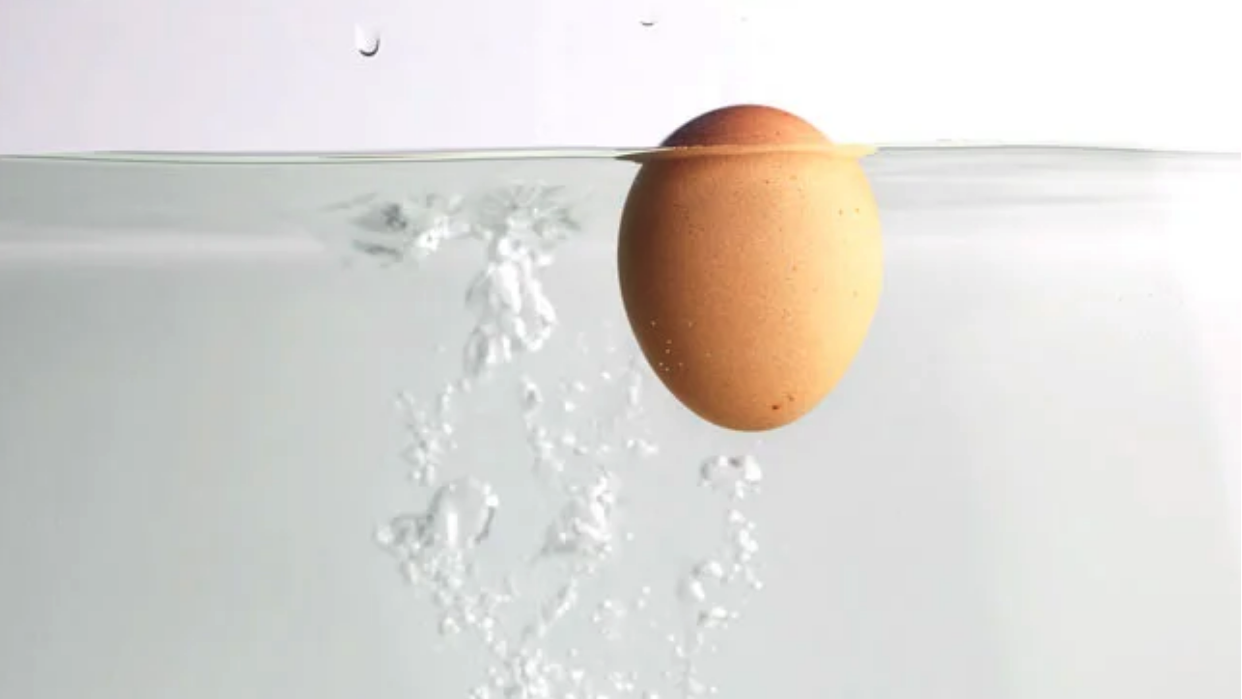
Image credit: Messy Little Monster

Continue Reading

Daily Discovery: Build Your Own Ball Run

Post written by Angela Kettle, School Programs Coordinator.

Daily Discovery: Build Your Own Ball Run

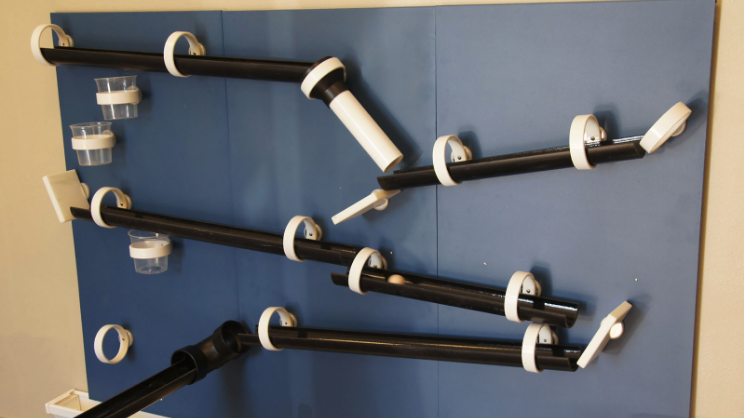
Missing the Ball Run at the museum? Sharpen those engineering skills, and use cardboard, paper, and whatever else you can find around your house to build your own version!

Supplies:

All supplies are optional – use what you have!

  • Large piece of cardboard or posterboard
  • Paper towel rolls
  • Cardstock paper
  • Hot glue
  • Duct tape
  • Scotch tape
  • Pipe cleaners
  • Marble
  • Yarn or string
  • Blank paper
  • Pencil

Instructions:

  1. Start by identifying a surface you can use to build your Ball Run on. For example, this might be a large piece of cardboard, or a piece of posterboard that you tape up on a wall (with an adult’s permission!).
  2. Gather up different supplies from around your house. Decide which supplies you would like to use for your Ball Run. Here are some ideas!
    a. Use paper towel tubes as slides for your ball. You can cut one paper towel tube into smaller tubes if you would like.
    b. Fold cardstock paper into thirds. Tape the top to make a triangular tube. If you don’t have cardstock paper, you can tape together several regular sheets of paper to make them thicker.
    c. Make your own tubes out of duct tape.
    d. Find other tube-shaped materials around your house!
    e. Find a marble to use for a ball. If you don’t have a marble, you can make a ball out of play-doh, clay, aluminum foil, or whatever else you can think of.
  3. . Keeping in mind the size of your surface, sketch your Ball Run. Where will your ball start and end? Which materials will you use for each portion? How will you make sure your ball has enough momentum to keep going until it has reached the end of the run?
  4. Using your sketch as a guideline, build your Ball Run! Lay it out so you can see it before you start attaching anything – that way, if you need to change anything, you can!
  5. Time to attach your pieces to your surface! There are lots of
    different ways to do this. You can use hot glue, tape, or one of the methods shown in the picture. Or, maybe, you’ll think of your own way!
  6. Try it! Place your ball at the top of your Ball Run. What  happens? Did it go as you expected? Why or why not? Make repairs as needed.
  7. Take a photo or video of your final project. With your adult’s
    permission, share it with us on social media using #DailyDiscovery. Great job, Engineer!

Want to download these directions? Click here for a handy PDF!

Follow along with our Daily Discovery! Click here for all activities that you can do at home.
Continue Reading

Enter the Zooniverse

Post written by Ben Gondrez, Digital Dome Manager.

Enter the Zooniverse

Have you ever wondered if there was an easy way to help scientists and researchers make new discoveries from your very own home? Well, whether you’ve had that thought or not, you can indeed be a vital participant in actual research through the Zooniverse! The Zooniverse is the world’s largest and most popular platform for people-powered research. By utilizing the power of volunteers – more than a million people around the world who come together to assist professional researchers – Zooniverse makes it easy for anyone, including you, to contribute to real academic research from their homes on their own computers. As many of us are spending more time than usual at home observing social distancing in response to COVID-19, now is the perfect time to become a citizen scientist and Zooniverse makes it easy for all ages of people to get involved. So how does Zooniverse work? Check out this short animation to learn more:

Ready to get started helping with real research projects from your own home? You can visit zooniverse.org to see all active projects including projects like Planet Four, a project exploring the surface and weather of Mar’s south polar region, or the project Bash The Bug, helping researchers find effective antibiotics to fight tuberculosis. Not sure where to start? Here are a couple of curated lists of projects and other links from Zooniverse to help you get started:

Designed for 5-12 year olds:

  • Curated list of age-appropriate Zooniverse projects for younger learners
  • Zooniverse-based Activity for 5-12 year olds
  •  Classroom.zooniverse.org
    • Wildcam Labs
      • Designed for 11-13 year olds, but the content can easily scale down for younger audiences.
      • Great way to engage if you love looking at photos of wild animals and want to investigate ecological questions. The interactive map allows you to explore trail camera data and filter and download data to carry out analyses and test hypotheses.
      • Educators can set up private classrooms, invite students to join, curate data sets, and get access to the guided activities and supporting educational resources.
      • Individual explorers also welcome – you don’t need to be part of a classroom to participate. · Planet Hunters Educators Guide

Designed for 11-13 year olds:

Designed for teens and adults:

  • Curated list of Zooniverse projects
  • Zooniverse-based Lesson Plan for teens and adults
  • Classroom.zooniverse.org
    • Wildcam Labs
      • Designed for middle school classrooms, but the content can easily scale up for older audiences.
      • See description above.
    • Astro101 with Galaxy Zoo
      • Designed for undergraduate non-major introductory astronomy courses, but the content has been used in many high-school classrooms as well.
      • Students learn about stars and galaxies through 4 half-hour guided activities and a 15-20 hour research project experience in which they analyze real data (including a curated Galaxy Zoo dataset), test hypotheses, make plots, and summarize their findings.
      • Developed by Julie Feldt, Thomas Nelson, Cody Dirks, Dave Meyer, Molly Simon, and colleagues.
    • For both Wildcam and Astro101 Activities
      • Educators can set up private classrooms, invite students to join, curate data sets, and get access to the guided activities and supporting educational resources.
      • Individual explorers also welcome – you don’t need to be part of a classroom to participate.
  • Planet Hunters Educators Guide
    • Designed for 11-13 year olds, but the content can easily scale up for older audiences.
    • See description above.
  • Notes from Nature Activity
    • Designed for 11-13 year olds, but the content can easily scale up for older audiences.
    • See description above.
  • Snapshot Safari-based Lesson Plans and Interactive Timeline
    • Developed by University of Minnesota PhD student Jessica Dewey
  • Kelp Forest Ecology Lab
    • Through the Zooniverse FloatingForests.org project, researchers are striving to understand the impact of climate change on giant kelp forests, an indicator of the health of our oceans. In this lab, students analyze Floating Forest and other ocean data to explore their own research questions.
    • Developed by Cal State – Monterey Bay faculty Dr. Alison Haupt and colleagues
  • NEH Teacher’s Guide for Digital Humanities and Online Education
Continue Reading