Daily Discovery: Agriculture in Action!

Post written by Hannah Curtis, Education Assistant.

Daily Discovery: Agriculture in Action!

Agriculture and farming have a long history in Fort Collins and all over the globe. Most of the time we only see the end product, the fruits and vegetables at the grocery store. With this activity, see what happens under the dirt through experimentation with the scientific method!

Follow along through Facebook and Instagram with museum educator Hannah as she demonstrates this experiment in her own home. Happy Farming!

Supplies:

General:

  • Water
  • Indoor space with sunlight
  • Sharpie or marker
  • Paper and pencil to record daily observations
  • Potting soil and planter (optional)

Growing Produce from seeds:

  • Seeds (dried beans, flower seeds, other fruit or vegetable seeds)
  • Baking tray or cutting board
  • Paper towels
  • Spray bottle (optional)
  • Ziploc bags

Re-Growing Produce from Kitchen Scraps:

  • Kitchen scraps (celery base, lettuce heart, green onion base, yellow onion top)
  • Small bowls or containers
  • Sharp kitchen knife and adult supervision

Instructions:

For ages 3-5:

  1. Review what plants and flowers need to grow and walk through the stages of plant growth.
  2. The Ziploc bag method can be easily monitored and observed, but we recommend setting up a method together that works best for your household. See procedures below.
  3. Ask your young scientist what they think will happen to the produce or seeds? Talk about different plants they have seen and discuss how they grow or where their favorite fruits and vegetables come from.
  4. Observe and talk about what is happening to your produce or seeds every day.

For ages 6 and up:

  1. Review what plants and flowers need to grow and walk through the stages of plant growth.
  2. Work through the scientific process before proceeding with the experiment. Decide on an experiment you want to test.
  3. Write down your answers for the scientific process and create your method for observation.
  4. Depending on your growing method, follow the procedures below.
  5. Record your observations every day in an observational chart, farming journal or a photo archive. As your produce grows you can look back on previous days, predict what will happen next and share with family and friends!
  6.  Follow along with Hannah as she tests her experiment in her home.

Want to download these directions? Click here for a handy PDF!

Follow along with our Daily Discovery! Click here for all activities that you can do at home.

Educational opportunities like this are supported in part by Fort Fund.

Continue Reading

Daily Discovery: What’s Up With Yeast?

Post written by Heidi Furhman, Discovery Camp Coordinator.

Daily Discovery: What’s Up With Yeast?

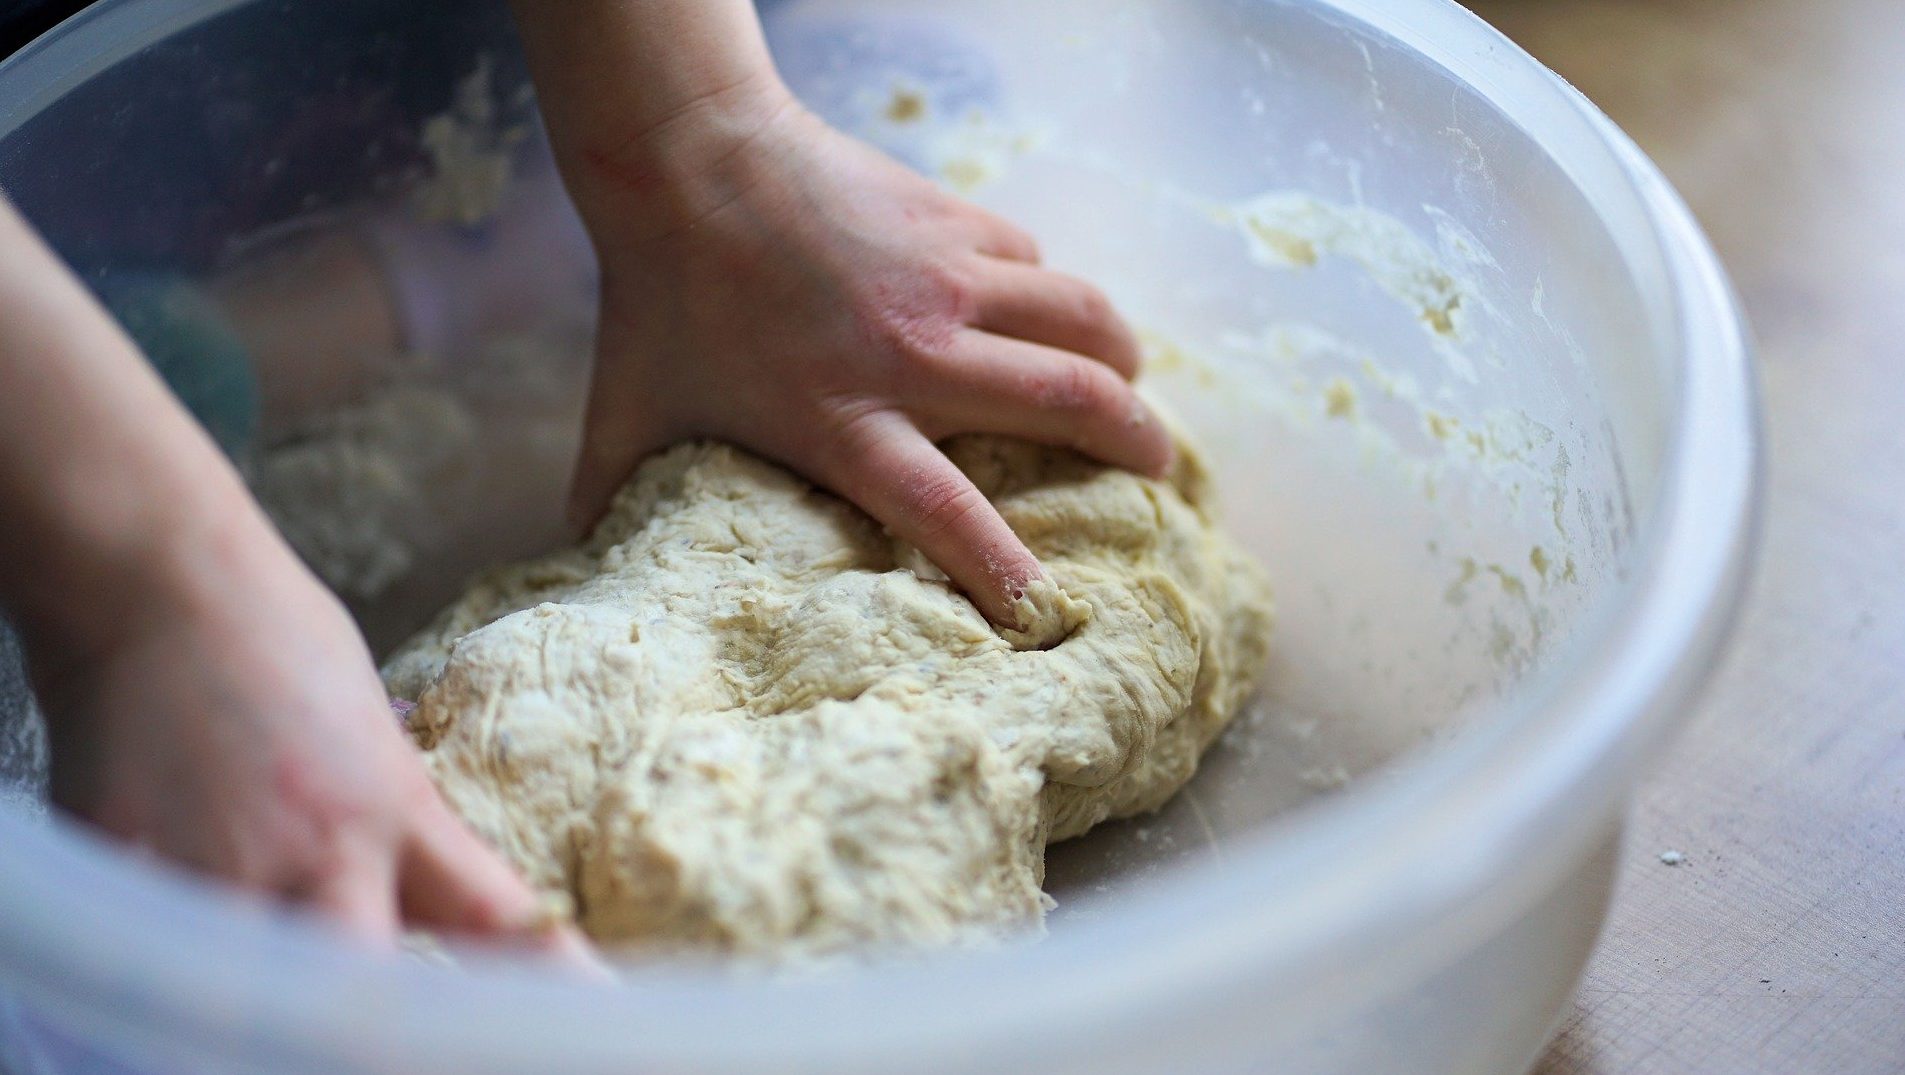
What is yeast? How does it work? Why is it important for making the breads and treats we all love? Learn about yeast through our video “What’s Up With Yeast” and conduct this experiment to observe yeast at work for yourself!

Supplies:

  • Clear Bottle (water bottles work well)
  • Warm water
  • Package of Yeast
  • Sugar
  • Balloon

What is Yeast?

Check out our video “What’s Up With Yeast?” to discover the connection between bread and balloons, and explore what yeast is, how it works in bread dough, and what kinds of yeast people have been using for hundreds of years.

As you watch, conduct this experiment along with our educator Heidi!

Instructions:

  1. Gather your supplies! You’ll need a clear bottle, a balloon, warm water, sugar, and a package of yeast.
  2. Stretch out your balloon. Try blowing it up a couple of times to loosen it up.
  3. Add one to two inches of warm water to a clear bottle. Make sure the water is warm to the touch but not hot! If your water is too hot you’ll kill the yeast. A good test is to hold your wrist under the running water. If you can’t stand it the water is too hot! Which purposes does the warm water serve to help the yeast thrive? (Moisture and warmth).
  4. Add the package of yeast to the bottle. It will work if you use less than the whole package just adjust the sugar in ratio. (Note: A smaller amount of yeast will take longer to blow up the balloon). Mix up the water and yeast.
  5. Add about 1 Tablespoon of sugar to the yeast and water mixture and stir it around (or about equal parts yeast and sugar). What purpose does the sugar serve to help the yeast thrive? (Food).
  6.  Stretch the balloon over the top of the opening and set in a warm place for about 15-20 minutes.
  7. Observe what happened? What do you notice about the yeast mixture? Does it look different than when you put it in? What about the balloon has it expanded? What does that tell you about the yeast? What is causing the balloon to expand (carbon dioxide released by the yeast is filling the balloon!)
  8. You can leave your experiment alone for several hours or days and keep observing! Does your balloon keep expanding? What about the yeast? What happens to it? At some point the yeast will consume all the food and stop releasing carbon dioxide. Your balloon will likely deflate.
  9. You can try the experiment again! Try adding more yeast and sugar or less yeast and sugar. How does that impact the time it takes for the balloon to inflate? Try using hot water or cold water. What happens then? Is your yeast able to grow? If yes, does it grow faster or slower? If no, why do you think your yeast was unable to grow? (Packaged yeast needs warm water to reactivate since it’s suspended in a forced hibernation state. Too cold, and your yeast will not be reactivated, too hot and you’ll kill it!

Sourdough Starters

You can try making your own sourdough starter at home to observe living yeast! Remember it can take some practice and a whole lot of patience to get it right, but just about anyone can do it! If it doesn’t work the first time try again!

You’ll need flour, water, and a glass jar to get started.

Try this to get you started or google “Sourdough Starter” for many amazing resources and recipes to get you started.

Want to download these directions? Click here for a handy PDF!

Follow along with our Daily Discovery! Click here for all activities that you can do at home.

Continue Reading

Daily Discovery: Solar System String Model

Post written by Sierra Tamkun, Learning Experiences Manager. This activity was adapted from NASA/JPL.

Daily Discovery: Solar System String Model

How big is our solar system? Really, REALLY big! Astronomers use a unit of measurement called an Astronomical Unit, or AU, to calculate the distances of different planets from the sun and measure the size of our solar system. One AU is equal to the distance from the sun to Earth, about 93 million miles (150 million kilometers)! Use the chart in the linked PDF of relative distances provided to build your very own to-scale model of our solar system and planets!

Supplies:

  • Measuring tape with centimeter markings
  • 4.5-meter-long piece of string
  • Large craft pony beads (or other craft beads) in various colors
  • Small piece of cardboard or wood to wrap solar system string around

Instructions:

  1. Pick out different beads to represent each planet and the sun! Look for beads that are roughly the same colors – blue for Earth, red for Mars, green for Uranus, etc.
  2. Tie the bead representing your sun to the end of your string.
  3. Using the distances (in centimeters) in the chart below, measure the distance from the sun to the first planet, Mercury.
  4. Tie Mercury in place on your sting. Tip: ask an adult to help you to make sure it stays in place!
  5. Repeat steps 3 and 4 for each planet.
  6. Lay your sting out on the floor to see the relative distance between all the planets in our solar system!

On your solar system string, all the planets are in a line so we can see the distances between them, but in space, the planets all orbit around the sun. Want to see your string of planets in orbiting action? Have a friend or family member hold the sun, while you stand apart from them holding the end. With the string pulled tight, walk counter-clockwise around your friend to see how the planets circle the sun in outer space!

This activity was adapted from NASA/JPL. Explore more at https://www.jpl.nasa.gov/.

Want to download these directions? Click here for a handy PDF!

Follow along with our Daily Discovery! Click here for all activities that you can do at home.

Continue Reading

Daily Discovery: Monster Genetics

Post written by Angela Kettle, School Programs Coordinator.

Daily Discovery: Monster Genetics

Monsters may be imaginary, but just like all living things, they have genes that determine what they look like and how they behave. Make your very own monster using Mendelian genetics. Will your monster be tall or short? Furry or scaly? Green or blue? Toss a coin to find out!

Supplies:

  • Paper (if you can, print off the last page of the PDF version of this activity)
  • Pencil
  • Crayons, colored pencils, or markers
  • A coin
  • 3D making materials (optional)

Definitions to Know

  • Trait: A characteristic or feature of a living thing… hair color, eye color, and blood type are all examples of traits.
  • Gene: Genes are parts of DNA and carry hereditary  information passed from parents to children.
  • Allele: A version of a gene. Each parent gives its offspring one allele.
  • Genotype: A living thing’s complete genetic information.
  • Phenotype: A living’s things traits.
  • Dominant allele: An allele that is always expressed in the phenotype if present in the genotype.
  • Recessive allele: An allele that is only expressed in the phenotype if the dominant allele is not present.

Don’t understand these definitions yet? No worries! It will all make more sense once you complete the activity.

Instructions:

  1. Just like humans and other animals, FCMoD monsters (which are only imaginary, we promise!) have genes that determine their traits. FCMoD monster babies inherit one allele from each monster parent. The combination of the two alleles decides which traits the baby monster has. In this activity, by flipping a coin, you will determine which alleles your monster inherits from each parent (its genotype). Then, using the rules of dominant versus recessive alleles, you will figure out your monster’s traits (its phenotype).
  2. Print off the last page of the PDF version of this activity entitled “Determining Your Monster’s Genetics.” No printer? No problem! You can make a copy of this page using pencil and paper.
  3. On the “Determining Your Monster’s Genetics” page, you should a table with lots of different monster traits, from height to teeth shape. Each row lists the allele that is dominant and the allele that is recessive.
  4. Flip a coin twice for each trait. If you flip heads on your first flip, write down the dominant allele in the Coin Toss #1 column. If you flip tails on your first flip, write down the recessive allele in the Coin Toss #1 column. Repeat in the Coin Toss #2 column. Leave the Phenotype column blank for now.
  5. Once you have completed two coin tosses for every trait, it’s time to figure out your monster’s phenotype! If a trait is recessive, it is only expressed if it has another recessive allele as its buddy. Find any traits where you wrote down the recessive allele in both the Coin Toss #1 AND Coin Toss #2 columns. (In other words, you got tails twice in a row when you did your coin toss.) Write down the recessive allele in the Phenotype column. Write down the dominant allele in the Phenotype category for all other cases.
  6. Time to make your monster! Draw your monster using the traits listed in your Phenotype column. Bonus points: once you are done drawing your monster, make it in 3D using whatever you have at home!

Questions to Ponder
• Did you flip more heads than tails, more tails than heads, or did you flip about an even amount of heads and tails?
• How much of your monster’s phenotype is made up of recessive alleles versus dominant alleles? Is it the same or different than the number of heads vs. tails in your coin toss? Why do you think that is?
• How do you think your monster’s form affects its function? For example, would a monster with long legs move differently than a monster with short legs? Would a monster with sharp teeth eat different things than a monster with blunt teeth?
• Are genes the only thing that determines what an individual is like? Can you think of any times when the environment could affect an individual’s traits?

Monsters and Us

What do humans, animals, plants, and monsters all have in common? Genetics! While you completed this activity using a monster as an example, you could have also done it for a cow, a cat, a snake, a tree, or even yourself!

In other living things besides FCMoD monsters, though, genetics can get pretty complicated. Sometimes a gene has more than two alleles. (For example, there is a gene in domesticated cats that determines if the cat is black, brown, or cinnamon. Black is the dominant allele, while brown is recessive to black, and cinnamon is recessive to brown.) Sometimes, neither allele is completely dominant, and the allele expressed in the phenotype is a blend or a combination of the two alleles — scientists call this “incomplete dominance” and “codominance,” respectively. (For example, human blood types are classified as A, B, and O, depending on the protein types found in the blood. But, if a human inherits one A-type allele from one parent and one B-type allele from the other parent, her blood type will be AB, a combination of the proteins.)

Scientists have been working hard for many years to map out the genetics that make up all kinds of different organisms. But why does it matter? Understanding genetics can make us better stewards of our planet. See below for some real-life examples!

Real-Life Genetics: Saving the Black-footed Ferret

On September 26th, 1981 the black-footed ferret was rediscovered near Meeteetse, Wyoming. Before that, Black-footed ferrets were thought to be extinct! Since that fateful day of rediscovery, biologists and conservationists have been working hard to recover this endangered species.

Because no new populations of wild BFFs have been found since 1987, the BFF breeding season ( March-July) at BFF managed care facilities follow protocols for specific pairings of individuals to minimize the loss of genetic diversity. In other words, the biologists responsible for breeding Black-footed Ferrets use what they know about genetics to make sure that future BFF generations are
born genetically healthy.

Did you know that FCMoD has two live Black-footed Ferrets on site, in partnership with U.S. Fish & Wildlife Service? Make sure to visit the BFFs when the museum is open… and you can watch them 24/7 from anywhere in the world on the Black-footed Ferret cam.

Real-Life Profile: Mary F. Lyon

Mary F. Lyon (1925-2014) was a British geneticist who is credited as having discovered Xchromosome inactivation, often termed Lyonization in her honor. Lyonization is a process that occurs in female mammals (including female humans!), where one copy of the X-chromosome is inactivated in each cell. (Females inherit two X chromosomes, while males inherit an X and a Y chromosome.)

Mary Lyon’s discovery has helped geneticists understand a range of genetic anomalies. For example, tortoiseshell cats are a great example of Lyonization. Orange coloration is carried on the Xchromosome in cats. Let’s say a cat inherits one “orange” X-chromosome and one “non-orange” Xchromosome from its parents. Due to Lyonization, one of those X-chromosomes will be inactivated in each cell. However, which X-chromosome is inactivated varies from cell to cell, resulting in some cells expressing orange coloration while others do not. This creates the random mosaic pattern on tortoiseshell cats.

Lyonization is also the reason that male tortoiseshell cats are so rare. In order for Lyonization to occur, a cat must have two X-chromosomes. A genetic mutation must occur for a male cat to have two X-chromosomes, though it does happen on occasion!

Want to download these directions? Click here for a handy PDF!

Follow along with our Daily Discovery! Click here for all activities that you can do at home.

Educational opportunities like this are supported in part by Fort Fund.

Continue Reading

Daily Discovery: Annie The Railroad Dog

Post written by Heidi Fuhrman, Discovery Camp Coordinator.

Daily Discovery: Annie The Railroad Dog

Here at FCMoD we love Annie the Railroad Dog! Learn more about who Annie was and complete a fun activity to celebrate the special animals in your life!

Supplies:

  • Assorted craft materials/recyclables
  • Crayons, colored pencils, or markers
  • Imagination!

Who was Annie?

Annie the Railroad Dog was a very special animal who lived in Fort Collins a long, long time ago! She has a very special story—check it out through our video on Annie The Railroad Dog or explore the story through our online Archive collection.

After learning more about Annie’s story do the activity below to celebrate her or some other special animal friends in your own life!

Celebrating Our Special Animals

Annie was one special dog and we celebrate her friendliness with a statue of her that sits right outside of the Old Town Library! Maybe you’ve seen her there or given her paw a little shake (I have!). What special animals do you have in your life? Maybe you have your own dog, cat, fish, or other pet! Maybe you have a type of animal that you really love! Today we’re going to create some of our own statues or drawings of our favorite animals!

Instructions:

  1. Gather up all your materials! You can use craft supplies like construction paper, string, fabric, paint, popsicle sticks, pipe cleaners, etc… or you can use recyclables! Maybe an old cereal box can be the body and a paper towel tube could be a tail… use your imagination!
  2. Create! Use your supplies to make a statue of the special animal you’re thinking of! Will it look the same or a little wonky? If you don’t want to make a statue you can draw a picture of the animal instead!
  3. Share! Show someone in your house or a friend or family member (maybe over video chat) your creation. Explain why that animal is special to you and maybe tell them the story of Annie! You can also share your creations with us @focomod!

Level Up:

Annie lived here at the C&S Railroad Passenger Depot! Where does your special animal live? When you’re done creating your animal can you create a home for them to live in? You could use recyclables, add
it to your drawing, or construct it out of legos or blocks!

Discover More:

Annie isn’t the only special Fort Collins Animal! At the Fort Collins Museum of Discovery we take care of a bunch of animals—such as the very special Black Footed Ferrets or our Fancy Rats! Learn more about our animals through some of our Discovery At Home Activities and Videos (find them on our website at fcmod.org/blog) or by visiting us someday at the museum!

The museum isn’t the only place to see and learn about animals, there are animals all across Fort Collins! Keep your eye out next time you’re hiking, at a park, or playing in your backyard. . .you never know what creature!

If you liked our story of Annie The Railroad Dog, you might also like the book A Lucky Dog: Owney, U.S. Rail Mail Mascot by Dirk Wales or Owney, The Mail-Pouch Pooch by Mona Kerby, they both tell the story of another railroad dog, Owney, who had another very important job!

Want to download these directions? Click here for a handy PDF!

Follow along with our Daily Discovery! Click here for all activities that you can do at home.

Continue Reading

Daily Discovery: Imagining Life

Post written by Sierra Tamkun, Learning Experiences Manager. Adapted from the National Informal STEM Educator’s Network (NISE Net).

Daily Discovery: Imagining Life

Have you ever looked up at the night sky and wondered what other life might be out there, circling other stars? If so, you’re thinking like an astrobiologist!

Astrobiologists study how life began and evolved on Earth, and what conditions are needed to make other worlds habitable. Part of their research includes the study of extreme Earth environments where life exists, and they use this information to make predictions about where in the universe we might find other life, and what those life forms might be like!

Explore some different extremophiles (living creatures whose habitats are too extreme for us!) and make your own predictions about what life might exist on another planet!

Supplies:

  • Drawing sheet (linked in PDF below) or blank piece of paper
  • Markers or colored pencils
  • Extremophiles Cards (linked in PDF below)

Instructions:

  1. Take a look at the different extremophiles cards and learn about organisms that thrive in places too extreme for humans.
  2. Imagine a planet or moon in the universe where the  environment is too harsh for people. Is it very hot? Very cold? Is the air too thick, or very thin? Is it too acidic? Use the provided drawing sheet or your own piece of paper to draw the landscape of your imagined world!
  3. Think like an astrobiologist! What sort of organism would  survive on your planet or moon? What adaptations would it need to live there? Would it look like an extremophile of Earth, or something completely different? Draw your life form in its extraterrestrial habitat!

Are we alone in the universe?

We don’t yet have scientific evidence for life in other parts of the universe, but there are some exciting possibilities in the Milky Way galaxy— and even our own solar system! Astronomers have found many potentially habitable planets in the Milky Way using NASA’s Kepler telescope. These “Goldilocks” planets are just the right distance from the stars they orbit—not too close and not too far—to allow liquid water to exist on their surfaces, a critical ingredient for life as we know it. Citizen scientists also participate in Kepler’s
research through the Planet Hunters project!

Astrobiologists expect that alien life forms—if they’re out there—will be specially adapted to their environment. Most of the alien worlds we’ve explored so far are very different from Earth, so any living things we find beyond Earth will probably be very different, too.

Want to download these directions? Click here for a handy PDF!

Follow along with our Daily Discovery! Click here for all activities that you can do at home.

Image credit: earthsky.org

Continue Reading

Daily Discovery: Shadows! / Descubrimiento en casa: Sombras y siluetas!

Post written by Hannah Curtis, Education Assistant.

Daily Discovery: Shadows!

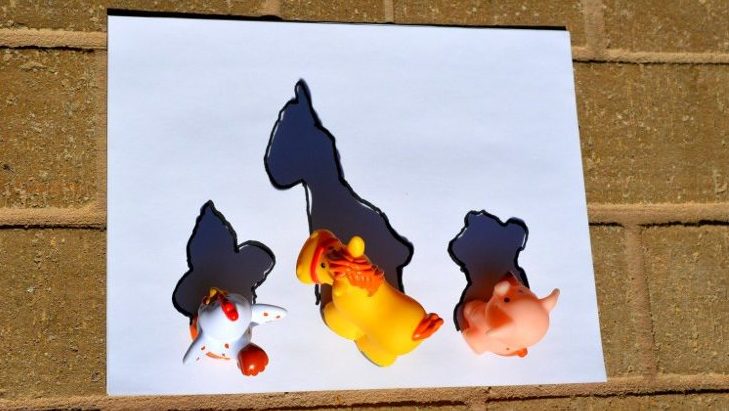
The simple relationship between light and dark. Shadows are everywhere, and we all have a shadow, well sometimes! Explore the realms of natural light during the day and artificial light at night and experiment with how shadows change.

Supplies:

  • Sunlight
  • Toys or objects around your house
  • Sidewalk chalk
  • Sidewalk space
  • Flashlight
  • Paper
  • Coloring utensils

Instructions:

Natural Light Shadows

  1. During a sunny day, find space on the sidewalk to which you can draw with chalk or use paper and coloring utensils.
  2. Place a household object or a toy on the sidewalk and check out the shadow that is created. Move your object around and observe how the shadow changes.
  3. Find a spot where you will leave your object all day. Draw the shadow the object on your canvas. Check back every 30 minutes or hour to trace the shadow at that time without moving your object.
  4. At the end of the day before the sun goes down, pick up your object and see the different shadows that were created by one object over the course of the day!
  5. You can also experiment with the shadows of nearby trees or even family member.

Artificial Light Shadows

  1. After the sun sets and there is not more sunlight, you can create your own light and shadows using a flashlight or lamp.
  2. Turn off indoor house lights and direct the flashlight onto a bare wall or ceiling.
  3. Using your hands to form different shapes, you can create different shadow images onto the wall. Test out these different hand shapes or create your own shadow puppet shows.
  4. Try taping a piece of paper onto the wall, and draw the silhouette of a family member.
  5. Discover what happens when you bring objects closer to the flashlight, what about further away? How does the shadow change?

Want to download these directions? Click here for a handy PDF!

Follow along with our Daily Discovery! Click here for all activities that you can do at home.

Image Credit: Rookieparenting.com


Traducido por Károl de Rueda y Laura Vilaret-Tuma.

Descubrimiento en casa: Sombras y siluetas!

La relación entre la oscuridad y la luz es muy simple. Las sombras están por todas partes, y algunas veces, ¡hasta nosotros también las proyectamos! Vamos a explorar la luz natural durante el día y la luz artificial por la noche para experimentar cómo se forman las sombras y cómo se cambian las siluetas.

Artículos necesarios:

  • Luz natural
  • Juguetes/objetos que tengas en casa
  • Una acera o banqueta
  • Tiza o gis para la acera y/o utensilios para colorear
  • Una linterna o lámpara eléctrica portable
  • Papel

Instrucciones:

Para formar sombras en la luz natural

  1. Durante un día soleado, busca un sitio en una acera o banqueta donde puedas colorear con tiza o usar papel y utensilios para colorear.
  2. Pon algún objeto o juguete sobre la acera y mira la sombra que forma. Mueve y gira tu objeto para observar cómo esta cambia.
  3. Busca un lugar donde puedas dejar tu objeto todo el día, y colócalo encima de una hoja de papel. Dibuja su silueta sobre este, y regresa cada treinta minutos o cada hora para trazar una nueva silueta en ese tiempo sin mover tu objeto.
  4. Antes del anochecer, recoge tu objeto y observa la evolución de las sombras que dibujaste durante el curso del día.
  5. ¡También puedes experimentar con las siluetas o sombras de los árboles alrededor, o hasta con algún miembro de tu familia!

Para formar siluetas usando luz artificial

  1. Después del ocaso y cuando ya no haya más luz natural, podrás crear tu propia luz artificial usando una lámpara o linterna.
  2. Apaga las luces de un cuarto y enciende la lámpara dirigiéndola hacia una pared o hacia el techo.
  3. Crea diferentes formas con tus manos y colócalas al frente de la lámpara para hacer diferentes imágenes. Más abajo te damos algunas ideas para crear personajes ¡y organizar tu propio espectáculo de sombras!
  4. También podrías pegar un papel blanco sobre la pared y trazar la silueta de un miembro de tu familia.
  5. ¿Qué pasa cuando acercas o alejas tus manos de la fuente de luz? Descubre cómo cambian las sombras y siluetas, mientras te diviertes en familia.

¿Te gustaría descargar esta actividad? Haz clic aquí para obtener un archivo PDF.

Para encontrar actividades, ideas y mucho más descubrimiento en casa, ¡síguenos!

Educational opportunities like this are supported in part by Fort Fund.

Continue Reading

Daily Discovery: Singing Glass / Descubrimiento en casa: Copas musicales

Post written by Eisen Tamkun, Music Programming Lead.

Daily Discovery: Singing Glass

Wine glasses aren’t just for wine. Learn how to make them sing!

Supplies:

  • Wine glasses – the more the better (not all work – experiment to see which work best!)
  • Water
  • Tape
  • Pen

Instructions:

  1. Wash your hands to get any dirt off so they are squeaky clean.
  2. Fill the glass about half way with water.
  3. Take your pointer finger and dip it into the water; then with slight pressure, run your finger in a circular motion along the rim. If it feels too dry, just give you finger another dip!
  4. The key is maintaining the same amount of pressure as you move your finger along the rim. And pretty soon you will have a new musical talent! Just remember the three things needed to make that glass sing: moisture, pressure and glass type.
  5. Now that you have mastered making your glass sing, it’s time to start experimenting! Using the tape, mark where the water level is. Add or take away some water and listen to
    how the sound changes.

Nicely done! You have gained a new musical talent. Practice creating different tones with multiple glasses and water levels, and host a singing glass concert for you family!

Want to download these directions? Click here for a handy PDF!

Follow along with our Daily Discovery! Click here for all activities that you can do at home.


Traducido por Károl de Rueda y Laura Vilaret-Tuma.

Descubrimiento en casa: Copas musicales

Las copas de vino no se usan solamente para beber. ¡También pueden hacer música! Aprende cómo hacerlas sonar siguiendo unas instrucciones sencillas.

Artículos necesarios:

  •  Copas de vino vacías, mientras más, mejor. (Hay algunas copas que no suenan, así que primero prueba para ver cuáles sirven mejor para esta actividad)
  • Agua
  • Cinta adhesiva
  • Pluma

Instrucciones:

  1. Lávate las manos hasta que estén super limpias.
  2. Llena una copa con agua hasta la mitad.
  3. Mete la punta de tu dedo índice, sácalo del agua y después, con un poco de presión, mueve el mismo dedo en forma circular sobre el borde de la copa; esta debe emitir un tono musical. Si se siente un poco seco, simplemente moja tu dedo en el agua otra vez.
  4. La clave para mantener este sonido es el aplicar la misma cantidad de presión sobre el borde de la copa. ¡Ya estás adquiriendo una nueva habilidad musical! Solo recuerda los
    tres elementos para hace música con las copas: humedad, presión, y el tipo de copa que usas.
  5. Ahora que ya has hecho música, ¡es hora continuar el experimento! Llena otras copas con diferentes cantidades de agua y usando cinta adhesiva, marca el nivel del agua en cada una. Aplícales presión con tu dedo índice como aprendiste en esta actividad, y ¡observa cómo cambia el tono musical!

¡Bien hecho! Ya has ganado un nuevo talento musical. ¡Organiza un concierto de copas musicales para tu familia!

¿Te gustaría descargar esta actividad? Haz clic aquí para obtener un archivo PDF.

Para encontrar actividades, ideas y mucho más descubrimiento en casa, ¡síguenos!

Educational opportunities like this are supported in part by Bohemian.

Continue Reading

Daily Discovery: Engineering at Home – Bouncy Ball Challenge

Post written by Sierra Tamkun, Learning Experiences Manager. Adapted from EEK.

Daily Discovery: Engineering at Home – Bouncy Ball Challenge

Engineers often use things called “polymers” as part of their inventions. Though the word may sound unfamiliar, you interact with polymers every day! Plastic is a polymer that’s in everything from toys to toothbrushes. Engineers and scientists even use polymers in building spacecraft, and study how the environment of space effects these materials in different ways. Make your very own polymer, and then modify it to make the bounciest ball possible!

What are polymers?

Polymers are made from big molecules, but these big molecules are really many small molecules linked together in a pattern. Just like how a single braid is made of many strands of hair!

What makes polymers special?

The interesting thing about polymers is that you can change the big molecules by changing the small molecules. Just like changing a recipe makes a cookie taste differently, changing the ingredients can make a polymer behave differently.

Supplies:

  • 2 cups Borax
  • Corn Starch
  • Elmer’s glue
  • Warm Water
  • Measuring cups/spoons

Instructions:

  1. Begin by making a borax solution! Pour 2 tablespoons of warm water into a cup. Add 1/2 teaspoon of borax. Stir until the borax dissolves.
  2. To make your bouncy ball, pour 1 tablespoon of glue into the second cup.
  3. Add 1/2 teaspoon of the borax solution and 1 tablespoon of corn starch. DO NOT STIR for 15 seconds!
  4. Now stir! When it gets too difficult, pull the mixture out and begin kneading it! It’ll start off sticky, but soon you’ll have a bouncy ball. Tip: Unlike a regular bouncy ball, this can dry out, so make sure you store your ball in a plastic bag or container.
  5. Now it’s time to experiment with different types of polymers! Make 2 more bouncy balls. This time change the amount of one of the three ingredients (borax solution, corn starch, or glue).
  6. Time to test! Which ball bounces best? Use a ruler or tape measure to find out. Record your results in a chart like in the PDF!

Want to download these directions? Click here for a handy PDF!

Follow along with our Daily Discovery! Click here for all activities that you can do at home.

Continue Reading

Daily Discovery: What’s With Weather? – Wind

Post written by Heidi Fuhrman, Discovery Camp Coordinator.

Daily Discovery: What’s With Weather? – Wind

You’re on your way to becoming a junior meteorologist! Today we’re going to learn more about another ingredient for weather—wind! Learn what causes wind, why it’s important, how scientists learn about wind before doing your own experiment to see what’s blowing in your neighborhood, and building another tool for your weather station! (If you haven’t checked out “What’s With Weather: Forecast It!” you might start there first!)

Supplies:

For Wind Experiment

  • A few plastic lids
  • petroleum jelly
  • Yarn
  • Hole punch
  • Magnifying glass (optional)
  • A windy day!

For Anemometer:

  • 5 small dixie cups OR 1 egg carton
  • Scissors
  • Hole punch
  • Tape
  • 2 straws OR wooden dowels
  • 1 push pin
  • 1 pencil (with eraser)
  • Electric fan (optional)

What’s With Wind?

We’ve already learned that weather is the mix of events that happen each day in our atmosphere. We know that there are many different pieces that make up weather, but temperature, atmospheric pressure, wind, humidity, precipitation, and cloudiness are especially important! We’ve also learned that meteorologists are
scientists who study and forecast—predict—the weather and learned about some of the tools they use to make accurate forecasts! [TIP: If you haven’t tried out “What’s With Weather: Forecast It!, you might want to try that Discovery at Home first!]

Today we’re going to learn about one of those important pieces for weather—wind!

Wind is air in motion, but what causes it? The Sun’s rays heat up Earth’s surface and its atmosphere. . .but don’t heat it all evenly. Some parts of Earth’s surface warm quicker. Warm air weighs less than cold air, so the warm air rises up and it is replaced by cool air. This movement—caused by uneven heating—is wind! If you remember from What’s With Weather: Forecast It!, our weather is also caused by differences in atmospheric pressure (remember, that’s what we measure with our barometer). Atmospheric pressure is also a part of wind! Warmer air is usually found in low pressure systems (L on our weather maps!) and cold air is usually found in high pressure systems (H on our weather maps) so wind usually blows from high pressure to low pressure systems! Land formations can also affect wind. Mountains, valleys, lakes, and deserts will all change how the atmosphere warms and can funnel how wind blows. Humans can also impact wind! Skyscrapers and other all buildings close together can impact air pressure and funnel wind between them!

But the land doesn’t just shape wind, wind shapes the land! Over
time wind can cause erosion and even quickly change landscapes,
such as sand dunes! You can experience this yourself if you ever
visit Colorado’s Great Sand Dunes National Park!

Your Turn

Now that you know a bit about wind it’s your turn to track information about wind in your neighborhood! Conduct an experiment to see what’s blowing around your house and add your own anemometer to your meteorologist tool kit!

Experiment: What’s In The Wind?

Wind transports all sorts of things around the world—precipitation, pollution, pollen and more! You can see some of what is blowing through your neighborhood! Set up this experiment to discover what’s in the wind!

Instructions:

  1. Gather your supplies! You’ll need some plastic lids, a hole punch, scissors, string, and petroleum jelly.
  2. . Punch a hole near the edge of all your lids and tie a string through the hole to create a hanger.
  3. Cover both sides of your lids with petroleum jelly…careful this can get messy!
  4. Hang your lids in different locations around your yard on a windy or breezy day. Hypothesize: What do you think will get caught on your lid?
  5. Leave your lids outside for a few hours to collect whatever’s blowing in the wind. Then bring them inside. Place them on a paper towel or cookie sheet and observe!

Observe

Observe with your eyes.
• What got caught to your wind sample tools?
• Do you see anything that surprises you?
• Does it match your hypothesis?
Get out your magnifying glass.
• Do you see anything you didn’t notice with your plain eyes?
• What does this tell you about what’s blowing through your neighborhood?

This tool can’t catch everything that the wind might be carrying. It’s hard to catch things like smoke or pollution or precipitation, but you might see dust, leaves, seeds, maybe even insects or pollen!

Make Your Own Anemometer

Meteorologists and other scientists use a tool called an anemometer to measure wind speed. While tools like windsocks and  weathervanes can tell us which direction the wind is blowing, anemometers can help us measure the velocity of the wind too and help us make better forecasts and see if wind speeds might cause damage. Add your anemometer to the weather station you might have built from “What’s With Weather: Forecast It!”

  1. Gather your supplies! You’ll need tape, a push pin, scissors, a hole punch, a pencil, two straws (or wooden dowels) and five small dixie cups…if you don’t have cups on
    hand (like us!) you can use an egg crate instead!
  2. If you’re using an egg carton instead of small cups, start by cutting off the four corners of the carton and one other carton piece. These will serve as your
    cups! (If you have cups skip to step 3).
  3. Lay out four cups/carton pieces in this pattern and punch a hole on the inside side of each cup/piece.
  4. With your last cup/piece poke a hole in the bottom. Add holes on all four sides (you may only need to punch one hole in your carton piece.)
  5. Push your straws through the holes middle cup/piece to form an X. If you have a carton piece you may be able to cradle the X in the spaces. Poke the ends of the straws through your 4 outside cups/pieces. You may need to secure them together with tape or glue.
  6. Poke your pencil (eraser side up!) through the bottom hole, using a push pin, secure through the two straws into the eraser. Your anemometer is now complete!
  7. Make sure all four cups/pieces are facing in the same direction! Your pencil will also need to spin freely, so it is best to simply hold it between your fingers, however, you can also try weighting a bottle with sand or rocks and placing your pencil inside to create a stand.

Calibrate & Observe:
Hold the pencil between your fingers in a windy place (you can also use a fan indoors). What happens? Why does the anemometer spin? Why does it spin only one direction? What will happen if you set the fan to a higher speed or the wind blows stronger?

Want to download these directions? Click here for a handy PDF!

Follow along with our Daily Discovery! Click here for all activities that you can do at home.

Continue Reading