Post written by Hannah Curtis, Education Assistant.
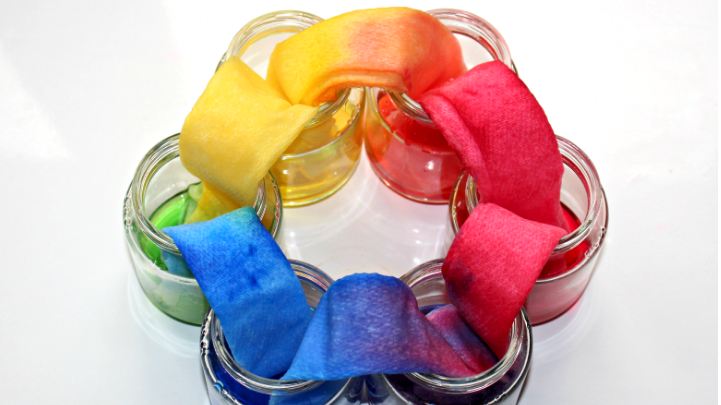
Daily Discovery: Walking Rainbows
Put your lab coat on; we’re getting scientific! With this experiment, discover how colors interact to form rainbows and observe the natural process of capillary motion in action!
Supplies:
- Time
- 6 full sheets of paper towels
- 6 mason jars (clear if possible). If you don’t have jars use cups or bowls
- Red, blue, and yellow food coloring
Instructions:
Before you get started, review the color wheel on page two and remember the colors you need to form a rainbow. Feel free to experiment to see how mixing certain colors will create different colors. Together, determine how you will create a rainbow using only red, blue and yellow.
- Fill three jars full of water. Add red food coloring to one, blue
to another and yellow to another, 4-6 drops each. - To form a circle place the empty jars between the red, yellow
and blue jars. - Roll each sheet of paper towel into tubes. Drape one side into
a full jar and the other into an empty jar until each jar is
connected with paper towels. - Start your timer to see how long it takes for the colored water
to move from one jar to the next. Water will begin absorbing
right away, but the whole process will take around 48 hours,
so check back every few hours to see how it has changed.
Want to download these directions? Click here for a handy PDF!
Follow along with our Daily Discovery! Click here for all activities that you can do at home.
Image credit: Messy Little Monster