Daily Discovery: Imagining Life

Post written by Sierra Tamkun, Learning Experiences Manager. Adapted from the National Informal STEM Educator’s Network (NISE Net).

Daily Discovery: Imagining Life

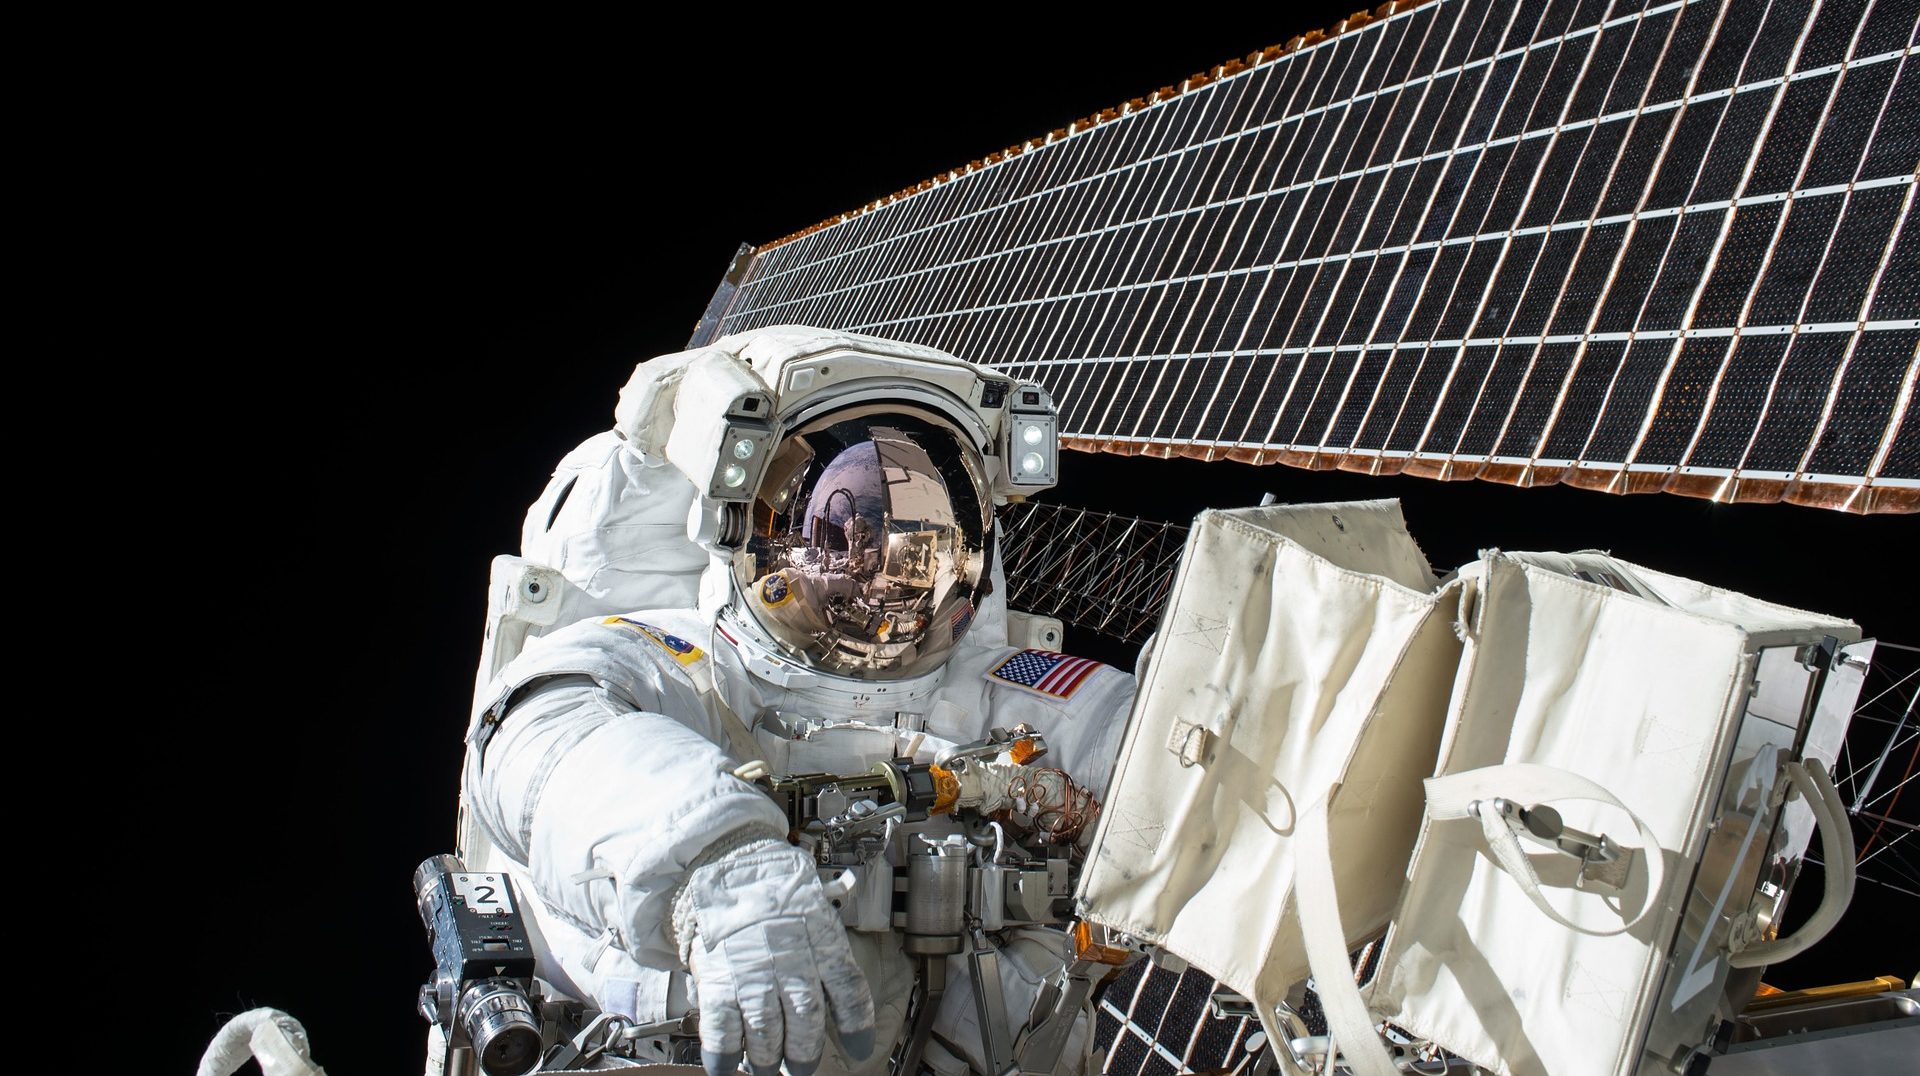
Have you ever looked up at the night sky and wondered what other life might be out there, circling other stars? If so, you’re thinking like an astrobiologist!

Astrobiologists study how life began and evolved on Earth, and what conditions are needed to make other worlds habitable. Part of their research includes the study of extreme Earth environments where life exists, and they use this information to make predictions about where in the universe we might find other life, and what those life forms might be like!

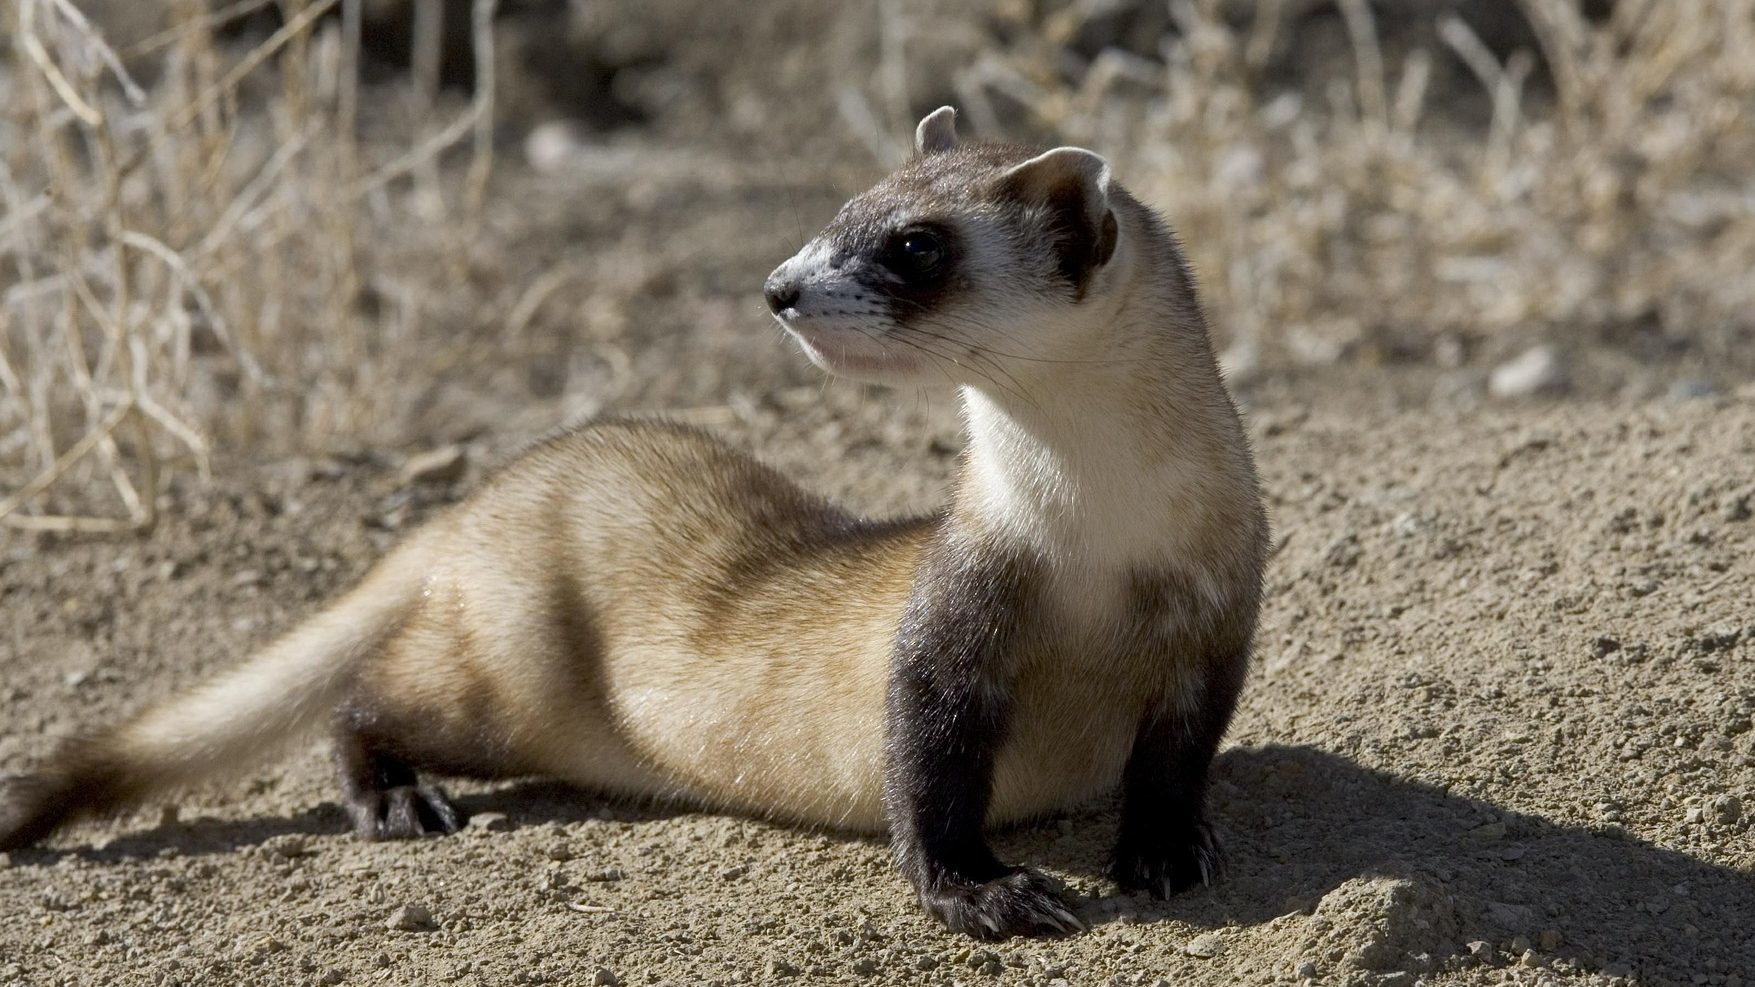
Explore some different extremophiles (living creatures whose habitats are too extreme for us!) and make your own predictions about what life might exist on another planet!

Supplies:

  • Drawing sheet (linked in PDF below) or blank piece of paper
  • Markers or colored pencils
  • Extremophiles Cards (linked in PDF below)

Instructions:

  1. Take a look at the different extremophiles cards and learn about organisms that thrive in places too extreme for humans.
  2. Imagine a planet or moon in the universe where the  environment is too harsh for people. Is it very hot? Very cold? Is the air too thick, or very thin? Is it too acidic? Use the provided drawing sheet or your own piece of paper to draw the landscape of your imagined world!
  3. Think like an astrobiologist! What sort of organism would  survive on your planet or moon? What adaptations would it need to live there? Would it look like an extremophile of Earth, or something completely different? Draw your life form in its extraterrestrial habitat!

Are we alone in the universe?

We don’t yet have scientific evidence for life in other parts of the universe, but there are some exciting possibilities in the Milky Way galaxy— and even our own solar system! Astronomers have found many potentially habitable planets in the Milky Way using NASA’s Kepler telescope. These “Goldilocks” planets are just the right distance from the stars they orbit—not too close and not too far—to allow liquid water to exist on their surfaces, a critical ingredient for life as we know it. Citizen scientists also participate in Kepler’s
research through the Planet Hunters project!

Astrobiologists expect that alien life forms—if they’re out there—will be specially adapted to their environment. Most of the alien worlds we’ve explored so far are very different from Earth, so any living things we find beyond Earth will probably be very different, too.

Want to download these directions? Click here for a handy PDF!

Follow along with our Daily Discovery! Click here for all activities that you can do at home.

Image credit: earthsky.org

Continue Reading

Daily Discovery: The Road to Recovery – The Black-Footed Ferret

Post written by written by Charlotte Conway, Public Programs Coordinator. Adapted from WILD about Black-footed Ferrets (US Fish and Wildlife Service).

Daily Discovery: The Road to Recovery – The Black-Footed Ferret

Did you know one of the most endangered mammals in North America lives right here in your backyard? Celebrate Endangered Species Day this year by learning about this amazing animal! Black-footed ferrets, or as we like to call them, BFFs, were thought to be extinct twice! BFFs have recovered from a population of only 18 individuals found in 1981 to several hundred today.

Learn about the rediscovery of the animal thought to be extinct, discover how important it is to protect the habitats of endangered species, and become a wild life conservationist yourself with these BFF activities!

Rediscovery of the BFFs: A Quick History

Black-footed ferrets are considered one of the most endangered animals in North America. Twice, scientists believed they were extinct. In 1964, as the U.S. government was about to declare the black-footed ferret extinct, a small population was located in Mellette County, South Dakota. That population continued to decline and nine ferrets were taken out of the wild to begin a captive breeding program. The captive breeding attempt failed. By 1974, there were no more wild ferrets in Mellette County. When the last captive animal died at Patuxent Wildlife Research Center in Laurel, Maryland in 1979, the ferret was again presumed extinct.

Most scientists gave up hope of ever finding another black-footed ferret. While many had searched far and wide, they did not find any more in the wild. A lucky incident changed all that. At about 3 a.m. on September 26, 1981, cattle rancher John Hogg and his wife, Lucille, were awakened by their dog’s furious barking just outside the bedroom window. They figured that Shep had gotten tangled up with a porcupine and they went back to sleep.

When John Hogg looked around the next day, he found the carcass of a strange little animal. He had never seen one like it before. It had a black mask, black feet, and a black-tipped tail. It also had a broken back. Lucille suggested they make a mount of it. They took it to a Meeteetse taxidermist. The taxidermist realized that it was a black-footed ferret.

Amazingly, another black-footed ferret population was soon discovered near Meeteetse, Wyoming. Then, canine distemper struck the population. In 1986, shortly before distemper wiped out all the remaining wild ferrets in Wyoming, the last 18 animals were captured for captive breeding. Unlike the efforts in the 1970’s, scientists were very successful breeding the animals in the 1980’s. By the fall of 1991, the captive-breeding population had grown to a large enough size to permit the first experimental reintroduction site.

The story of what has happened in the 30 plus years since a black-footed was discovered in Meeteetse is nothing less than extraordinary. While it is a story that it still being written, the possibility of a full recover of this species is within reach thanks to efforts lead by US Fish and Wildlife Service and numerous partners.

It is even possible that you could play a role in this amazing recovery effort!

Activity: The Prairie Web of Life

One of the main reasons BFFs became and remain endangered is loss of habitat, and the related decline of their prey, prairie dogs. Make your own prairie web of life to discover the rich diversity of life on the endangered Short-grass Prairie habitat, and then consider what makes a keystone species important to an ecosystem.

Supplies:

  • Pencil or pen
  • Paper
  • Short-grass Prairie Species Cards (included in separate document)
  • Short-grass Prairie Species Chart (printed or you can draw it on your own paper)

Instructions:

  1. Look through the Short-grass Prairie Species Cards. Select a few of your favorite species and write down which species you are most interested in.
  2. Next, fill out the Short-grass Prairie Species Chart (included below) using the Short-grass Prairie Species Card you chose. Fill out a new chart for each species. Fill out a chart for the Black-tailed Prairie Dog and the Black-Footed Ferret as well. You will need to know some vocabulary to help you fill out the chart!
    Producer – organisms like plants that can make their own food from the sun’s energy.
    Consumer – animals that must get their energy from eating plants or other animals.
    Herbivore – an animal that eats only plants.
    Omnivore – an animal that eats both plants and animals.
    Carnivore – an animal that eats only animals, a meat-eater.
    Scavenger:
    Decomposer – organisms such as bacteria and fungi that break down plant and animals.
  3. Now, you are going to make your own Short-grass Prairie food web using the Short-grass Species Charts you filled out. Food webs are like food chains, but they are more complex and help us understand how each species in an ecosystem has a role to play. Every species needs to get energy and nutrients from somewhere, and they often depend on other species to survive.
  4. To begin your food web, use a piece of paper and draw a horizontal line near the bottom. This represents the ground level of the prairie.
  5. Next, think about where energy for the food web comes from. Where do the producers get their energy? The sun! Draw the sun at the top of your page.
  6. Now, you will draw the first level of the food web, near the ground level of the prairie. What species begins every food chain or web? Producers, or plants! Draw clumps of grass to represent your grass, because grasses are the most abundant plant on the Short-grass Prairie. If you chose a Species Card that is a producer, draw it on your food chain here and label it!
  7. Your time to draw the next level of your food chain. What comes next? Herbivores! Draw and label your herbivores above the producers you drew. Be sure to include the Black-Tailed Prairie Dog! Draw an arrow that points from the grass up towards the animals. That arrow shows the direction that energy is flowing through the ecosystem! If you have an herbivore that only eats one species of plant (for example, the monarch butterfly only feeds on milkweed!) then the arrow should point from that plant to that animal.
  8. Next, add omnivore species to your food web. Remember, these animals eat plants, but they also eat other animals! Draw arrows from the plants and animal that these species eats towards the species. Repeat this process for any carnivores you have selected. Add the Black-footed Ferret to your chart at this point!
  9. Repeat this process for scavengers. Finally, repeat this process for any decomposers. Every species you filled out a chart for should now be on your food web!
  10. At this point, you may wish to add more species to your food web. If you include more species into your food web, make sure you draw arrows to connect your species to one anther and show the flow of energy!
  11. Now, consider what happens if a plant or animal is removed from the food web. Does it matter where in the food web a species is removed? Which species in the food web are most important to the Black-footed Ferret?
  12. At least 90% of the black-footed ferret’s diet consists of prairie dogs. Consider what would happen if the prairie dog were removed from the food web. How would black-footed ferrets be impacted? What other species would be impacted by the loss?

Become BFFs with the BFFs

If you care about saving the BFFs as much as we do, here are some ways you can continue learning and help conserve this species!

  • Visit the BFFs that live at FCMoD! Usually, you can visit the two US Fish and Wildlife Service ferrets that live at FCMoD. Lucky for us, you can still visit them virtually with our ferret cam! This ferret camera is always live, so you can see what our BFFs are up to any time of the day!
  • Tip! BFFs are nocturnal, so check out the ferret cam in the evenings for the most action.
  • Research websites to learn more about black-footed ferrets, their history, and the prairie ecosystems they need to survive. We recommend you start here and the National Black-footed Ferret Conservation Face Book page.
  • Reach out and share what you’ve learned about black-footed ferrets with your parents, children, friends, teachers, and people you trust in your local community.
  •  Travel to a wildlife refuge, national grassland or park, state, or city natural areas or other prairie habitat. Check out the Soapstone Prairie Natural Area to see a BFF reintroduction site, where BFFs live out in the wild, right here in Northern Colorado!

Want to download these directions? Click here for a handy PDF!

Follow along with our Daily Discovery! Click here for all activities that you can do at home.

Continue Reading

Daily Discovery: Storytime in the Home – Baby on Board Sloth Craft

Post written by Harlie Jo Rachel, Education Intern.

Daily Discovery: Storytime in the Home – Baby on Board Sloth Craft

Follow along with FCMoD’s live stream Storytime in the Home: Baby on Board. Then sit down with your family and make a sweet Mother’s Day gift, or just a great card to give to someone very special.

Supplies:

  • Brown and Green Construction Paper or any white paper
  • Glue stick
  • Scissors
  • Pencil
  • Crayons
  • Optional: Printer to print the sloth face coloring sheet

Instructions:

  1. Place all your supplies on a clear surface with plenty of room to create.
  2. Fold a piece of brown construction paper in half hamburger style. Tip: use any paper you have and color it!
  3. Put your hand with your palm on the creased side of the paper and trace it with a pencil.
  4. Using the scissors, cut out the handprint. You should have two hands joining at the crease!
  5. Color the handprint to look like a sloth.
  6. Print, color and cut out the sloth face! (Or you can draw your own sloth face)
  7. Glue the sloth face to the thumb on the front of your folded handprint card.
  8. Cut out a branch and leaves from the paper. Glue the leaves onto the branch.
  9. Glue the leafy branch to the sloth’s arms so it has a tree to hang from. Be sure you only glue it to one side your handprint so the card can open!
  10. Write a message on the inside of the card and give it to someone you love!

Want to download these directions? Click here for a handy PDF!

Follow along with our Daily Discovery! Click here for all activities that you can do at home.

Educational opportunities like this are supported in part by Buell Foundation. Their support helps make access to early childhood education at FCMoD possible for everyone in our community.

Continue Reading

Daily Discovery: Shadows! / Descubrimiento en casa: Sombras y siluetas!

Post written by Hannah Curtis, Education Assistant.

Daily Discovery: Shadows!

The simple relationship between light and dark. Shadows are everywhere, and we all have a shadow, well sometimes! Explore the realms of natural light during the day and artificial light at night and experiment with how shadows change.

Supplies:

  • Sunlight
  • Toys or objects around your house
  • Sidewalk chalk
  • Sidewalk space
  • Flashlight
  • Paper
  • Coloring utensils

Instructions:

Natural Light Shadows

  1. During a sunny day, find space on the sidewalk to which you can draw with chalk or use paper and coloring utensils.
  2. Place a household object or a toy on the sidewalk and check out the shadow that is created. Move your object around and observe how the shadow changes.
  3. Find a spot where you will leave your object all day. Draw the shadow the object on your canvas. Check back every 30 minutes or hour to trace the shadow at that time without moving your object.
  4. At the end of the day before the sun goes down, pick up your object and see the different shadows that were created by one object over the course of the day!
  5. You can also experiment with the shadows of nearby trees or even family member.

Artificial Light Shadows

  1. After the sun sets and there is not more sunlight, you can create your own light and shadows using a flashlight or lamp.
  2. Turn off indoor house lights and direct the flashlight onto a bare wall or ceiling.
  3. Using your hands to form different shapes, you can create different shadow images onto the wall. Test out these different hand shapes or create your own shadow puppet shows.
  4. Try taping a piece of paper onto the wall, and draw the silhouette of a family member.
  5. Discover what happens when you bring objects closer to the flashlight, what about further away? How does the shadow change?

Want to download these directions? Click here for a handy PDF!

Follow along with our Daily Discovery! Click here for all activities that you can do at home.

Image Credit: Rookieparenting.com


Traducido por Károl de Rueda y Laura Vilaret-Tuma.

Descubrimiento en casa: Sombras y siluetas!

La relación entre la oscuridad y la luz es muy simple. Las sombras están por todas partes, y algunas veces, ¡hasta nosotros también las proyectamos! Vamos a explorar la luz natural durante el día y la luz artificial por la noche para experimentar cómo se forman las sombras y cómo se cambian las siluetas.

Artículos necesarios:

  • Luz natural
  • Juguetes/objetos que tengas en casa
  • Una acera o banqueta
  • Tiza o gis para la acera y/o utensilios para colorear
  • Una linterna o lámpara eléctrica portable
  • Papel

Instrucciones:

Para formar sombras en la luz natural

  1. Durante un día soleado, busca un sitio en una acera o banqueta donde puedas colorear con tiza o usar papel y utensilios para colorear.
  2. Pon algún objeto o juguete sobre la acera y mira la sombra que forma. Mueve y gira tu objeto para observar cómo esta cambia.
  3. Busca un lugar donde puedas dejar tu objeto todo el día, y colócalo encima de una hoja de papel. Dibuja su silueta sobre este, y regresa cada treinta minutos o cada hora para trazar una nueva silueta en ese tiempo sin mover tu objeto.
  4. Antes del anochecer, recoge tu objeto y observa la evolución de las sombras que dibujaste durante el curso del día.
  5. ¡También puedes experimentar con las siluetas o sombras de los árboles alrededor, o hasta con algún miembro de tu familia!

Para formar siluetas usando luz artificial

  1. Después del ocaso y cuando ya no haya más luz natural, podrás crear tu propia luz artificial usando una lámpara o linterna.
  2. Apaga las luces de un cuarto y enciende la lámpara dirigiéndola hacia una pared o hacia el techo.
  3. Crea diferentes formas con tus manos y colócalas al frente de la lámpara para hacer diferentes imágenes. Más abajo te damos algunas ideas para crear personajes ¡y organizar tu propio espectáculo de sombras!
  4. También podrías pegar un papel blanco sobre la pared y trazar la silueta de un miembro de tu familia.
  5. ¿Qué pasa cuando acercas o alejas tus manos de la fuente de luz? Descubre cómo cambian las sombras y siluetas, mientras te diviertes en familia.

¿Te gustaría descargar esta actividad? Haz clic aquí para obtener un archivo PDF.

Para encontrar actividades, ideas y mucho más descubrimiento en casa, ¡síguenos!

Educational opportunities like this are supported in part by Fort Fund.

Continue Reading

Daily Discovery: Singing Glass / Descubrimiento en casa: Copas musicales

Post written by Eisen Tamkun, Music Programming Lead.

Daily Discovery: Singing Glass

Wine glasses aren’t just for wine. Learn how to make them sing!

Supplies:

  • Wine glasses – the more the better (not all work – experiment to see which work best!)
  • Water
  • Tape
  • Pen

Instructions:

  1. Wash your hands to get any dirt off so they are squeaky clean.
  2. Fill the glass about half way with water.
  3. Take your pointer finger and dip it into the water; then with slight pressure, run your finger in a circular motion along the rim. If it feels too dry, just give you finger another dip!
  4. The key is maintaining the same amount of pressure as you move your finger along the rim. And pretty soon you will have a new musical talent! Just remember the three things needed to make that glass sing: moisture, pressure and glass type.
  5. Now that you have mastered making your glass sing, it’s time to start experimenting! Using the tape, mark where the water level is. Add or take away some water and listen to
    how the sound changes.

Nicely done! You have gained a new musical talent. Practice creating different tones with multiple glasses and water levels, and host a singing glass concert for you family!

Want to download these directions? Click here for a handy PDF!

Follow along with our Daily Discovery! Click here for all activities that you can do at home.


Traducido por Károl de Rueda y Laura Vilaret-Tuma.

Descubrimiento en casa: Copas musicales

Las copas de vino no se usan solamente para beber. ¡También pueden hacer música! Aprende cómo hacerlas sonar siguiendo unas instrucciones sencillas.

Artículos necesarios:

  •  Copas de vino vacías, mientras más, mejor. (Hay algunas copas que no suenan, así que primero prueba para ver cuáles sirven mejor para esta actividad)
  • Agua
  • Cinta adhesiva
  • Pluma

Instrucciones:

  1. Lávate las manos hasta que estén super limpias.
  2. Llena una copa con agua hasta la mitad.
  3. Mete la punta de tu dedo índice, sácalo del agua y después, con un poco de presión, mueve el mismo dedo en forma circular sobre el borde de la copa; esta debe emitir un tono musical. Si se siente un poco seco, simplemente moja tu dedo en el agua otra vez.
  4. La clave para mantener este sonido es el aplicar la misma cantidad de presión sobre el borde de la copa. ¡Ya estás adquiriendo una nueva habilidad musical! Solo recuerda los
    tres elementos para hace música con las copas: humedad, presión, y el tipo de copa que usas.
  5. Ahora que ya has hecho música, ¡es hora continuar el experimento! Llena otras copas con diferentes cantidades de agua y usando cinta adhesiva, marca el nivel del agua en cada una. Aplícales presión con tu dedo índice como aprendiste en esta actividad, y ¡observa cómo cambia el tono musical!

¡Bien hecho! Ya has ganado un nuevo talento musical. ¡Organiza un concierto de copas musicales para tu familia!

¿Te gustaría descargar esta actividad? Haz clic aquí para obtener un archivo PDF.

Para encontrar actividades, ideas y mucho más descubrimiento en casa, ¡síguenos!

Educational opportunities like this are supported in part by Bohemian.

Continue Reading

Daily Discovery: Engineering at Home – Bouncy Ball Challenge

Post written by Sierra Tamkun, Learning Experiences Manager. Adapted from EEK.

Daily Discovery: Engineering at Home – Bouncy Ball Challenge

Engineers often use things called “polymers” as part of their inventions. Though the word may sound unfamiliar, you interact with polymers every day! Plastic is a polymer that’s in everything from toys to toothbrushes. Engineers and scientists even use polymers in building spacecraft, and study how the environment of space effects these materials in different ways. Make your very own polymer, and then modify it to make the bounciest ball possible!

What are polymers?

Polymers are made from big molecules, but these big molecules are really many small molecules linked together in a pattern. Just like how a single braid is made of many strands of hair!

What makes polymers special?

The interesting thing about polymers is that you can change the big molecules by changing the small molecules. Just like changing a recipe makes a cookie taste differently, changing the ingredients can make a polymer behave differently.

Supplies:

  • 2 cups Borax
  • Corn Starch
  • Elmer’s glue
  • Warm Water
  • Measuring cups/spoons

Instructions:

  1. Begin by making a borax solution! Pour 2 tablespoons of warm water into a cup. Add 1/2 teaspoon of borax. Stir until the borax dissolves.
  2. To make your bouncy ball, pour 1 tablespoon of glue into the second cup.
  3. Add 1/2 teaspoon of the borax solution and 1 tablespoon of corn starch. DO NOT STIR for 15 seconds!
  4. Now stir! When it gets too difficult, pull the mixture out and begin kneading it! It’ll start off sticky, but soon you’ll have a bouncy ball. Tip: Unlike a regular bouncy ball, this can dry out, so make sure you store your ball in a plastic bag or container.
  5. Now it’s time to experiment with different types of polymers! Make 2 more bouncy balls. This time change the amount of one of the three ingredients (borax solution, corn starch, or glue).
  6. Time to test! Which ball bounces best? Use a ruler or tape measure to find out. Record your results in a chart like in the PDF!

Want to download these directions? Click here for a handy PDF!

Follow along with our Daily Discovery! Click here for all activities that you can do at home.

Continue Reading

Daily Discovery: May the Fourth Be With You!

Post written by Eisen Tamkun, Music Programming Lead

Daily Discovery: May the Fourth Be With You!

Do you have a favorite Star Wars sound? Maybe the yell of a Wookie, the hoots, tweets, and coos of R2D2, or even the sound of Vader breathing through his helmet. No matter what sound pops into your head Star Wars would not be the same without it.

Who do we have to thank for all of the amazing sounds we hear in the Star Wars Universe? Why, sound designers, of course! And the sound designer who is responsible for all the sounds in Star Wars is Ben Burtt. It was Burtt’s job to discover all the sounds we hear in Star Wars.

Want to test your Star Wars knowledge? Use the activity below to guess what sounds Burtt took from our world and used to build the amazing Star Wars Universe. Then, be a sound engineer and make your very own blaster sounds at home. May the Force be with you!

Make Your Own Star Wars Sounds

Supplies:

  • Metal Slinky or metal clothes hanger
  • String

Instructions:

  1. Take the metal slinky/clothes hanger and tie a 12 inch piece of string to it.
  2. Wrap the string around one finger and let the slinky/hanger dangle on the end.
  3. Place the finger with the string wrapped around it it your ear and listen.
  4. And Viola! Can you hear laser blaster firing? Try knocking the hanger against another object. How does the sound change?

Want to download these directions? Click here for a handy PDF!

Follow along with our Daily Discovery! Click here for all activities that you can do at home.

Continue Reading

The Neuroscience of Discovery

Post written by Jenny Hannifin, Archive Assistant.

The Neuroscience of Discovery

Last year we posted Problem-Solvers or Rocket Scientists? Same Difference, a blog that explored the nature of learning in informal settings. It explained how children and adults are constantly navigating “an ecosystem of learning opportunities, interconnected experiences that interact with and influence one another.”

A book about neuroscience published this year – The Brain in Context: A Pragmatic Guide to Neuroscience* – explains that the learning inherent in the act of discovery is not just a 21st century skill: it links directly to the neurobiology of our brain.

  • “Learning is our premium cognitive capability. The continued integration of skills … into frameworks of inquiry reflects our very nature …” (Moreno and Schulkin p 93)

Different brain regions are associated with different cognitive functions, most of which relate to the process of discovery: face recognition in the fusiform gyrus, the capacity for reflection on intentions in the angular gyrus, the consolidation of events into memory in the hippocampus and neocortex, working memory in the lateral prefrontal cortex, and memory extinction in the medial prefrontal cortex, to name just a few. Add in myelin interaction, glial cells, synaptic pruning, and environmental factors, and the result is a complex neural process much more nuanced than the outdated metaphor of “brain as computer.”

Our drive to discover –  the physical thrill we get from playing with, and learning from, ideas –is a form of appetite. We crave things. Neurotransmitters like dopamine, norepinephrine, serotonin and acetylcholine modulate our arousal states – things like alertness, cognitive and motor organization, even emotions.

  • “Scientific hypothesis might seem like deadly serious stuff, but underneath it all, it is a form of play. … Play with ideas, the drudgery of test and failure, the excitement when something works, and, even more importantly, reliable replication, are all common themes, even in children’s play.” (Moreno and Schulkin p 193).

How we as humans think and act and learn is a dance of decisions and behaviors, constraints of neural design, interaction and compatibility with the external environment.

Here at the museum we wholeheartedly believe that problem-solving is something anyone can do. Neuroscience tells us that not only is it something anyone can do – problem-solving is something we are wired to do.

*All quotes from The Brain in Context: A Pragmatic Guide to Neuroscience, by Jonathan P. Moreno and Jay Schulkin (Columbia University Press, 2020)

Continue Reading

Daily Discovery: What’s With Weather? – Wind

Post written by Heidi Fuhrman, Discovery Camp Coordinator.

Daily Discovery: What’s With Weather? – Wind

You’re on your way to becoming a junior meteorologist! Today we’re going to learn more about another ingredient for weather—wind! Learn what causes wind, why it’s important, how scientists learn about wind before doing your own experiment to see what’s blowing in your neighborhood, and building another tool for your weather station! (If you haven’t checked out “What’s With Weather: Forecast It!” you might start there first!)

Supplies:

For Wind Experiment

  • A few plastic lids
  • petroleum jelly
  • Yarn
  • Hole punch
  • Magnifying glass (optional)
  • A windy day!

For Anemometer:

  • 5 small dixie cups OR 1 egg carton
  • Scissors
  • Hole punch
  • Tape
  • 2 straws OR wooden dowels
  • 1 push pin
  • 1 pencil (with eraser)
  • Electric fan (optional)

What’s With Wind?

We’ve already learned that weather is the mix of events that happen each day in our atmosphere. We know that there are many different pieces that make up weather, but temperature, atmospheric pressure, wind, humidity, precipitation, and cloudiness are especially important! We’ve also learned that meteorologists are
scientists who study and forecast—predict—the weather and learned about some of the tools they use to make accurate forecasts! [TIP: If you haven’t tried out “What’s With Weather: Forecast It!, you might want to try that Discovery at Home first!]

Today we’re going to learn about one of those important pieces for weather—wind!

Wind is air in motion, but what causes it? The Sun’s rays heat up Earth’s surface and its atmosphere. . .but don’t heat it all evenly. Some parts of Earth’s surface warm quicker. Warm air weighs less than cold air, so the warm air rises up and it is replaced by cool air. This movement—caused by uneven heating—is wind! If you remember from What’s With Weather: Forecast It!, our weather is also caused by differences in atmospheric pressure (remember, that’s what we measure with our barometer). Atmospheric pressure is also a part of wind! Warmer air is usually found in low pressure systems (L on our weather maps!) and cold air is usually found in high pressure systems (H on our weather maps) so wind usually blows from high pressure to low pressure systems! Land formations can also affect wind. Mountains, valleys, lakes, and deserts will all change how the atmosphere warms and can funnel how wind blows. Humans can also impact wind! Skyscrapers and other all buildings close together can impact air pressure and funnel wind between them!

But the land doesn’t just shape wind, wind shapes the land! Over
time wind can cause erosion and even quickly change landscapes,
such as sand dunes! You can experience this yourself if you ever
visit Colorado’s Great Sand Dunes National Park!

Your Turn

Now that you know a bit about wind it’s your turn to track information about wind in your neighborhood! Conduct an experiment to see what’s blowing around your house and add your own anemometer to your meteorologist tool kit!

Experiment: What’s In The Wind?

Wind transports all sorts of things around the world—precipitation, pollution, pollen and more! You can see some of what is blowing through your neighborhood! Set up this experiment to discover what’s in the wind!

Instructions:

  1. Gather your supplies! You’ll need some plastic lids, a hole punch, scissors, string, and petroleum jelly.
  2. . Punch a hole near the edge of all your lids and tie a string through the hole to create a hanger.
  3. Cover both sides of your lids with petroleum jelly…careful this can get messy!
  4. Hang your lids in different locations around your yard on a windy or breezy day. Hypothesize: What do you think will get caught on your lid?
  5. Leave your lids outside for a few hours to collect whatever’s blowing in the wind. Then bring them inside. Place them on a paper towel or cookie sheet and observe!

Observe

Observe with your eyes.
• What got caught to your wind sample tools?
• Do you see anything that surprises you?
• Does it match your hypothesis?
Get out your magnifying glass.
• Do you see anything you didn’t notice with your plain eyes?
• What does this tell you about what’s blowing through your neighborhood?

This tool can’t catch everything that the wind might be carrying. It’s hard to catch things like smoke or pollution or precipitation, but you might see dust, leaves, seeds, maybe even insects or pollen!

Make Your Own Anemometer

Meteorologists and other scientists use a tool called an anemometer to measure wind speed. While tools like windsocks and  weathervanes can tell us which direction the wind is blowing, anemometers can help us measure the velocity of the wind too and help us make better forecasts and see if wind speeds might cause damage. Add your anemometer to the weather station you might have built from “What’s With Weather: Forecast It!”

  1. Gather your supplies! You’ll need tape, a push pin, scissors, a hole punch, a pencil, two straws (or wooden dowels) and five small dixie cups…if you don’t have cups on
    hand (like us!) you can use an egg crate instead!
  2. If you’re using an egg carton instead of small cups, start by cutting off the four corners of the carton and one other carton piece. These will serve as your
    cups! (If you have cups skip to step 3).
  3. Lay out four cups/carton pieces in this pattern and punch a hole on the inside side of each cup/piece.
  4. With your last cup/piece poke a hole in the bottom. Add holes on all four sides (you may only need to punch one hole in your carton piece.)
  5. Push your straws through the holes middle cup/piece to form an X. If you have a carton piece you may be able to cradle the X in the spaces. Poke the ends of the straws through your 4 outside cups/pieces. You may need to secure them together with tape or glue.
  6. Poke your pencil (eraser side up!) through the bottom hole, using a push pin, secure through the two straws into the eraser. Your anemometer is now complete!
  7. Make sure all four cups/pieces are facing in the same direction! Your pencil will also need to spin freely, so it is best to simply hold it between your fingers, however, you can also try weighting a bottle with sand or rocks and placing your pencil inside to create a stand.

Calibrate & Observe:
Hold the pencil between your fingers in a windy place (you can also use a fan indoors). What happens? Why does the anemometer spin? Why does it spin only one direction? What will happen if you set the fan to a higher speed or the wind blows stronger?

Want to download these directions? Click here for a handy PDF!

Follow along with our Daily Discovery! Click here for all activities that you can do at home.

Continue Reading

Making History Come Alive

Post written by Emily Smith, Archive Intern Spring 2020.

Making History Come Alive

At the beginning of the semester I started out physically in the Archive processing a new collection sent in from a genealogist who had ties to the area. In the procession of the collection of documents I learned the collection had connections to the Mason Family, as well as Northern Colorado in general dealing with documents from local Colorado archives as well as original Homestead application documents from the National Archive.

Nearing the end of that – there was the closure of the museum which consequently changed the way we were able to work in the Archive. To continue working from home I was unfortunately unable to continue my work on the collection, however, it gave me more exposure to new and different things the Archive does! Now working from home, I have helped with the transcribing of the Mary Hottel journal as well as, successfully transcribed one Oral History interview and I am now starting on a new Oral History to transcribe. While things have been drastically changing it has always been nice to go back to the Archive work as it is always engaging and interesting, while also understanding how many people in the community this will help in the future!

Thank YOU, Emily, for being an awesome FCMoD intern! We so appreciate your hard work and our community is grateful for the work you’ve done to make local history accessible to all.

Interested in interning at FCMoD? Check out opportunities under the “Internships” section of this page.

Continue Reading