National Beer Day

Post written by Alex Ballou, Marketing Assistant.

National Beer Day

It’s #NationalBeerDay and there is no better place to celebrate this holiday than our home – Fort Collins, Colorado!

History of National Beer Day

National Beer Day is celebrated annually on April 7. This day marks the signing of the Cullen-Harrison Act. The signing of this act led to the 18th Amendment being repealed, with ratification of the 21st Amendment to the constitution. This enactment took the first step toward ending the prohibition. Beer drinkers rejoiced as they were able to purchase beer again for the first time in 13 years!

Beer is now the world’s most widely consumed alcoholic beverage. Following water and tea, it is the third most popular drink overall. This was not a “sour” move to make!

Fun fact: April 6, the day before National Beer Day, is also known as, New Beer’s Eve.

Local Beer History

Fort Collins is sometimes referred to as the “Napa Valley of Beer.” Although alcohol arrived with the first settlers in Fort Collins, prohibition hindered the growth of the industry until 1969.

In 1980, the large beer company, Anheuser Busch, made a bid to open a brewery in the city. It took 8 years to get the city on board for the first brewery in Fort Collins. The plant began construction in 1988. In 1990, Doug Odell opened Odell Brewery Co. Soon after, New Belgium opened in 1991. Other breweries opened soon after these leaders in the industry. Fort Collins was one of the first to latch onto the craft beer movement. By 2010, a new generation of breweries, like Funkwerks & Equinox Brewing, emerged. According to Visit Fort Collins, the city is now home to over 20 local craft breweries!

The craft beer industry, with its emphasis on local breweries, plays a vital role in the communities economy and culture, this goes hand in hand with the outdoor recreation that is popular in Colorado.

How YOU can celebrate!

Celebrate today with a pint of your favorite local brew. Even if you are stuck at home, no worries! You can order beer from your favorite breweries in Fort Collins (please check the preferred brewery website for updated hours and delivery options).

Cheers! ?

Continue Reading

Daily Discovery: Egg Carton Art / Descubrimiento en casa: Arte hecho con cartón de huevos

Post written by Lea Mikkelsen, Early Childhood Coordinator.

Daily Discovery: Egg Carton Art

Save that egg carton! It can be upcycled and turned into so many amazing things. You can cut it, glue it, build with it, paint it, use it to hold small loose things like beads or pretty rocks. There are endless possibilities!

This activity will show you how to cut apart an egg carton to make upcycled flowers. Share your egg carton creations with #DailyDiscovery!

Supplies:

  • Egg carton(s)
  • Scissors
  • Optional: Glue, decorative paper, paint, paintbrush

Instructions:

  1. Ask an adult to help you cut out the center pointy pieces of the egg carton. Be sure to leave plenty of the “petals” on them.
  2. Use the scissors to cut out the petals of the flower. Try cutting them in different shapes!
  3. Cut a long sturdy stem piece with a little tab on one end from a flat part of the egg carton.
  4. Make a hole in the base of the flower and thread your stem through the hole with the tab resting inside the flower. That will keep the stem from sliding out of the flower. Optional: use glue to keep the stem in the flower.
  5. Use paint (if you have some) to decorate your flowers. Be creative! You can also use paper to make leaves or more petals on the flower. Let the flowers dry and then pop them in a vase to bring cheer!

Want to download these directions? Click here for a handy PDF!

Follow along with our Daily Discovery! Click here for all activities that you can do at home.


Traducido por Károl de Rueda y Laura Vilaret-Tuma.

Descubrimiento en casa: Arte hecho con cartón de huevos

¡No tires ese cartón de huevos vacío! Se puede reciclar y, con tu imaginación, ¡volverse en algo maravilloso! Puedes cortarlo, pegarlo, pintarlo, construir algo con él o usarlo para contener cosas
pequeñas como tus piedras favoritas. ¡Las posibilidades son infinitas!

Esta actividad te enseñará cómo cortar un cartón de huevos para hacer flores recicladas. ¡Comparte tu creación a través de las redes sociales usando la etiqueta #Descubrimientoencasa!

Artículos necesarios:

  • Cartón de huevos
  • Tijeras
  • Opcional: pegamento, algún tipo de papel decorativo,
    papel blanco, pinturas, brocha

Instrucciones:

  1. Pídele a un adulto que te ayude a cortar las partes más puntiagudas del centro del cartón de huevos. Asegúrate de dejar bastante espacio alrededor para formar los “pétalos.”
  2. Usando las tijeras, corta los bordes de cada flor para hacer estos pétalos. ¡Prueba cortándolos en diferentes formas!
  3. Corta un tallo largo y fuerte para cada flor usando una parte plana del cartón.
  4. Haz un hueco en la base de la flor, mete el tallo y dóblalo dentro para asegurarte que no se mueva. Opcional: usa un poco de pegamento para adherir el tallo a la flor.
  5. Si quieres, utiliza pinturas para decorar tus flores. Si las pintas, deja que las flores se sequen completamente. ¡Usa tu creatividad! Con papel decorativo podrías construir hojas o pétalos adicionales. ¡Ponlas en un florero para traer alegría a tu casa!

¿Te gustaría descargar esta actividad? Haz clic aquí para obtener un archivo PDF.

Para encontrar actividades, ideas y mucho más descubrimiento en casa, ¡síguenos!

Image credit: Thinkery Austin

Continue Reading

Daily Discovery: Wild Ones Engineering Challenge

Post written by Lea Mikkelsen, Early Childhood Coordinator.

Daily Discovery: Wild Ones Engineering Challenge

Follow along with FCMoD’s live stream Storytime in the Home: Wild Ones: Observing City Critters. Then take a walk in your  neighborhood. Use your observation skills to keep an eye out for signs of wild animals in your area. Think about how animals must adapt to living in our city. Can you design and build a safe way for animals to cross busy streets? Try this engineering challenge with items you have at home!

Supplies:

  • Building supplies (Try anything you have at home like blocks, LEGO, popsicle sticks, playdoh, cardboard,
    etc! The possibilities are endless!)
  • Piece of paper
  • Something to write and draw with

Instructions:

  1. Identify your user. This is the animal who will benefit from your design. It can be any animal you want. Maybe it is a dog like Scooter from the book! Or maybe it is a squirrel or a deer! The animal’s goal is to cross a busy street safely. Think about what this animal needs. How do they move? What do they like and dislike? What are some of the obstacles they face in meeting their goals?
  2. Sketch out your design on paper. Identify 3 ways your design will help the animal cross the street.
  3. Place all your building supplies on a clear surface with plenty of room to create.
  4. Draw a busy road on a piece of paper.
  5. Try to build your design with the materials you chose. Can your design help your animal cross the road safely? How might you change the design to make it better?
  6. Share your project with us on social media using #dailydiscovery
  7. Check out all the other amazing activities you can download that go with the Wild Ones book, like making dog bones at home!

Want to download these directions? Click here for a handy PDF!

Follow along with our Daily Discovery! Click here for all activities that you can do at home.

Educational opportunities like this are supported in part by Buell Foundation. Their support helps make access to early childhood education at FCMoD possible for everyone in our community.

Continue Reading

Daily Discovery: Be a Noise Control Engineer – Quiet that Phone!

Post written by Eisen Tamkun, Music Education Lead.

Daily Discovery: Be a Noise Control Engineer – Quiet that Phone!

Pollution. We often hear about the different kinds, from air and water to light pollution. But have you ever heard of sound pollution? Sound pollution can have harmful effects on both our health and the environment. It is the job of Noise Control Engineers to design and test noise insulation technologies and sound-adsorbent materials to help limit the harmful impacts of noise and sound pollution. Try your own hand at being a Noise Control Engineer and quiet that phone!

Supplies:

  • Smart Phone
  • Box or container large enough to hold phone and surrounding
    materials
  • Materials- A variety of should be gathered. Start with clothes, plastic bags, bubble wrap, blankets, rain jackets, and anything else that comes to mind
  • Song to play during testing
  • Pen and paper for recording

Instructions:

  1.  Once you have gathered a variety of materials it is time to begin! Start by picking only one kind of material such as t-shirts.
  2. Begin playing that rocking song you chose.
  3. Next, surround the phone with the t-shirts and place it in your container. Try to have the phone be positioned in the very center of the box with equal amount of t-shirt material on all sides. If the phone is touching one side of the container the whole experiment is off.
  4. Close the lid and listen. Did the music get quieter or not? Go ahead and record with your pen and paper the material you used (t-shirts) and how successful it was in quieting the phone on a scale of 1-10. 10 being you can’t hear the music at all and 1 being no change in sound level.
  5. Chose another material and repeat steps 1-4.
  6. Repeat step 5.
  7.  Repeat step 5 again.
  8. Now instead of using only one kind of material switch it up and try combining the materials together. Perhaps both t-shirts and plastic bags or bubble wrap and rain jackets. The possibilities are endless! Just don’t forget to record your results.
  9. Once you are finished testing each materials and combinations of materials got back and check out your recordings. Which material did the best in canceling out noise? Why do you think that is? What other materials do you think might work better? These are questions Noise Control Engineers ask themselves.

Want to download these directions? Click here for a handy PDF!

Follow along with our Daily Discovery! Click here for all activities that you can do at home.

Continue Reading

Daily Discovery: Celebrating Día del Niño! / Descubrimiento en casa: ¡Celebrando Día del Niño!

Post written by Károl de Rueda, Graphic Designer.

Daily Discovery: Celebrating Día del Niño!

Día del Niño, or Children’s Day, is an annual celebration that takes place in many nations throughout the world. In Mexico, it’s held on April 30 as a very special festivity full of fun activities, treats and laughter, while honoring and paying tribute to all children, their hopes, well-being and dreams. How can you celebrate such a special day? We have fun ideas; make some or discover them all. Plus, treat yourself with homemade popsicles, recipe included!

Fun ideas:

  • Crafts. Use your creative side and make your favorite crafts. Do you need ideas? The museum has many at Daily Discovery.
  • Your favorite treat. Cooking together as a family can be a lot of fun!
  • Board games. What about chess, la lotería game or a puzzle? They are very entertaining!
  • Hide and seek… a treasure. This is a big favorite! You could hide a “treasure” instead around the house, give away some clues and see who can find it first.
  • Family theater. What’s your favorite story or book? You could perform a play at home, with handy costumes included of course!
  • Storytelling. Ask adults to tell you stories from when they were little. You could even draw these stories to make a personalized, homemade beautiful picture book.
  • Virtual party with your family and friends. These days it’s very common to “meet” with others through the internet. Reaching out to your favorite people at the same time over a screen can be a fun experience! You could even exchange some tongue twisters or riddles with your loved ones.
  • Cinema at home. How about making a list of your favorite movies, drawing and coloring their posters, arranging comfortable cushions and blankets and making popcorn or some other snack? Don’t forget to design your own entrance tickets!
  • Make some delicious fruit popsicles. Recipe included below!

Fruit Popsicles

Did you know that the very first popsicle out there was made by accident by an 11-year-old? Young Frank Epperson didn’t set out to create a treat that would keep us happy and cool for generations to come. He simply left his cup of soda with the stirring stick out on the porch in a cold night. The next day, he found a piece of flavored ice and the rest is history! By the way, did you also know that there are 16 types of ice? The most common is the one you have in the freezer, which is type IV. Another interesting fact is that water, when frozen under normal conditions, increases its volume by almost 10 percent, so if we fill a bottle of water and freeze it, it can break! Let’s enjoy this special and warm day with some fruit popsicles! They are very easy to make and you could use handy ingredients.

Supplies:

  • Water
  • Fruit, fresh or frozen
  • Sugar
  • Plastic container or disposable cup
  • Wooden sticks or plastic spoons
  • Optional: Juice

Instructions:

With the help of an adult, blend the fruit with some water and sugar to taste. It can be any type of fruit; strawberries, blueberries, tangerines, lemons, be creative! You could also use some fruit juice instead. Place the mixture in a plastic container or disposable cups. Remember not to fill them up because liquids expand when frozen. Insert the wooden stick or plastic spoon in the center and carefully place them in the freezer. After a few hours, and once the mixture has turned into ice, remove your popsicles from their container with the help of some warm water.

Enjoy your very own delicious fruit popsicles and ¡feliz Día del Niño!

Want to download these directions? Click here for a handy PDF!

Follow along with our Daily Discovery! Click here for all activities that you can do at home.


Traducido por Károl de Rueda.

Descubrimiento en casa: ¡Celebrando Día del Niño!

El Día del Niño es una celebración anual que se lleva a cabo en muchos lugares del mundo. En México, se celebra cada 30 de abril y es un festejo mágico lleno de actividades divertidas y de muchas carcajadas, mientras se les rinde tributo a todos los niños, a su bienestar, a su felicidad y a sus sueños. ¿Qué puedes hacer durante este día tan especial? Hemos creado una lista de ideas con actividades divertidas. ¡Haz alguna o descubre todas! Además, es el día perfecto para disfrutar de unas deliciosas paletas de fruta caseras, ¡receta incluida!

Ideas divertidas:

  • Manualidades. Utiliza tu lado creativo y haz algunas de tus manualidades favoritas con objetos que encuentres en casa. ¿Necesitas ideas? El museo tiene muchas en Descubrimiento en casa.
  • Tu comida favorita. Ayuda a preparar alguno de tus platillos favoritos. ¡Cocinar en familia puede ser muy divertido!
  • Juegos de mesa. ¿Tienes ajedrez, el juego de la lotería o un rompecabezas? Son muy entretenidos.
  • Las escondidas. ¡Uno de los juegos favoritos de todos! ¿Qué tal si en lugar de esconderte tú, esconden algún “tesoro” y juegan a ver quién lo puede encontrar más rápido?
  • Obra de teatro familiar. ¿Cuál es tu cuento o libro favorito? Lleva a cabo una obra de teatro en casa ¡con todo y disfraces!
  • Cuentacuentos. Pídeles a los mayores que te cuenten historias de cuando ellos estaban pequeños. Puedes intentar dibujarlas y hasta hacer tu propio libro familiar ilustrado.
  • Fiesta virtual con tus familiares y amigos. En estos días, es muy común “reunirse” con los demás por medio del internet. Llamarles a tus personas favoritas al mismo tiempo puede ser muy divertido. ¡Pueden contar adivinanzas o descifrar trabalenguas juntos!
  • Día de payasos. Haz una fiesta en casa disfrazándote de payaso y haz reír a todos.
  • Cine en casa. ¿Qué tal si haces una lista con tus películas favoritas, dibujas y coloreas sus carteles, acomodas cojines y cobijas cómodas y preparan palomitas de maíz o alguna otra botana? No se te olvide diseñar tus propios boletos de entrada.
  • Prepara unas deliciosas paletas de frutas. ¡Nosotros te damos la receta!

Paletas de frutas

¿Sabías que la primera paleta de hielo fue hecha por accidente, y por un niño de solo 11 años? El joven Frank Epperson no estaba pensando en inventar un postre que nos mantuviera felices y frescos. Simplemente olvidó su vaso con refresco en el porche durante una noche fría. Al día siguiente, lo encontró convertido en hielo con sabor dulce y ¡el resto es historia! Y hablando de hielo, ¿sabías que en el mundo existen 16 tipos de este en total? El más común es el hielo que tienes en el congelador, que es el tipo IV. ¡Increíble! Otro dato interesante es que el agua, al congelarse en condiciones normales, aumenta su volumen casi un 10%, por eso, si llenamos una botella de agua y la congelamos, se puede romper.

Ahora a disfrutar de este día especial y caluroso ¡con unas deliciosas paletas de frutas! Es muy fácil prepararlas, y se pueden hacer con ingredientes que ya tengas en casa.

Artículos necesarios:

  • Agua
  • Algún tipo de fruta fresca o congelada
  • Azúcar
  • Contenedor, molde o vaso de plástico
  • Palitos de madera o cucharas plásticas
  • Opcional: Jugo de fruta

Instrucciones:

Con ayuda de algún mayor, licúa la fruta con un poco de agua y azúcar al gusto. Puede ser de cualquier tipo; fresas, moras, mandarinas, limones, etc. También podrías utilizar jugos.
Coloca la mezcla en algún contenedor de plástico o en vasos desechables. Recuerda de no llenarlos porque los líquidos se expanden al congelarse, y tampoco uses vidrio porque este se podría romper con el frío. Inserta el palito de madera o cuchara de plástico en el centro, cuidando que no se mueva, y colócalos en el congelador. Al cabo de unas cuantas horas, asegúrate que toda la mezcla se haya convertido en hielo. Para sacarlas de su contenedor, ponlas dentro de un recipiente con agua tibia por unos segundos. ¡Y listo!

Otras opciones: Paletas de avena, de arroz con leche, de fresas con crema, rellenas de lechera, de mango con chile, de yogur, de agua de coco, etc. Usa tu creatividad, hay muchos sabores por explorar.

Disfruta de unas deliciosas paletas de fruta en un día tan especial, diviértete mucho ¡y feliz Día del Niño!

¿Te gustaría descargar esta actividad? Haz clic aquí para obtener un archivo PDF.

Para encontrar actividades, ideas y mucho más descubrimiento en casa, ¡síguenos!

Continue Reading

Daily Discovery: Simple Machines – Engineering Challenge!

Post written by Hannah Curtis, Education Assistant.

Daily Discovery: Simple Machines – Engineering Challenge!

How can one person easily lift a 500 lbs. piano? We have the how and why behind the simple machines that help you do just that! Think like a mechanical engineer to create a design concept, build and test your own machines, and see what you can lift at home!

Mechanical Engineering and Simple Machines:
Mechanical engineering combines physics, material sciences, and mathematical principles to design, build and maintain machines and tools that help make our world move and improve the conditions the life.

Subdisciplines of mechanical engineering:
1. Mechanical Manufacturing Engineering: These engineers have the important job of understanding, and improving, product quality of complex industrial and infrastructure systems.
2. Mechatronic Engineering: These engineers create robot-type smart machines that can make their own decisions and be conscious of their surroundings.

Mechanical engineers work with highly complex systems and machinery, but can often involve simple machines in what they do. Simple machines have a few working parts that provide a mechanical advantage to make aspects of our lives easier. These include the wheel and axel, levers, pulleys, or an inclined plane.

How do they work?

A lever is a rigid bar resting on a pivot, used to help move a heavy
load with one end when pressure is applied to the other. There are three classes of levers, and we see examples of all in everyday objects!

A pulley is a wheel and axel that guides or changes the direction of a rope, or reduce the force needed to move a load. Engineers can even use multiple pulleys to increase the mechanical advantage! There are three types of pulleys: fixed, moveable and compound. Each wheel rotates appropriately with the rope being pulled to reduce friction and increase mechanical advantage.

Supplies:

  • Cardboard
  • Writing utensils
  • Glue or tape
  • Random objects of varying weights
  • Paper tubes
  • String or yarn
  • Sticks and rocks
  • Wire coat hanger
  • Spools

Instructions:

  1. Find something in your house that you want to use as your load (an object to lift) this could be heavy or light.
  2. Use what you now know about simple machines, and engineer a way to move or lift your object effectively.
  3. Continue your research into other simple machines to assist in your design concept. Will you use pulleys, levers, wheels and axels, wedges, or maybe a combination?

Want to download these directions? Click here for a handy PDF!

Follow along with our Daily Discovery! Click here for all activities that you can do at home.

Continue Reading

Daily Discovery: Rocket Power – Engineering Challenge

Post written by Charlotte Conway, Public Programs Coordinator.

Daily Discovery: Rocket Power – Engineering Challenge

Engineers design rockets that can leave our planet and travel through space! But how do they build spacecraft that can fly there? Through this balloon rocket demonstration, see firsthand how a jet engine works to propel rockets into outer space!

Supplies:

  • Balloon
  • String (fishing string or a fine, smooth string is preferred)
  • Drinking straw
  • 2 supports to tie your string to – Chairs, a railing, and/or door knob work (make sure they are level in height)
  • Tape or glue dots
  • Tape measure or ruler
  • Pencil
  • Paper
  • Colored pencils (optional)
  • Clothespin or binder clip (optional)

Instructions:

  1. To demonstrate how a rocket moves, you are going to make a balloon rocket. The balloon rocket is propelled, or caused to move, by the air rushing out the end. Think of the balloon as your rocket’s engine, or propulsion system, and the air inside as your jet fuel!
  2. Begin with your straw. Straight drinking straws work best the best, but if you have a bendy straw, cut off the part that bends and keep the straightest segment.
  3. Now tie one end of the string to a chair, railing, or doorknob. This is where your balloon rocket will fly to. If you would like to, draw a picture of a planet you would like to visit and tape your drawing to the chair or railing.
  4. Thread the free end of the string through the straw. Tie the other end of the string to the other support (chair, railing, or doorknob).
  5. Blow up the balloon to its maximum capacity, being careful not to pop your balloon! Hold the end closed. Don’t tie your balloon shut. Keep it pinched closed with the help of a friend, or you can use a clothespin or binder clip to keep it closed.
  6. Attach the balloon to the straw using tape or glue dots.
  7. 3…2…1… Blast off! Let go of the balloon’s end and see how far it flies!
  8. Use your tape measure or ruler to measure how far your rocket traveled on the first launch. Print the table below, or draw the table on your own paper to track your results. Write down the distance traveled for each launch, making sure to write down how much ‘fuel’ (air) was inside your balloon and the launch number.
  9. Repeat steps 5-8 to launch your balloon two more times, for a total of three launches.
  10. Repeat steps 5-8, but on step 4, instead of blowing up the balloon to maximum capacity, blow the balloon up to ¾ air capacity and repeat the launch 3 times. Follow the same procedure to launch the balloon with ½ air capacity and again with ¼ air capacity.
  11. Compare the data from your launches. What conclusions can you draw from your data? Is the distance your balloon traveled related to how much air was in your balloon?

Want to download these directions? Click here for a handy PDF!

Follow along with our Daily Discovery! Click here for all activities that you can do at home.

Continue Reading

Daily Discovery: Engineering Challenge – Civil Engineers

Post written by Heidi Fuhrman, Discovery Camp Coordinator.

Daily Discovery: Engineering Challenge – Civil Engineers

You can live, work, learn, and travel thanks to the solutions of Civil Engineers all around you! Learn about what Civil Engineers do, go on a scavenger hunt to find their work in your own neighborhood or city, and put on your own Jr. Civil Engineering hat to see if your design can stand up to our Civil Engineering challenge!

Supplies:

  • Pencil & Paper
  • Ruler
  • Civil Engineering Scavenger Hunt Page (optional, included)
  • Assortment of noodles, toothpicks, mini-marshmallows, tape, string, sticks, recycled cardboard, index cards, foam, pipe cleaners, popsicle sticks—whatever you can find in your house or backyard!
  • Fan (optional)
  • Bucket of water (optional)
  • Pillow or extra cardboard and a few balls (optional)

What is Civil Engineering?

Have you ever driven on a road? Turned on the sink to get water? Traveled across a bridge or through a tunnel? Flushed your toilet? Swum in Horsetooth or another reservoir? Gone in a building? You can do all these things and more thanks to the work of Civil Engineers!

Civil Engineering is one of the many branches of engineering.* Civil Engineers are problem solvers who work specifically with infrastructure. They design roads, buildings, tunnels, bridges, dams, buildings, subways, and more—all the things that help us live, work, and travel! They also help design important systems you may not see, such as how to get water clean and into your house; where dirty water and sewage (the stuff that goes down your toilet!) go; and where to direct stormwater to keep your neighborhood or basement from flooding! Our cities wouldn’t be the same without Civil Engineers!

Your Turn!

Think: What kind of Civil Engineer would you want to be?
What are things you care about or enjoy? Animals, people, airplanes, cars, trains, building structures, traveling, taking care of our planet? Which type of Civil Engineer could work with the things you love? Think about what problems you want to solve? Which Civil Engineer could help you solve them? If you were a Civil Engineer how would you solve them?
Look: Find examples of Civil Engineering in your city or neighborhood. As you drive or walk around keep your eyes open! You can even use the scavenger hunt page included at the end! What do you find? A lot of examples? A few? What did you find that surprised you? Which examples would you like to learn more about?
Try: Do the activity below to become a Jr. Civil Engineer and see if your design can solve some of the problems and pass some of the tests real Civil Engineers have to deal with!

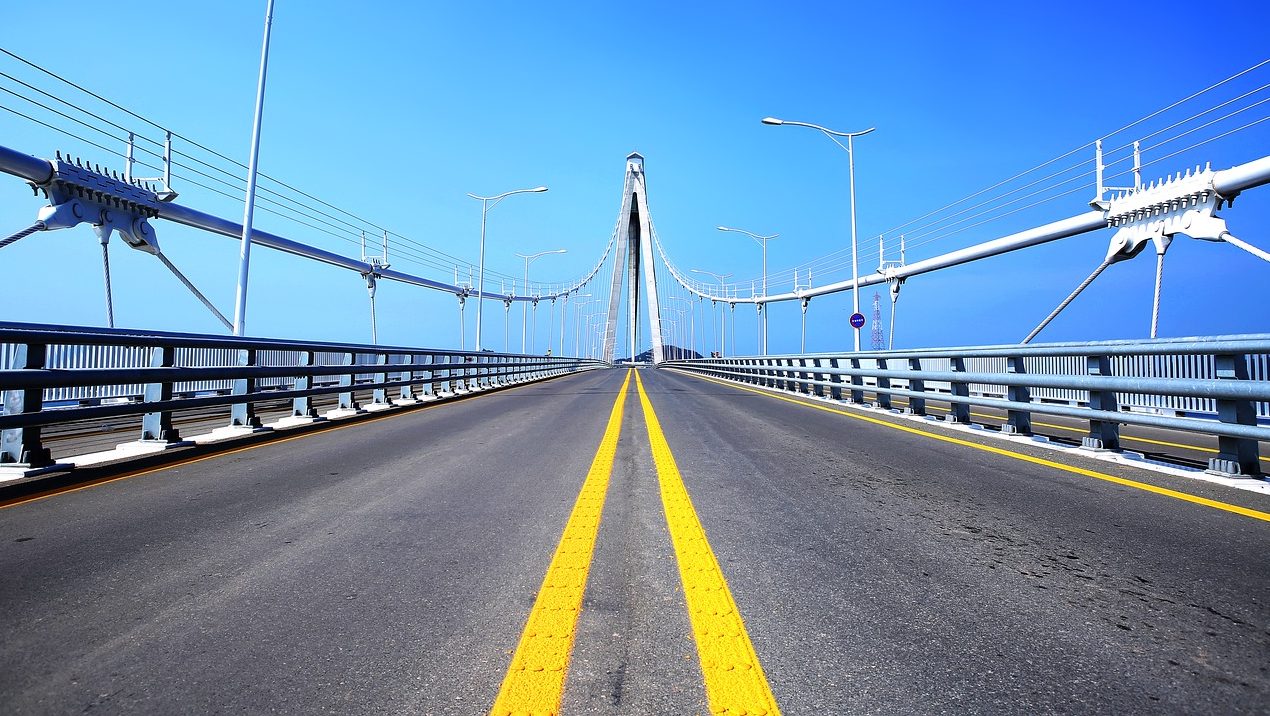
Create The Strongest Bridge:

One of the many things Civil Engineers design are bridges! And guess what? Every type of Civil Engineer you learned about earlier may be involved in bridge design and  construction! (Can you figure out how?)

Your challenge: Using your available materials, design a bridge that can span at least three inches. Your bridge will not only have to cross the divide, but also withstand testing—wind, earthquake, load, and possibly even flood testing—to make sure it is a safe design to be built and used by humans. Follow the steps below to get building!

  1. Engineers use something called the Engineering Design Process to come up with, design, and test possible solutions to problems. We’re going to use that to solve our problem today (see the whole process in the chart on the next page). First, we need to identify the problem or need. What is the problem or need we’re facing in this challenge?
  2. Next, gather your bridge building materials (noodles, toothpicks, mini-marshmallows, tape, string, sticks, recycled cardboard, index cards, foam, pipe cleaners, popsicle sticks— whatever you can find in your house or backyard!) Set them in front of you so you know what you’ve got to work with!
  3. The next steps of the Engineering Design Process are to imagine possible solutions and draw a plan. Think about how you might use the materials in front of you to solve the
    identified problem. Remember that your solution will need to withstand testing! It will need to bear weight, stand in the wind, and stand in an earthquake. Once you’ve got an
    idea grab paper and a pencil. Draw your idea and write some steps to your design (you can use the worksheet included at the end if you want!)
  4. Now that you’ve got a plan build your bridge! This is the fourth step of the Engineering Design Process; you’re creating a prototype! Level up: Don’t use tape or glue in your bridge design!

Time To Test:

Once you’ve got your bridge built it’s time to test it! Testing is the fifth step of the Engineering Design Process. It’s ok if you’re nervous to test your design (A NASA Engineer once told me that even they’re nervous to test their designs)! You put a lot of work into it, but testing is the only way we can be sure our designs will work and keep people safe. Even if your design fails you learn important information!

Load

1. The most important job of a bridge is to get people and vehicles from one place to another. But people and vehicles are heavy! A bridge must be able to withstand load (that’s the weight of the bridge itself and the weight of anything it might hold). Choose a heavy object (such as a can or book, you might choose this before construction so you know what your bridge will hold). Place it on your bridge. Can your bridge hold the weight? What about your design do you think helped its ability to hold weight. What hindered it?Did anything break or fall off? If it broke than your bridge isn’t safe enough for the real world yet! Level up: How much weight can your bridge hold?

Wind

1. Weather patterns can also be load on a bridge! Bridges need to be able to withstand a variety of weather conditions…including high wind! Place a fan a few feet from your bridge and turn it on. Can your bridge withstand the wind? Did anything break or fall off? If it broke than your bridge isn’t safe enough for the real world yet!
Level up: What wind speed can your bridge withstand (turn that fan on high!)

Earthquake!

1. Bridges also have to be able to withstand unexpected events such as earthquakes (thank you Earthquake Engineers)! To see if your bridge can withstand an earthquake place it on a moveable surface (such as a pillow or cookie sheet), tape it down, and give that surface a shake! Can your bridge withstand the earthquake? Did anything break or fall off? If it broke than your bridge isn’t safe enough for the real world yet! Level up: Build your very own shake table!

Flood!

1. For a final, fun test see how your bridge holds up in a flood (warning: this one could destroy your bridge)! You’ll want to place your bridge somewhere where a flood won’t cause other damage (such as on a porch or in a bathtub). Tape your bridge down, fill a bucket of water, and dump it downstream of your bridge. Did your bridge withstand the flood? Did anything break or fall off? If it broke than your bridge isn’t safe enough for the real world yet!

How did your bridge(s) hold up? Where did they fail? The final steps in the Engineering Design Process are improve and redesign, and repeat! How could you improve your bridge? If you designed again what would you change? Give your improvements a try! Did your bridge preform better this time?

Share It!
We’d love to see your bridges and any other Jr. Civil Engineering Projects you might try!

Want to download these directions? Click here for a handy PDF!

Follow along with our Daily Discovery! Click here for all activities that you can do at home.

Continue Reading

Daily Discovery: You’re an Engineer!

Post written by Sierra Tamkun, Learning Experiences Manager.

Daily Discovery: You’re an Engineer!

There are lots of different types of engineers, but their skills come from four key areas: chemical, civil, electrical, and mechanical engineering.
Chemical engineers use chemistry to solve problems! They help make food, medicine, fuel, and clean water.
Civil engineers keep cities and towns safe for people. They build bridges, buildings, systems that bring clean water to your home, and more!
Electrical engineers make things that use or make electricity. If it lights up or turns on, an electrical engineer made it.
Mechanical engineers build machines. If it moves, a mechanical engineer created it!

Many engineers use skills from more than one area; an aeronautical engineer works on rockets and planes (mechanical), the controls inside (electrical), and sometimes the chemicals used in different reactions (chemical). Explore the different ways chemical, civil, electrical, and mechanical engineering can be used, and find out what kind of engineer you are!

Supplies:

  • Paper
  • Colored pencils or markers
  • Engineer worksheet (attached)
  •  You Are an Engineer slides – online here

Instructions:

  1. Print off the attached worksheet, or use it as a guide to draw your own engineering grid!
  2. Follow the link above and look through the different activity slides! Answer the question on the front of each slide, and turn to the next page. You can read more about different types of engineers, what they do, and what questions they need to ask in their work. If needed, ask an adult to help you!
  3. Now that you’re looking through the activity slides, it’s time to fill out your worksheet! If you answer yes to a question on a slide, give yourself a point for each checked engineering box by coloring in a square above the corresponding branch of engineering on your worksheet.
  4. When you’ve read all the slides, count up your points on your worksheet. This tells you what type of engineer you are most like! Are you most like a civil engineer, mechanical engineer, chemical engineer, or electrical engineer?
  5. On the back of your worksheet, use the activity slides for inspiration and draw the type of engineer you are! What tools do you need? Where do you work? What engineering projects are you working on?

Want to download these directions? Click here for a handy PDF!

Follow along with our Daily Discovery! Click here for all activities that you can do at home.

Continue Reading

Arbor Day 2020

Post written by Alex Ballou, Marketing Assistant.

Arbor Day 2020

Every year Arbor Day is celebrated the last Friday in April. This Arbor Day we wanted to share 5 fun facts about trees that will ‘leaf’ you ‘stump’ed!

  • Did you know that the tallest tree is around the same size as the Statue of Liberty? According to the Guinness World Records, the tallest tree can be found in California’s Redwood Forest. Hyperion is a Sequoia tree that is 380 feet tall. Hyperion is estimated to be between 600 and 800 years old. The statue of liberty is 305 feet tall. Hyperion could overpower and shadow the Statue of Liberty in size!

  • According to the Guinness World Records, the oldest living individual tree is found in California’s White Mountain range and its name is the Methuselah. This tree is 4,845 years old! This bristle cone pine tree stands guard of the Mountain range today.

  • Trees drink up to 100 gallons of water a day – this is 200 times more than the average human drinks a day! That’s a ‘tree’mendous amount of water!

  • Trees can be used as natural compasses. If a tree has moss growing on it, that side is the north of the trunk because that side spends the most time in the shade. If  you are lost in a forest and there are any tree trunks around, the growth rings that are thicker are on the south because that side gets the most sun. Trees can direct you back to the path where you were rooted from!

  • The worlds largest tree in terms of sheer volume is a giant Sequoia named General Sherman. This tree could be the largest living thing on the planet. General Sherman is located in California’s Sequoia National park. The tree is a whopping 52,508 cubic feet in volume. You would need more than 15 people all connected to hug this tree’s trunk!

To find out more about our local effort as an annual Tree City, USA award recipient for over 40 years, find out more from The City of Fort Collins Forestry Division. This division maintains over 54,500 trees along streets and in parks, cemeteries, golf courses and other City facilities or property. They strive to sustain a safe, healthy and attractive urban forest through frequent and sound management practices.

Continue Reading