The Bias Inside Us Educator Toolkit

The Bias Inside Us Educator Toolkit is a free educational resource, which contains a set of posters, and an educators guide used for facilitating conversation, and is intended to be used in conjunction with The Bias Inside Us exhibit.

This resource will help facilitate conversations on the real-world impacts of bias. It contains discussion questions to spark dialogue, links to interactive activities on the online exhibition, and articles expanding on the research of bias.

Click through the link below for access to the toolkit:

TBIU Educator Guide

Additional information about The Bias Inside Us can be found on the online exhibition website.

Continue Reading

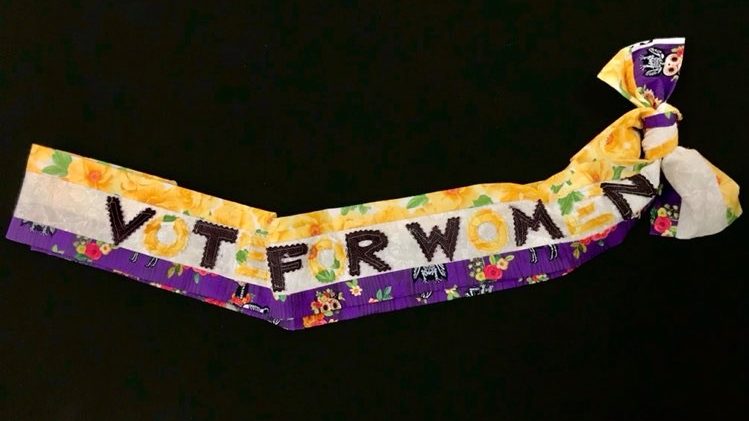
Your True Colors Suffragette Sash Project

Post written by Linda Moore, Curator of Collections

Sip and Stitch At-Home Edition: Your True Colors Suffragette Sash Project

Woman working to get the right to vote in the 19th and early 20th centuries faced a tricky problem: how could they influence the vote to get the vote without the vote? Savvy suffragettes recognized that optics matter, and set out to shape the images of their movement to convey its strength. At the same time, many activists felt they had to be careful to avoid any appearance that could be dismissed as emotionally unstable, hysterical, or even unwomanly.

The suffragette sash, which appeared first in Britain and was quickly adopted by the American suffragist movement, seemed to have walked that line, and stands out today as emblematic of the movement. Sashes bore the traditional colors of the American National Woman’s Party: purple for loyalty and unswerving steadfastness to a cause, white for purity, and gold as the color of light and life “as the torch that guides our purpose, pure and unswerving”.

Here is your chance to express you own “unswerving” devotion to the right to vote: use these instructions and your own creativity to create a sash you’ll be proud to wear!
Materials

To make stripes in the traditional white, purple, and gold you will need 2 strips of each that are the length you want your sash to stretch, from your shoulder across your body –from 34 to about 40 inches. If you are buying fabric by the yard, the most economical way to get that is to buy:

  • ¼ yard of each of the 3 colors

You’ll also need:

  • Thread
  • Sewing machine (or a good chunk of time for hand stitching)
  • An iron
  • Extra scraps of fabric and interfacing if you want to applique your message; you can also use embroidery, iron-on lettering, or fabric paint

 Instructions:

  1. Cut 2 2.5” wide strips of white fabric (or whatever you are using as the center band of your sash) and 2 3.5” wide strips of each of your colors.
  2. Putting the right sides of your fabrics together, sew one colored strip of fabric to each side of one white band, along the long edge, stitching ¼” from the edge. Repeat for the other set of strips. You should have 2 identical, long strips, with the white bands in the middle.
  3. Use an iron to press the seam allowance away from the center band.
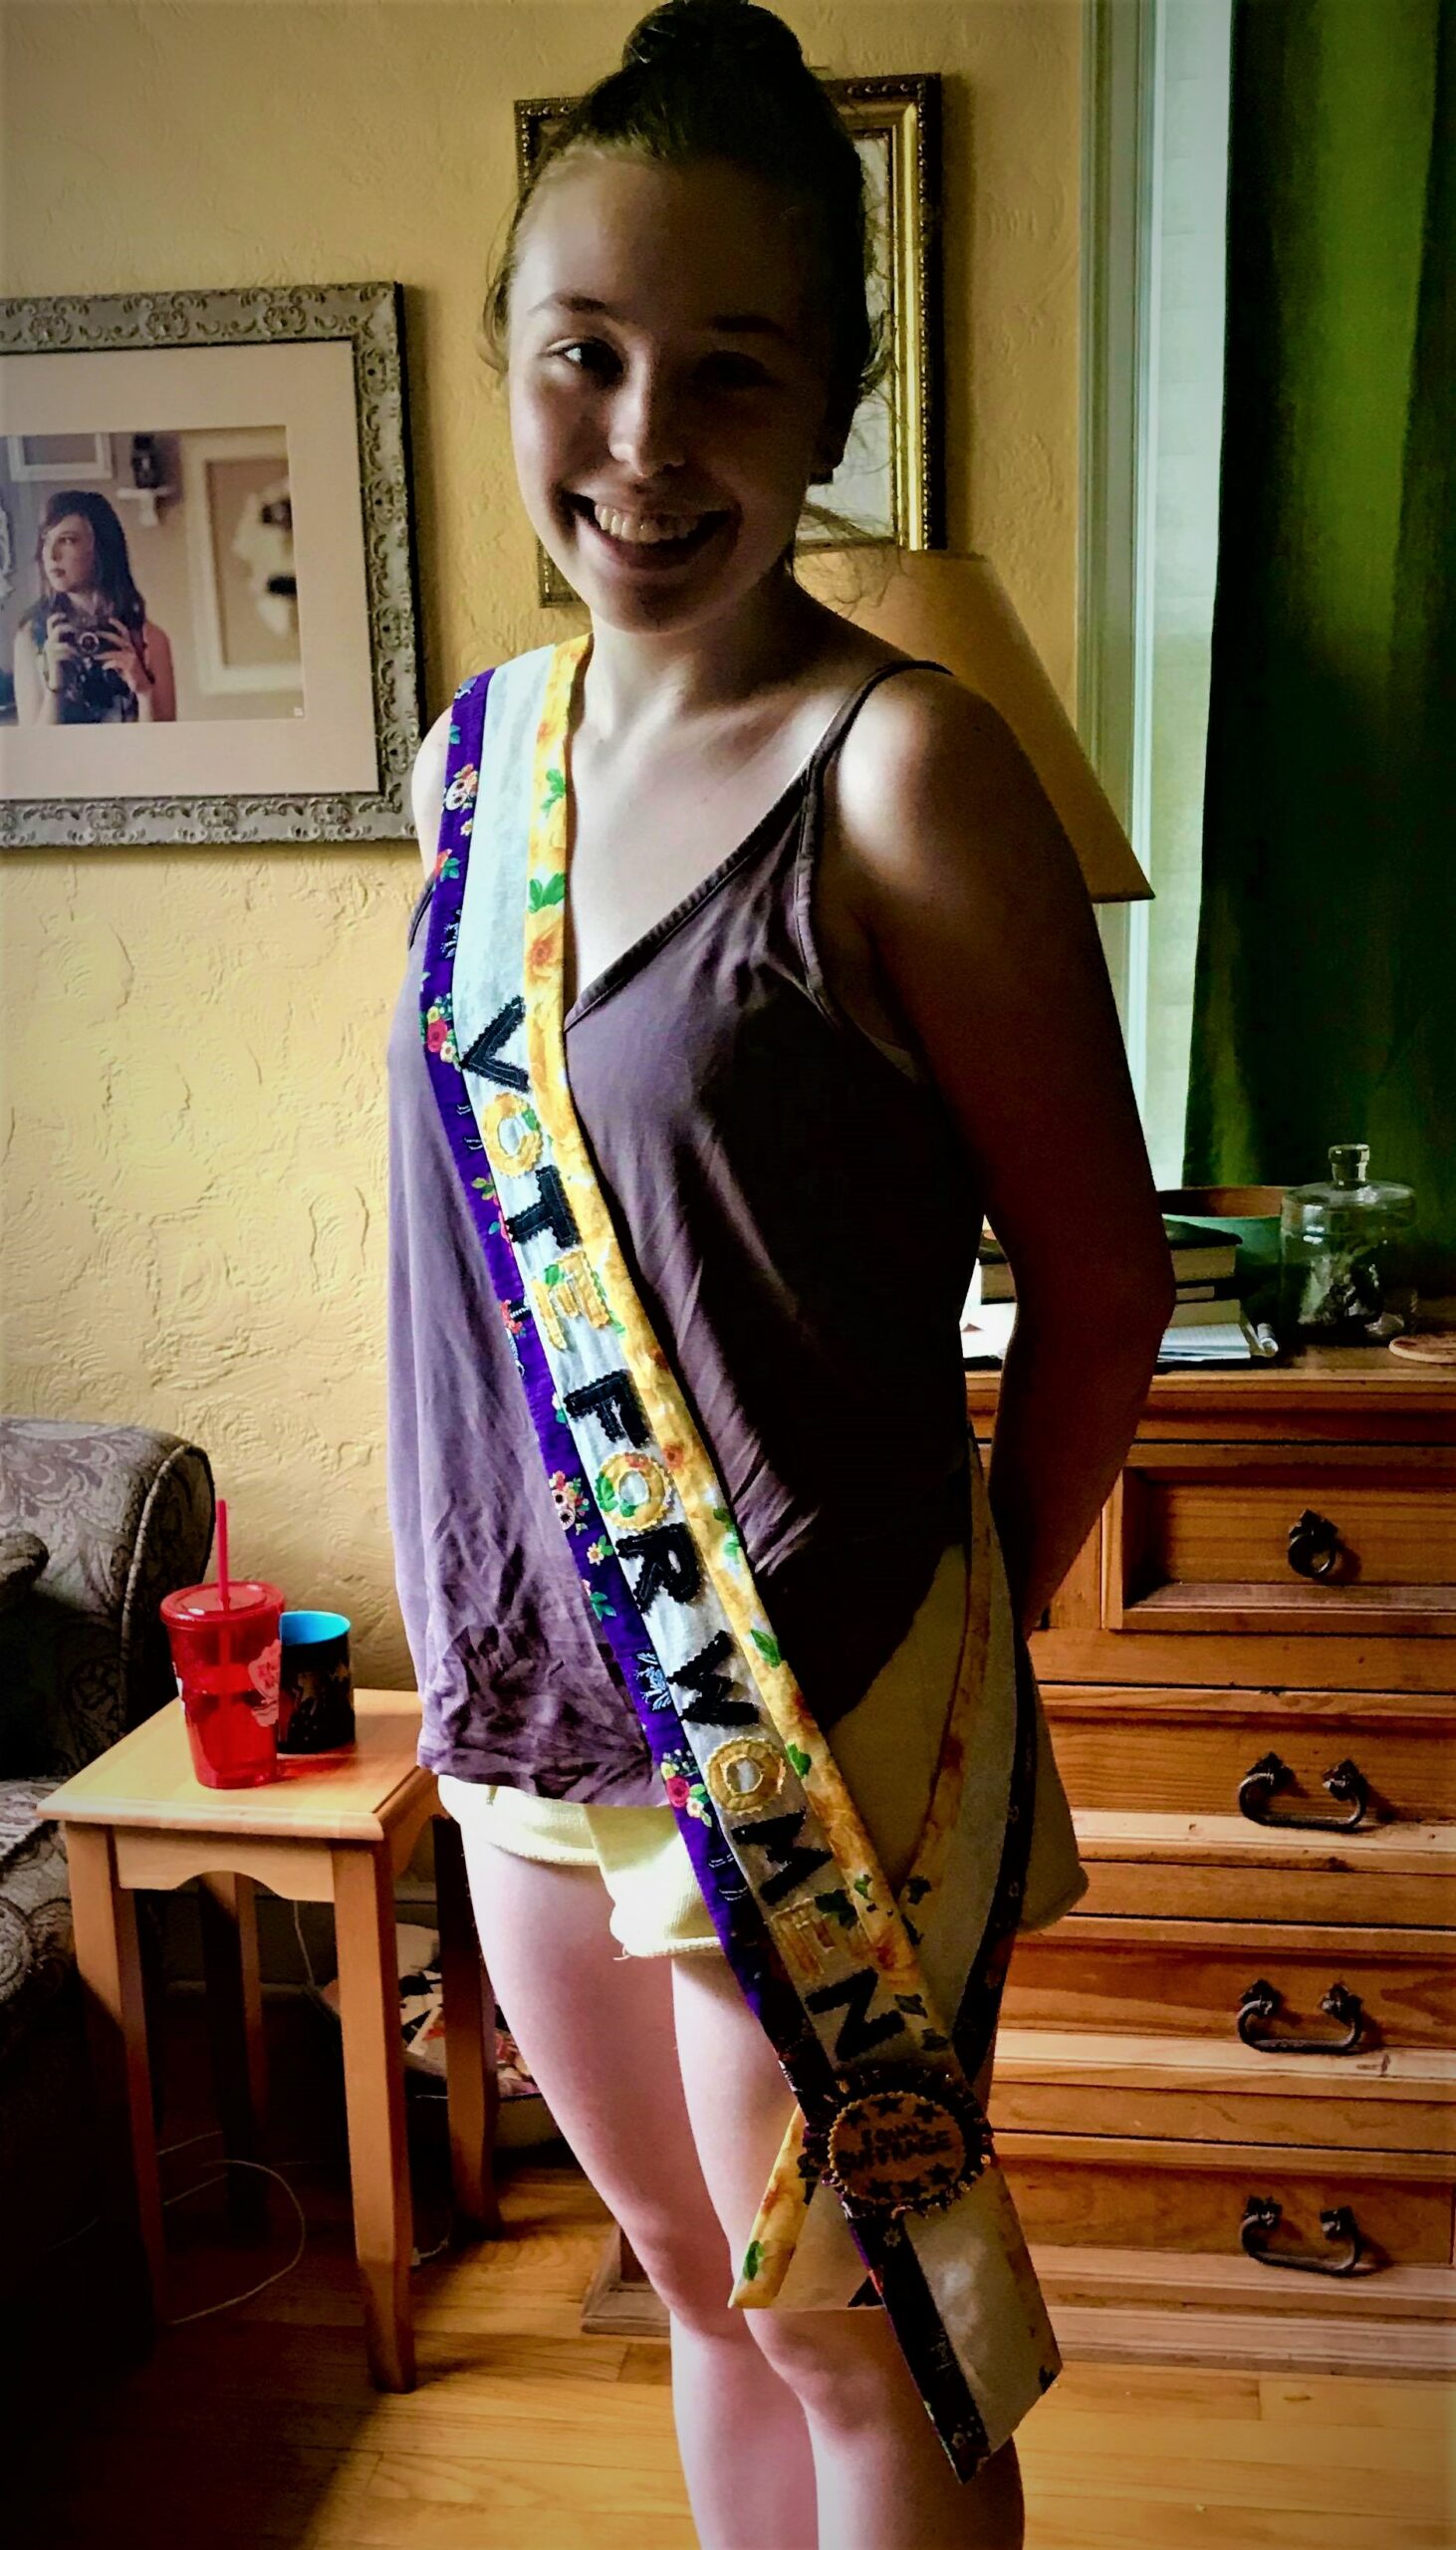
  4. This is the point when you should add your message. I backed scraps of fabric with interfacing (to prevent raveling) and cut out letters with pinking shears; then stitched them on. Your message will be whatever you choose, of course –it’s your right! But if you use fabric paint be sure to put paper or cardboard under your fabric in case the paint bleeds through.
  5. Now you sew your 2 wide strips into 2 tubes: with right sides together, fold each strip in half long-ways, joining the edge of each color. Stitch the long edges together.
  6. Press your inside-out tubes flat so that one side has the white band in the center and a color on each side, and the other side has the 2 colors only. Sew the bottom short edges closed. Then turn both tubes right-side out and press again.
  7. Almost done! A fussy bit that will make your sash sit nicely on your shoulder is to cut the short edges that are still open at a slight angle, sloping down from the left corner to the right. Finish these cut edges with a zigzag stitch to prevent raveling. Now put the right sides (with the white bands together and sew these cut edges together. Flip them over and the seam should form a gentle point that will sit nicely on your right shoulder.
  8. Put on your sash and join the open ends at your hip –either by tying them together or by pinning them with an appropriate political button.
  9. Now you are ready to march!

(P.S. Don’t forget to vote before 7:00pm on November 3, 2020!)

Continue Reading

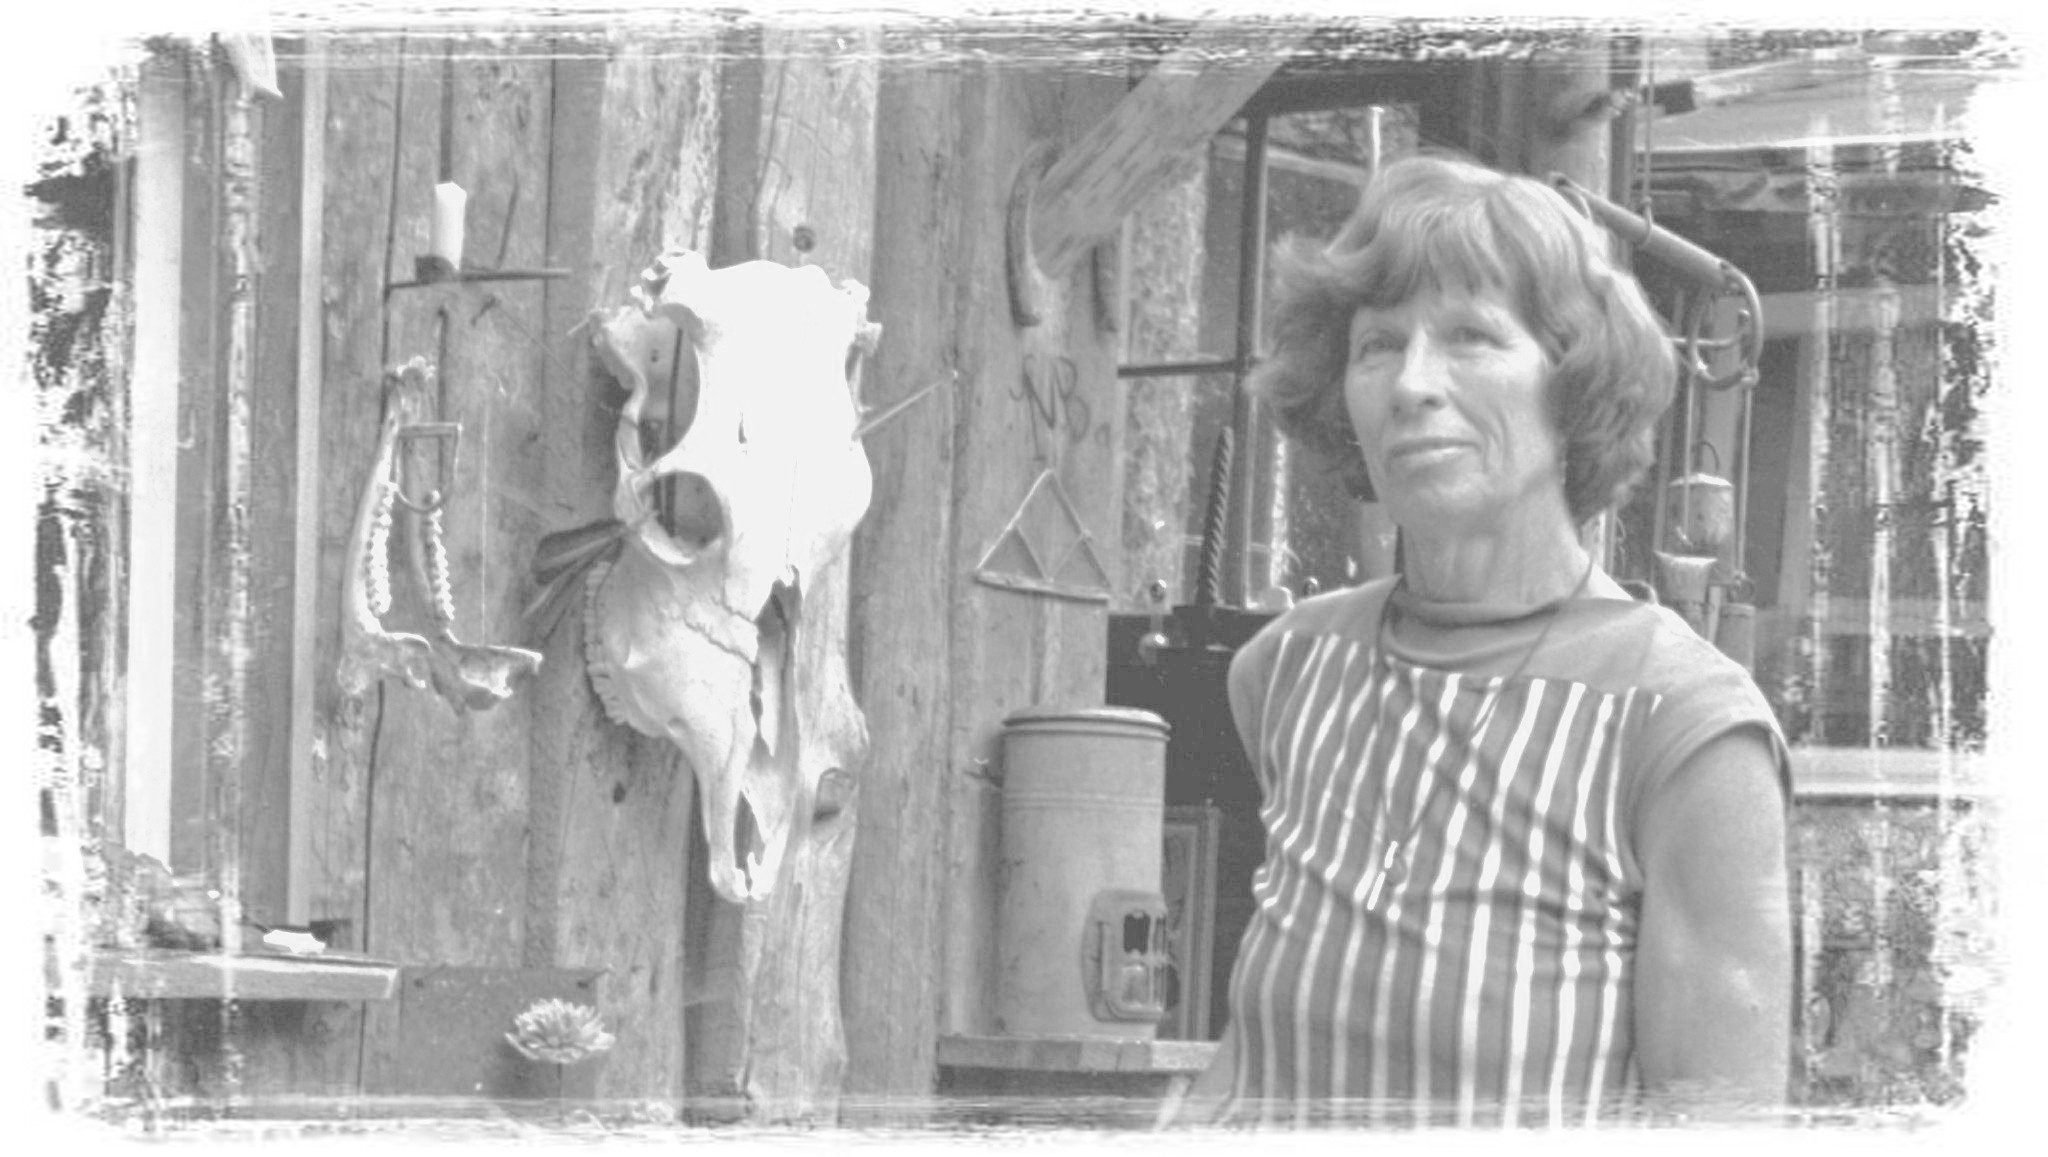
Daily Discovery: Polly Brinkhoff

Post written by Archive & Collections team.

Daily Discovery: Polly Brinkhoff

Get Inspired!

In celebration of the 100th anniversary of the ratification of the 19th Amendment, we’re highlighting the paths of local women in Fort Collins history with a series of video presentations created by the Archive & Collections staff at Fort Collins Museum of Discovery.

Today Curator of Collections Linda Moore will present on Polly Brinkhoff, artist and long-time resident of Skin Gulch off Poudre Canyon.

After you have learned about Polly Brinkhoff, be sure to create your very own shrink-plastic charm.

Click here to download the printable Polly Brinkhoff Charm.

Want to download the charm bracelet directions? Click here for a handy PDF!

Follow along with our Daily Discovery! Click here for all activities that you can do at home.

Educational opportunities like this are supported in part by Fort Fund.

Continue Reading

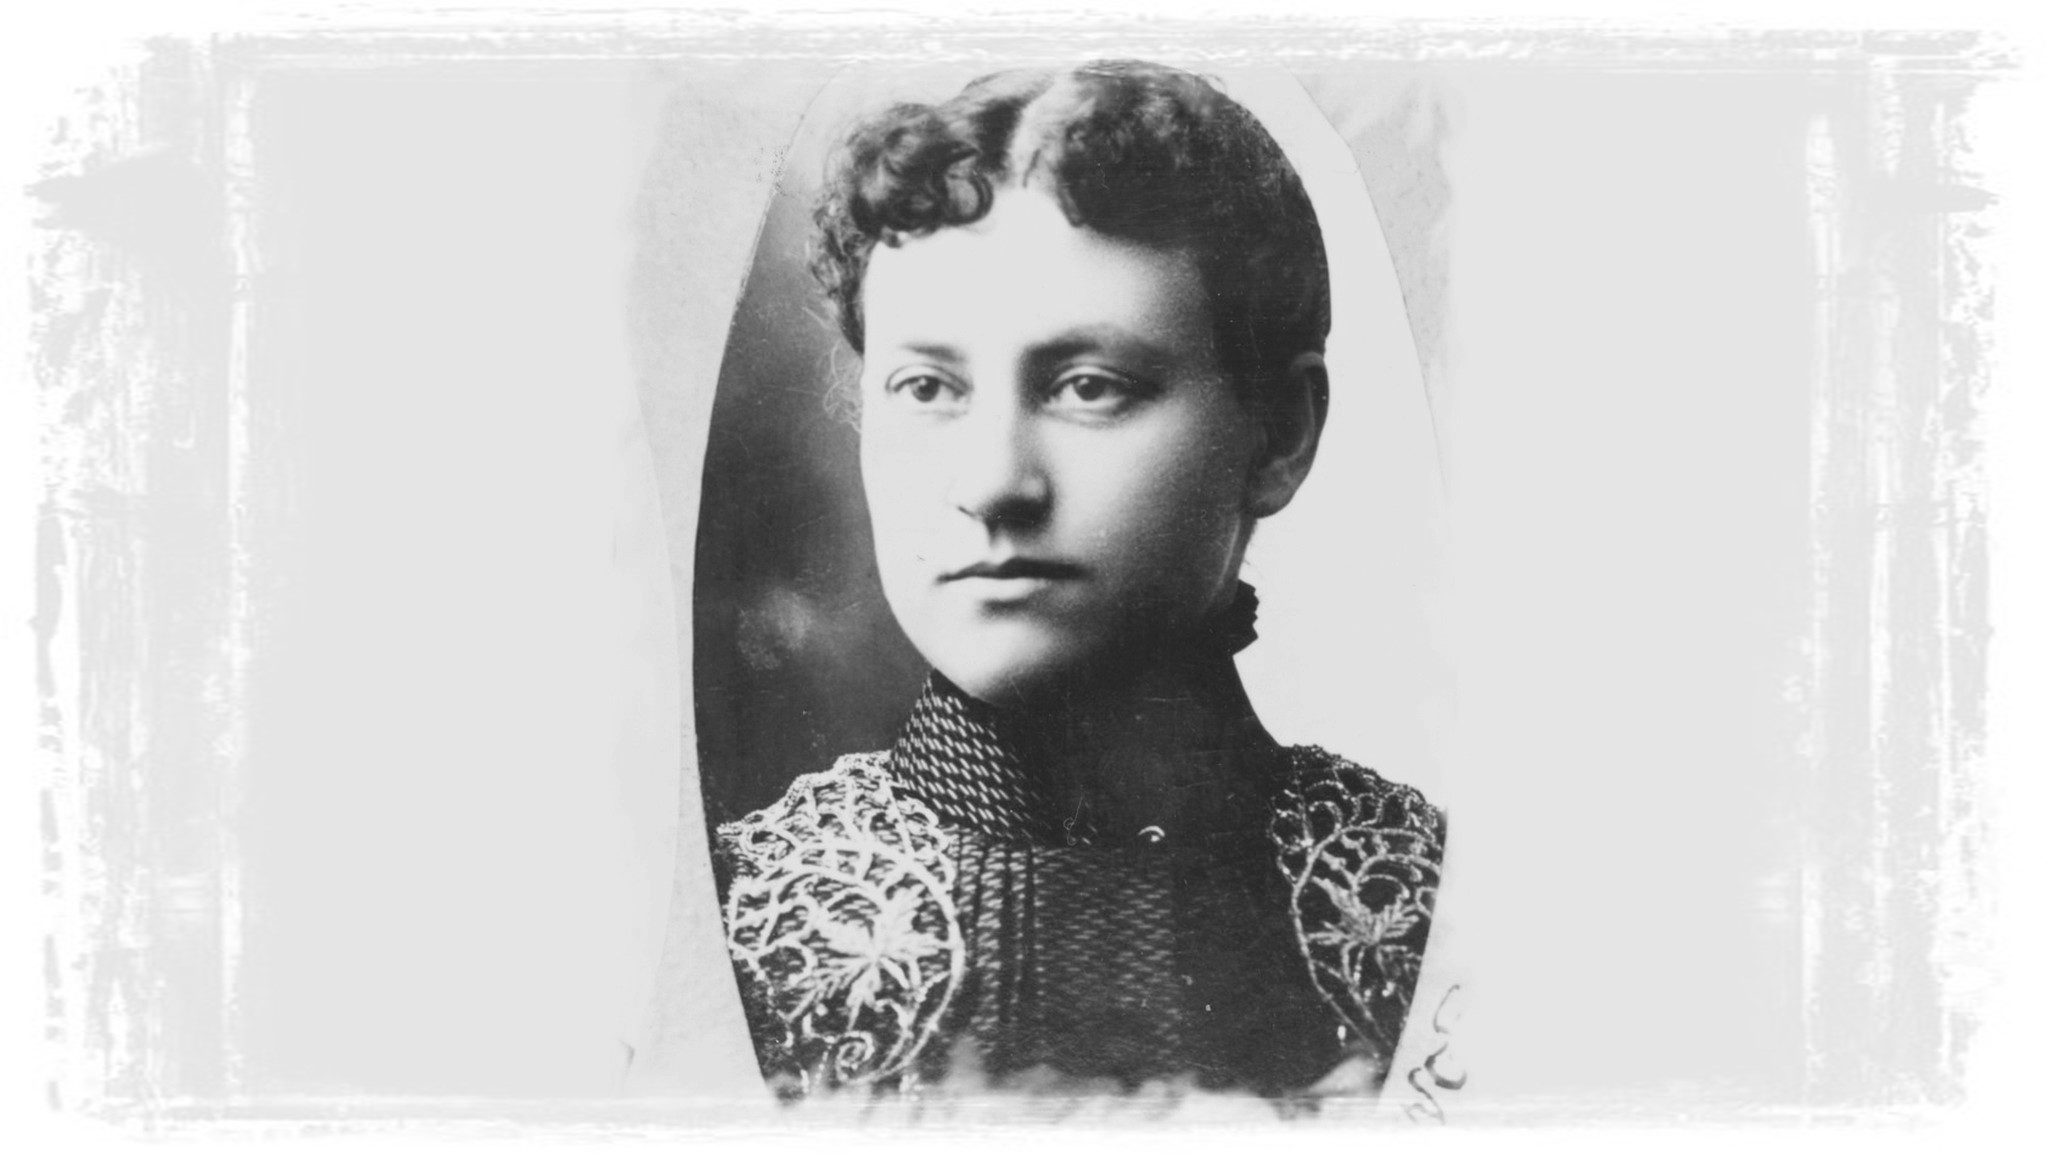
Daily Discovery: Elizabeth Coy

Post written by Archive & Collections team.

Daily Discovery: Elizabeth Coy

Get Inspired!

In celebration of the 100th anniversary of the ratification of the 19th Amendment, we’re highlighting the paths of local women in Fort Collins history with a series of video presentations created by the Archive & Collections staff at Fort Collins Museum of Discovery.

Today Museum Collections Assistant Morgan Wilson will speak about Elizabeth Coy, first woman to graduate from a Colorado institute of higher education.

After you have learned about Elizabeth Coy, be sure to create your very own shrink-plastic charm.

Click here to download the printable Elizabeth Coy Charm.

Want to download the charm bracelet directions? Click here for a handy PDF!

Follow along with our Daily Discovery! Click here for all activities that you can do at home.

Educational opportunities like this are supported in part by Fort Fund.

Continue Reading

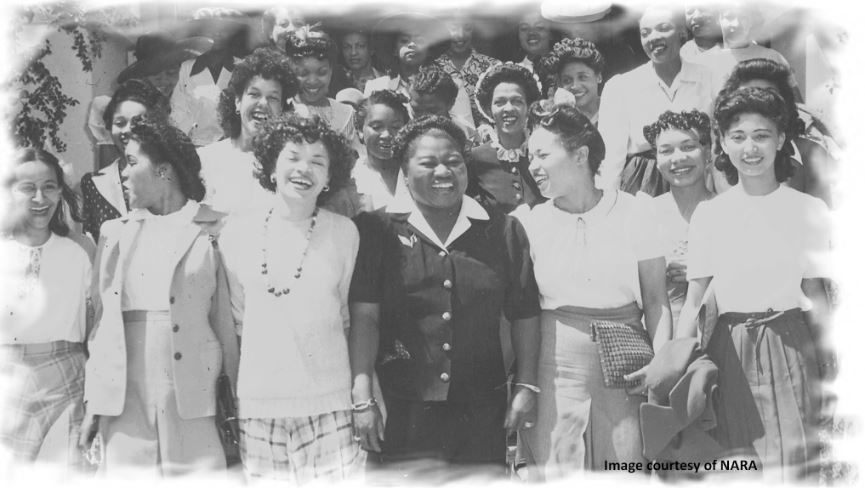
Daily Discovery: Hattie McDaniel

Post written by Archive & Collections team.

Daily Discovery: Hattie McDaniel

Get Inspired!

In celebration of the 100th anniversary of the ratification of the 19th Amendment, we’re highlighting the paths of local women in Fort Collins history with a series of video presentations created by the Archive & Collections staff at Fort Collins Museum of Discovery.

Today Archive Curator Lesley Struc will speak about Hattie McDaniel, Hollywood star who lived in Fort Collins as a child.

After you have learned about Hattie McDaniel, be sure to create your very own shrink-plastic charm.

Click here to download the printable Hattie McDaniel Charm.

Want to download the charm bracelet directions? Click here for a handy PDF!

Follow along with our Daily Discovery! Click here for all activities that you can do at home.

Image credit: NARA

Educational opportunities like this are supported in part by Fort Fund.

Continue Reading

Daily Discovery: Hope Sykes

Post written by Archive & Collections team.

Daily Discovery: Hope Sykes

Get Inspired!

In celebration of the 100th anniversary of the ratification of the 19th Amendment, we’re highlighting the paths of local women in Fort Collins history with a series of video presentations created by the Archive & Collections staff at Fort Collins Museum of Discovery.

Today Archive Assistant Barbara Cline will present on Hope Sykes, author of the 1935 book Second Hoeing.

After you have learned about Hope Sykes, be sure to create your very own shrink-plastic charm.

Click here to download the printable Hope Sykes Charm.

Want to download the charm bracelet directions? Click here for a handy PDF!

Follow along with our Daily Discovery! Click here for all activities that you can do at home.

Educational opportunities like this are supported in part by Fort Fund.

Continue Reading

Daily Discovery: Elizabeth Case

Post written by Archive & Collections team.

Daily Discovery: Elizabeth Case

Get Inspired!

In celebration of the 100th anniversary of the ratification of the 19th Amendment, we’re highlighting the paths of local women in Fort Collins history with a series of video presentations created by the Archive & Collections staff at Fort Collins Museum of Discovery.

Today Archive Assistant Sarah Frahm will share stories about Elizabeth Case, Fort Collins volunteer extraordinaire!

After you have learned about Elizabeth Case, be sure to create your very own shrink-plastic charm.

Click here to download the printable Elizabeth Case Charm.

Want to download the charm bracelet directions? Click here for a handy PDF!

Follow along with our Daily Discovery! Click here for all activities that you can do at home.

Educational opportunities like this are supported in part by Fort Fund.

Continue Reading

Daily Discovery: Sara Ellis Eddy

Post written by Archive & Collections team.

Daily Discovery: Sara Ellis Eddy

Get Inspired!

In celebration of the 100th anniversary of the ratification of the 19th Amendment, we’re highlighting the paths of local women in Fort Collins history with a series of video presentations created by the Archive & Collections staff at Fort Collins Museum of Discovery.

Today Archive Assistant Jenny Hannifin will introduce us to Sara Ellis Eddy, a Fort Collins businesswoman who lived here in the 1890s.

After you have learned about Sara Ellis Eddy, be sure to create your very own shrink-plastic charm.

Click here to download the printable Sara Ellis Eddy Charm.

Want to download the charm bracelet directions? Click here for a handy PDF!

Follow along with our Daily Discovery! Click here for all activities that you can do at home.

Educational opportunities like this are supported in part by Fort Fund.

Continue Reading

Daily Discovery: Making History with Our Local Legends – Shrink Plastic Charm Bracelet

Post written by Linda Moore, Museum Curator of Collections.

Daily Discovery: Making History with Our Local Legends – Shrink Plastic Charm Bracelet

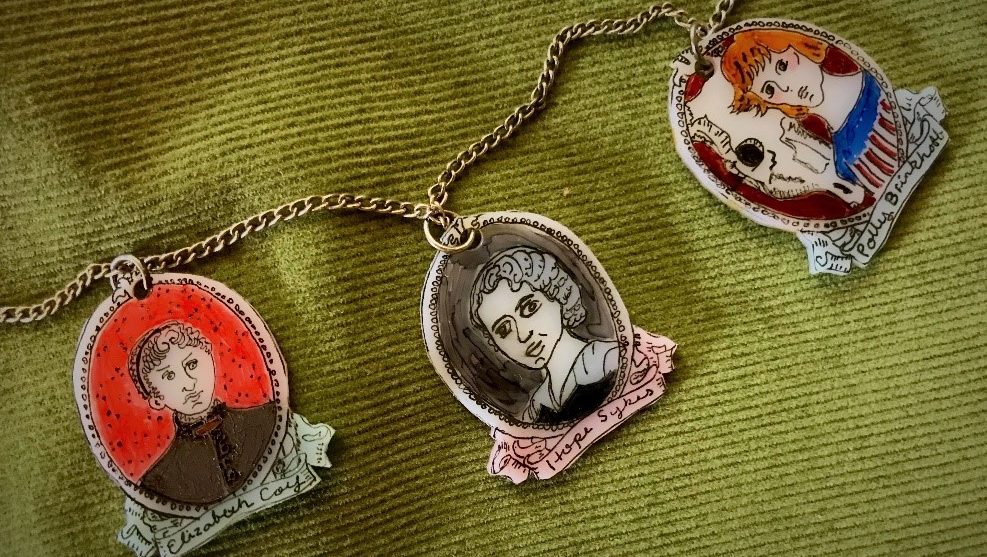
Wearing charms to commemorate or celebrate people, places, or events important to you has a long history: there is archaeological evidence that charm bracelets were worn as long ago as 600 to 400 BCE! Celebrate the stories that FCMoD is presenting of some of our distinguished local women this month by using the templates that will accompany each presentation to create a charming piece of jewelry that will remind you of them every time you wear it!

Supplies:

  • Shrink Plastic
  • Template to trace (example on right)
  • Permanent markers
  • Hole punch
  • Metal cookie sheet
  • Foil to line cookie sheet
  • Oven
  • Jewelry findings of your choice

Instructions:

  1. Print out your template; a 2.5 inch original will create a 1.25 inch charm.
  2. Place your shrink plastic over the template and trace in permanent marker.
  3. Let outline dry completely, then add color.
  4. Cut your charm out. Punch a hole at the top! This is essential for adding it to a bracelet.
  5. Following the guidelines for your specific shrink plastic, preheat your oven.
  6. Place your plastic on a foil-lined cookie sheet, and once your oven is at temperature bake it for the time suggested for your plastic –about 3 minutes, so stand by!
  7. There you go, a perfectly charming portrait to add to your bracelet.

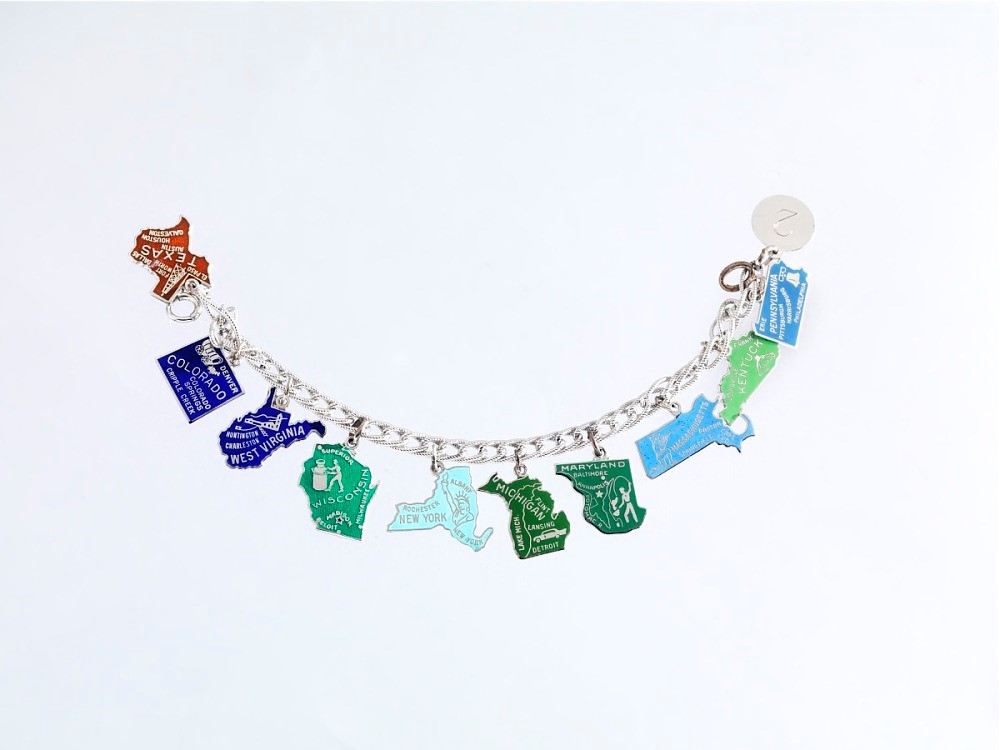
This charm bracelet, in the collection of the National Museum of American History, commemorates the effort to ratify the Equal Rights Amendment with charms added for each state that successfully ratified the amendment.

Want to download these directions? Click here for a handy PDF!

Follow along with our Daily Discovery! Click here for all activities that you can do at home.

Educational opportunities like this are supported in part by Fort Fund.

Continue Reading

Daily Discovery: Suffrage Flag Infinity Scarf

Post written by Morgan Wilson, Museum Assistant for Collections.

Daily Discovery: Suffrage Flag Infinity Scarf

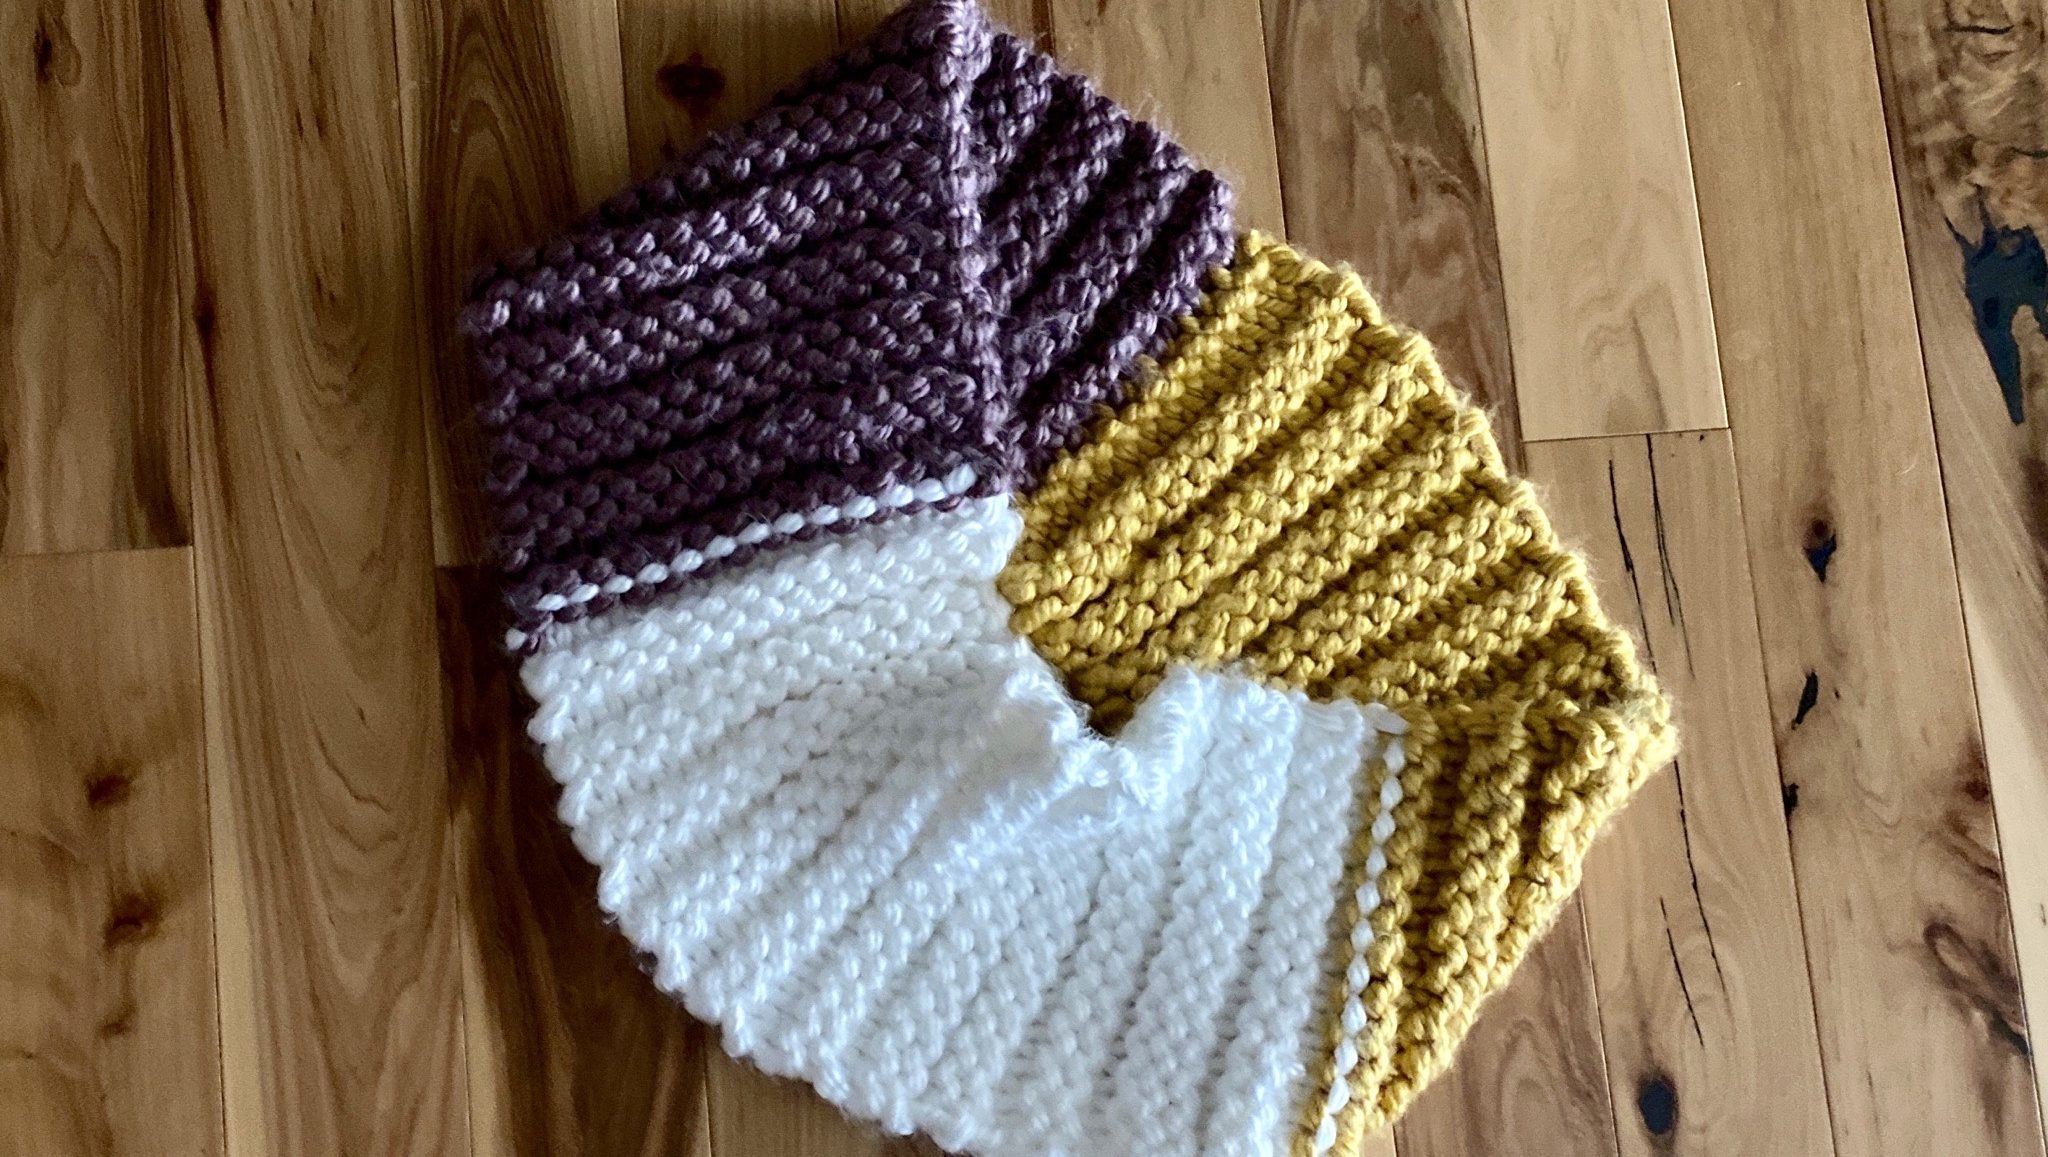
Basic knitting skills are required to make this scarf. Luckily, this is a quick and easy knitting project that will be ready for the cool weather this fall. This scarf is made in the colors of the National Women’s Party flag- purple, white and gold! Once you reach the end, just connect it in a loop to create this stylish infinity scarf.

Supplies:

  • Between 40-50 yards of bulky yarn (weight 6) in purple
  • Between 40-50 yards of bulky yarn (weight 6) in white
  • Between 40-50 yards of bulky yarn (weight 6) in gold
  • 1 pair of US size 13 knitting needles
  • 1 yarn needle

Instructions:

  1. Cast on 12 stitches in your preferred method in the purple color.
  2. Knit the first two rows.
  3. Purl the next two rows.
  4. Repeat the knit-knit-purl-purl pattern until you have about 20 inches left of the first color.
  5. Continuing the pattern, knit or purl the next color onto the existing scarf.
  6. Continue the knit-knit-purl-purl pattern with the second color until you have 20 inches left of yarn and knit or purl the last color onto the scarf.
  7. Continue the pattern until you have about 20 inches of yarn and cast off the stitches to close the scarf.
  8. If you want to wash and block your piece, now would be the time to do so. If not, continue to step 9.
  9. Using the remaining yarn and your yarn needle, mattress stitch the end of the scarf to the beginning of the scarf to create a loop.
  10. Enjoy your suffrage scarf!

Want to download these directions? Click here for a handy PDF!

Follow along with our Daily Discovery! Click here for all activities that you can do at home.

Educational opportunities like this are supported in part by Fort Fund.

Continue Reading