Daily Discovery: Agriculture in Action!

Post written by Hannah Curtis, Education Assistant.

Daily Discovery: Agriculture in Action!

Agriculture and farming have a long history in Fort Collins and all over the globe. Most of the time we only see the end product, the fruits and vegetables at the grocery store. With this activity, see what happens under the dirt through experimentation with the scientific method!

Follow along through Facebook and Instagram with museum educator Hannah as she demonstrates this experiment in her own home. Happy Farming!

Supplies:

General:

  • Water
  • Indoor space with sunlight
  • Sharpie or marker
  • Paper and pencil to record daily observations
  • Potting soil and planter (optional)

Growing Produce from seeds:

  • Seeds (dried beans, flower seeds, other fruit or vegetable seeds)
  • Baking tray or cutting board
  • Paper towels
  • Spray bottle (optional)
  • Ziploc bags

Re-Growing Produce from Kitchen Scraps:

  • Kitchen scraps (celery base, lettuce heart, green onion base, yellow onion top)
  • Small bowls or containers
  • Sharp kitchen knife and adult supervision

Instructions:

For ages 3-5:

  1. Review what plants and flowers need to grow and walk through the stages of plant growth.
  2. The Ziploc bag method can be easily monitored and observed, but we recommend setting up a method together that works best for your household. See procedures below.
  3. Ask your young scientist what they think will happen to the produce or seeds? Talk about different plants they have seen and discuss how they grow or where their favorite fruits and vegetables come from.
  4. Observe and talk about what is happening to your produce or seeds every day.

For ages 6 and up:

  1. Review what plants and flowers need to grow and walk through the stages of plant growth.
  2. Work through the scientific process before proceeding with the experiment. Decide on an experiment you want to test.
  3. Write down your answers for the scientific process and create your method for observation.
  4. Depending on your growing method, follow the procedures below.
  5. Record your observations every day in an observational chart, farming journal or a photo archive. As your produce grows you can look back on previous days, predict what will happen next and share with family and friends!
  6.  Follow along with Hannah as she tests her experiment in her home.

Want to download these directions? Click here for a handy PDF!

Follow along with our Daily Discovery! Click here for all activities that you can do at home.

Educational opportunities like this are supported in part by Fort Fund.

Continue Reading

Daily Discovery: What’s Up With Yeast?

Post written by Heidi Furhman, Discovery Camp Coordinator.

Daily Discovery: What’s Up With Yeast?

What is yeast? How does it work? Why is it important for making the breads and treats we all love? Learn about yeast through our video “What’s Up With Yeast” and conduct this experiment to observe yeast at work for yourself!

Supplies:

  • Clear Bottle (water bottles work well)
  • Warm water
  • Package of Yeast
  • Sugar
  • Balloon

What is Yeast?

Check out our video “What’s Up With Yeast?” to discover the connection between bread and balloons, and explore what yeast is, how it works in bread dough, and what kinds of yeast people have been using for hundreds of years.

As you watch, conduct this experiment along with our educator Heidi!

Instructions:

  1. Gather your supplies! You’ll need a clear bottle, a balloon, warm water, sugar, and a package of yeast.
  2. Stretch out your balloon. Try blowing it up a couple of times to loosen it up.
  3. Add one to two inches of warm water to a clear bottle. Make sure the water is warm to the touch but not hot! If your water is too hot you’ll kill the yeast. A good test is to hold your wrist under the running water. If you can’t stand it the water is too hot! Which purposes does the warm water serve to help the yeast thrive? (Moisture and warmth).
  4. Add the package of yeast to the bottle. It will work if you use less than the whole package just adjust the sugar in ratio. (Note: A smaller amount of yeast will take longer to blow up the balloon). Mix up the water and yeast.
  5. Add about 1 Tablespoon of sugar to the yeast and water mixture and stir it around (or about equal parts yeast and sugar). What purpose does the sugar serve to help the yeast thrive? (Food).
  6.  Stretch the balloon over the top of the opening and set in a warm place for about 15-20 minutes.
  7. Observe what happened? What do you notice about the yeast mixture? Does it look different than when you put it in? What about the balloon has it expanded? What does that tell you about the yeast? What is causing the balloon to expand (carbon dioxide released by the yeast is filling the balloon!)
  8. You can leave your experiment alone for several hours or days and keep observing! Does your balloon keep expanding? What about the yeast? What happens to it? At some point the yeast will consume all the food and stop releasing carbon dioxide. Your balloon will likely deflate.
  9. You can try the experiment again! Try adding more yeast and sugar or less yeast and sugar. How does that impact the time it takes for the balloon to inflate? Try using hot water or cold water. What happens then? Is your yeast able to grow? If yes, does it grow faster or slower? If no, why do you think your yeast was unable to grow? (Packaged yeast needs warm water to reactivate since it’s suspended in a forced hibernation state. Too cold, and your yeast will not be reactivated, too hot and you’ll kill it!

Sourdough Starters

You can try making your own sourdough starter at home to observe living yeast! Remember it can take some practice and a whole lot of patience to get it right, but just about anyone can do it! If it doesn’t work the first time try again!

You’ll need flour, water, and a glass jar to get started.

Try this to get you started or google “Sourdough Starter” for many amazing resources and recipes to get you started.

Want to download these directions? Click here for a handy PDF!

Follow along with our Daily Discovery! Click here for all activities that you can do at home.

Continue Reading

Daily Discovery: Solar System String Model

Post written by Sierra Tamkun, Learning Experiences Manager. This activity was adapted from NASA/JPL.

Daily Discovery: Solar System String Model

How big is our solar system? Really, REALLY big! Astronomers use a unit of measurement called an Astronomical Unit, or AU, to calculate the distances of different planets from the sun and measure the size of our solar system. One AU is equal to the distance from the sun to Earth, about 93 million miles (150 million kilometers)! Use the chart in the linked PDF of relative distances provided to build your very own to-scale model of our solar system and planets!

Supplies:

  • Measuring tape with centimeter markings
  • 4.5-meter-long piece of string
  • Large craft pony beads (or other craft beads) in various colors
  • Small piece of cardboard or wood to wrap solar system string around

Instructions:

  1. Pick out different beads to represent each planet and the sun! Look for beads that are roughly the same colors – blue for Earth, red for Mars, green for Uranus, etc.
  2. Tie the bead representing your sun to the end of your string.
  3. Using the distances (in centimeters) in the chart below, measure the distance from the sun to the first planet, Mercury.
  4. Tie Mercury in place on your sting. Tip: ask an adult to help you to make sure it stays in place!
  5. Repeat steps 3 and 4 for each planet.
  6. Lay your sting out on the floor to see the relative distance between all the planets in our solar system!

On your solar system string, all the planets are in a line so we can see the distances between them, but in space, the planets all orbit around the sun. Want to see your string of planets in orbiting action? Have a friend or family member hold the sun, while you stand apart from them holding the end. With the string pulled tight, walk counter-clockwise around your friend to see how the planets circle the sun in outer space!

This activity was adapted from NASA/JPL. Explore more at https://www.jpl.nasa.gov/.

Want to download these directions? Click here for a handy PDF!

Follow along with our Daily Discovery! Click here for all activities that you can do at home.

Continue Reading

Daily Discovery: Recycled Bird Feeder / Descubrimiento en casa: Reciclando – Comedero para pájaros

Post written by Lea Mikkelsen, Early Childhood Coordinator.

Daily Discovery: Recycled Bird Feeder

Are you enjoying watching the birds from your window at home? Take a look in your recycling and imagine what you can re-use to make a bird feeder. An oatmeal container? A plastic bottle? How about a milk carton? Let’s practice upcycling and turn that container into a beautiful bird feeder to hang in your yard!

Supplies:

  • A medium to large container from your recycling
  • Materials to decorate with. Try colored paper, stickers, bright colored or patterned tape, paint, tissue paper, leaves and  ticks, or other recycled materials.
  • A stick, dowel, or other similar item for the birds to perch on.
  • Scissors
  • String or a pipe cleaner
  • You might need tape or glue
  • Birdseed

Instructions:

  1. Place all your supplies on a clear surface with plenty of room to create.
  2. Brainstorm some ideas for what your birdfeeder could look like. Tip: try drawing your idea out on a piece of paper first.
  3. Ask an adult to help you cut a few doors into your container, a hole for the stick for the bird to sit on, and a place for the string to loop through to hang the feeder.
  4. Decorate your birdfeeder using your amazing creativity!
  5. Fill the birdfeeder with seed and hang it outside to watch from your window!

Want to download these directions? Click here for a handy PDF!

Follow along with our Daily Discovery! Click here for all activities that you can do at home.

Image credit: saronti.com

Traducido por Károl de Rueda y Laura Vilaret-Tuma.

Descubrimiento en casa: Reciclando – Comedero para pájaros

¿Te gusta observar a los pajaritos cantar y volar desde la ventana de tu casa? En el contenedor de basura reciclable, podría haber objetos necesarios para construir un comedero especial para ellos. ¡Imagina todas las posibilidades! ¿Una botella de agua vacía? ¿O quizás un cartón de leche? Vamos a reciclar en una manera creativa y convertir lo que era basura ¡en un bello comedero para pájaros!

Artículos necesarios:

  • Un recipiente reciclable vacío, mediano o grande
  • Materiales para decorarlo. Por ejemplo, papel de colores, de construcción, cinta adhesiva colorida, pintura, hojas y ramitas secas, u otros materiales reciclados.
  • Una varita, palito u otra plataforma para que los pájaros puedan aterrizar
  • Tijeras
  • Hilo de estambre o algún tipo de cuerda para colgarlo
  • Pegamento
  • Semillas para aves

Instrucciones:

  1. . Reúne todos tus materiales.
  2. Imagina, crea y diseña tu comedero de pájaros. Consejo: dibuja y boceta tus ideas en un papel antes de empezar.
  3. Pídele a un adulto que te ayude a cortar unas aberturas en el contenedor, incluyendo un área para que los pájaros puedan entrar a comer, un orificio para el palito o cualquier otra plataforma, y un lugar para colgar el hilo de estambre.
  4. Decora tu comedero de pájaros. ¡Usa tu creatividad!
  5. Coloca algunas semillas dentro y cuélgalo en algún lugar donde lo puedas observar desde tu ventana. ¡Observa el festín!

¿Te gustaría descargar esta actividad? Haz clic aquí para obtener un archivo PDF.

Para encontrar actividades, ideas y mucho más descubrimiento en casa, ¡síguenos!

Image credit: earth911

Continue Reading

Daily Discovery: Meet the Amphibians! / Descubrimiento en casa: Conoce al animal – ¡los anfibios!

Post written by Hannah Curtis, Education Assistant.

Daily Discovery: Meet the Amphibians!

Metamorphic, ectothermic, and ecological indicators! What kind of animal has these terms in common? That’s right, amphibians: toads, frogs, salamanders, and newts! Meet FCMoD’s amphibians, and become a herpetologist in your own backyard!

What are Amphibians?

Amphibians are characterized as ectothermic (cold-blooded) vertebrates. They require water or moist environments to survive and for laying eggs. The skin on amphibians is very thin and permeable, so liquids and gases are absorbed through their skin, allowing them to breath underwater! Some small frogs and salamanders don’t even have lungs and rely only on this adaptation to breathe through their skin!

Almost all amphibians go through the process of metamorphosis. Adult females lay their eggs and once the larvae hatch, they have gills and resemble fish. Through metamorphosis they grow four legs and air breathing lungs!

At FCMoD we care for a variety of amphibians. Check out a few of their individual life histories!

Threats from Water Pollution

Amphibians play an important role in their wild ecosystems, but they – and their water-based habitats – become threatened due to water toxicity and pollution. Because frogs, toads and salamanders spend most of their time in or around water environments, they will come into contact with any toxic chemicals in the water or abnormal rising temperatures.

Amphibians are like sponges! They absorb and breathe in whatever is in the water. Due to their easy susceptibility to unhealthy water conditions, they are a great indicator species for an ecosystem; they can be used to infer conditions in a particular habitat. If there is clean, fresh water, frogs and toads are going to be healthy. If there is trash, chemical waste like pesticides or oil spillage, or food processing waste in the water, the animals breathe in these bad, unhealthy things and are at high risk of dying.

You can help amphibians in the wild by remembering a few things:

  1. If you see a frog or toad, try not to touch it without gloves or clean hands (no hand sanitizer), as you could expose them to germs and chemicals.
  2. Always remember to dispose of your trash properly; if you see trash in a natural area or in a body of water, set an example for others in your community by cleaning it up!
  3. Buy and eat organic food. This reduces the use of harmful pesticides and insecticides that can leak into water sources, and don’t use pesticides on your own yard or garden.
  4. If you have a pet amphibian, protect them from noise and disturbance from other pets in your house.
  5. Share with others about what you learned about amphibians, and all the ways we can protect them!
  6. Remember that if you take care of the earth, the earth will take care of you and all the wildlife too!

Observations in the Backyard!

Whether it is in your backyard, neighborhood or at a Natural Area, animals can be observed just about anywhere! Herpetologists are scientists who study amphibians, as well as reptiles. They study and observe these animals in the wild to learn about their behaviors and identify their role within the ecosystem. Be a backyard herpetologist and observe animals similar to the museum’s amphibians and record what you discover!

Supplies:

  • Writing utensil
  • Paper
  • Computer and internet access (optional)

Instructions:

  1. If you created an observational journal, write down your animal observations in the “explore your world” section. If not, create your own observational chart, using the provided guiding questions.
  2. Head out to your backyard or take a walk to a natural area with a water source to explore amphibians and their habitats.
  3. Check out FrogWatch USA to learn about the frogs and toads native to Colorado and listen to their unique croaks and calls!

Want to download these directions? Click here for a handy PDF!

Follow along with our Daily Discovery! Click here for all activities that you can do at home.


Traducido por Károl de Rueda y Laura Vilaret-Tuma.

Descubrimiento en casa: Conoce al animal – ¡los anfibios!

Son metamórficos, ectotérmicos e indicadores ecológicos. ¿Cuáles animales comparten estas características? ¡Los anfibios por supuesto! Estos incluyen sapos, ranas, salamandras y tritones. Conoce a los anfibios del Museo del Descubrimiento de Fort Collins (FCMoD) y ¡sé un herpetólogo en tu propio patio!

¿Qué son los anfibios?

Los anfibios son ectotérmicos y vertebrados. Esto significa que tienen sangre fría y una columna vertebral. Por resultado, necesitan vivir en el agua o en un ambiente húmedo para poder poner sus huevos y para sobrevivir. La piel de un anfibio es muy fina y permeable, por lo tanto, los líquidos y gases de su ambiente se absorben fácilmente a través de su piel. Esta peculiaridad les permite ¡respirar bajo el agua! La adaptación de “respirar” por medio de su piel ha logrado una evolución en algunas ranas y salamandras a tal grado, que algunas de ellas ¡no tienen pulmones!

Casi todos los anfibios experimentan el proceso de metamorfosis. Las hembras adultas ponen sus huevos en el agua y, cuando las larvas o los renacuajos salen del cascarón, estos nacen con branquias y parecen peces. Pero con el tiempo, y a través de la metamorfosis, ¡les nacen cuatro patas y dos pulmones que les ayudarán a respirar aire fresco!

En el museo, cuidamos a una variedad de anfibios.

La contaminación del agua y sus daños

Los anfibios poseen un rol importante en el ecosistema, pero ellos, al igual que sus ambientes acuáticos, son amenazados por la contaminación y la toxicidad del agua. Debido a que las ranas, salamandras, y los sapos pasan la mayor parte de su tiempo dentro o cerca de ambientes acuáticos, absorben los contaminantes en el agua o sufren con sus temperaturas anormalmente altas.

Los anfibios ¡son como esponjas! Absorben y respiran químicos presentes en el agua. Su susceptibilidad a condiciones insalubres sirve para ser una especie indicadora para el ecosistema. Los científicos usan esta clase de animales para determinar la condición de un hábitat particular. En agua fresca y limpia, las ranas o sapos vivirán sanos. Si hay basura, residuos químicos como pesticidas, derrame de petróleo, o desechos de residuos de alimentos, los animales respirarán estos contaminantes y estarán en alto riesgo de morir.

Tú puedes ayudar a los anfibios en la naturaleza simplemente recordando algunas cosas:

  1.  Si ves alguna rana o un sapo, trata de no tocarlos con manos sucias o sin guantes. No uses desinfectante de manos, porque este puede exponerlos a gérmenes o químicos.
  2. Recuerda eliminar tu basura apropiadamente. Si ves basura en un área natural o en un cuerpo de agua, recógela y ¡sé un ejemplo para otros en tu comunidad!
  3. Trata de no usar pesticidas e insecticidas en tu jardín debido a que estos químicos pueden filtrarse en cuerpos de agua y dañar a los anfibios. Otra manera de ayudar es consumiendo comida orgánica.
  4. Si tienes una mascota anfibia, protégela de los ruidos o molestias de otras mascotas en tu casa.
  5. Comparte con los demás lo que has aprendido sobre los anfibios, incluyendo las maneras en las que los podemos proteger.
  6. Recuerda que si cuidamos a nuestro planeta, ¡el planeta nos cuidará a nosotros y a toda la vida salvaje!

Observaciones a tu alrededor

Los animales se pueden observar en un patio, en los jardines, en un área natural o en cualquier sitio. Los herpetólogos son científicos que estudian anfibios y reptiles, observándolos en su medio ambiente para aprender sobre sus comportamientos e identificarsu rol en el ecosistema. ¡Tú también puedes ser herpetólogo! Observa animales similares a los anfibios del museo ¡y documenta lo que descubres!

Artículos necesarios:

  • Algo para escribir (lápiz, pluma o marcador)
  • Papel y/o cuaderno
  • Computadora y acceso al Internet (opcional)

Instrucciones:

  1. Crea una tabla de observaciones usando la guía de preguntas que puedes encontrar más abajo. Anótalas en un cuaderno, un diario o en hojas de papel.
  2. Da un paseo con tu familia por los alrededores donde haya algún cuerpo de agua (lago, río, etc.) y busca algunos anfibios. Observa sus comportamientos y medio ambiente. Si quieres aprender más sobre las ranas y sapos nativos de Colorado, haz clic en este enlace: FrogWatch USA ¡Ahí también puedes escuchar los sonidos que hacen

¿Te gustaría descargar esta actividad? Haz clic aquí para obtener un archivo PDF.

Para encontrar actividades, ideas y mucho más descubrimiento en casa, ¡síguenos!

Continue Reading

Daily Discovery: Storytime in the Home – The Prairie That Nature Built Black-Footed Ferret Puppet

Post written by Lea Mikkelsen, Early Childhood Coordinator.

Daily Discovery: Storytime in the Home – The Prairie That Nature Built Black-Footed Ferret Puppet

Follow along with FCMoD’s live stream Storytime in the Home: The Prairie That Nature Built. Then work together with an adult to make this Black-Footed Ferret puppet! Black-Footed Ferrets (BFFs) are an endangered species and an important part of the prairie ecosystem. You can learn more about them here!

Supplies:

  • A popsicle stick
  • Black or green beads
  • Glue
  • Craft paper (White, Black, Pink, Green)
  • Pencil
  • Scissors

Instructions:

  1. Place all your supplies on a clear surface with plenty of room to create.
  2. Ask an adult to help you find some pictures of BFFs on the internet for inspiration!
  3. Use a pencil to draw the shape of your BFFs head and ears on the white paper then cut it out. (This one is about 2 ½ inches from ear to ear and 1 ¾ inches from top of ears to chin.)
  4. Cut out a mask (an upside down U shape) and a nose (a rounded triangle shape with the point down) from the black paper and glue them down.
  5. Use the pink paper to cut out ears (half circles) and a small pointy mouth (a very small flat triangle) and glue them down.
  6. Use black or green beads for eyes. A BFF’s eyes appear green at nighttime.
  7. Glue your BFF to the popsicle stick.
  8. Cut out a round burrow for your BFF to live in! Make a small slit in the burrow to let your puppet pop in and out. Decorate your burrow with grass or other prairie features. Have fun!

BONUS: Here are some activities from Dawn Publishing that relate to The Prairie that Nature Built. Here is a coloring page! Build your own bird feeder!

Want to download these directions? Click here for a handy PDF!

Follow along with our Daily Discovery! Click here for all activities that you can do at home.

Educational opportunities like this are supported in part by Buell Foundation. Their support helps make access to early childhood education at FCMoD possible for everyone in our community.

Continue Reading

BFFs: Black-footed Ferrets or Best Friends Forever

Post written by Kim Fraser, Black Footed Ferret Program Coordinator.

BFFs: Black-footed Ferrets or Best Friends Forever

The Black-footed Ferret (BFF) (Mustela nigripes) is the only ferret native to North America and lives on the short grass prairie of the Great Plains. BFFs are members of the Mustelidae family which is often referred to as the weasel family, and includes mink, badger, marten, otter, weasel, fisher, wolverine, and domestic ferret. They are nocturnal, solitary, require large expanses of landscape, and spends their whole life on prairie dog colonies. In the prairie dog burrow systems they seek shelter from predators and weather, eat, sleep, and raise their young. Over 90% of their diet is prairie dog and they eat over 100 per year. BFFs are called fossorial predators, meaning they hunt underground. Their home range is in 12 Western states including Canada and Mexico. Considered one of the most endangered mammals in North America it has been federally protected for over 40 years.  The BFF Recovery Program is one of the most successful recovery programs with over 50 State, Federal, Tribal, NGOs and private landowner partners that all participate in recovery efforts.

Why should we protect black-footed ferrets?

In 1974 when the Endangered Species Act was enacted the Black-footed Ferret was in the top 10 species listed for protection. No one knew then how difficult or easy saving a species from extinction would be. Today, we know recovering an endangered species involves many partners, time, and effort. Since the ESA became law some species have had survival success and some have not. Many people have asked is it worth it?  Is preventing the extinction of an iconic species like the black-footed ferret worth the effort? The answer is yes, it is worth it, and here’s why. The BFF is an important member of the prairie ecosystem and their presence indicates a healthy habitat that supports many other species. Without black-footed ferret conservation efforts, prairie dogs and other associated species such as burrowing owls, swift fox, mountain plovers, ferruginous hawks, prairie rattlesnakes, and many others could easily succumb to current threats. So by conserving black-footed ferrets, we have to conserve prairie dog habitat and that saves an entire ecosystem and its inhabitants that call the short grass prairie home!


Why should people care and help save this species from extinction?

Maybe it’s because BFFs capture the imagination that there’s this rarely seen and secretive animal living on the short grass prairie underground. And even though it is one of the most endangered mammals, most Americans will never have the opportunity to see a live BFF.  It’s like a fairytale character of the prairie that represents the wild, and people are passionate about the wild and fascinated about the animals that live there.  When folks learn about BFFs they are amazed that something so cool lives right in their backyard- in America.  We all know about other species that are in trouble across the globe, like elephants, tigers, chimpanzees and rhinos. And it is good to care about what happens to all species on our planet because we are a global living place. Every day we hear about how these other species are doing and how we can help them and that’s important.  But here is an animal that makes its home right here, it belongs to us as Americans as one of our native species. We should care and protect BFFs so they will remain part of the wilds of North America.  One way to help save BFFs is by learning all you can about them.  Because by learning you will come to care about them, and when you care, you will want to help save them. So you see by caring and helping to save them from extinction you are being a BFF or Best Friend Forever not just to black-footed ferrets but to future generations so they too will have BFFs living wild and free on the prairie.

The museum is proud to have two black-footed ferrets on-site in partnership with the National Black-footed Ferret Conservation Center. You can see what our BFFs are up to while we’re closed via our Ferret Cam: fcmod.org/ferret-cam!

Continue Reading

Amazing Amphibians

Post written by Willow Sedam, Live Animal Husbandry Team Member.

Amazing Amphibians

Did you know that amphibians were the first animals to live on land? Or that they swallow by blinking and pushing the backs of their eyes into their throat?

Today, we’re looking at the amazing world of amphibians!

What is an amphibian?

Toads, frogs, and salamanders are all amphibians. While amphibians are a wide and varied class of animals, they all have a few things in common.

Amphibians have slimy skin which they can breathe and drink through and has to be kept damp at all times. Amphibians lay squishy, shell-less eggs in water. And they all start out life as aquatic larvae, later metamorphosing (like a caterpillar turning into a butterfly) into their adult form, growing legs and shedding their tails!

Because water is so important to amphibians, they are often found around ponds, streams and marshes. But spending so much time in water means they can often be the first animals affected by a change in water quality. Amphibians can be the first warning that something is wrong with an environment, as they are very sensitive to pollutants, and a decline in amphibian populations can be a clue to scientists that something is wrong. But when amphibians are doing well, that means the environment around them is, too – which is why they are such important animals to learn about and protect!

At the museum, we have four species of amphibians on display, two of which are native to the US, and one that can be found right here in Colorado!

Fire-bellied toad

Despite being called toads, these Eurasian amphibians are technically frogs – you can tell by their long legs and preference for swimming.

These amphibians display two interesting types of coloration at once: camouflage, which blends them into their environment, and aposematism, which warns predators that they might be dangerous. Much like poison dart frogs, fire-bellied toads are brightly colored to warn predators that they are toxic. However, while poison dart frogs are bright all over, fire-bellied toads limit their bright warning coloration to their bellies. When a predator looks down on a frog, it sees only the green and black camouflage on its back, and might not notice it. But if the frog is threatened, it can rear up on its back and show off it’s bright belly that acts just like caution tape and says: stay away from me!

This behavior, called an unken reflex, actually gets its name from fire-bellied toads and the German name for their species, Unke.

Southern toad

Our southern toad is actually more of a southeastern toad, hailing from the warmer and wetter parts of the American east coast, from North Carolina to Mississippi. These amphibians are true toads – warty, with short legs ill-equipped for swimming and jumping but built perfectly to dig. They actually have claw-like spurs on their back legs that help them build burrows to stay safe and moist when the weather gets too hot, too cold, or too dry for them.

Like all amphibians, they lay their eggs in open water – about 3,000 of them per season! After only a couple of days, these eggs hatch into tadpoles, which undergo metamorphosis when they’re barely half an inch long!
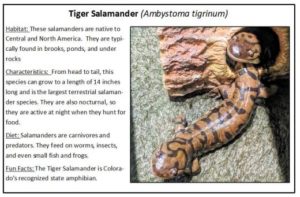
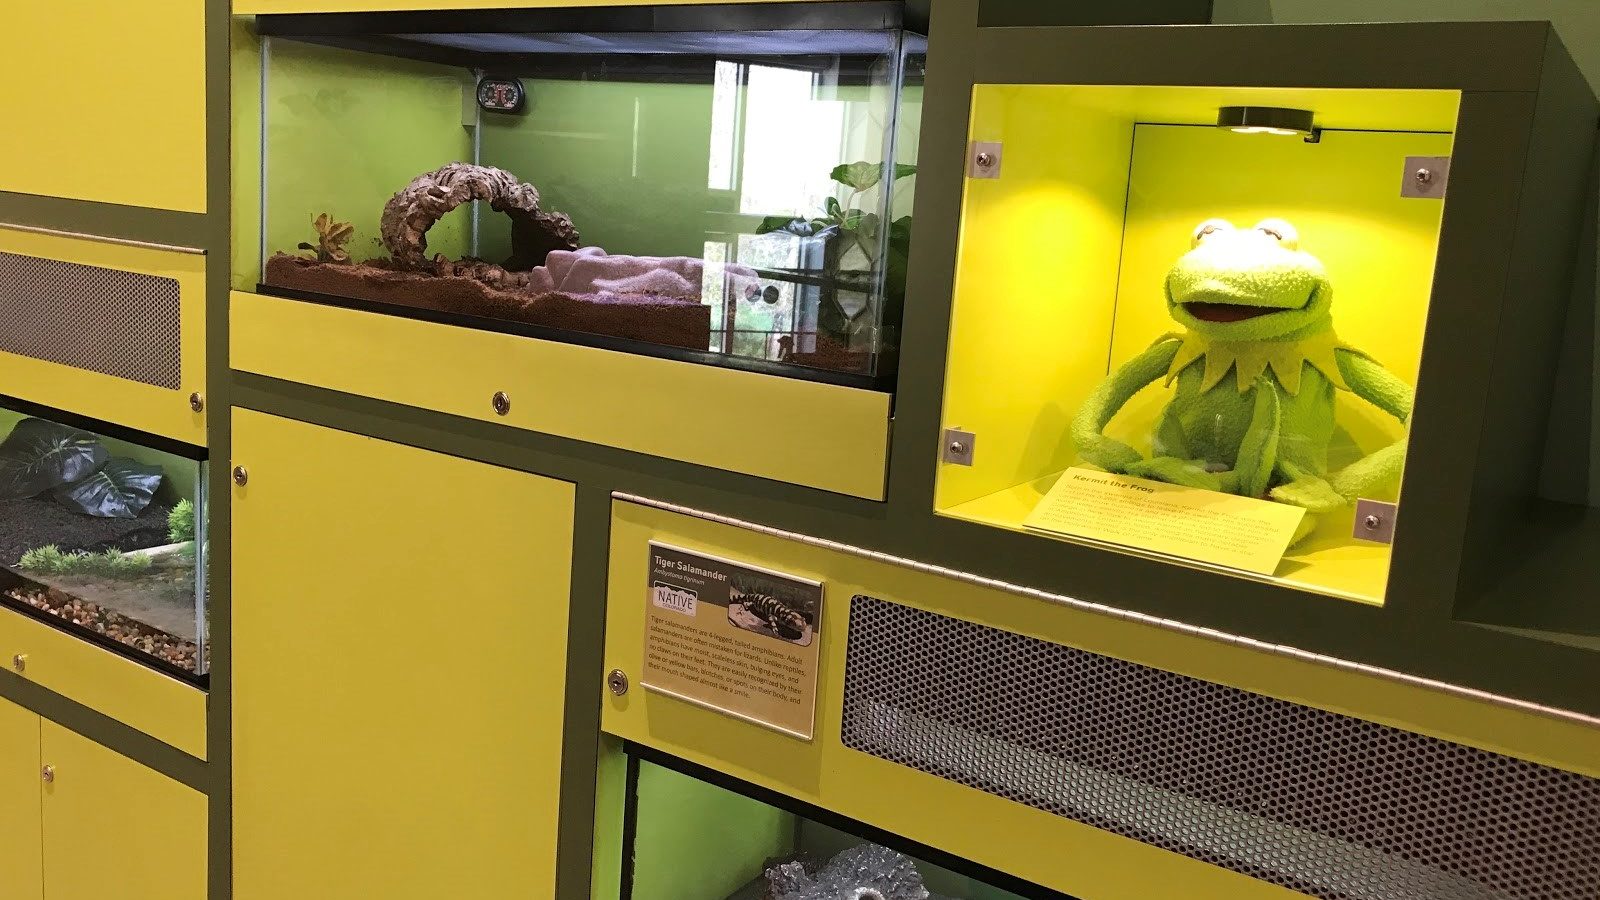
Tiger salamander

These salamanders are a Colorado native and can be found in marshes and ponds right here in Fort Collins! But they’re not picky about where they live – they’re actually the most wide-spread salamander species in North America, ranging from Canada all the way to Mexico! Their name comes from the yellow and black splotches on their skin, which look a little bit like tiger stripes. Like tigers, they are also ferocious predators – even if they don’t look like it. When they emerge from their burrows to hunt, they look for anything they can eat – worms, spiders, and beetles, even frogs and smaller salamanders are all fair game!

Our salamanders at the museum get so excited during feeding time, that sometimes they’ll even try and bite their caretaker’s fingers! Unlike frogs, salamanders actually have teeth – lucky for the people feeding them, they aren’t very sharp.
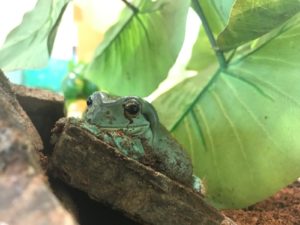
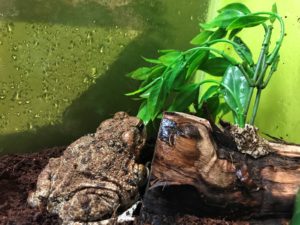
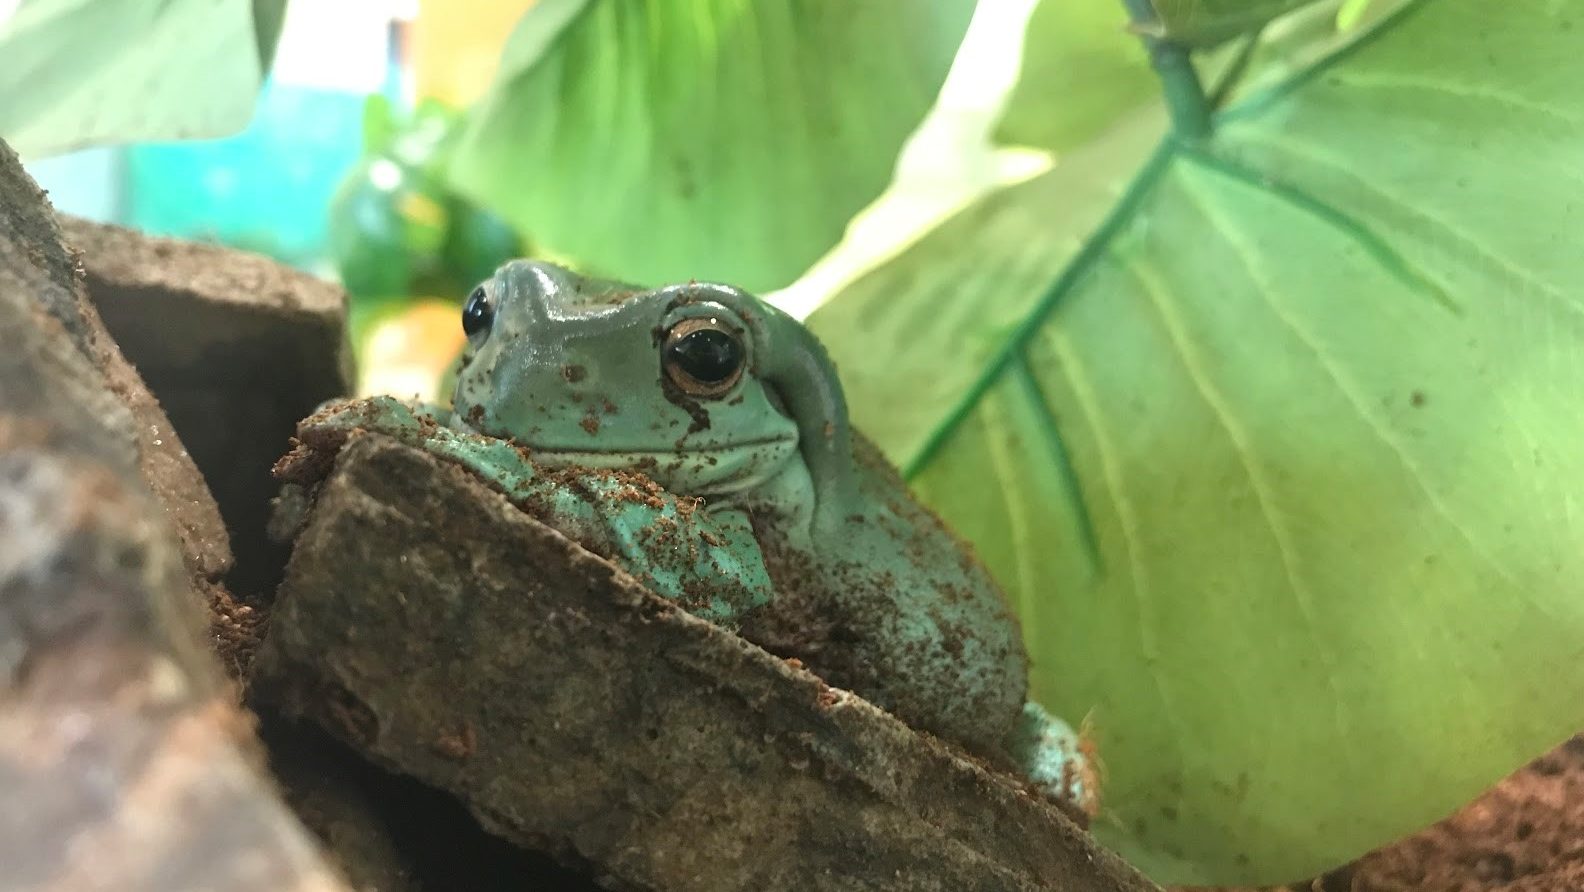
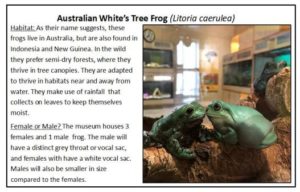
White’s tree frog

These Australian frogs are very popular in the pet trade because of how calm they are around humans – even wild frogs will find their way into people’s sinks, laundry roo

rooms, and bathtubs, no matter if they’re occupied!

Unlike some frogs, White’s tree frogs do not have long sticky tongues that they use to catch prey. Their preferred method of hunting is close-range. Once they’re close enough to a bug or other tasty morsel, they lunge at it with their mouth open wide and scoop it up into their gob with their hands.

These frogs are also very unique for the way they protect their delicate amphibian skin. They secrete a goo from their skin that is antibacterial, antiviral, and antifungal, allowing them to stay safe and free from disease even when they’re living in places that are mucky and full of germs. The virus-fighting ability they possess is so impressive, it’s even being studied for use in human medicine!

Amphibians are amazing animals, coming in so many different shapes and sizes. From legless, soil-dwelling caecilians to flying tree frogs, they all play an important part in our ecosystem!

Continue Reading

Daily Discovery: Monster Genetics

Post written by Angela Kettle, School Programs Coordinator.

Daily Discovery: Monster Genetics

Monsters may be imaginary, but just like all living things, they have genes that determine what they look like and how they behave. Make your very own monster using Mendelian genetics. Will your monster be tall or short? Furry or scaly? Green or blue? Toss a coin to find out!

Supplies:

  • Paper (if you can, print off the last page of the PDF version of this activity)
  • Pencil
  • Crayons, colored pencils, or markers
  • A coin
  • 3D making materials (optional)

Definitions to Know

  • Trait: A characteristic or feature of a living thing… hair color, eye color, and blood type are all examples of traits.
  • Gene: Genes are parts of DNA and carry hereditary  information passed from parents to children.
  • Allele: A version of a gene. Each parent gives its offspring one allele.
  • Genotype: A living thing’s complete genetic information.
  • Phenotype: A living’s things traits.
  • Dominant allele: An allele that is always expressed in the phenotype if present in the genotype.
  • Recessive allele: An allele that is only expressed in the phenotype if the dominant allele is not present.

Don’t understand these definitions yet? No worries! It will all make more sense once you complete the activity.

Instructions:

  1. Just like humans and other animals, FCMoD monsters (which are only imaginary, we promise!) have genes that determine their traits. FCMoD monster babies inherit one allele from each monster parent. The combination of the two alleles decides which traits the baby monster has. In this activity, by flipping a coin, you will determine which alleles your monster inherits from each parent (its genotype). Then, using the rules of dominant versus recessive alleles, you will figure out your monster’s traits (its phenotype).
  2. Print off the last page of the PDF version of this activity entitled “Determining Your Monster’s Genetics.” No printer? No problem! You can make a copy of this page using pencil and paper.
  3. On the “Determining Your Monster’s Genetics” page, you should a table with lots of different monster traits, from height to teeth shape. Each row lists the allele that is dominant and the allele that is recessive.
  4. Flip a coin twice for each trait. If you flip heads on your first flip, write down the dominant allele in the Coin Toss #1 column. If you flip tails on your first flip, write down the recessive allele in the Coin Toss #1 column. Repeat in the Coin Toss #2 column. Leave the Phenotype column blank for now.
  5. Once you have completed two coin tosses for every trait, it’s time to figure out your monster’s phenotype! If a trait is recessive, it is only expressed if it has another recessive allele as its buddy. Find any traits where you wrote down the recessive allele in both the Coin Toss #1 AND Coin Toss #2 columns. (In other words, you got tails twice in a row when you did your coin toss.) Write down the recessive allele in the Phenotype column. Write down the dominant allele in the Phenotype category for all other cases.
  6. Time to make your monster! Draw your monster using the traits listed in your Phenotype column. Bonus points: once you are done drawing your monster, make it in 3D using whatever you have at home!

Questions to Ponder
• Did you flip more heads than tails, more tails than heads, or did you flip about an even amount of heads and tails?
• How much of your monster’s phenotype is made up of recessive alleles versus dominant alleles? Is it the same or different than the number of heads vs. tails in your coin toss? Why do you think that is?
• How do you think your monster’s form affects its function? For example, would a monster with long legs move differently than a monster with short legs? Would a monster with sharp teeth eat different things than a monster with blunt teeth?
• Are genes the only thing that determines what an individual is like? Can you think of any times when the environment could affect an individual’s traits?

Monsters and Us

What do humans, animals, plants, and monsters all have in common? Genetics! While you completed this activity using a monster as an example, you could have also done it for a cow, a cat, a snake, a tree, or even yourself!

In other living things besides FCMoD monsters, though, genetics can get pretty complicated. Sometimes a gene has more than two alleles. (For example, there is a gene in domesticated cats that determines if the cat is black, brown, or cinnamon. Black is the dominant allele, while brown is recessive to black, and cinnamon is recessive to brown.) Sometimes, neither allele is completely dominant, and the allele expressed in the phenotype is a blend or a combination of the two alleles — scientists call this “incomplete dominance” and “codominance,” respectively. (For example, human blood types are classified as A, B, and O, depending on the protein types found in the blood. But, if a human inherits one A-type allele from one parent and one B-type allele from the other parent, her blood type will be AB, a combination of the proteins.)

Scientists have been working hard for many years to map out the genetics that make up all kinds of different organisms. But why does it matter? Understanding genetics can make us better stewards of our planet. See below for some real-life examples!

Real-Life Genetics: Saving the Black-footed Ferret

On September 26th, 1981 the black-footed ferret was rediscovered near Meeteetse, Wyoming. Before that, Black-footed ferrets were thought to be extinct! Since that fateful day of rediscovery, biologists and conservationists have been working hard to recover this endangered species.

Because no new populations of wild BFFs have been found since 1987, the BFF breeding season ( March-July) at BFF managed care facilities follow protocols for specific pairings of individuals to minimize the loss of genetic diversity. In other words, the biologists responsible for breeding Black-footed Ferrets use what they know about genetics to make sure that future BFF generations are
born genetically healthy.

Did you know that FCMoD has two live Black-footed Ferrets on site, in partnership with U.S. Fish & Wildlife Service? Make sure to visit the BFFs when the museum is open… and you can watch them 24/7 from anywhere in the world on the Black-footed Ferret cam.

Real-Life Profile: Mary F. Lyon

Mary F. Lyon (1925-2014) was a British geneticist who is credited as having discovered Xchromosome inactivation, often termed Lyonization in her honor. Lyonization is a process that occurs in female mammals (including female humans!), where one copy of the X-chromosome is inactivated in each cell. (Females inherit two X chromosomes, while males inherit an X and a Y chromosome.)

Mary Lyon’s discovery has helped geneticists understand a range of genetic anomalies. For example, tortoiseshell cats are a great example of Lyonization. Orange coloration is carried on the Xchromosome in cats. Let’s say a cat inherits one “orange” X-chromosome and one “non-orange” Xchromosome from its parents. Due to Lyonization, one of those X-chromosomes will be inactivated in each cell. However, which X-chromosome is inactivated varies from cell to cell, resulting in some cells expressing orange coloration while others do not. This creates the random mosaic pattern on tortoiseshell cats.

Lyonization is also the reason that male tortoiseshell cats are so rare. In order for Lyonization to occur, a cat must have two X-chromosomes. A genetic mutation must occur for a male cat to have two X-chromosomes, though it does happen on occasion!

Want to download these directions? Click here for a handy PDF!

Follow along with our Daily Discovery! Click here for all activities that you can do at home.

Educational opportunities like this are supported in part by Fort Fund.

Continue Reading

Daily Discovery: Annie The Railroad Dog

Post written by Heidi Fuhrman, Discovery Camp Coordinator.

Daily Discovery: Annie The Railroad Dog

Here at FCMoD we love Annie the Railroad Dog! Learn more about who Annie was and complete a fun activity to celebrate the special animals in your life!

Supplies:

  • Assorted craft materials/recyclables
  • Crayons, colored pencils, or markers
  • Imagination!

Who was Annie?

Annie the Railroad Dog was a very special animal who lived in Fort Collins a long, long time ago! She has a very special story—check it out through our video on Annie The Railroad Dog or explore the story through our online Archive collection.

After learning more about Annie’s story do the activity below to celebrate her or some other special animal friends in your own life!

Celebrating Our Special Animals

Annie was one special dog and we celebrate her friendliness with a statue of her that sits right outside of the Old Town Library! Maybe you’ve seen her there or given her paw a little shake (I have!). What special animals do you have in your life? Maybe you have your own dog, cat, fish, or other pet! Maybe you have a type of animal that you really love! Today we’re going to create some of our own statues or drawings of our favorite animals!

Instructions:

  1. Gather up all your materials! You can use craft supplies like construction paper, string, fabric, paint, popsicle sticks, pipe cleaners, etc… or you can use recyclables! Maybe an old cereal box can be the body and a paper towel tube could be a tail… use your imagination!
  2. Create! Use your supplies to make a statue of the special animal you’re thinking of! Will it look the same or a little wonky? If you don’t want to make a statue you can draw a picture of the animal instead!
  3. Share! Show someone in your house or a friend or family member (maybe over video chat) your creation. Explain why that animal is special to you and maybe tell them the story of Annie! You can also share your creations with us @focomod!

Level Up:

Annie lived here at the C&S Railroad Passenger Depot! Where does your special animal live? When you’re done creating your animal can you create a home for them to live in? You could use recyclables, add
it to your drawing, or construct it out of legos or blocks!

Discover More:

Annie isn’t the only special Fort Collins Animal! At the Fort Collins Museum of Discovery we take care of a bunch of animals—such as the very special Black Footed Ferrets or our Fancy Rats! Learn more about our animals through some of our Discovery At Home Activities and Videos (find them on our website at fcmod.org/blog) or by visiting us someday at the museum!

The museum isn’t the only place to see and learn about animals, there are animals all across Fort Collins! Keep your eye out next time you’re hiking, at a park, or playing in your backyard. . .you never know what creature!

If you liked our story of Annie The Railroad Dog, you might also like the book A Lucky Dog: Owney, U.S. Rail Mail Mascot by Dirk Wales or Owney, The Mail-Pouch Pooch by Mona Kerby, they both tell the story of another railroad dog, Owney, who had another very important job!

Want to download these directions? Click here for a handy PDF!

Follow along with our Daily Discovery! Click here for all activities that you can do at home.

Continue Reading