Daily Discovery: Egg-cellent Egg-tivities – Part 2

Post written by Lea Mikkelsen, Early Childhood Coordinator & Charlotte Conway, Public Programs Coordinator.

Daily Discovery: Egg-cellent Egg-tivities – Part 2

Let’s learn all about eggs! What are eggs, anyway? What animals do they come from? What are the different parts made of? What can we do with eggs?

Glowing Egg

People who raise chicks use a technique called candling to determine if an egg is fertilized and has a chick growing inside of it. Your eggs from your refrigerator at home will not have a chick growing inside, but this is a really neat way to look inside an egg!

Supplies:

  • One egg
  • Flashlight
  • Dark room

Instructions:

  1. Hold the egg gently in your hand (or ask an adult to help you) and press the flashlight carefully against the eggshell.
  2. Carefully rotate the egg to see it from different angles.
  3. What can you see? Do you see the spots in the egg shell? Do you see the air cell?
    a. The egg shell is almost entirely composed of calcium carbonate. There are pores in the egg shell that allow some breathability to the shell.
    b. The air cell forms when the egg is laid. You can see where the air cell was when you look at the flat end of a boiled egg.

Floating Egg

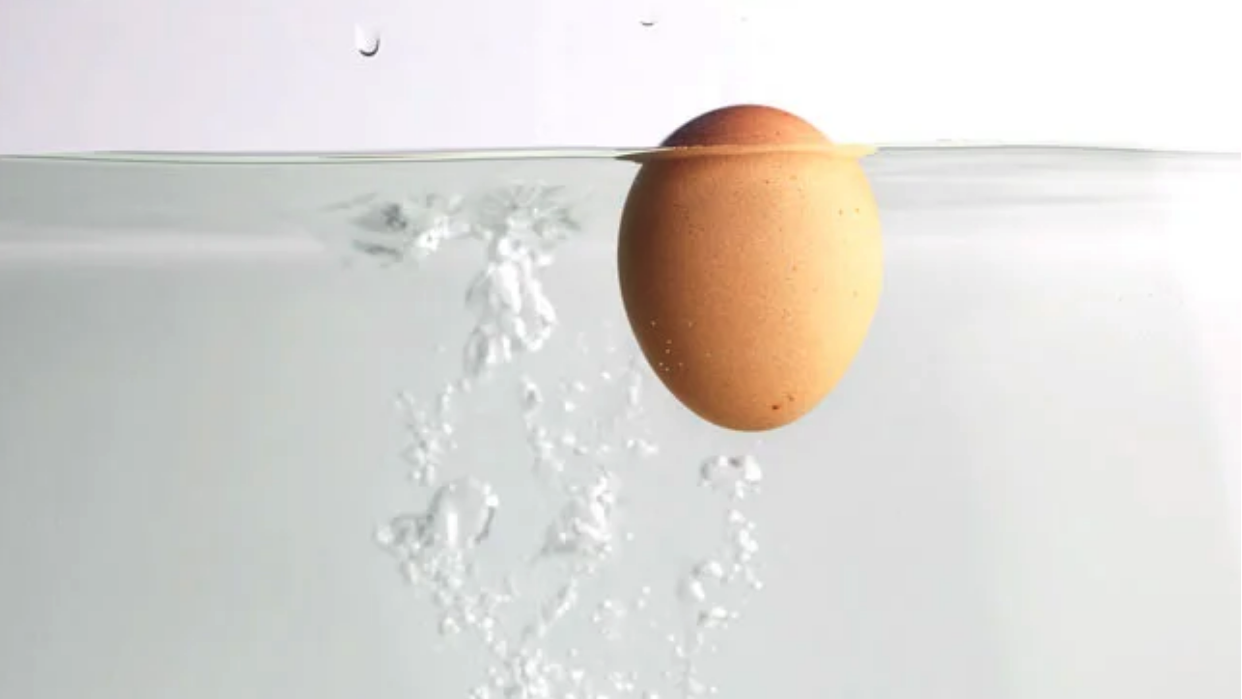
Learn about density and buoyancy through this floating egg  experiment. Don’t forget to make your hypothesis about what will happen to each egg!

Supplies:

  • Two eggs
  • Water
  • Two tall drinking glasses
  • Three tablespoons of salt

Instructions:

  1. Fill one glass ¾ of the way with water.
  2. Make a hypothesis about what will happen to the first egg.
  3. Carefully place the egg into the glass of water and observe. What happened to the egg?
  4. Fill a second glass ¾ of the way with water.
  5. Add 3 tablespoons of salt and stir.
  6. Make a hypothesis about what will happen to the second egg.
  7. Carefully place the second egg into the second glass of water and observe. What happened to the egg?

Tip: If an egg floats in water without adding salt, the egg is likely old. The air cell has grown inside the egg, making it buoyant. Check the egg for a bad smell before you eat it.

Want to download these directions? Click here for a handy PDF!

Follow along with our Daily Discovery! Click here for all activities that you can do at home.

Image credit: bonappetit.com

Continue Reading

Daily Discovery: Egg-cellent Egg-tivities – Part 1

Post written by Lea Mikkelsen, Early Childhood Coordinator & Charlotte Conway, Public Programs Coordinator.

Daily Discovery: Egg-cellent Egg-tivities – Part 1

Let’s learn all about eggs! What are eggs, anyway? What animals do they come from? What are the different parts made of? What can we do with eggs?

Egg Carton Art

Save that egg carton! It can be upcycled and turned into so many amazing things. You can cut it, glue it, build with it, paint it, use it to hold small loose things like beads or pretty rocks. There are endless possibilities!

This activity will show you how to cut apart an egg carton to make upcycled flowers. Share your egg carton creations with #dailydiscovery!

Supplies:

  • Egg carton(s)
  • Scissors
  • Glue, decorative paper, paint, paintbrush (optional)

Instructions:

  1. Ask an adult to help you cut out the center pointy pieces of the egg carton. Be sure to leave plenty of the “petals” on them.
  2. Use the scissors to cut out the petals of the flower. Try cutting them in different shapes!
  3. Cut a long sturdy stem piece with a little tab on one end from a flat part of the egg carton.
  4. Make a hole in the base of the flower and thread your stem through the hole with the tab resting inside the flower. That will keep the stem from sliding out of the flower. Optional: use glue to keep the stem in the flower.
  5. Use paint (if you have some) to decorate your flowers. Be creative! You can also use paper to make leaves or more petals on the flower. Let the flowers dry and then pop them in a vase to bring cheer!

Natural Egg Dying: Cooking with Science!

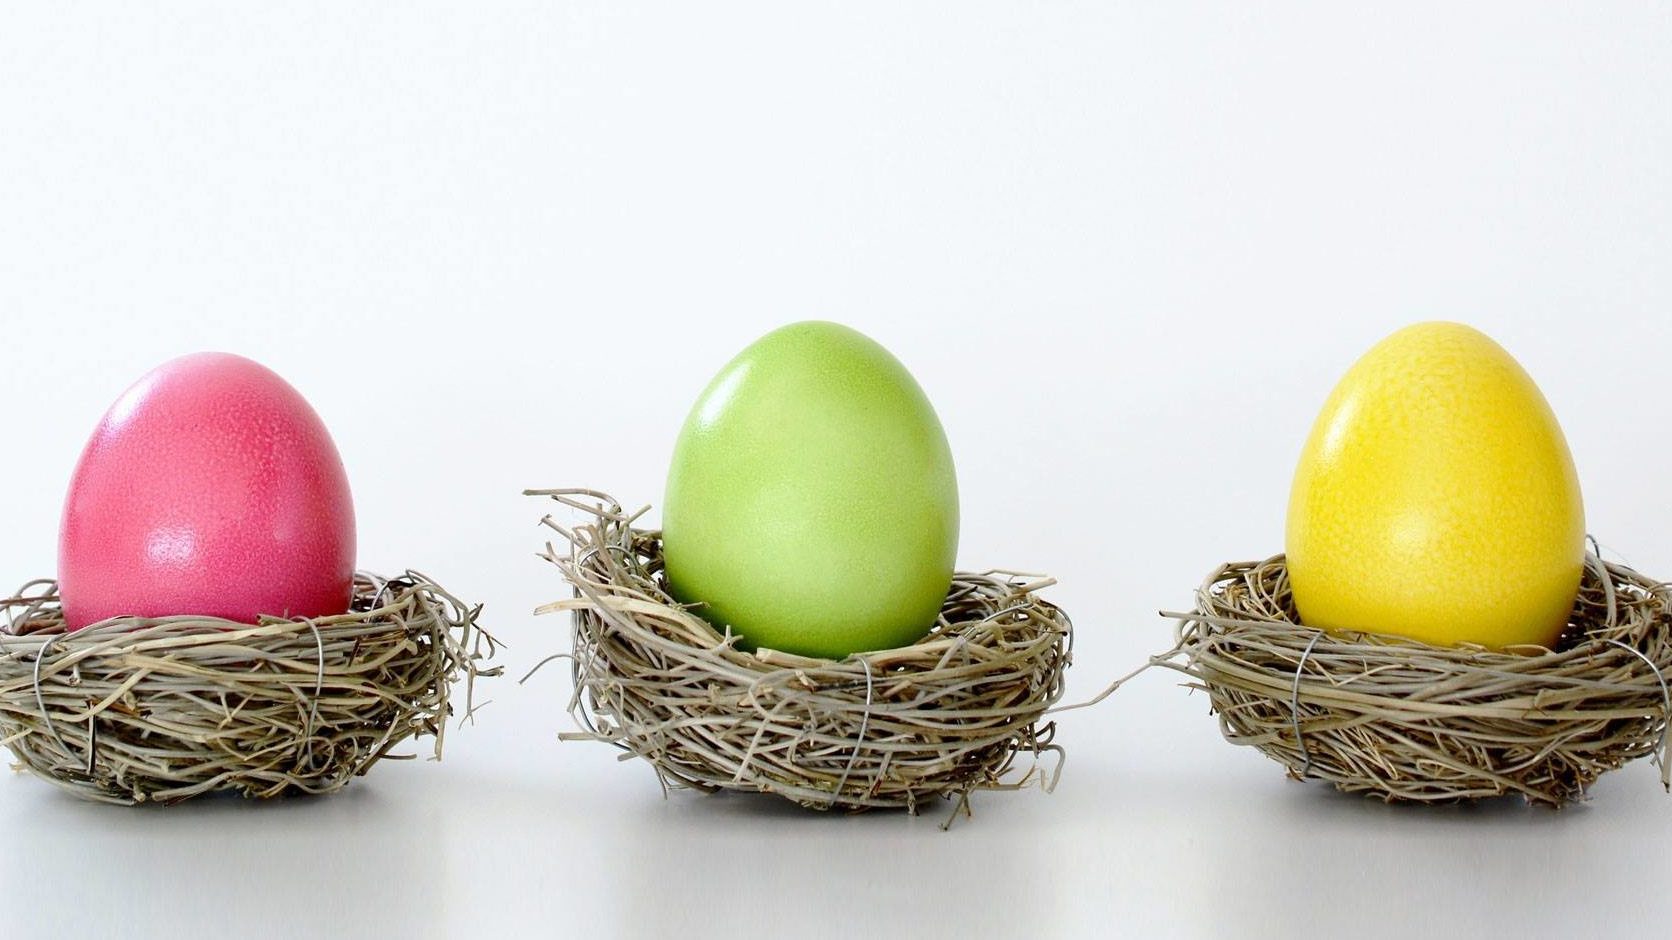
Experiment with these natural dyes to make beautiful, colorful eggs that are totally edible! The best part is, you can make these dyes using items you have in your kitchen, and you don’t have to waste any food in the process.

Adult supervision is required for this activity.

Supplies:

  • Hard-boiled eggs
  • Saucepan
  • Water
  • White Vinegar
  • Clean kitchen or paper towels
  • Slotted spoon
  • Small bowls
  • Cheesecloth, fine sieve, or strain
  • Natural dying materials from your kitchen (Suggestions: beets, ground turmeric, coffee, spinach, yellow onion skins, red cabbage, yellow delicious apple peels)

Instructions:

  1. Gather materials for your natural dyes. This is a great opportunity to reduce, reuse, and recycle! Try using your kitchen waste like yellow onion skins, any stale coffee, or apple peels for dyes! If you use fresh produce, like a beet or red cabbage, think about how you might eat the boiled vegetables afterwards.
  2. Now comes the fun part! Experimenting with different natural materials can produce surprising colors, and don’t hold back from mixing 2 or more materials together to achieve new colors.
  3. Prepare your natural materials into liquid dyes according to which materials you are using. Always use adult supervision when you are using the stove or chopping vegetables.
    a. For the whole vegetables, like red cabbage or beets, chop them into smaller pieces first(around one inch). Place 1 cup of desired material in your saucepan and cover with 1 quart of water. Simmer the mixture for 30 minutes, or until desired color is achieved. Strain mixture and reserve the liquid.
    b. For the spinach, onion skins, or apple peels, place about 2 cups of desired material in saucepan and cover with 1 quart of water. Simmer the mixture for 30 minutes, or until desired color is achieved. Strain the mixture and reserve the liquid.
    c. For the ground turmeric, place 2 tablespoons of turmeric in 1 quart of water. Simmer the mixture for 30 minutes. Strains the mixture if you are using cheesecloth, otherwise, don’t worry about straining. Reserve the liquid.
    d. If you are using stale coffee, there are no preparations needed. Skip ahead to the next step!
  4. Place reserved liquids in individual small bowls. Stir in 2 tablespoons of white vinegar per every cup of liquid dye.
  5. Retrieve your hard-boiled eggs when you are ready to dye. Make sure to keep them refrigerated at all times when you are not using them!
  6. Use a slotted spoon to slowly lower your hard-boiled egg into desired color dye. Refrigerate the bowl to let the dye soak into the eggshell.
  7.  Time for the big reveal! After at least 30 minutes, use your slotted spoon to remove the egg from the dye.
  8. Pat the egg dry using paper towels or a clean kitchen towel. To mix colors, you can soak an egg first in one colored dye for 30 minutes or more, followed by a second soak in another colored dye for 30 minutes to an hour. Get creative and experiment with different soak times and color mixtures to achieve a whole spectrum of colors!
    a. Note that natural dyes will produce a subtler color than artificial dyes. For more vibrant natural colors, you can soak your eggs in the refrigerator overnight.
  9. Store the colored eggs in an egg carton in the refrigerator until you are ready for an egg-celent snack.

Want to download these directions? Click here for a handy PDF!

Follow along with our Daily Discovery! Click here for all activities that you can do at home.

Continue Reading

Daily Discovery: Make Your Own Observation Journal

Post written by Sierra Tamkun, Learning Experiences Manager.

Daily Discovery: Make Your Own Observation Journal

Scientists, engineers, naturalists, writers… they all need space to record their ideas, plans, experiments, and observations! Make your own observation journal to record all your at-home exploration!

Supplies:

  • Paper (white or lined)
  • Decorative/Construction Paper
  • Staples or a hole punch
  • String, yarn, or ribbon
  • Glue
  • Brightly colored tape or paper
  • Markers, crayons, or colored pencils

Instructions:

  1. Plan out how many sections you want in your notebook, and how many pages you will need per section. Design the pages yourself, use the templates provided at the end of these instructions, or keep your pages blank for flexibility. Tip: You can always add more pages later if you need them!
    a. Our four sections are: Experiments, Invent and Build, Explore Your World, and Stories. What sections do you need in your observation journal?
  2. Line up your section pages with your cover paper. Cut along the edge until your cover paper is the same size. Tip: If you cover paper is the same size as your inside pages, you can skip this step.
  3. Place your cover paper on top of your other pages. Staple or hole punch the left side of your sheets to create a binding. If using a hole punch, tie the pages together with string, yarn, or ribbon.
  4. Use colorful tape, paper, or markers to create page tabs and label the different sections inside your journal.
  5. Now it’s time to label the front of your journal! Cut a rectangle out of the paper of your choice to glue to the front of your journal, and add a title.
  6. Start exploring, observing, and recording! Record your experiments, make notes about the world around you, record a family story, or design your own invention!

Want to download these directions? Click here for a handy PDF!

Follow along with our Daily Discovery! Click here for all activities that you can do at home.

Continue Reading

Daily Discovery: Walking Rainbows

Post written by Hannah Curtis, Education Assistant.

Daily Discovery: Walking Rainbows

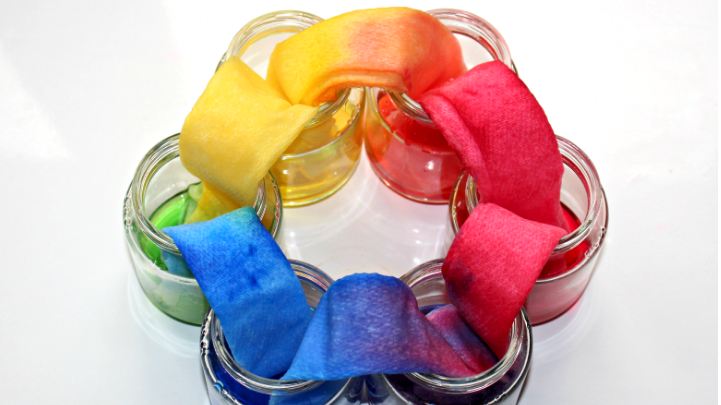
Put your lab coat on; we’re getting scientific! With this experiment, discover how colors interact to form rainbows and observe the natural process of capillary motion in action!

Supplies:

  • Time
  • 6 full sheets of paper towels
  • 6 mason jars (clear if possible). If you don’t have jars use cups or bowls
  • Red, blue, and yellow food coloring

Instructions:

Before you get started, review the color wheel on page two and remember the colors you need to form a rainbow. Feel free to experiment to see how mixing certain colors will create different colors. Together, determine how you will create a rainbow using only red, blue and yellow.

  1. Fill three jars full of water. Add red food coloring to one, blue
    to another and yellow to another, 4-6 drops each.
  2. To form a circle place the empty jars between the red, yellow
    and blue jars.
  3. Roll each sheet of paper towel into tubes. Drape one side into
    a full jar and the other into an empty jar until each jar is
    connected with paper towels.
  4. Start your timer to see how long it takes for the colored water
    to move from one jar to the next. Water will begin absorbing
    right away, but the whole process will take around 48 hours,
    so check back every few hours to see how it has changed.

Want to download these directions? Click here for a handy PDF!

Follow along with our Daily Discovery! Click here for all activities that you can do at home.

Image credit: Messy Little Monster

Continue Reading

Daily Discovery: Build Your Own Ball Run

Post written by Angela Kettle, School Programs Coordinator.

Daily Discovery: Build Your Own Ball Run

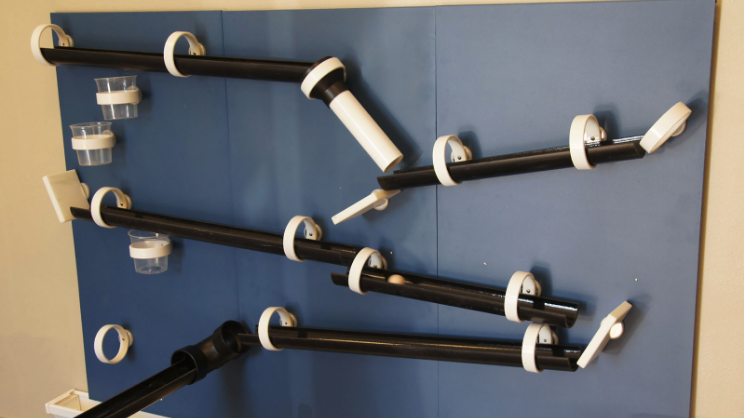
Missing the Ball Run at the museum? Sharpen those engineering skills, and use cardboard, paper, and whatever else you can find around your house to build your own version!

Supplies:

All supplies are optional – use what you have!

  • Large piece of cardboard or posterboard
  • Paper towel rolls
  • Cardstock paper
  • Hot glue
  • Duct tape
  • Scotch tape
  • Pipe cleaners
  • Marble
  • Yarn or string
  • Blank paper
  • Pencil

Instructions:

  1. Start by identifying a surface you can use to build your Ball Run on. For example, this might be a large piece of cardboard, or a piece of posterboard that you tape up on a wall (with an adult’s permission!).
  2. Gather up different supplies from around your house. Decide which supplies you would like to use for your Ball Run. Here are some ideas!
    a. Use paper towel tubes as slides for your ball. You can cut one paper towel tube into smaller tubes if you would like.
    b. Fold cardstock paper into thirds. Tape the top to make a triangular tube. If you don’t have cardstock paper, you can tape together several regular sheets of paper to make them thicker.
    c. Make your own tubes out of duct tape.
    d. Find other tube-shaped materials around your house!
    e. Find a marble to use for a ball. If you don’t have a marble, you can make a ball out of play-doh, clay, aluminum foil, or whatever else you can think of.
  3. . Keeping in mind the size of your surface, sketch your Ball Run. Where will your ball start and end? Which materials will you use for each portion? How will you make sure your ball has enough momentum to keep going until it has reached the end of the run?
  4. Using your sketch as a guideline, build your Ball Run! Lay it out so you can see it before you start attaching anything – that way, if you need to change anything, you can!
  5. Time to attach your pieces to your surface! There are lots of
    different ways to do this. You can use hot glue, tape, or one of the methods shown in the picture. Or, maybe, you’ll think of your own way!
  6. Try it! Place your ball at the top of your Ball Run. What  happens? Did it go as you expected? Why or why not? Make repairs as needed.
  7. Take a photo or video of your final project. With your adult’s
    permission, share it with us on social media using #DailyDiscovery. Great job, Engineer!

Want to download these directions? Click here for a handy PDF!

Follow along with our Daily Discovery! Click here for all activities that you can do at home.

Continue Reading

Enter the Zooniverse

Post written by Ben Gondrez, Digital Dome Manager.

Enter the Zooniverse

Have you ever wondered if there was an easy way to help scientists and researchers make new discoveries from your very own home? Well, whether you’ve had that thought or not, you can indeed be a vital participant in actual research through the Zooniverse! The Zooniverse is the world’s largest and most popular platform for people-powered research. By utilizing the power of volunteers – more than a million people around the world who come together to assist professional researchers – Zooniverse makes it easy for anyone, including you, to contribute to real academic research from their homes on their own computers. As many of us are spending more time than usual at home observing social distancing in response to COVID-19, now is the perfect time to become a citizen scientist and Zooniverse makes it easy for all ages of people to get involved. So how does Zooniverse work? Check out this short animation to learn more:

Ready to get started helping with real research projects from your own home? You can visit zooniverse.org to see all active projects including projects like Planet Four, a project exploring the surface and weather of Mar’s south polar region, or the project Bash The Bug, helping researchers find effective antibiotics to fight tuberculosis. Not sure where to start? Here are a couple of curated lists of projects and other links from Zooniverse to help you get started:

Designed for 5-12 year olds:

  • Curated list of age-appropriate Zooniverse projects for younger learners
  • Zooniverse-based Activity for 5-12 year olds
  •  Classroom.zooniverse.org
    • Wildcam Labs
      • Designed for 11-13 year olds, but the content can easily scale down for younger audiences.
      • Great way to engage if you love looking at photos of wild animals and want to investigate ecological questions. The interactive map allows you to explore trail camera data and filter and download data to carry out analyses and test hypotheses.
      • Educators can set up private classrooms, invite students to join, curate data sets, and get access to the guided activities and supporting educational resources.
      • Individual explorers also welcome – you don’t need to be part of a classroom to participate. · Planet Hunters Educators Guide

Designed for 11-13 year olds:

Designed for teens and adults:

  • Curated list of Zooniverse projects
  • Zooniverse-based Lesson Plan for teens and adults
  • Classroom.zooniverse.org
    • Wildcam Labs
      • Designed for middle school classrooms, but the content can easily scale up for older audiences.
      • See description above.
    • Astro101 with Galaxy Zoo
      • Designed for undergraduate non-major introductory astronomy courses, but the content has been used in many high-school classrooms as well.
      • Students learn about stars and galaxies through 4 half-hour guided activities and a 15-20 hour research project experience in which they analyze real data (including a curated Galaxy Zoo dataset), test hypotheses, make plots, and summarize their findings.
      • Developed by Julie Feldt, Thomas Nelson, Cody Dirks, Dave Meyer, Molly Simon, and colleagues.
    • For both Wildcam and Astro101 Activities
      • Educators can set up private classrooms, invite students to join, curate data sets, and get access to the guided activities and supporting educational resources.
      • Individual explorers also welcome – you don’t need to be part of a classroom to participate.
  • Planet Hunters Educators Guide
    • Designed for 11-13 year olds, but the content can easily scale up for older audiences.
    • See description above.
  • Notes from Nature Activity
    • Designed for 11-13 year olds, but the content can easily scale up for older audiences.
    • See description above.
  • Snapshot Safari-based Lesson Plans and Interactive Timeline
    • Developed by University of Minnesota PhD student Jessica Dewey
  • Kelp Forest Ecology Lab
    • Through the Zooniverse FloatingForests.org project, researchers are striving to understand the impact of climate change on giant kelp forests, an indicator of the health of our oceans. In this lab, students analyze Floating Forest and other ocean data to explore their own research questions.
    • Developed by Cal State – Monterey Bay faculty Dr. Alison Haupt and colleagues
  • NEH Teacher’s Guide for Digital Humanities and Online Education
Continue Reading

Daily Discovery: Harness the Wind!

Post written by Hannah Curtis, Education Assistant.

Daily Discovery: Harness the Wind!

Wind! It doesn’t just blow silver tiles on the museum’s Wind Wall; it’s a natural renewable resource. Engineers develop ways to harness wind to help the modern and natural world. Build your own creation using the design process, materials in your home, and of course, the wind!

Supplies:

All supplies are optional – use what you have!

Pre-design supplies:

  • Scratch paper or graph paper
  • Writing utensil

Building Supplies

  • Plastic bottles and lids
  • Tin cans
  • Paper scraps or sticky notes
  • Pencils or pens
  • Straws
  • Disposable cups or containers
  • Cardboard
  • Yarn or string
  • Rubber bands
  • Natural materials (sticks or rocks)
  • Blank CD or floppy disks
  • Plastic spoons
  • Paper tubes
  • Old socks
  • Tissue paper
  • Scissors
  • Tape
  • Glue
  • Metal brads
  • Paper clips
  • Push pins
  • Magnets

Instructions:

  1. As an engineer, work through the design process to begin building! Follow the design process on the right, sketch out your design, and think creatively about what materials you can use inside your home.
    Use the following guiding questions to help you:
    a. What purpose will your design have? What is its function?
    b. Could your design be multifunctional?
    c. How will you ensure your design will hold up against heavy winds or other weather?
    d. How will you know your design was a success?
  2.  Test your design and adjust as necessary. Share your creation with family and friends through photos or videos!
  3. Wind isn’t the only renewable resource! What other renewable resources have helped other cultures and countries?
  4. Challenge yourself to build a new creation that reflects other sustainable energy sources! What do we utilize here in Fort Collins?

Want to download these directions? Click here for a handy PDF!

Follow along with our Daily Discovery! Click here for all activities that you can do at home.

Continue Reading

Daily Discovery: Mermaid Music

Post written by Charlotte Conway, Public Programs Coordinator.

Daily Discovery: Mermaid Music

Mermaids are famous for singing, but do their songs sound different underwater than on land? Do this experiment to discover for yourself!

Supplies:

  • 2 Chopsticks
  • 2 Metal forks
  • 2 Rocks (large enough to clink together)
  • Large bowl
  • Water
  • Tray or similar solid board (we use plastic trays!)
  • Plastic water bottle cut in half (this acts as a hydrophone)

Instructions:

  1. Start by observing what objects sound like in our human environment, surrounded by air. Clink each pair of objects together in the air and listen to the sound they make.
  2. You made a hydrophone out of a recycled plastic water bottle. This tool will allow you to hear what’s happening underwater! Place the narrowest part of the water bottle up to your ear and hold the cut
    end of the water bottle right over the surface of the water.
  3. Have a partner, it could be a sibling or parent, clink the objects together under the water. What do you hear?
  4. Why do you think things sound different underwater? It all has to do with sound waves! Sound is what we hear when sound waves bounce off objects. Molecules are closer together in liquid than in a gas (like our air!), so there is greater opportunity for waves to bounce off molecules underwater. What do you think will happen when sound waves travel through a solid?
  5. Place a tray (face down) up to your ear. Have a partner very lightly tap each one of the objects against the tray. How does this differ from what you heard in the water? What about in the air? Hypothesize why you think that is.

Want to download these directions? Click here for a handy PDF!

Follow along with our Daily Discovery! Click here for all activities that you can do at home.

Educational opportunities like this are supported in part by Bohemian.

Continue Reading

At Home STEAM Activities

Post written by Alex Ballou, Marketing Assistant.

At Home STEAM Activities

Here at FCMoD, we believe in discovery. And during times like this, we want you to know that discovery can be found anywhere! Which is why we’ll be posting fun, hands-on activities for you and any other life-long learners you’re currently at home with!

In this blog post, we’ve compiled a list of our top STEAM resources. Learn more below!

  • Water Xylophone:

Missing the Music & Sound Lab? Let’s experiment with sound waves! With just some basic materials you can create your own musical instrument to teach kids about sound waves. In this water xylophone experiment, you’ll fill glass jars with varying levels of water. Once they’re all lined up, kids can hit the sides with wooden sticks and see how the pitch differs depending on how much water is in the jar (more water=lower pitch, less water=higher pitch). This is because sound waves travel differently depending on how full the jars are with water.

    • Materials Needed:
        • Glass jars
        • Water
        • Wooden sticks/skewers
        • Food coloring
  • Tornado in a Jar:

    Create your own Tornado Chamber at home!  This is one quick and easy and science experiment for kids to teach them about weather. It only takes about five minutes and a few materials to set up. Once ready, you’ll create your own miniature tornado whose vortex you can see, and the strength of which you can change depending on how quickly you swirl the jar.

    • Materials Needed:
      • Mason Jar
      • Water
      • Dish Soap
      • Vinegar
      • Glitter (optional)
  • Wheel of the Year:

    To help connect kids more with nature and the changing seasons check out the Wheel of the Year crafts – crafts that actually spin! This was a really fun way to learn more about the year, months, and seasons.

    • Materials Needed:
      • Paper plates
      • Construction paper
      • Colored craft sticks
      • Thumbtack
      • Scissor
      • Ruler
      • Marker
      • Glue stick
      • White glue
      • Tape
      • Clothespin
      • Paper (to write month names and draw images)
  • Dinosaur Fossils:

    We love dinosaurs! These DIY dinosaur fossils made with salt dough are so fun. Plus, who knows, it may even inspire someone to become a paleontologist in your home!

    • Materials Needed:
      • Flour
      • Salt
      • Water
      • Plastic dinosaurs
  • Crystal Flowers:

    Have you ever tried making crystals yet? There are quite a few ways of making them, and we’re so keen to try them all!

    • Materials Needed:
      • Borax (laundry detergent alternative)
      • Pipe cleaners
      • Boiling water
      • Glass jars
      • Chopsticks/Pencils
      • Spoon
      • Safety glasses (preferred)

Other resources for at home activities:

Even though the museum is closed, we want to continue to inspire creativity and encourage hands-on learning for all! When you’ve completed any of these STEAM activities, be sure to post a photo and tag us at @focomod on social media!

Continue Reading